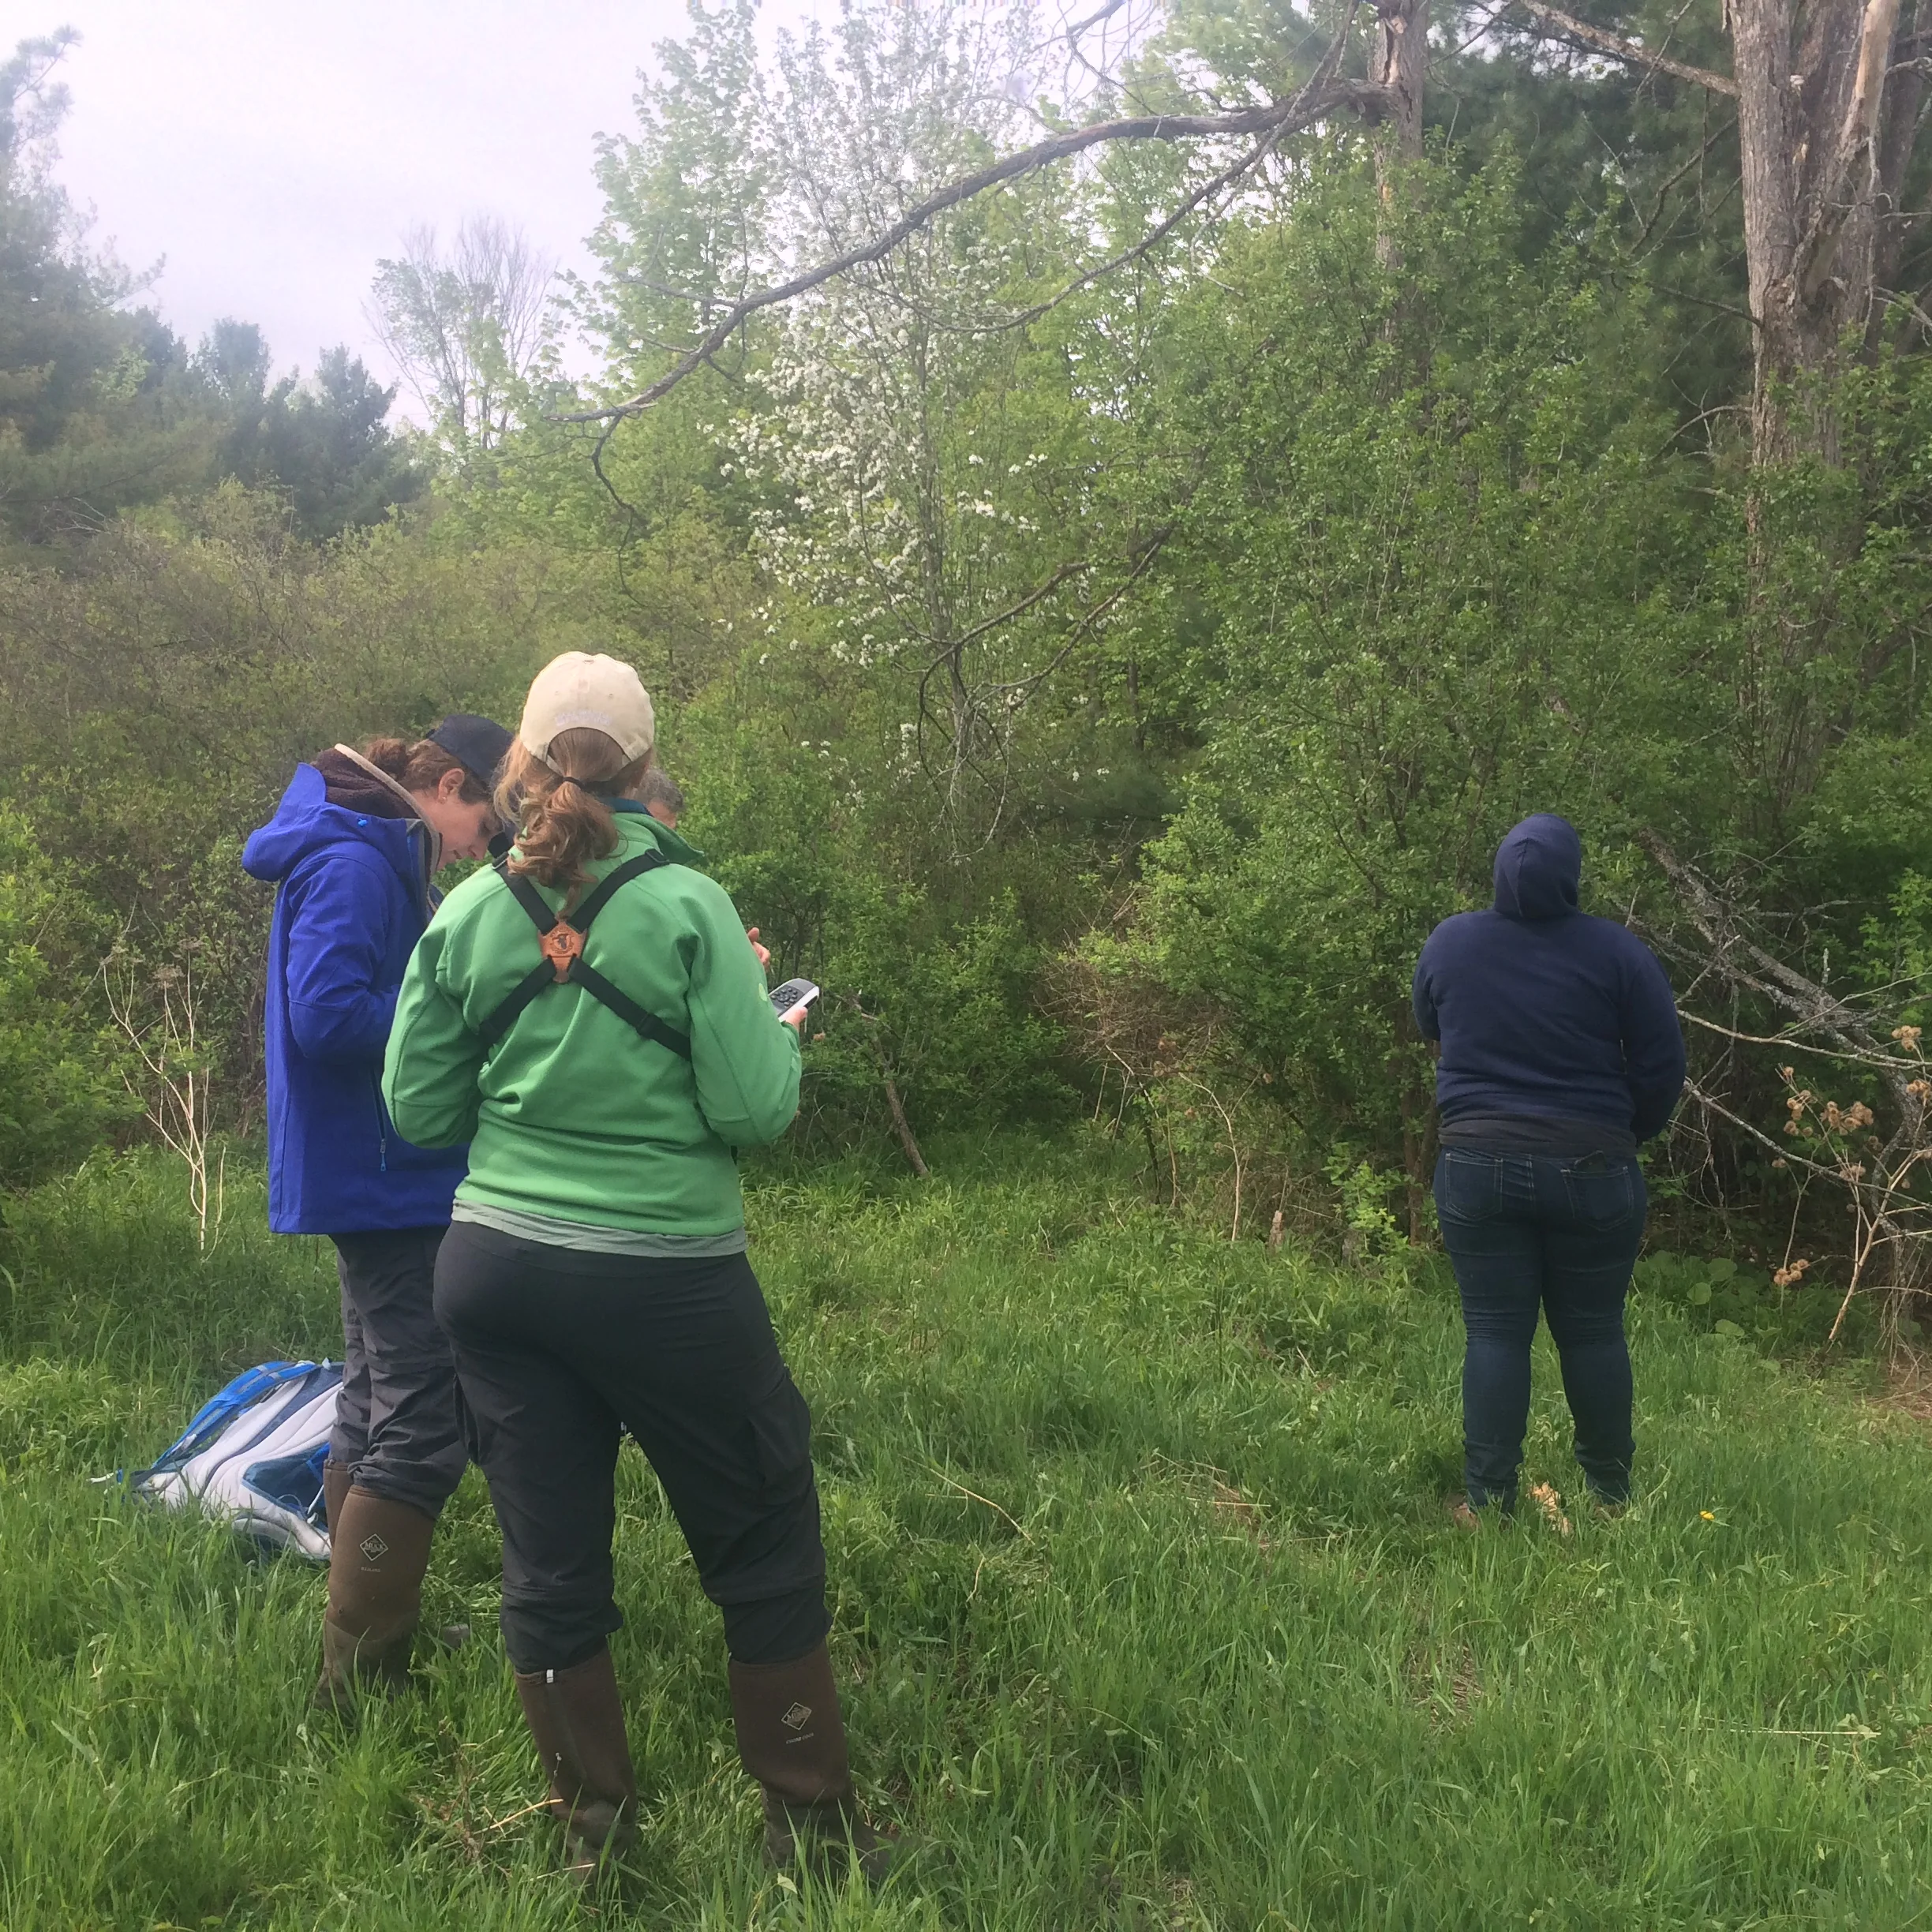
Thanks to some gifts of birdhouses from Local friends, we're sporting a serious bird village at BetterFarm after the weekend.
Each spring, we do an annual clean-up
and repair session of birdhouses throughout the property. We have
almost a dozen birdhouses we keep up and manage for our feathered
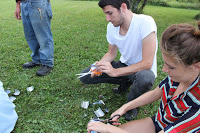
tenants—including a gorgeous bluebird house given to us last year by the New York State Bluebird Society. Last week, our friend Carl stopped by with two gorgeous,
large houses made from slab wood by a craftsman in Goveurneur, N.Y.,
and our friend Shirley Kimberley out in Plessis gave us four bluebird
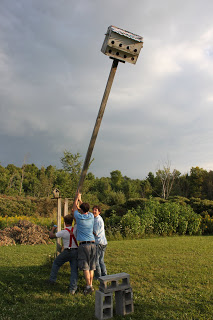
houses her husband Greg had made. So yesterday we took advantage of
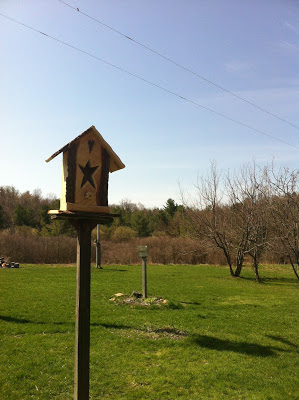
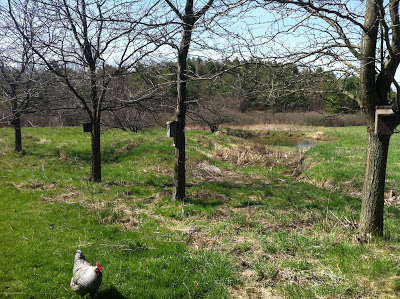
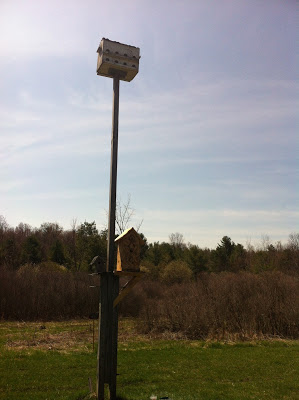
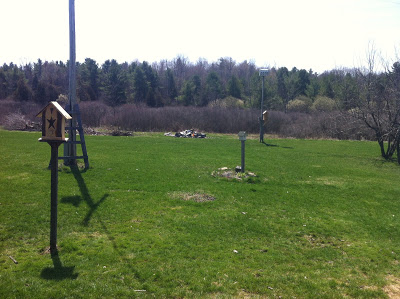
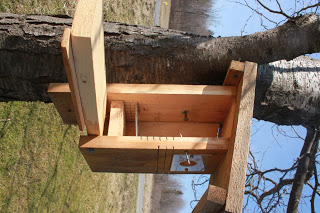
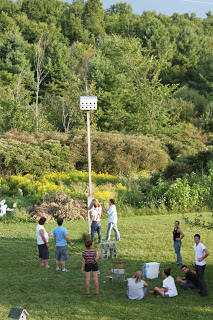
all the sunshine to hang the houses throughout the backyard. Here are the bluebird houses all in a row:
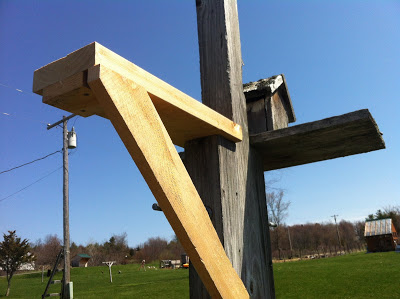
The houses Carl brought us are too large for a simple mounting, so some stabilizers were in order:
For the other house from Carl, we mounted it on a post that used to hold a bird feeder that has since fallen apart:
Birdwatching off the back deck is going to be pretty extreme this summer: four bluebird houses to right along a row of trees, two giant houses in plain sight, a small bluebird house on a small mount in the middle of the yard, plus a purple martin bird complex on the tall post way in the back.
Regular birdhouses should be placed in safe locations away from predators where birds will feel secure. Bluebirds need a few extra amenities, outlined here courtesy of the New York State Bluebird Society:
Bluebirds nest in open fields or orchards. They don't generally nest in cities or suburbs.
Place the box in an open an area as possible, do not mount on trees
or buildings. Keep away from the edge of woods as house wrens will fill
them up with sticks.
mount the box 4 to 6 feet up a pole, tree, or board
put a guard on the pole to keep out raccoons, snakes and other potential predators.
Try to face the box opening towards a tree or bush to give thefledglings something to fledge to
Do not face the box opening INTO the prevailing wind direction
Place boxes 100 yards from each other to minimize bluebird territory
overlap. This distance can be reduced if there are
trees/shrubs/landscape that break up the line of sight between the
boxes.
Consider placing boxes in pairs, either back to back or within 4-6
feet of each other to encourage tree swallows and bluebirds to both
nest. They will tolerate each other but not pairs of their same species.
If you don't get bluebirds in some boxes (or too many house wrens)
after a couple seasons, consider moving them to another location.
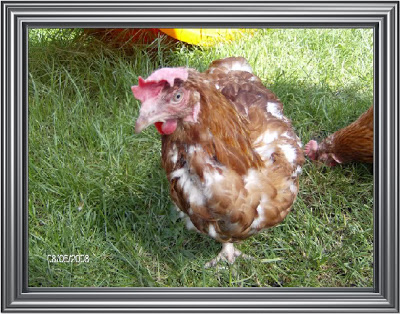
We had an unfortunate hawk attack the other day at Better Farm, and sadly lost one of the Rapunzels, whom we rescued last summer from certain death at an egg factory. The tragedy caused us to do a bunch of research on chicken hawks and deterrents for birds of prey. Here's a quick rundown of what we found out, and the steps we took to ensure the Better Farm chickens can enjoy a predator-free, free-range life. (Note: These deterrents will work for most birds, so feel free to use these ideas near fruit trees or anywhere you have problems with birds.)
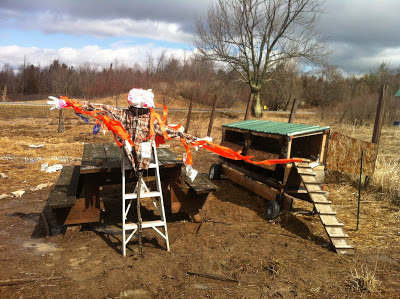
A shiny, fluttery scarecrow strategically placed (and moved every few days) will ward off flying predators.
Better Farm's terrifying new scarecrow. Fluttering pieces of bright fabric and shimmering CDs helped our scarecrow become more ferocious.
The Problem at Hand
Everyone's got to eat! For hawks, food is scarce in the early spring, winter, and late fall. So if the bird is lucky enough to come upon a property with dozens of grazing, slow-moving prey like chickens, you can bet the hawk (or any other bird of prey) is going to check out what's available—and come back for seconds. A chicken coop can quickly become a delicious buffet for a predator, so if you've got backyard chickens in an uncovered run (or free range), chances are you'll need to take some basic steps to protect your birds.
A Few Solutions
Hawks will be scared off by a few things, but it's important to remember that whatever you do, you'll have to continuously reinvent yourself so the hawk doesn't grow accustomed to your decoys. Here are a few ways people in the backyard birding community have protected their ranging hens during the day:
Fluttering CDs—If you take some old, scratched-up CDs you're not using anymore and hang them around your coop or chicken run (or from trees throughout your yard), the reflecting light will frighten away birds of prey.
Mirrors—Hang mirrors at an angle facing upwards around where your chickens like to spend time. Hang them facing all four directions. An easy way to hang the mirrors is to place them, face-up, in the bottom of a plant basket with handle. Hang the basket from a clothesline, fence, tree limb, swing set, or even a trampoline. Or, simply set the basket on the ground.
Gazing Balls—Gazing balls put out throughout where your chickens hang out will work the same way CDs and mirrors do.
Scarecrow—A scarecrow decked out in fluttery strips of mylar or shiny fabric and holding dangling CDs will scare away predatory birds—but be aware that you'll need to move the scarecrow every few days so the hawks don't get used to him (or her).
Mylar—Whether you buy balloons or strips made out of mylar, you can fashion your own shimmery bird deterrent. Hang mylar strips on fence posts, tree branches, or anywhere else you choose.
Mr. Nicol from the New York State Blue Bird Society stopped in at Better Farm on Sunday to introduce himself and give us some literature on his group (and to give us a BEAUTIFUL new bluebird house, see photo above!).
The New York State Bluebird Society is a non-profit organization dedicated to the conservation of the Eastern Bluebird (Sialia sialis), New York's state bird. It is the group's mission to:
monitor and increase production of Eastern Bluebirds and certain other cavity nesting birds through a statewide nestbox program.
educate or inform people of New York on the ecology and management of Eastern Bluebirds.
conduct research on bluebirds and bluebird habitat selection, including nest box preference studies.
cooperate and coordinate with other organizations with purposes similar to those set forth above.
the corporation is organized exclusively for charitible, educational, or scientific purposes within the meaning of Section 501(C) of the United States Internal Revenue code.
Mr. Nicol said he'd spoken with my Uncle Steve about the organization once or twice in the past, which was what inspired him to stop by—extra fitting, as Sunday was also the day after the three-year anniversary of Steve's death. After Mr. Nicol's left, I set about reading the literature he'd left behind:
Then took to hanging the bluebird house he so generously gave Better Farm:
Below is information on everything you'd ever want to know about bluebirds. If you're in New York (or not) and would like to support the valuable work of the New York State Bluebird Society, click here to become a member.
Eastern Bluebird (Sialia sialis)
The Eastern Bluebird is a member of the thrush family, as is the Robin.
Adult males are a dark blue color on their head, back, wings and tail. Theyare a reddish-brown color on their chin and breast. Their belly is white.
Adult females are a duller blueish-gray color on the head, dull brown on their backand blue on the tail and wings. They are a light reddish-bown on the chin and breast.Their belly is white.
The Eastern Bluebird is found throughout the eastern US and southern Canada.
Eastern Bluebirds in the north will remain as far north during the winter as they can as long as they can find food, water and shelter. The harder the winter, or the more scarce food, water and shelter are, the further south they will migrate till winter breaks.
Eastern Bluebirds generally return north to the state of New York in early to mid-March.
Range
NestBox Location
Bluebirds nest in open fields or orchards. They don't generally nest in cities or suburbs.
Place the box in an open an area as possible, do not mount on trees or buildings. Keep away from the edge of woods as house wrens will fill them up with sticks.
mount the box 4 to 6 feet up a pole or board
put a guard on the pole to keep out raccoons, snakes and other potential predators.
Try to face the box opening towards a tree or bush to give thefledglings something to fledge to
Do not face the box opening INTO the prevailing wind direction
Place boxes 100 yards from each other to minimize bluebird territory overlap. This distance can be reduced if there are trees/shrubs/landscape that break up the line of sight between the boxes.
Consider placing boxes in pairs, either back to back or within 4-6 feet of each other to encourage tree swallows and bluebirds to both nest. They will tolerate each other but not pairs of their same species.
If you don't get bluebirds in some boxes (or too many house wrens) after a couple seasons, consider moving them to another location.
NestBox Dimensions
There are many styles and shapes of bluebird boxes. Some made of wood,others PVC. Some general criteria are:
Inside dimensions of 4x4 for the eastern bluebird, 5x5 for themountain/western bluebirds.
entrance hole of 1.5 inches for the eastern bluebirds, slightly largerfor the mountain/western bluebirds.
bottom of entrance hole should be around 6 inches above the floor
no perch
box should open from top or side to allow for monitoring
ventilation at top of sides, drainage holes in bottom
Average Activity Periods
Many of these periods are subject to delay or extension due to inclimate weather and availability of food.
Courtship - 3 to 5 days
Nest building - 4 to 5 days
Egg Laying - starts 1 or 2 days after nest is completed. One egg is laid each day until the clutch is completed. Average clutch size is 5 eggs.
Incubation - starts when last egg is laid, lasts on average around 14 days
Brooding - starts when eggs hatch, lasts on average around 18 days. Stop nest checks after 12 days to prevent premature fledging
NestBox Monitoring
Try to monitor at least once a week
Stop monitoring 12 days after the eggs hatch. The young *may* prematurely fledge at this time
Minimize your time at the nest, especially in wet/cold weather
Tapping on side of box may help flush out brooding parent
Take note of eggs and nestlings and dates when laid, hatched and fledged
Remove nest after nestlings fledge to promote a subsequent nesting. Bluebirds will nest up to 3 times a season.
Join your state bluebird society or the North America Bluebird Society. The society will provide valuable information and birders with similair interests. Your data will help to understand the bluebird's breeding success.
Competing Species
Tree Swallows, Chickadees, Wrens and House Sparrows my attempt to nest in your box. The first three are tolerable. House Sparrows ARE NOT. Please do not "settle" for house sparrows. If you let them breed, you are actually working AGAINST bluebirds and other native cavity nesting birds.
Tree Swallows: mount a 2nd box on the same pole or on a pole 4-6 feet away. Tree swallows will nest in one, bluebirds in the other.
Wrens: move the box out in the open, away from the edge of the woods
Sparrows: keep removing their nests to deter them. They are a non-native unprotected species so you can deal with them as you see fit. We have in-house trap plans if you areso inclined.
Predator Deterrance
Put a pole guard on the pole to keep climbing predators out
some people grease the poles as well
Have the roof of the box overhang the front around 4 inches tomake it harder for predators to reach the entrance hole
If birds of prey attack your bluebirds, move the boxes away fromtrees where the prey birds may be launching their attacks
keep grass/weeds trimmed near box to remove predator hiding spots
deter feral/stray cats. They prey on many bird species.
Food Supply
Bluebirds eat mainly insects that they capture on the ground. They do noteat bird seed. They will eat berries, currants, raisins and mealworms when insects are not readily available.
keep some areas mowed to provide ground insects more readily
supply some of the materials listed above in bad weather (early spring,late fall, during winter) to supplement insect food.
Bluebirds will winter over if the weather does not get too harsh and they have (1) shelter,(2) food and (3) water.
For shelter, bluebirds will roost in empty nestboxes. You can add clean dried grass in thefall if you wish for bedding material. You can also plug up air vent holes to help prevent heat loss. You can also build roosting boxes.
For food, you can plant berry bearing trees and shrubs so the bluebirds will have fresh food available. The also eat raisins and currents.
Martha Sargent suet recipe:
1 cup crunchy peanut butter
1 cup lard
2 cups quick-cook oats
2 cups cornmeal
1 cup regular (white) flour
1/3 cup sugar
Melt the lard and peanut butter together in the microwave or on the stove top. Stir in the remaining ingredients. Pour (actually its more like “plop”) the mixtureinto square freezer containers that will fit your suet basket. Or cool it in the fridge and crumble for a feeding platform. Store it in the freezer or refrigerator (depending on how much you use daily) until you are ready to use it. This recipe makes about six cakes. Only use the peanut butter in a mixture, not alone, as it may stick to the birds' crop.
For water, you can put fresh water out daily if there is not running water available. There are also products available to heat or vibrate the water to help prevent freezing.
This article was adapted from its original, posted at Permies.com by Paul Wheaton.
After years of scraping/shoveling/scrubbing chicken poop, selling meat/eggs for just a hair more than he paid for feed, and not being able to take a few days away from the chickens, Paul Wheaton has discovered a system where he never scrapes or shovels chicken poop, turns a profit, and can go more than a week away from the birds. Here's what he has to say about it:
At any given time when raising chickens I thought what I was doing at that time was "the best" only later to learn of something I like better. Now, when somebody asks about my opinion on the way they are raising chickens, I find myself tongue-tied. I see their chickens standing in shit all day, eating feed made from grains (and other things) considered too awful for human consumption. The feed is often medicated and loaded with vitamins and minerals that somebody thinks is good for the average chicken—it has to be, because what the chicken really wants to eat is not available to the chicken.
I want to paint a picture of something healthier that would be easy to do. To build a foundation, I need to first explore the other ways that I'm aware of raising chickens. There are a lot of techniques out there. I've tried nearly all of them. I've visited a lot of farms and a lot of city coops. I've had a lot of people ask me what I think of their approach. And usually my answer is not the answer they were hoping for.
Logic, Reason, Passion, and Raising Chickens
I'm going to start off examining the base approaches of raising chickens, then cover a lot of the other details. At the risk of finding mobs with torches and pitchforks beating on my front door, I'm also going to mention what I don't like about these systems.
Concerns About the Way Most People Raise Chickens
The moment you put an animal in a cage or behind a fence, you are taking responsibility for the welfare of that animal. If you are a person of conscience, then you want to treat the animal well— possibly giving it a life better than if the animal were on its own in the wild. Does this imply that every person of conscience who has caged any animal has the arrogance to believe that they can improve upon nature's designs?
We can attempt to protect the animals from predators—this is easy to wrap our heads around. We can attempt to provide food that is better than what they would find in the wild. But wait! We can't seem to agree on what is best for humans to eat, let alone another species that does not speak our language. Some simple trial and error reveals what foods are preferred or result in "progress," but a lot of this information is being contested regularly.
The first domesticated chickens were plucked from the jungle. For thousands of years, chickens have been bred to survive non-jungle situations. But when they get loose they rarely survive anywhere on their own but in the jungle—"Dammit! The chickens got out and wiped out the strawberries!"
Since chickens are driven to choose what to eat based on instinct, it would seem that the strawberries may have supplied something that was not in their "chicken feed". Consider for a moment being put into a cage where your only food is moldy "human chow" (everything your human needs for growth and reproduction, now with ground up minerals!) and your only drink is dirty water. And just out of reach of your cage are fresh strawberries. This image would not be complete without a farmer saying, "I must be doing a good job of raising these humans, because most of them haven't died!"
The jungle comes complete with polyculture foods all year long. Greens, bugs, fruits, grains and more. Mostly fresh. Something we cannot do all year because we have winter. Most chicken feeds eliminate three out of four of these - leaving only grain. And that grain is dried grain, not fresh. Since we have learned that grain alone makes for a sickly chicken, "chicken feed" also contains dried legumes and a vitamin/mineral mix that contains the vitamins and minerals that we are aware of that we think chickens need.
I see people build massive, elaborate stuff for raising chickens that deprive them of fresh foods or bugs even in the summer. Or natural sunlight. Or have them standing in their own poop all day. Or, worse, the chickens are killed by predators.
And this is the norm. Therefore, I am concerned about the way most people are raising chickens.
Six Approaches to Raising Chickens
These are all of the methods I'm aware of for raising chickens. All of these can be done in the city or on a farm. And lots of folks come up with combinations of these, like using a coop and run, but letting your chickens free range once in a while.
factory
coop and run
chicken tractor
truly free range
pastured poultry pens
pastured poultry paddocks
I'm a strong advocate of the last one: paddocks. Later I'll go into a lot of detail of why I like paddocks so much more than the others. But, first, I want to make up some metrics to better help me describe why I like the paddocks approach so much.
Raising Chickens: Metrics
I've tried to come up with a way to represent these ideas numerically, for comparison. I've tried to use a scale such that the value 10 is best. These numbers are entirely made up by me and are a numerical representation of my opinion.
Vegetation Factor: How much quality vegetation is available to the chicken. 0 = none, 10 = so much that the chicken doesn't eat any of the provided chicken feed. Negative values represent feeding toxic plants to chickens. This is the strongest driving force to me. If I can get my feed bill near zero, then I have increased my profit margin by a factor of 8 or so. Plus, I am powerfully driven by the idea of my animals eating from a polyculture.
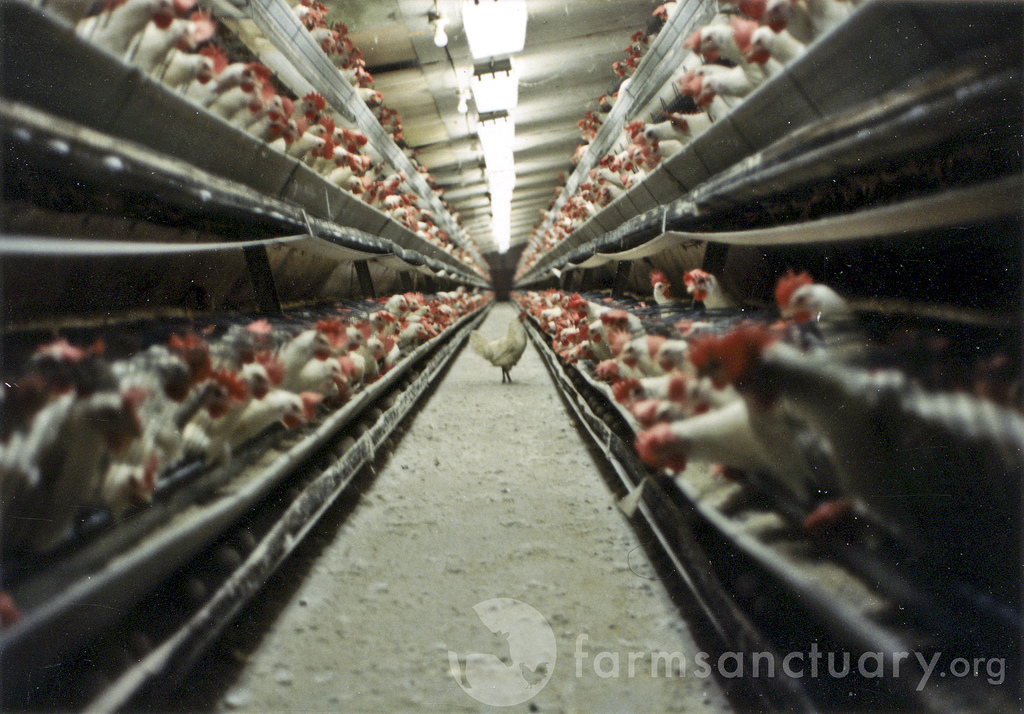
Bug Factor: Nearly half of a chicken's natural diet is bugs. The more bugs a chicken can eat, the less feed I have to buy. 0 = no bugs are available, 10 = the chickens get their fill with plenty of bugs to spare. This might be a good time to point out that when I see "100% vegetarian diet!" on a carton of eggs, I think "we are raising chickens to suffer to satisfy the passions of ignorant twits!" I have yet to see a package of eggs with the words "diet includes bugs and other meat". What's funny about the egg carton pictured is right next to "vegetarian diet" is "certified humane".
Poop-Cleaning Factor: How much effort is exerted in cleaning up chicken poop. 0 = fixed coop, 10 = no effort.
Poop Hygiene Factor: 0 = every moment of every day the chicken is standing on poopy bits and breathing in ammonia, 10 = the chicken is never standing on poop and the air is as fresh as it can get.
Work Factor:0 = about 4 hours per week for 25 birds, 10 = about 2 minutes per week for 25 birds.
Natural Habitat Factor:0 = factory farms, 10 = completely loose in a jungle
Food Cost Factor: 0 = factory farms, 10 = the chickens do not eat purchased food
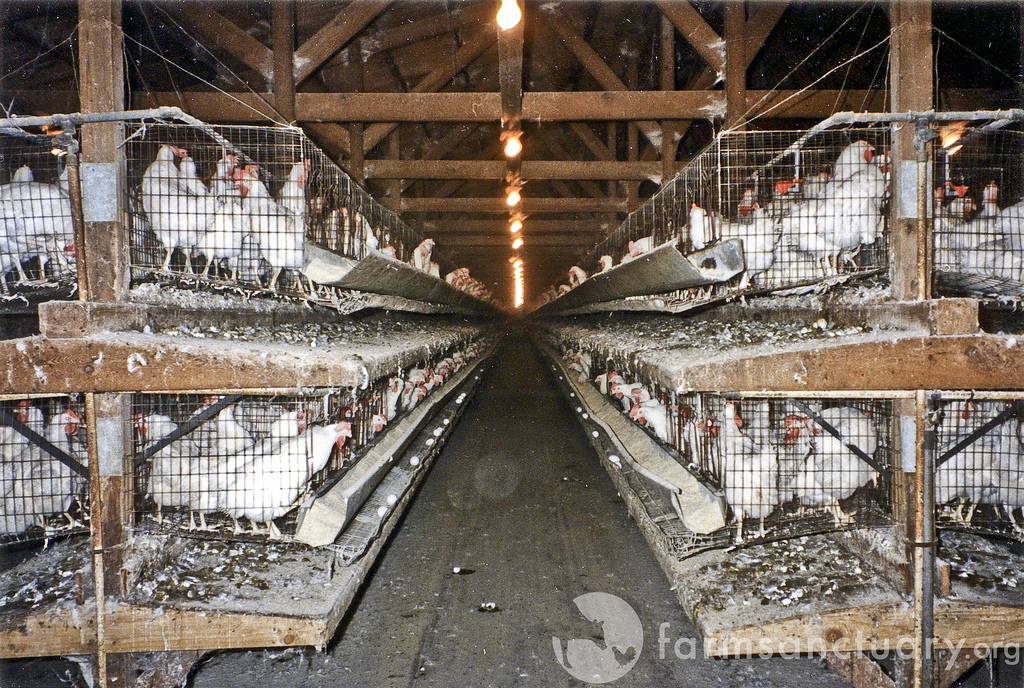
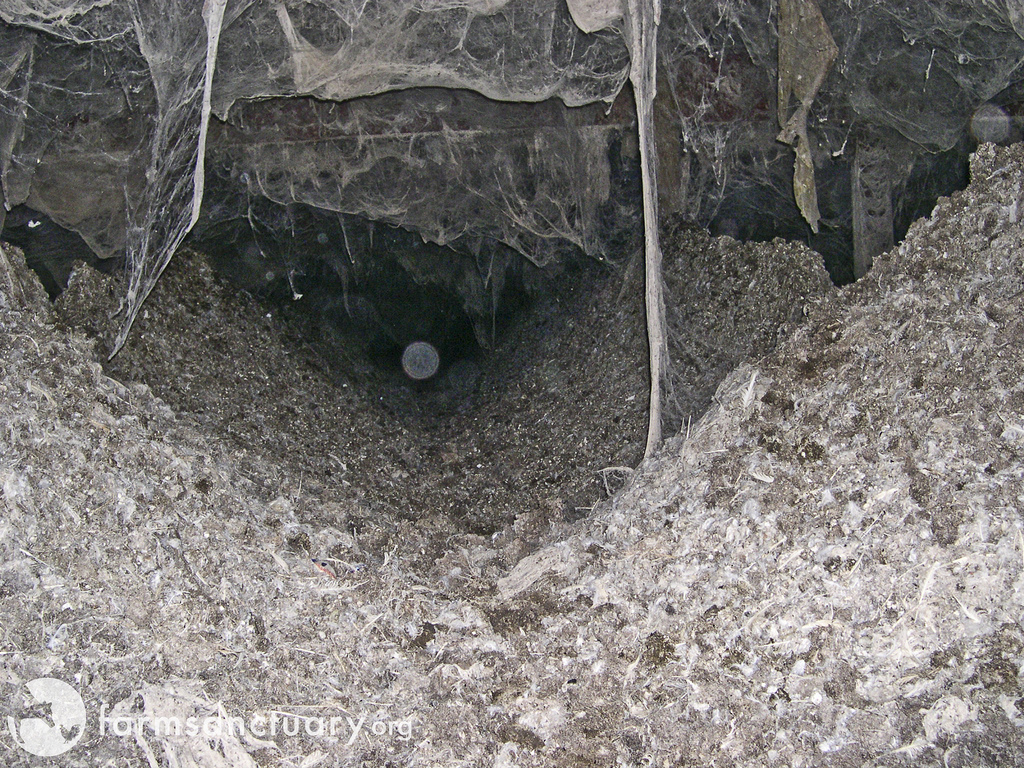
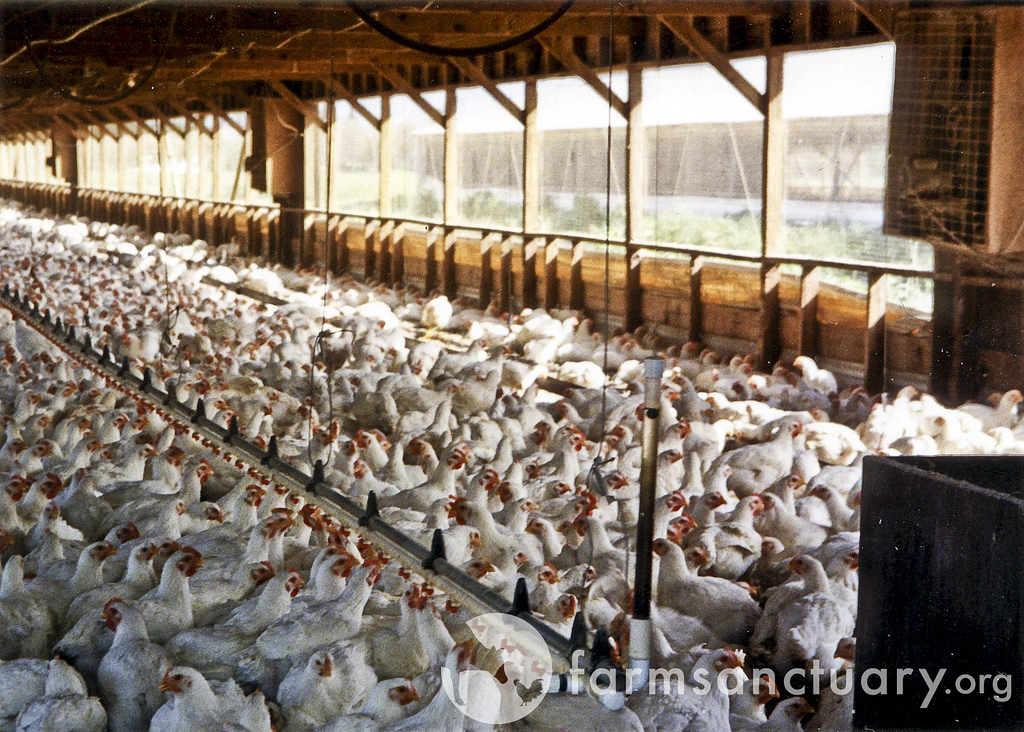
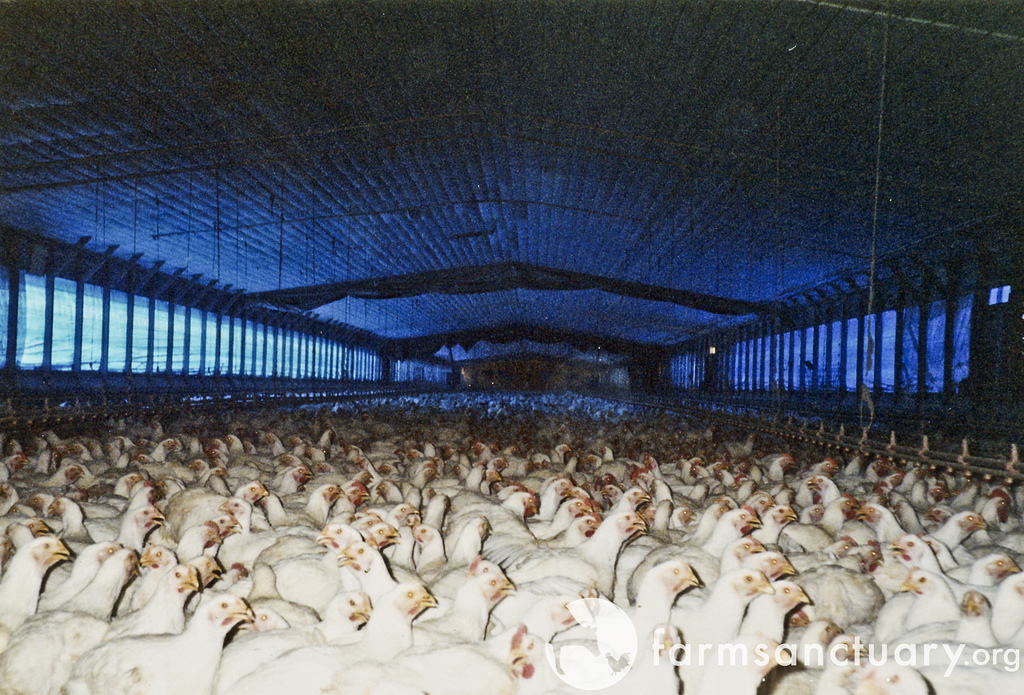
Raising Chickens in a Factory FarmLayers packed into small cages, meat birds in huge warehouses. Poop and stink everywhere. No natural sun. The so called "free range" birds are given a patch of grass, but it seems so alien to them, they choose to not take advantage of it - they would rather hang out by the feeder.
The following pics are so gross, they are intentionally left small. After all, this isn't really what this article is about, but it is presented as a reference. You can click on any of the pictures to get a full size pic. I would like to thank farmsanctuary.org for freely sharing these images.
factory farm layers
more factory farm layers
factory farm layers poop
factory meat chickens
more factory meat chickens
vegetation factor: 0 bug factor: 0 poop cleaning factor: 0 poop hygiene factor: 0 work factor: 2 - I imagine that systems are optimized to keep the level of work low natural habitat factor: 0 confinement factor: 0 food cost factor: 0
Raising Chickens with Coop and Run
Exactly one non-portable chicken coop and exactly one non-portable chicken run. Probably the most common way to be raising chickens. This is, no doubt, a huge step above and beyond what the factories do. An excellent first step. And while I embrace this technique as something that can be pretty good, I hope to impress upon you by the end of the article something I think is better.
I wish to express that we all have to start somewhere. It is better to have something like everybody else the first time and learn by it, than to shoot for perfection the first time and never be raising chickens at all! Coop and run is how I was raising chickens as a kid. It was how I did it when I was first raising chickens as an adult. I think that whenever somebody first has the thought of raising chickens, this is what they imagine.
This is my rendition of a typical coop and run. The point of this image is the part that is brown. That designates an area where stuff doesn't grow anymore. For most coop/runs I have seen, the entire run is without vegetation. Vegetation Factor: 0 to 7 - I have seen coops and runs that were too small, so every spec of vegetation was utterly gone. So the vegetation factor would be the same for a factory farm: zero. Although I have never seen it, I can imagine a chicken run loaded with plenty of variety of plants edible to chickens. But without the element of paddock shift (more on paddock shift later), the vegetation cannot do nearly as well. Bug Factor: 1 to 3 - With a really small run, the chickens will wipe out all of the bugs and then they only get those bugs that happen to come through the fence. With a really big run, the same thing happens, but a bigger fence means more bugs will find their way in. Poop Cleaning Factor: 0 to 1 - You can make it a little easier on yourself if you can pile lots and lots of straw or sawdust in the coop. Maybe the lower layers will eventually compost and you'll have less muck to muck out (some folks do this compost trick with the idea that it will warm the coop in the winter. It works, but I have concerns about it too). Still ... some day you have to get all of that poop out of there. What an awful job. I would think that a lot of people would switch to the paddock system for this one reason alone! If the run is too small, you might have to shovel poop out of the run too. Poop Hygiene Factor: 0 to 4 - Most non-portable coops STINK! To me, this seems just plain wrong. The only shelter that the chicken has is a disgusting health hazard. Often, the ground is covered in poop and there are even little poop mounds under the roosts. Smaller runs are sometimes one big layer of chicken poop. Better coops and runs are often better by being much bigger and/or getting cleaned frequently. Sometimes daily. Some coop designs have a mesh bottom where most of the poop falls through to a compost pile underneath. But there is still poop on the wire mesh and there is still that awful ammonia smell coming from the pile. Work Factor: 1 to 6 - Generally you pack in feed and water twice a day. Some folks scoop poop every day, some folks scoop poop more like once a month. It is possible to have a watering system and bigger feeder set up to cut back on the feeding chores. And if your coop has a mesh bottom, you might be able to just throw straw or sawdust onto the poop pile once a week - but eventually that pile has to be dealt with. And you are still going to need to clean that mesh once in a while. Natural Habitat factor: 2 to 6 - Even the worst coop/run combo is a big step up from factory farms. I can imagine a massive chicken run loaded with 20 trees and loads of bushes and all sorts of polyculture edible growies. Unfortunately, the chickens will eventually have an over impact on a lot of those growies and the quality will slowly degrade. Confinement Factor: 1 to 6 - Granted, the worst coop/run is far, far better than a factory farm. But ... wouldn't a loose chicken be ten times better off than being in the worst coop/run? Hence the value of "1". I've never seen a run that I would give a value of higher than 3, but it is theoretically possible to have a really huge run - so I'm allowing a value of "6" on the high side. Food Cost Factor: 0 to 3 - Nearly all coop/run situations provide zero to near zero vegetation food for the chickens. But .... a freaky huge run loaded with excellent plants is possible. Any grains or annuals will probably be wiped out before they can get very big. But some good trees could provide a fair amount of food.
A paddock system would have a micro coop that you can drag around from paddock to paddock. Easier and cheaper to build than any of the non-portable coops I've seen. And since the micro coop is portable, there is no more mucking out the coop and the vegetation under and around the coop doesn't get wiped out.
Raising chickens in the exact same area day after day harbors diseases. Since there is a lot of chicken poop in the area and a lack of plant growth to take in the manure, the poop is headed for the groundwater supply.
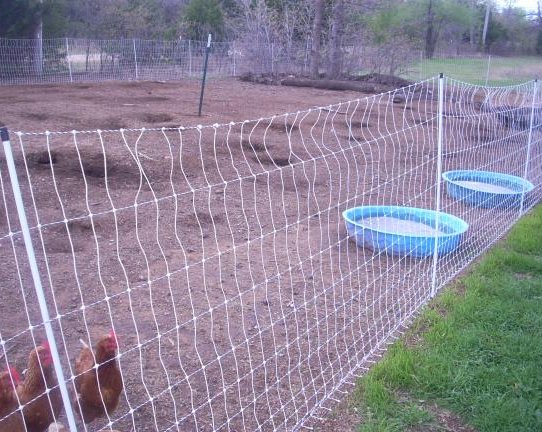
The following picture is provided with permission from happyeggs.org. I think this is an excellent example of a typical chicken run that has been in use for more than a few months.
Note the pits. That's where the chickens have scratched and scratched in the same spot for months. The upside is that they make themselves some lovely dust baths - something that chickens need. Note also - no edible vegetation in the run although there is vegetation outside of the run. The fencing appears to be some pos/neg temporary electric fencing - excellent for a paddock shift system! If you go to their site and look, you will see that they have about 20 chickens and they have room to spare. These folks could take their existing fencing and make a paddock about half the size of this one on fresh vegetation; then make a new paddock like that once a week and move the chickens to the new paddock. They could probably easily have five paddocks like this. The chickens would then constantly be on edible vegetation and get far more bugs. Plus they would have less chance of getting sick being in the same place all the time and ... and ... and ... well ... I have lots more to say about this, but I'll say it all later.
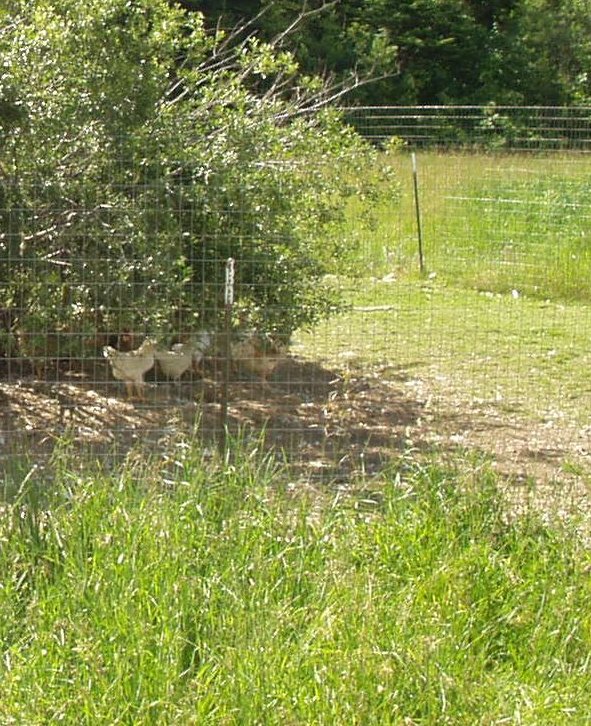
This picture is of my first chicken run (as an adult) from a long time ago. You can see that there is a LOT more vegetation outside of the run. Proof that the chickens do eat this stuff. Consider - the more of this stuff they eat, the less your feed bill is.
Note how the chickens are down to the dirt under the bush. Also note how the vegetation inside of the run is less diverse than the vegetation outside the run: chickens have preferences - there were lots of "weeds" outside of the run, but only grass and the serviceberry bush inside the run. The chickens like "weeds" better than grass. The fencing in this case is 6 feet tall field fence. It keeps in about 95% of the flightiest layers.
Raising Chickens with a Chicken Tractor
Basic chicken tractor design
This is generally a small, portable pen about three feet wide and six feet long with no bottom. You keep three to six chickens in it. The reason it is called a tractor is because it is used a bit like a rototiller (I think "chicken tiller" or "chicken plow" would probably have been more accurate). The idea is that you leave this pen in one spot and the chickens will eat all of the vegetation and will scratch for bugs and stuff. In the end, it is lightly tilled and covered in chicken poop - all ready for you to plant your crops!
There are people who do not use a chicken tractor structure this way. They use their chicken tractor structure as tiny salatin-style pen, which I discuss later. This technique is sometimes referred to as a "chicken ark". For this section I am going to refer strictly to the chicken tractor used to eliminate all vegetation. For the "chicken ark" style of use, please refer to the salatin-style pen section.
Another common chicken tractor design
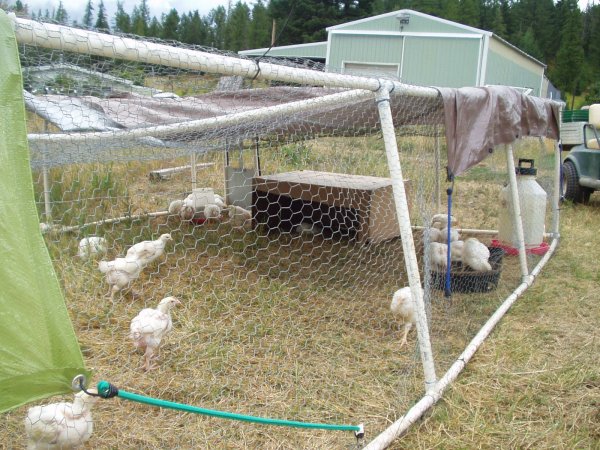
The pictures below are from the Washington State University test fields: the person giving the tour bounced back and forth between calling these chicken tractors or salatin-style "pastured poultry" pens. Although these are definitely bigger than anything I would call a chicken tractor, they are also smaller than anything I would call a salatin-style "pastured poultry" pen. The important thing is the clear demonstration of my concern with a chicken tractor. The first pic shows where the tractor will be put tommorrow
The second pic shows where the tractor was yesterday.
The important part of this pic is to note how much greenery was consumed yesterday. These are about five feet wide and ten feet long. With 35 chickens in each. That, in my opinion, is way too many chickens for such small pens. I think that such small pens should have no more than 15 to 20 birds and should be moved at least twice a day. Salatin recommends that the birds consume about 30% of the vegetation. This looks more like 90% to me.
While the WSU pictures show some of my concerns about raising chickens in chicken tractors, I do have to say that in this picture, WSU has mitigated my primary concern even though you might not be able to tell in the picture. First, the chicken tractor concept is to eliminate ALL vegetation - which clearly is not done in this picture. Second, I happen to know that this is not a normal pasture. This is a test plot. A pasture would contain 10 to 100 plant species - a few of which would be toxic. This test plot contains only clover and rye. Neither of which is toxic to chickens.
While I have seen many cases of chicken tractors eliminating all vegetation from a polyculture, I did not think to take a picture of it. Please don't ever use a "chicken tractor" to remove all vegetation. This may (debatably) be good for your garden, but I think it is a terrible way for raising chickens - as I will explain below. Vegetation Factor: -2 (negative two) - that's right, this can be worse than a factory farm. Consider that in general, 40% of what grows on the ground is probably good for chickens to eat. 30% is slightly toxic and the rest is moderately toxic to very toxic. Since chickens will instinctively eat what is good for them, they start off really great! But once all of the good stuff is gone, then they eat the slightly toxic stuff. And then they are walking the edge between craving greens and the only greens being poison - so they slowly eat the poisonous greens - slowly enough so that they don't die. They might not even show any signs of being ill. But you probably do notice that the last few bits of green seem to last 20 times longer than the first bits of green. Bug factor: 1 to 2 Poop Cleaning Factor: 8 to 10 - there is no bottom, so rather than cleaning poop, you just move the tractor. Poop Hygiene Factor: 1 to 2 - For a while, the chickens are on fresh vegetation. Before moving, nearly all the ground has poop. Sometimes the pen is not moved until there is a solid mat of poop. Work Factor: 1 to 3 Natural Habitat Factor: 1 to 2 Confinement Factor: 1 to 2 Food Cost Factor: 1 to 2
About half the feedback I get on this article is bashing me for bashing chicken tractors.
Raising Chickens Truly Free Range
I have to put the word "truly" in there because factory farms use the phrase "free range" to mean something really stupid. The idea here is that your chickens have 24x7 access to your whole place. On the farm, you probably have no fence and the chickens just don't go too far from the food. In the city, you might have a fenced yard and the chickens just stay in there.
Usually, there's a coop where the chickens go to lay eggs and to roost every night. If so, then you have all of the hassles that come with the coop. If not, then you have all of the hassles that come with finding eggs or finding the chickens when it is time to harvest.
Vegetation Factor: 2 to 10 - How to get a 2 is pretty obvious. To get a 10, you have a rich polyculture that has far more food than the chickens could eat. Bug Factor: 6 to 10 Poop-Cleaning Factor: 0 to 10 - Even if you don't have a coop, there will be poop all over everything where you don't want poop! At first this was "3 to 4" and then I had some people write to me to say that they had terrible problems with poop all over all sorts of things where they didn't want poop and it was far worse than the worst coop! They implored me to discourage folks from raising chickens with a free range approach due to the endless poop everywhere. And then I had people write to me to insist that I should give a value of 10 since they have personally never seen any chicken poop with their free range chickens. I suppose if you had some nearly feral chickens this could happen. So after a bunch of conversations I'm opening it to the full range, but I think the average is gonna be 3. Poop Hygiene Factor: 3 to 10 - Even if you don't have a coop, you will find that the chickens will want to hang out in the same place day after day and make a hygiene issue. Usually right on your porch. They like you. Again, a couple of feral-ish chickens on lots of acres will be what scores a 10 - but this isn't very common. Work Factor: 3 to 10 - Even if you don't have to feed or water them, you still have to clean that poop! Again, I put the number "10" here because of the nearly ferral element. But I really think "3" is the most likely. Natural Habitat Factor: 6 to 10 Confinement Factor: 10 Food Cost Factor: 4 to 10
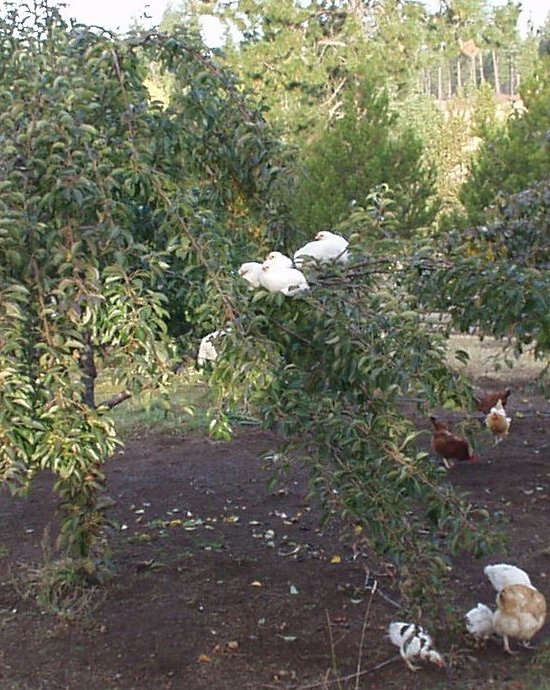
The chickens are everywhere. Here they are unmulching some fruit trees:
I set a piece of plywood on the porch while I came inside to have lunch. In no time at all, the chickens turned it into a roost and pooped on it:
Reshaping a pear tree. Note that the mulch is now all gone.
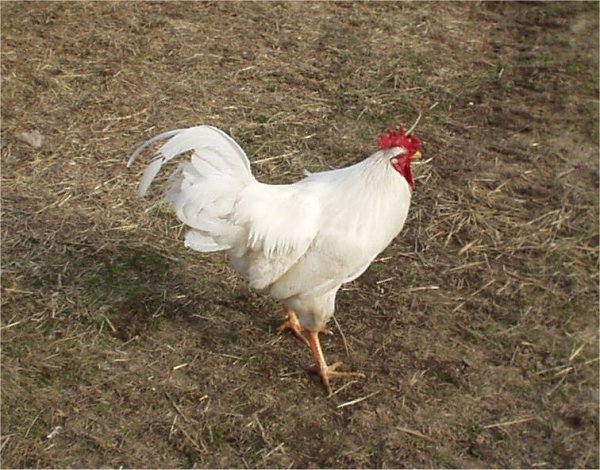
Several white rock roosters turned out to think they could take anybody down. Even me. They would attack and attack and attack. Until they took that special trip to the soup pot.
This was a lovely place to sit until it was perpetually covered in chicken poop:
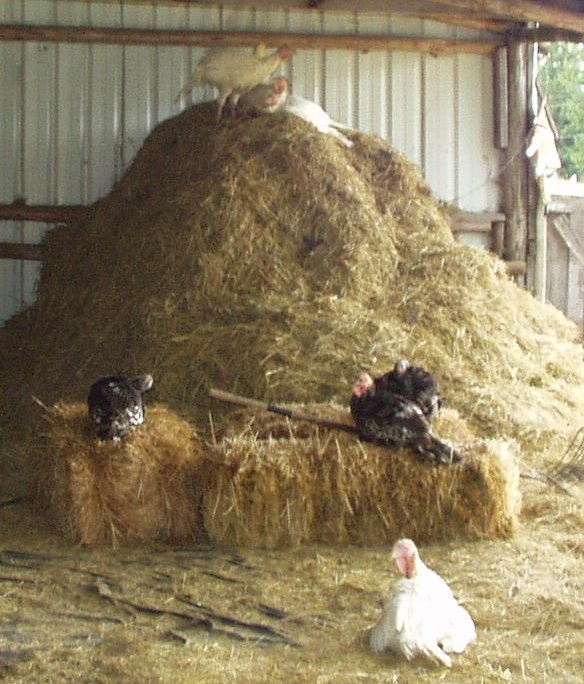
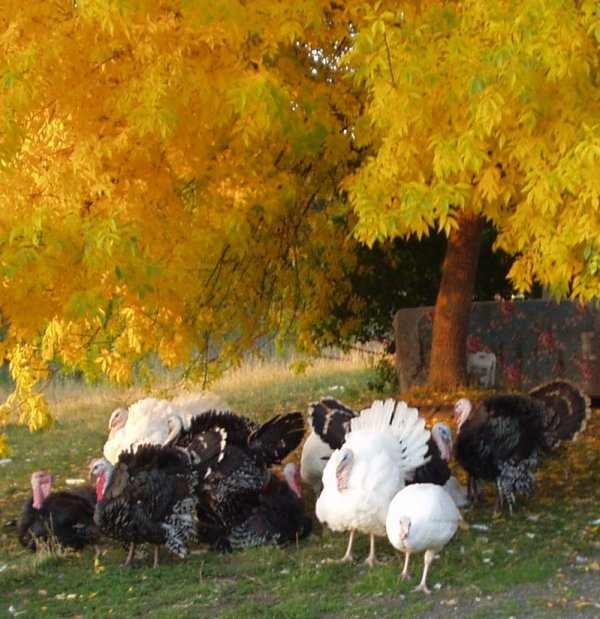
These turkeys found some perfectly good hay and straw to poop on:
The weird thing about this picture is that the turkeys really wanted to spend all of their lives about 20 feet due south from this point, sitting on the porch. A snow shovel and a scoop shovel were kept on the porch and turkey poop was shoveled off twice a day. So gross:
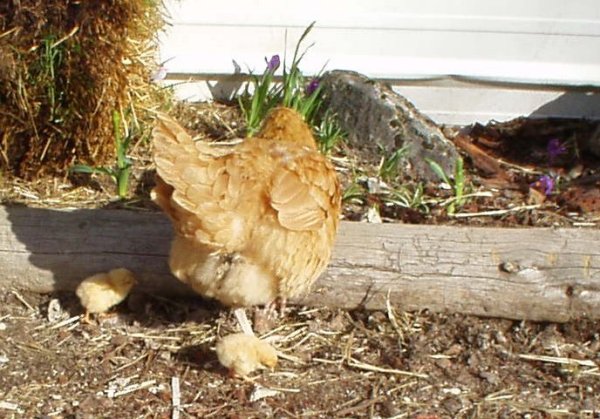
Here is a wonderful upside to raising chickens truly free range - every once in a while, a chicken can hide a clutch of eggs from us and then pops out with some chicks:
Free-range chickens try to eat all of the dog food and cat food. Watch out! Free-range chickens can wipe out your garden. Soils and pastures will do better when given a chance to rest between visits from the chickens. With free range, there is no way to have that rest.
Because of trying this, I now have chicken scratches all over my car: They attempted to roost on the bottom edges of windows, only the window made it hard to do that. So they would desperately try to keep from falling off by using their claws.
If you find an egg in an odd spot, don't eat it - you have no idea how old it is. I would find eggs on my workbench. And chicken poop on my porch, in my shop, on my workbench... it's just everywhere. They even started nesting in the baler.
And when chickens are spread out in the day, it's harder to protect them from predators.
Raising Chickens in Pastured Poultry Pens
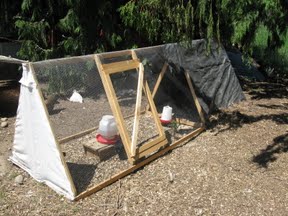
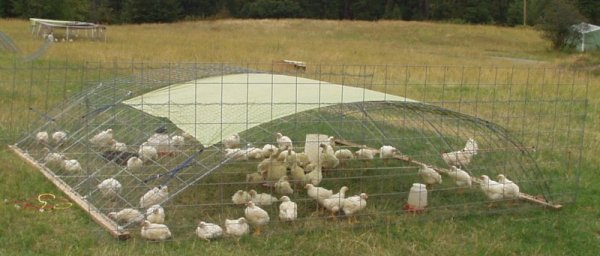
A standard salatin-style pastured poultry pen.
Joel Salatin is a brilliant man! His book Pastured Poultry is excellent. In the book, he describes making a pen that is about 10 feet wide and 20 feet long. He puts a bunch of chickens inside and then moves the pen one pen length every twelve hours or so. The chickens eat a fair amount of the pasture and bugs and leave behind a bunch of chicken poop. This cuts his feed bill about 20% which adds up to profit!
Vegetation Factor: 1 to 3 - lots of pasture stuff but no trees, shrubs or stuff that doesn't do well in pasture. Because it is such a great system, I want to give a higher number. But I think the very best pastured poultry system might cut the feed bill by 30% - so the highest number I can give is a 3. Bug Factor: 2 to 3 - when the pen is freshly moved, 90% of the bugs in the pen are probably consumed in the first 20 minutes. Then the chickens wait for bugs to happen to pop into the pen. Poop Cleaning Factor: 10 - a perfect score. How could there possibly ever be any poop to clean? Poop Hygiene Factor: 6 to 8 - After six hours, there's a fair amount of fresh poop right where the chickens are standing. Work Factor: 0 to 3 - All the feeding and watering, plus, move that pen twice a day every day. Some folks might do just once a day. And the pens are generally not too terribly close by. Natural Habitat Factor: 2 - lots of excellent sunshine, but a chicken is a forest animal. Confinement Factor: 3 to 4 Food Cost Factor: 2 to 3
I used pastured poultry pens for several years with moderate success. I once heard a fella suggest that rather than move the pens, park an empty pen next to a full pen and then open the doors between the two: the chickens will run into the new pen to get the new grass! It works great! And eliminates the problem of when you drag the pens, the chickens all wanna run away from you so they end up and the opposite end that is dragging - I constantly worry that they will get trapped under the edge that is dragging.
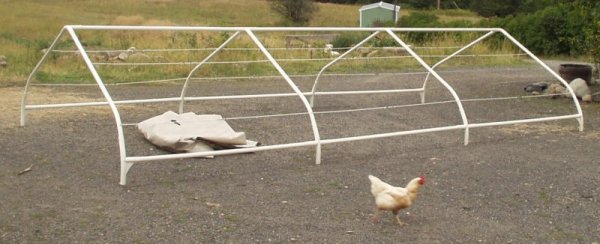
Here is my first design using the "door technique". I used PVC pipe which made it plenty lightweight.
I came up with about five design improvement ideas, but at the end of the first season, it started to break a lot. It turns out that most PVC is not UV resistant. The following season it just crumbled - it turns out the most PVC also hates temperatures of -20.
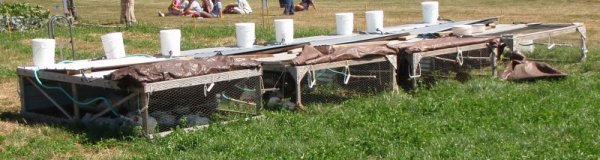
Having it be very lightweight is important to me. The lighter it is, the easier everything is. I came up with an idea using cattle panels, but they are kinda heavy. And then I got the idea of making them modular. One pen could be made of three "modules" with two ends. When I set up a new pen, I could just lift one "end" between the two pens, the chickens run through and then the front end of the old pen becomes the back end on the new pen.
This worked very well! Except that as the season went on we started to figure out that the time to move the pens was kinda huge. Rather than about 10 to 15 minutes per pen (move the pen, new water and feed) it was about 25 minute per pen (moving the modules and bungee-ing them together). I needed something faster.
One idea was to buy one of those Costco temporary garages and toss out the legs that make it high. I put it on 2x4 skids and dragged it around.
Still too heavy.
Poly pipe is really light. And fairly stiff.
Well, not stiff enough.
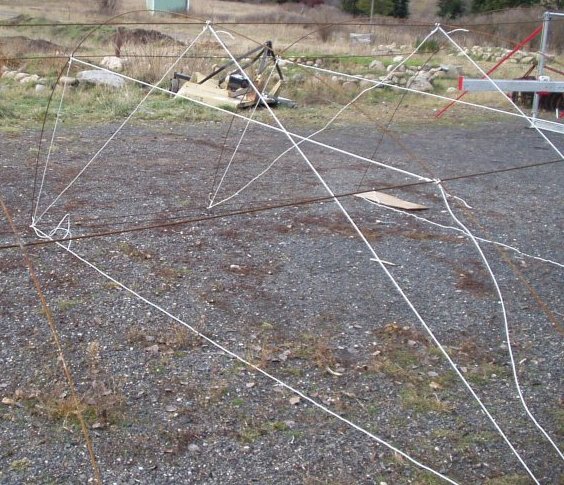
1/4 inch steel rod is stiffer. And I won't need much. I welded some together and held the shape with clothesline.
It rusted freaky fast. I ran through a massive collection of ideas about paint (it will come off) and oil and ....
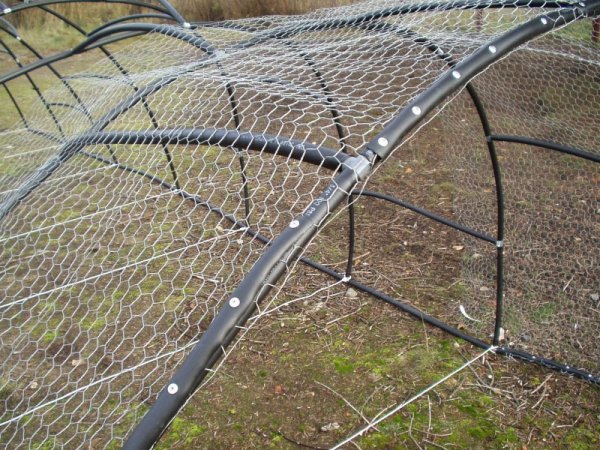
I put the steel rods through the poly pipe. The poly pipe protects the steel rods and the steel rods add rigidity to the poly pipes.
About at this point is when I got the idea for the chicken paddocks. I didn't even finish building this prototype - but I am convinced that if building a portable pen, this design is the best. Exceptionally lightweight. Cheap and easy to build. Should have an excellent lifespan.
Raising Chickens in Paddocks
Ahhhh .... now this is the ultimate solution for raising chickens. At least, it is the best that I'm currently aware of. There are two basic approaches:
Four or more fenced areas. Put the chickens in an area and after 7 to 10 days move to the next area. Each area gets at least 28 days of rest until the chickens return. The more areas you have, they can be smaller and the time spent in an area can be less. If the chickens consume more than 30% of the vegetation, you have too many chickens or too small of a paddock.
Get the same effect with portable fencing.
Paddock shift systems often improve the paddock. Some folks report five times more vegetation when using paddock shift like the one suggested here. This is something that vegans do not consider when designing gardens with no animals. So, imagine your garden without chickens produces less than your garden with chickens where the chickens eat 30%. Joel Salatin calls this system the "egg-mobile" and often has the chickens following cattle in a paddock shift system. The paddock shift system in the following image has some things that concern me—but! It is a paddock shift system.
Vegetation Factor: 2 to 10 Bug Factor: 5 to 10 Poop Cleaning Factor: 9 to 10 - Get a 10 if the micro coop has no bottom. Poop Hygiene Factor: 9 to 10 Work Factor: 4 to 10 - imagine moving the chickens once a week or so. Just open a gate and drag the micro coop to the new paddock. The chickens are anxious to get to the new space. Total time is about a minute. Oh sure, you probably should look in on them every day. But you don't have to. The lower value is for temporary paddocks - they take more times to set up and take down each week. Natural Habitat factor: 6 to 10 Confinement Factor: 9 to 10 Food Cost Factor: 4 to 10
Note that it is possible to have a 10 for every metric.
Each paddock can contain trees, brush and annual plants that provide a plethora of people food as well as chicken food. When the raspberries are on, go into the paddock and pick all the raspberries. Then move the chickens in and they'll find whatever you missed and will eat the lower fruit that comes on during their time there.
A teeny tiny dribble of a creek running through each paddock would be nice - it would save you from having to bring water in.
To help paint a picture .... I've ... well ... painted a crappy picture.
My rendition of a city lot complete with a pretty nice coop and run.
Here is the same lot without the coop and run. Instead there are four temporary paddocks and a portable micro-coop. The chickens spend 7 to 10 days in a paddock. Each area rests from the chickens at least 28 days. Each paddock is loaded with people food and chicken food. When the time comes to move the chickens, set up the new paddock and then create an opening between the two paddocks. Drag the micro-coop to the new paddock and the chickens will run to the fresh forage. Close the new paddock and take down the old paddock.
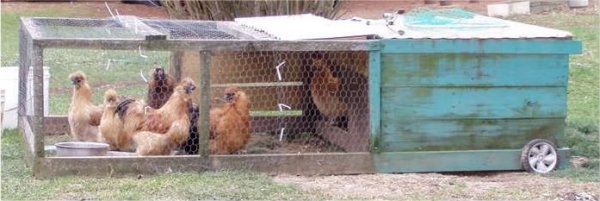
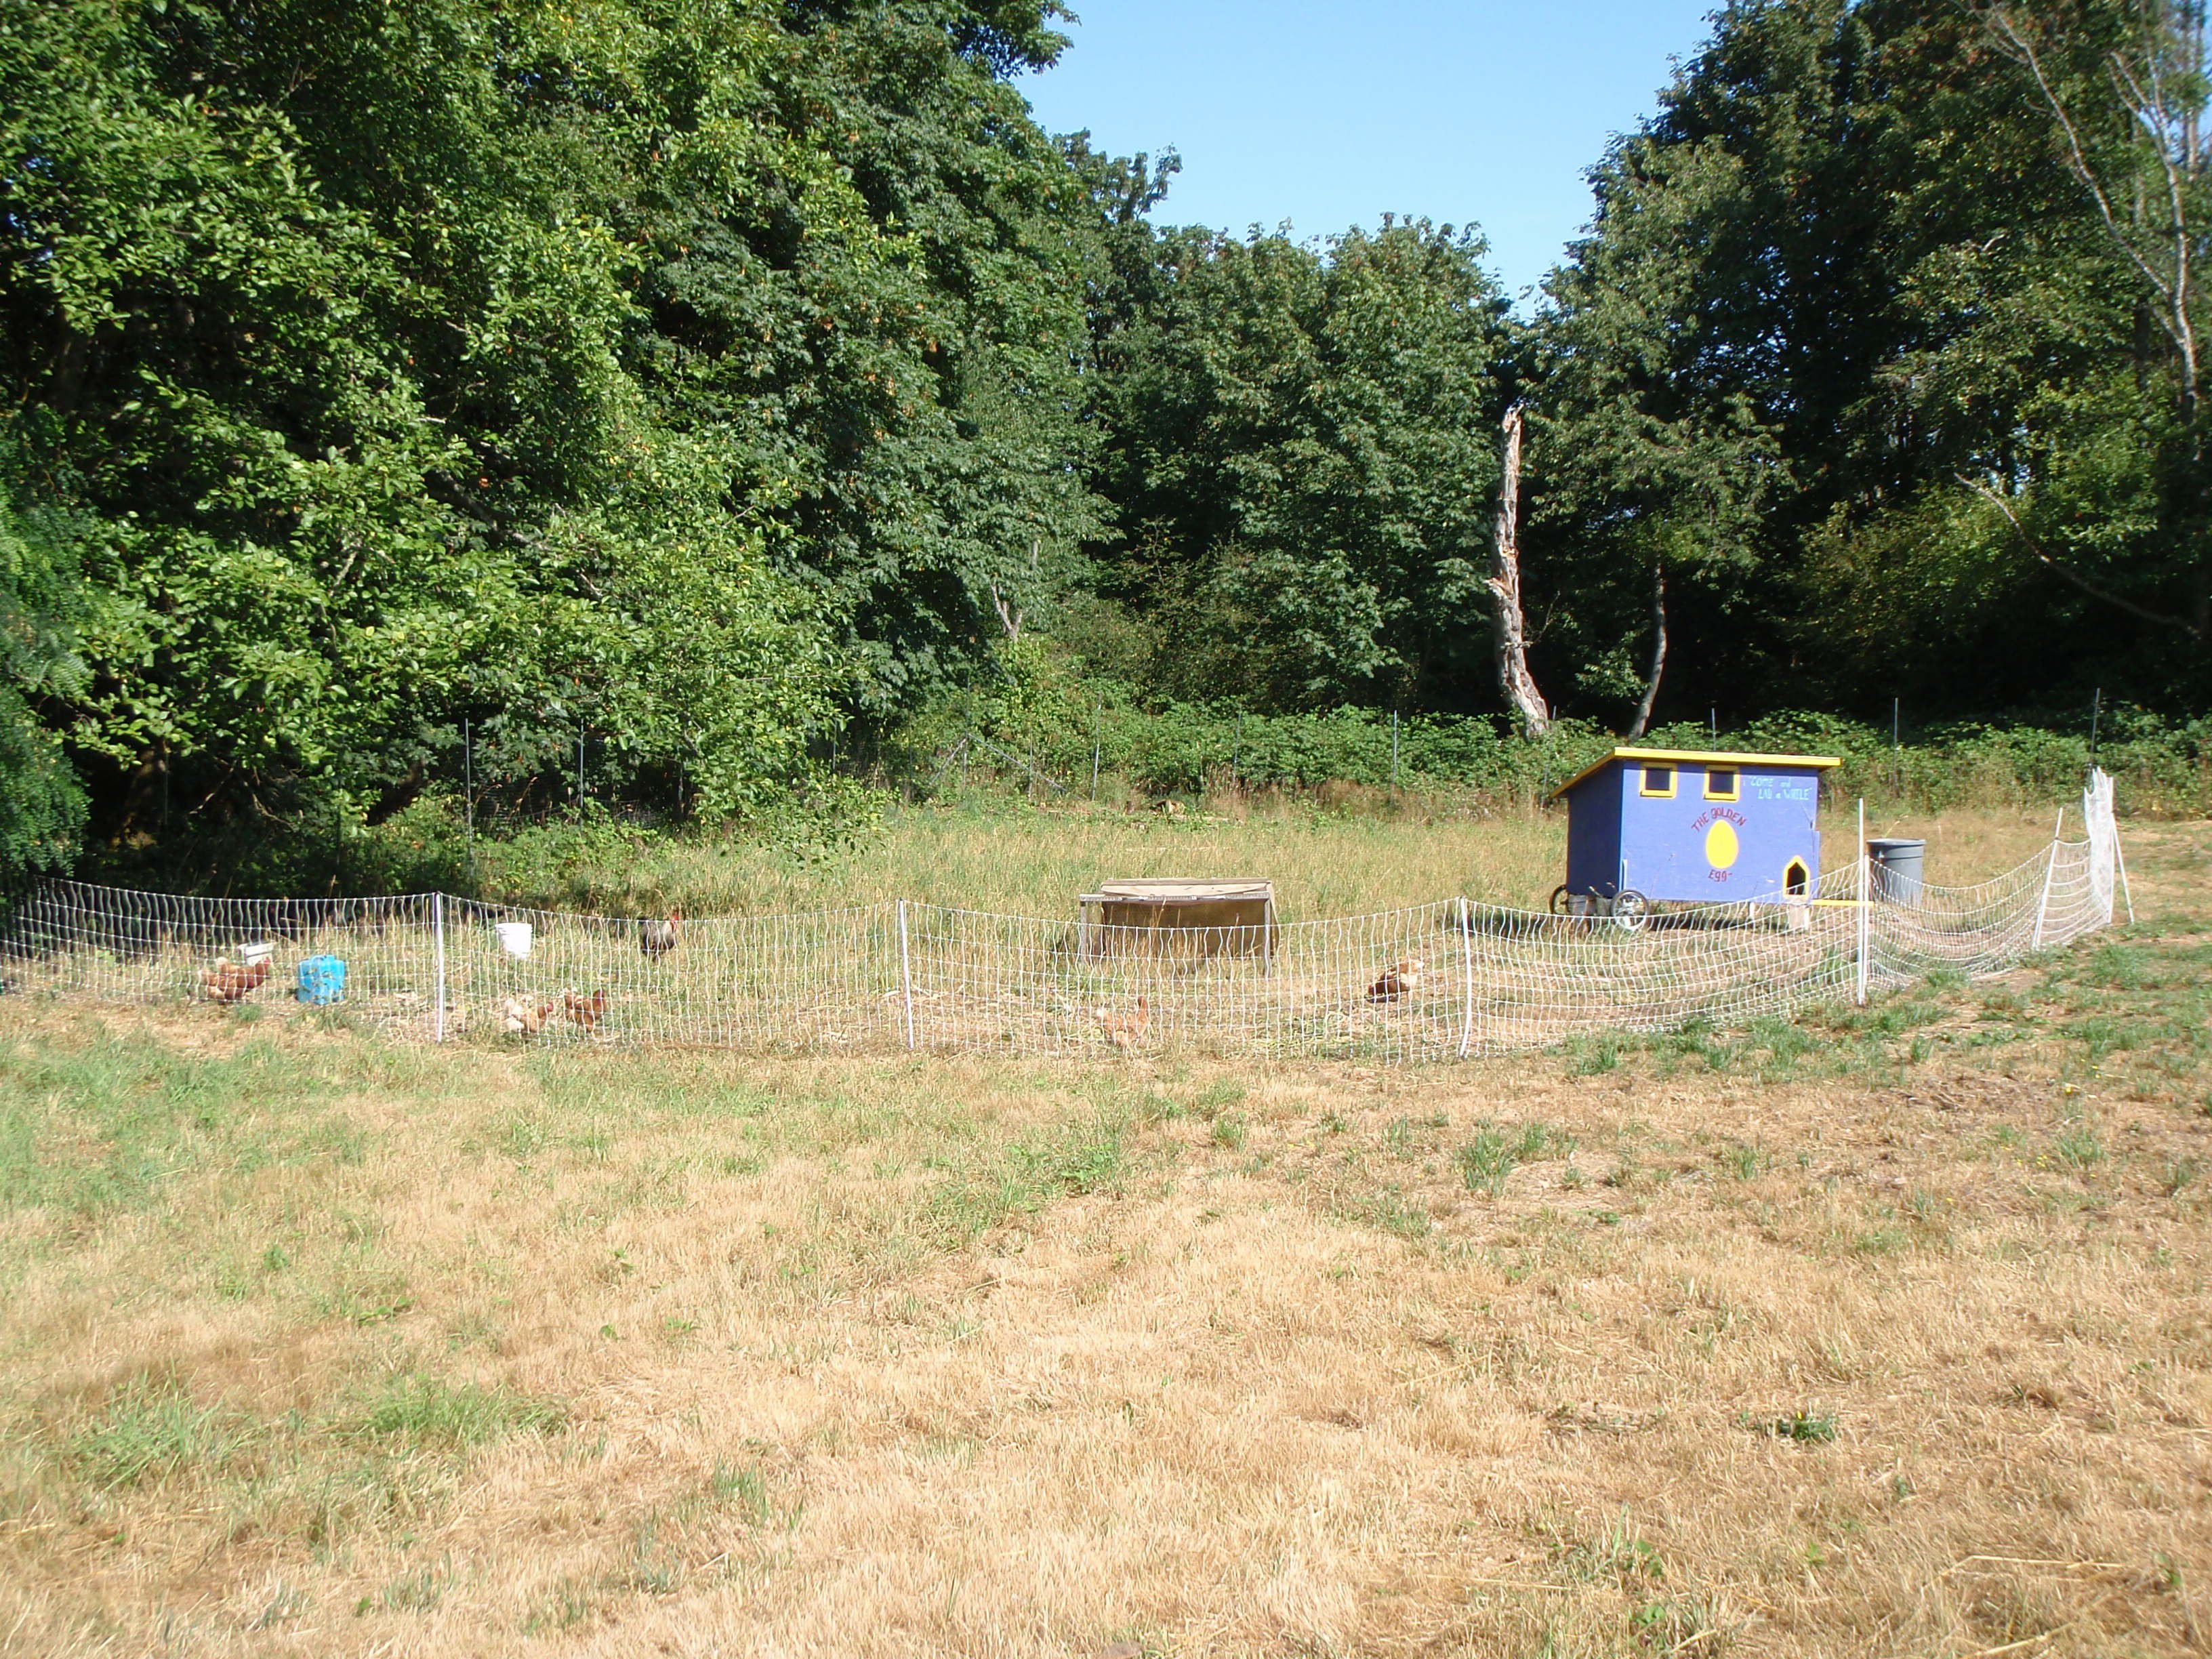
Here is a picture of using temporary paddocks in a city lot. In this case, this person is using some short fence that is designed to contain dogs. She moves it every few days.
She gave me permission to pass on these words about her system:
What you can see in the pic is the dry/eaten area right in front of the coop. That's where the coop has stayed in one position while the pen is moved several times in different orientations to the pen, so the area right in front of the coop gets a little "worn" which they can use as a shady dust bath area right under their ramp, but *not* cuz they are out of good forage anywhere else. You see the green grass to the left side of the pic where the pen goes now, you can not see the whole pen obviously its bigger. Last time, the pen came straight out front of the coop, you can kind of tell the grass right around the little bowl (for kitchen tidbits) is more eaten than the grass on the left side. That slightly worn grass is as bad as it gets before I move the pen as you seen in the fresh grass on the left. The pen is easy to move, I do it before I let them out in the morning. I *usually* (not always) do the work of locking and letting out due to aggressive urban raccoons. On the rare day when I am forced to leave them in for some weird reason, they eat nearly twice as much food when I refill it as when they are out, so I believe they are getting about 40% of their food from forage.
Raising Chickens: The Grand Summary
style
vegetation
factor
bug
factor
poop cleaning
factor
poop hygiene
factor
work
factor
natural habitat
factor
confinement
factor
food cost
factor
factory farm
0
0
0
0
2
0
0
0
coop and run done poorly
0
1
0
0
3
2
1
0
coop and run done well
7
3
1
4
6
6
6
3
chicken tractor done poorly
-2
1
8
1
3
1
1
1
chicken tractor done well
-2
2
10
2
1
2
2
2
truly free range done poorly
2
6
0
3
5
6
10
4
truly free range done well
10
10
10
10
10
10
10
10
pp pens done poorly
1
2
10
6
0
2
3
2
pp pens done well
3
3
10
8
3
2
4
3
pp paddocks done poorly
2
5
9
9
4
6
9
4
pp paddocks done well
10
10
10
10
10
10
10
10
Further discussion about coops, runs, tractors, pens or paddocks or raising chickens in general in this thread at permies.com.
Predator Control
When I moved onto my first farm, I was told that nobody in the neighborhood was able to be raising chickens because there was such a serious coyote problem. Sure enough, you can hear them howling and yipping every night. But I was dead set on raising chickens. I told the neighbors that I'll just build some super fence to keep the coyotes out. They told me stories of people with all sorts of amazing fences and the coyotes still killed all of the chickens.
Research! I could find lots of people that had some wimpy fence and never had any predator trouble: "Do it like me! You won't have any problems! I promise!" I was tempted, but my gut said that these folks did not have the coyote challenge I faced and if I tried to do what they did, all of my chickens would be killed.
And then I met a woman advocating dogs to protect the chickens. Which struck me as not quite right because not only were coyotes rather dog-like, I've heard of people losing chickens to dogs. This woman had the patience to carefully explain to me that there are certain breeds of dogs that have been bred for thousands of years to protect livestock, including chickens. These dogs would take on a mountain lion to save a chicken. And then the woman told me about how she had built what she was sure was a coyote proof fence only to lose every last chicken to coyotes. And then she got a great Pyrenees dog and never lost a chicken to predators after that.
After hearing from two more people with similar experiences with livestock guardian dogs, I bought a great Pyrenees pup. Liza. Well, she wasn't a pure bred great pyr. She had a little Anatolian shepherd (another livestock guardian dog breed) and a pinch of Saint Bernard.
On patrol with Henry, a mutt. Henry always followed Liza's lead so they made an excellent team.
Liza and Henry were both very people-friendly.
You could hear Liza battle the coyotes nearly every night. First you hear the howling and then about 3/4 of a second later you hear Liza running at full speed. About 12 seconds later you hear the howling replaced by "hyipe! yipe! yipe!" - she's run them off.
She patrolled all night for all predators. And if the chickens make a certain noise during the day, she's right there looking to see if there might be any threat. I have a lot more to say about livestock guardian dogs. But for now, let me just leave it at: if you have acreage, a livestock guardian breed of dog is the way to go. Everything becomes much easier and cheaper.
Predator Control without a Livestock Guardian Dog
If you are not going to use an LGD, then this topic can fill a book. I'm going to only skim the surface of a few of the basics. I'll be happy to explore more details in the forum as people have questions. Maybe some day I'll expand on this topic a bit, but I kinda doubt it since I travel the LGD path.
Before leaving biological control behind, I want to mention the use of llamas, donkeys and attack geese: I've heard lots of stories of success and and equal number of stories of failure. The failure stories make sense to me. The success stories make me wonder if the predator pressure may have been low.
I think it is possible that there are ways to have llamas, donkeys or geese work to protect your chickens and I just don't fully understand it yet. Or maybe these folks have come across animals that just so happen to have a powerful passion to protect chickens, which leaves one to wonder how to duplicate the process. I have heard that for llamas to be effective, you need to have only one llama. Otherwise, the llamas will protect only the llamas and nothing else. If there is only one llama, the llama thinks the chickens are its family and will protect the chickens. There is an excellent book (Livestock Guardians: Using Dogs, Donkeys, and Llamas to Protect Your Herd) that goes into a lot of detail about the finer points of getting llamas and donkeys to work for you. It also covers LGDs quite thoroughly, including all the bits and bobs about breeds. There has also been a fair amount of discussion here.
Let's start simple. Raccoons. Raccoons climb and dig and I have heard that they can break "chicken wire". So they can climb over a fence - or they will even climb a tree to get in and climb a different tree to get out. So a physical barrier alone will be quite the challenge. I suspect that raccoons are the number one reason why folks stop raising chickens.
The most common approach is to close up the coop at night and open the coop again in the morning. Raccoons are mostly nocturnal, and you focus your security effort on the coop. But now you have also added two chores a day that require you to be home on time. And sleeping in in the morning isn't particularly good for the chickens. And forgetting to lock them in at night ... well ... that depends on how often the raccoons test the lock.
I've heard of folks setting up the coop door with a weight or a spring so that if you just pull a small pin, the door will open. And then setting up a wind-up alarm clock that will pull the pin in the morning. All of this so folks can sleep in a bit in the morning. Not a bad idea!
Live traps don't work so good: first, you end up catching animals you don't want to catch. Second, if you catch the raccoon and take it far, far away, you'll find that that raccoon was keeping other raccoons away. So new raccoons come along a little later and you're back to square one.
An electric fence can work very well. You have to make sure that your zapper has a powerful punch. After all, an electric fence is a psychological barrier. When the raccoon encounters it and you don't have a lot of pop, then the raccoon tries to decide if the pain will be worth it - or if it can find a way in without getting shocked. With a big pop, a raccoon thinks DAMMIT! .... RUN AWAY! RUN AWAY!
Using electric fence on large portable paddocks works really well. You should never use electric fence for a small paddock. It's too stressful for the animals inside the paddock.
Anything that works on a raccoon will also generally work on coyotes, dogs, foxes (canines), cats (all sizes), skunks and opossums. Although the canines are more apt to dig than raccoons.
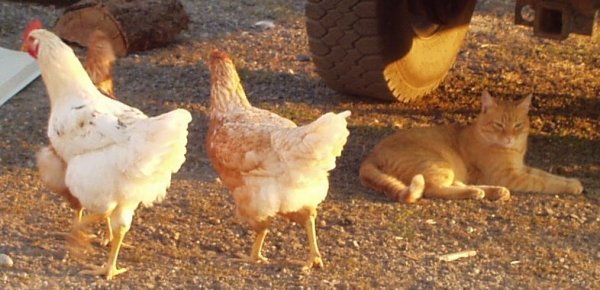
This cat (walter cronkite) generally eats a bird a day, but has never taken a chicken:
Weasels (which includes minks) will dig a little and climb a little, but what they are really great at is squeezing themselves through a tiny space and then eating the heads off of all of the chickens. One day all will be great, and the next morning you find all of your chickens have no heads. Weasels can also chew through wood a bit.
Rats are a different sort of problem. They will take eggs and chicks, but I have yet to hear of a rat taking down a grown chicken. More on rats and mice here and here. Snakes can pose a similar problem.
Raptors (hawks, eagles, owls, etc.) will take chickens and chicks. Some ravens will take chicks. Lots of shrubs and trees seems to solve nearly all of this during the day. A good coop solves the owl problem at night.
A couple of odd contraptions I have heard about but have never tried, nor have I even heard of anybody trying them.
Motion-detecting water squirt. Apparently, when something crosses its sensor, it will aim water at it and squirt it. I guess this won't work during the winter.
Red-eye thing: I guess you put a bunch of these solar powered contraptions around your property. At night, they have some sort of intermittant red light. This will, supposedly, freak out the predators. They gurantee that it will work. If anybody has any experience with this sort of contraption, please tell us about it in the critter care forum.
Chickens Harvesting Their Own FeedThis is where permaculture really shines.
Imagine an area for the chickens which has en enormous mulberry tree dropping fruit throughout June, July and August. There is a plethora of clover, alfalfa, grains, sunflowers, buckwheat, peas and lentils in the more open areas. Fruit and nut trees are surrounded by Siberian pea shrubs, chickweed, comfrey, dandelion, amaranth, nettles and sunchokes. Maybe some raspberries and blueberries are in the mix too. Assuming it is summer, why would a chicken eat dried up "chicken feed" with this bounty at hand?
When raising chickens on a large scale, you generally raise your meat birds only in the summer. And you harvest your non productive layers in the fall. So most of your chicken feeding efforts are focused in the warmer months when your chicken feed crops can be producing prolifically.
What, specifically, to grow depends on a lot of factors. How much room do you have; how cold does it get; what is your soil like; how much does it rain ....
Some plants produce more food per acre per year than other plants. And some produce food for a just a week and others produce food for six months. The best producers appear to be mulberry trees (lots of fruit dropped constantly over three months) and wheat (when grown with the bonfils method). Sepp Holzer pushes a perennial rye and sunchokes as the core chicken/pig feeds.
I advocate using the chicken paddock method. And along with that, I think that the lion's share of the people food should be grown in those same paddocks. A lot of the stuff we eat is great chicken food! And the chickens clean up anything we drop and anything we leave behind. Less waste.
This is a good time to mention polyculture. All plant eating animals are designed to eat plants from a polyculture. They eat plants, not from rows and rows of the same thing, but from a mix of a dozen or more species. Every plant has special nutrient needs and every plant exudes an excess of nutrients that it mysteriously has superpowers to find/build/whatever. The mycelium in the soil has no leaves and depends on developing a bartering relationship with plants to get sugar. The mycelium offers nutrients. The sugar water from a carrot is loaded with nutrients that the carrot has in excess. The sugar water from an oak tree is loaded with something completely different. The carrot gets a bit of the oak excess and the oak gets a bit of the carrot excess. Because the oak's roots cover a bigger territory, it gets far more diversity than the carrot. And the oak ends up inadvertantly sharing some of that with the carrot.
We have barely scratched the surface of what we know for human nutrition. And we have studied human nutrition ten thousand times more than chicken nutrition. Human nutrition is based on humans eating from a polyculture and eating the meat of animals that consumed from a polyculture. Rather than prending that we know all there is to know and growing things in a harshly organized fashion, I suggest that, instead, we grow things in a diverse polyculture of 50 or more species. I suspect that by doing this, the vegetation will become far richer in nutrients (both known and currently unknown) than if we attempt to infuse the soil with known nutrients. Diversity would include things that make for good chicken feed and things that make for good people feed. Rather than have an area for the chickens and an area for the people food, have one area for both (and many other purposes too).
Since paddock shift systems tend to encourage five times more growth of vegetation, the result should be MORE people food than if chickens were not rotated through the area.
For the winter, a lot of remaining grains and seeds will still be on their stalks. The taller stalks will eventually fall to the level chickens can get it. Winter apples will often stay on the trees deep into the winter. When they fall, they will keep for a long time on the ground. Kale can provide some winter greens. If chickens follow pigs in a rotation, pigs will often pull up sunchokes (and other tubers) and leave scraps for the chickens. Sepp Holzer has observed chickens eating the manures of other animals in winter. His son reports that they will provide feed to chickens only on the dozen coldest days of the year.
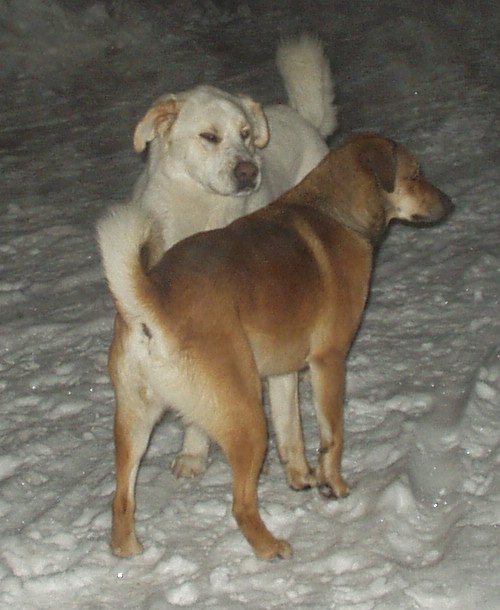
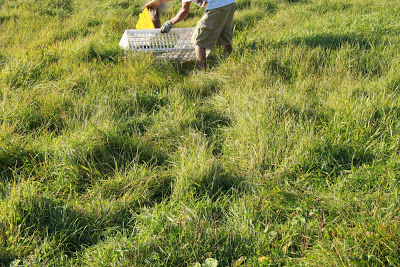
With yesterday being Valentine's Day and all, we thought it would be appropriate to use this opportunity to make a very public lovenote to a bunch of spent hens in the North Country and to send out word that we're coming to swoop them away, Prince Charming-style.
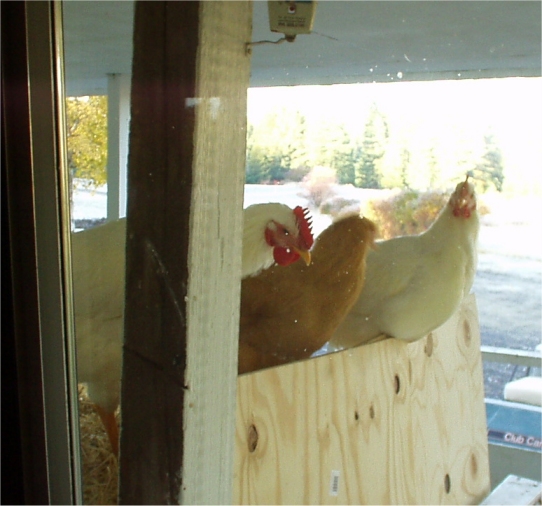
Because egg-laying chicken breeds have been genetically selected exclusively for maximum egg production, they don't grow fast or large enough to be raised profitably for meat. Therefore, male chicks of egg-laying breeds are of no economic value, and they are discarded on the day they hatch.
The female birds' confined space doesn't allow the ladies to stretch their wings or legs, and they cannot fulfill normal behavioral patterns or social needs like scratching in the dirt, chasing bugs, and taking extremely adorable, endearing dust baths:
As you can imagine, constantly rubbing against the wire cages means these birds lose a lot of feathers; and it's not uncommon for the ladies to have lots of bruises and abrasions. In order to reduce injuries resulting from excessive pecking—a behavior that occurs when confined hens are bored, stressed, or frustrated—most (but not all) laying hens have part of their beaks cut off.
Laying more than 250 eggs in one year, a laying hen's body is severely taxed (whose wouldn't be?!). They suffer from "fatty liver syndrome" and "cage layer fatigue"; and, percentage-wise, after about a year most hens in the egg industry are considered "spent" and sent to slaughter. The hens who did nothing but lay eggs usually end up in soups, pot pies, dog food, or similar low-grade chicken meat products.
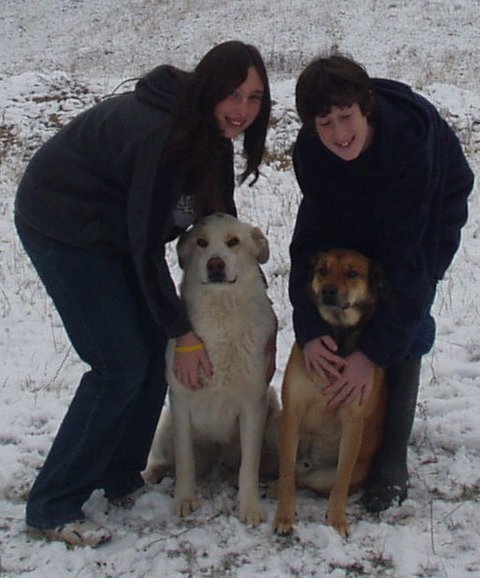
But the truth is, these hens don't have to be spent! So we've linked up through a liaison with a local egg farm that has thousands of laying hens. And we've been told we're welcome to as many spent hens as we want.
While we certainly can't house them all, we expect to take 20 birds into custody at Better Farm. The hens will be welcome to come and go as they please in the grass, brush, and dirt on the property (living and playing outside for the first time!), laying eggs only if they feel like it. They'll have plenty of room to flap their wings, squawk, devour worms and bugs, and experience all the lovely North Country has to offer.
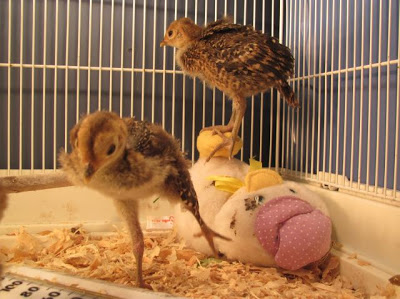
New York State's Day-Old Pheasant Program distributes 46,496 day-old pheasant chicks to qualified applicants across the state who agree to raise the baby birds to eight weeks of age and then release them. We'd like to get Better Farm involved, which means we have to construct a fly pen for the pheasants and create other crucial accommodations. To make the research part simpler for those of you also interested in getting with the program, here's a handy outline of what we've learned about raising these beautiful birds.
(Editor's Note: To ensure their best chance of survival in the wild, it's very important to give pheasants PLENTY of natural surroundings to grow up in (brush, grash, bushes, branches)—and to release them no later than when they're eight weeks old.)
The brooder house for pheasant chicks should be weather tight, free from drafts and rodent proof. It can be designed for the birds or part of another building that can have a penned-in portion.
Young pheasants are very delicate and your brooder must be set up correctly or you may encounter problems. Clean and disinfect your brooder house at least two weeks before the chicks arrive. The best litter to use on the floor is chopped straw. Pheasants seem to like to eat wood shavings. If the chicks have access to wood shavings, they will eat them and die. Sand or newspaper is not recommended as litter. If brooder paper (a coarse, rough paper that allows chicks to keep their footing) is not available at your feed store, burlap works very well also. Do not use newspaper as the chicks will not be able to get a firm footing. Remember to remove the burlap or brooder paper after the chicks are about one week old.
Heat Lamps
Heat lamps are the easiest to use. Be sure to have at least one 250 Watt infrared bulb for each 100 chicks you plan on starting. Make sure to get the bulb with a red end, as it won't be so bright and will help control cannibalism. Hang the heat lamp from the ceiling, about 18 inches from the floor to the bottom of the lamp.
Ring/Draft Shield
Use a ring or draft shield to confine the chicks for the first 5-7 days the chicks are in the brooder. Cardboard about 14-18 inches high can be bent to make a ring or circle. A kiddy pool will work too! A circle with a diameter of 4 feet will be sufficient for 50 chicks (with the heat lamp in the center). This shield helps cut down on the drafts on the floor.
Your brooder house should be big enough to allow 3/4 of a square foot per bird. Pheasants tend to be very cannibalistic, so don't overcrowd them.
Use at least one 2-foot long feeder for each 50 chicks. Also, 1 one-gallon waterer for each 75 chicks. Use a waterer with a narrow lip (1/2 inch or less) or fill the water trough with marbles so the chicks can't drown.
From the time chicks arrive until they are six weeks old, they should be fed a 30% protein medicated gamebird or turkey starter feed. The best medicated started feed contains 1 lb. Amprolium (a coccidiostat) per ton of feed. The feed should be in crumble form.
Introducing Chicks to Their New Home
When the chicks arrive, remove them from the box, dip their beaks in the water, and put them under the heat lamp. Most losses occur because the chicks do not start to eat or drink. Never let your chicks run out of feed or water. The chicks should form a circle around the heat lamp. If the chicks bunch up directly under the heat lamp they are cold. Lower the lamp, and add more bulbs, or further draft-proof your brooder house. If the chicks spread out too far away from the brooder and pant, etc...they are too hot - turn off one of the bulbs, raise the heat lamp, and perhaps open a window during hot weather.
Inspect the chicks often during the first week - especially at night during the first few nights. Chicks often die from piling (from being too cold) during the first or second night.
After the chicks are 2 or 3 weeks old it is a good idea to allow the chicks to range outside during the daytime. Wait for a warm sunny day and open the brooder house door into the pen. The pen must be covered and enclosed with one inch hole chicken wire to prevent the chicks from escaping. The pen should be large enough to allow 1 - 2 square feet per bird. Drive the chicks back into the house late each afternoon. Continue to turn the heat on each afternoon. Discontinue operating your heat lamp during the day once the chicks spend each day outside. Continue to turn the heat on each night until they are 3-4 weeks old (depending on how cold it is outside). After the birds are 4-5 weeks old, they will need a bigger pen. You should always be on the lookout for cannibalism. The first evidence you will see will be blood on the wing tips and tails of some of the smaller birds. Don't expect it to just go away—instead, it will just get worse. Add branches and alfalfa hay to the pen for the birds to peck at and play on - this will help. You may have to trim the top beaks on your birds to curtail the problem. A pair of fingernail clippers will do - trim far enough back just so it bleeds a little. This can be done as early as 2 weeks old and may have to be repeated.
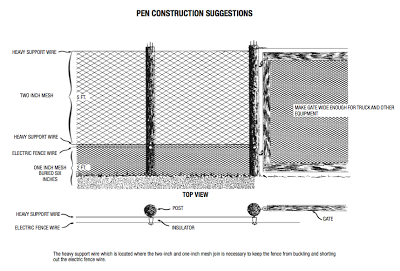
One of the most expensive requirements on a game bird farm are covered pens. It is important to build your pens in such a way that they will do what they are supposed to do. ie keep the birds in and predators out. Other considerations are 1) cost 2) long life 3) ease of construction 4) resistance to bad weather. Below is a covered pen that incorporates many of these desirable characteristics.
Basic Layout
A pen of 144' x 96' conforms to two rolls of toprite and can hold 700 hens with peepers, or 500 cocks with peepers, or 600 hens and cocks with peepers.
Pheasants require 25 square feet of pen space per bird for proper flying. Building a bigger pheasant pen is better than building one too small.
Keep building costs to a minimum by price shopping for new materials or reusing chicken wire, fencing and lumber.
Use pressure treated lumber or locust for the main posts. Choose materials that are resistant to bad weather and outdoor durable.
Locate the pheasant pen in an area with adequate shelter and shade access. The more natural cover available, the safer young pheasants will feel, which results in less cannibalism.
Design the pen with gates or doors of sufficient width and height to allow for easy feeding, watering and catching of young chicks.
Posts
These posts should be set equidistant from each other around the perimeter of the pen. It works out that the posts should be 12 feet apart. The posts should be 10' long. They should go into the ground 3' and extend 7'.
Wire The four sides of the pen should be covered with galvanized-after-weaving wire - 1" mesh - either 18 or 20 gauge. This wire should be buried at least 6" and flared to the outside underground. This prevents animals from digging down under the pen. The wire should extend up to the sides of the pen to the tops of the posts.
#9 Wire A standard #9 galvanized wire should be strung around the top of the poles around the perimeter of the pen. Another strand of #9 wire should be strung the length of the pen equidistant from the two sides. Two #9 wires should be strung widthwise splitting the pen in thirds. These #9 wires will support the roof. The poles to which the #9 wires is attached should have "dead-man" poles for support. This will prevent the poles from pulling in.
Toprite
Over the top of this grid put two connected rolls of 150' x 50' toprite netting. The netting should be connected to the four corners first to make sure it is square. It should be pulled over the edges and attached to both the #9 wire and to the wire sides. DO NOT attach the netting to the #9 wire running through the pen. You should hog-ring the #9 wire to the toprite in the inside of the pen about every 5' to prevent ripping in the wind. At the junction of the #9 wire in the middle of the pen, put brace posts made of 2" x 4" material. They should be tall enough (10 to 12 ft.) to make the pen tent-like in appearance. On the top of the 2" x 4" add a screw-in eyehook, run the #9 wire through, then close the eyehook. This pen is designed to be lowered in case of wet snow or icy conditions. In case of foul weather, simply take down the 2" x 4" poles and let the toprite down. Even with the birds inside, they will move to the edges of the pen. This pen is economical as you have fewer posts and #9 wire then most pen designs. I purposely avoided the subject of gates, feeding, watering or catching birds, as each farm has is own situations.
Building Instructions
Build the pheasant pen frame by placing 10 foot long treated posts 3 feet into the ground, about 12 feet apart. Place the posts equally distant from each other, making sure there are posts at all corners, both sides of the door frames and in the center of each side.
Dig a trench around the base of the pen between each of the set posts, about 6 inches deep and 6 inches wide.
Lay the first layer of galvanized wire into the trench, flaring out 2 or 3 inches at the bottom. Fill in the trench with dirt. This prevents predators from burrowing under the fence to get inside the pen.
Extend the galvanized fencing around the fence up to the top of the posts.
Around the perimeter of the top of the posts, lay #9 wire fencing over the tops like an edging. Lay several pieces across the pen width for top netting support.
Place one or two brace posts on the inside of the pen like tent poles. Use 10- to 12-foot lumber or shorter lengths in areas with lots of snow and ice load.
Lay game bird netting across the top of the pen to prevent birds from escaping. Connect the netting to the corner posts first for a snug fit and then lay the remainder. Attach the netting to the #9 wire on the inside with hog rings to prevent ripping in high winds.
Strips of burlap approximately 10 inches by 20 inches or
similar material hung randomly throughout the pen will help reduce injuries.
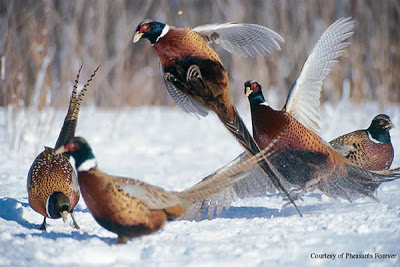
The lovely pheasants of Better Farm. Photo/Nicole Caldwell
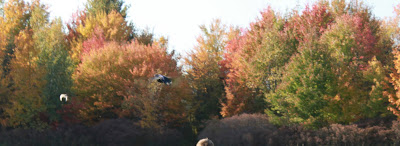
Pheasant farmers in the North Country typically raise hundreds of these birds in cages before killing and selling the birds locally for meat. Some people buy the birds and hunt them on their own (a released pheasant will typically stay put on the land it's released on). But us? We find local pheasant farmers willing to turn some birds loose for no purpose other than the simple act of emancipation. Then we release them at Better Farm.
Whether these birds move on to other pastures, fall prey to an errant coyote or bobcat or human, live out their lives in perfect health, have their eggs gobbled up by predators, or procreate and fill the world with beautiful baby pheasants, we're happy just knowing the birds are in the wild, being the free birds they were born to be.
Check it out—the first time in their lives these birds have been airborne!
Want to learn more about these amazing animals? Visit Pheasants Forever.
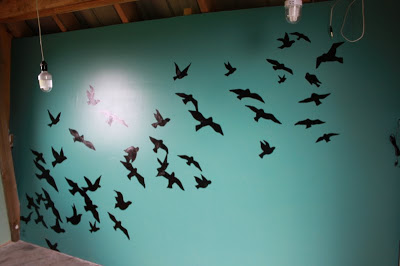
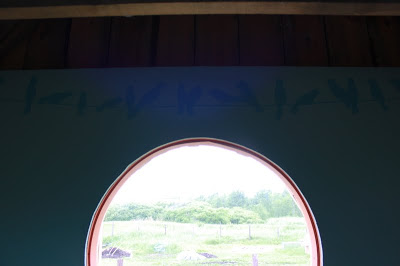
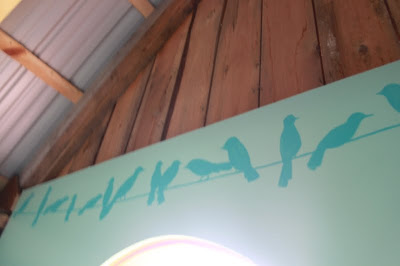
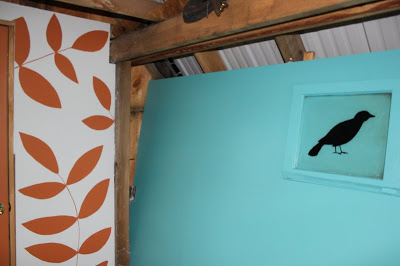
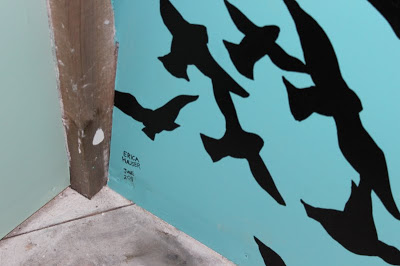
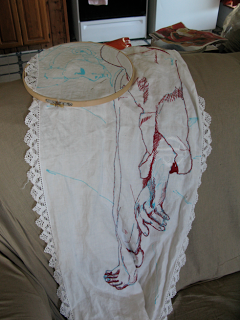
Erica Hauser is in the last week of her betterArts residency at Better Farm. During her time here, in addition to creating many wonderful paintings, culinary delights, and forming close-knit relationships with the crew here, she's also been calling Better Farm's human-scale "Birdhouse" home. In the last week or so, she set about making that home a little cozier by painting the inside walls, then coming up with a sweet four-wall mural of—what else? Birds!
I have so enjoyed my time here at Better Farm and am happy with the amount of work I've gotten done, though I would have loved to have gotten more done of course. But I finished a red work, a text work, got a new red work well on its way, and four new drawings done.
And... I swam, I rode in a boat I saw baby birds, heard coyotes, met amazing people, took time to be with my son, saw incredible scenery and one of my favorite things... dried my laundry in the sun.
The process and idea of drying laundry in the sun is simply wonderful. I feel like in a strange way it is much like embroidery, slow, quiet, contemplative, and connects to so many women and lives of the past.
I loved seeing my clothes drying with t's and it would have been a complete family portrait if C's clothes were up there with us. Seeing their colors and textures flutter in the wind. T at my feet as I slowly hung each item one at a time, breathing in the air. Then gathering them up in a pile warm and clean. Simple things like this are what I miss out on in NYC. Simple things like this can be so lovely.
Here's what Jennifer had to say about her latest completed work:
This painting took an extremely long time, perhaps the longest stretch of time I've ever worked on anything. I started it about a year ago with a thought I had while riding a train to New Jersey and looking at the naked trees through the fog. After painstakingly, and time consumingly, painting each tree in harrowing detail (which was already the 3rd layer, mind you), I of course put an egg made of text all over the bulk of the trees. At one point this painting was looking quite neon and graphic, if you can imagine. And here is the final work, a forest grown over a forgotten promise, winter covered with the inkling of spring.
For more information about betterArts residencies and to apply, click here.
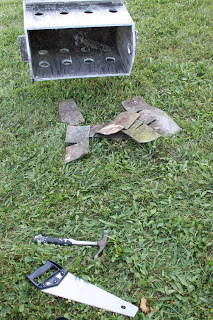
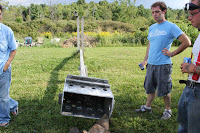
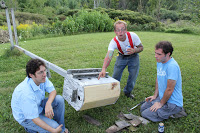
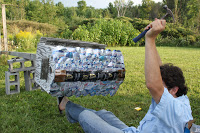
One of the many birdhouses on Better Farm's property has been roofless for years. Long-since deserted by its many feathered guests, the structure has sat birdless far too long.
We decided the other day to do something about it, and began brainstorming what materials would work best for a replacement roof. Thatched hay? Sticks and mud? Glass? Tin? We liked the idea of reappropriating some of our aluminum recyclables, but figured we'd need a base to affix said cans to. Off to the wood shed we went, where we found scraps from the tongue-and-groove pine used for loft flooring back in May.
After scrounging up a few more materials found around the house, we were ready to get started. Directions on how to build your own birdhouse roof, along with photos, after the jump!
Materials:
Tape measure
Hand saw
Staple gun and staples
Hammer and nails
Wood (we used leftover scraps from tongue-and-groove flooring in our lofts)
Emptied and cleaned aluminum cans
Scissors
Directions:
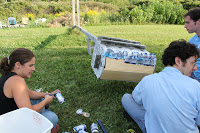
Cut the wood to fit. Hammer into place.
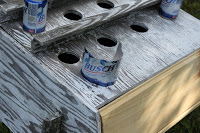
Cut apart the aluminum cans, then cut them into a scalloped shape.
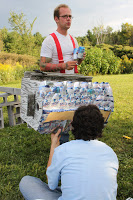
Starting at the bottom of the roof, staple the cans to the wood in a row. Work your way up, staggering the cans so the scallops overlap nicely from row to row.
After you've stapled the top row, take a few cans and cut them into rectangles. Staple the rectangles along the top crease of the roof so moisture doesn't leak in.
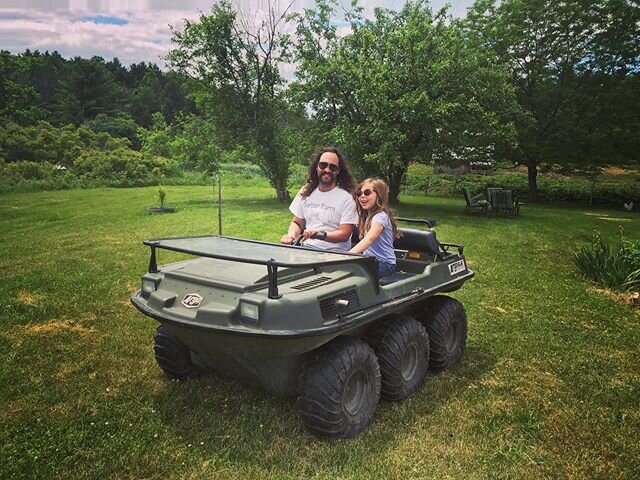
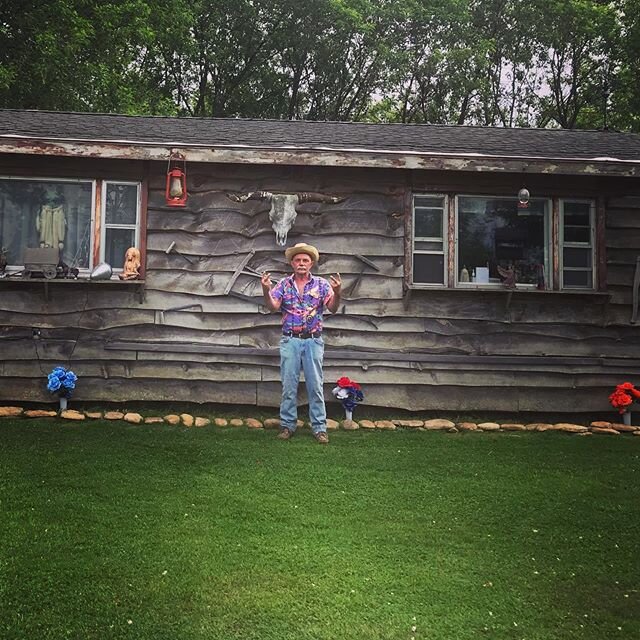
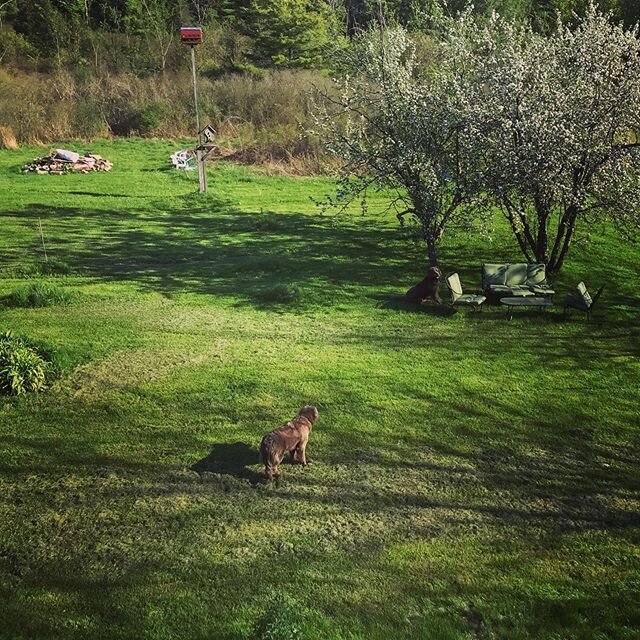
Neighbor Joey repping late-spring flair from a distance. #northcountryposh
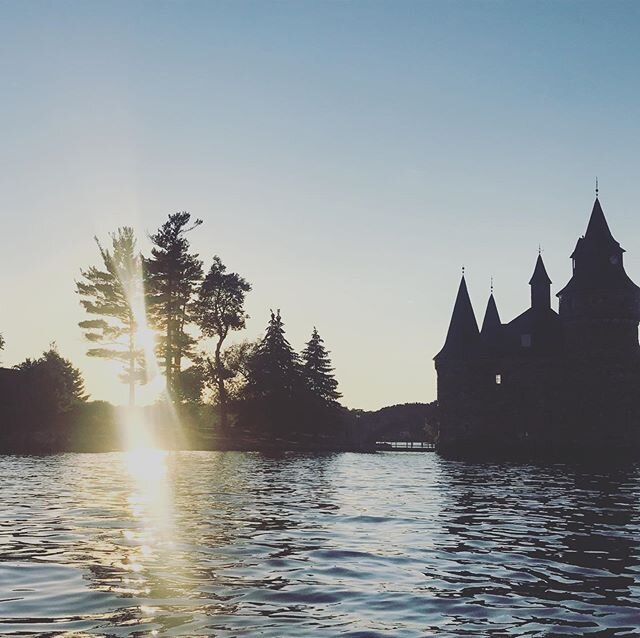
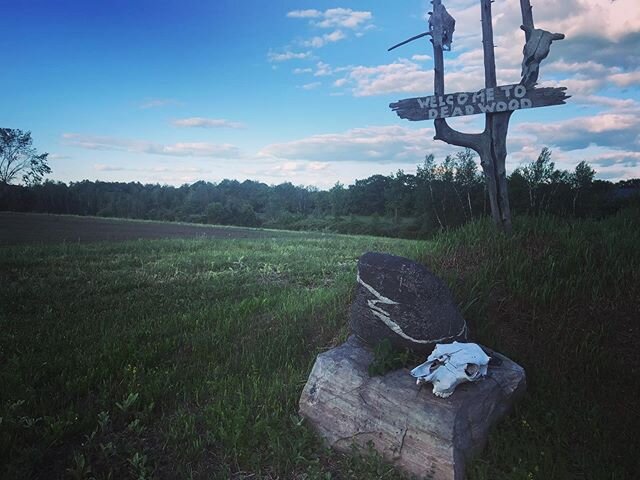
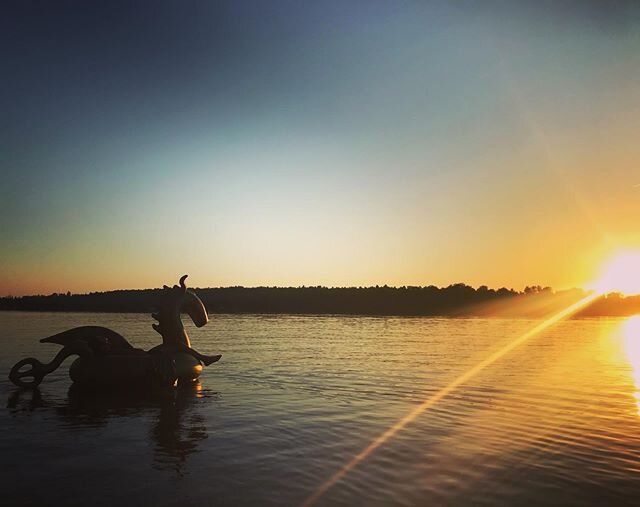
Dragon sunsets.
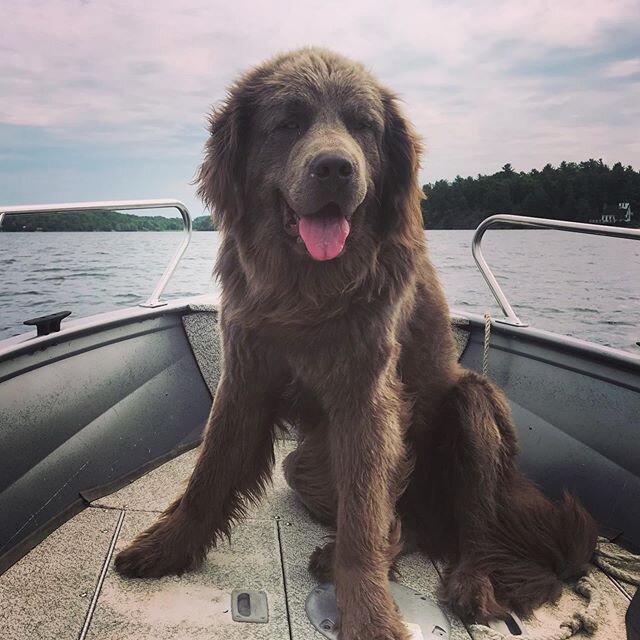
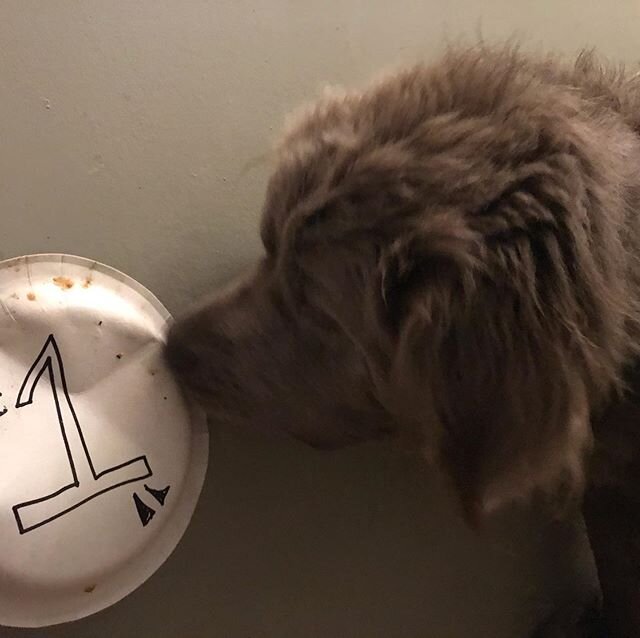
Happy birthday to these giant babies. 👯♂️
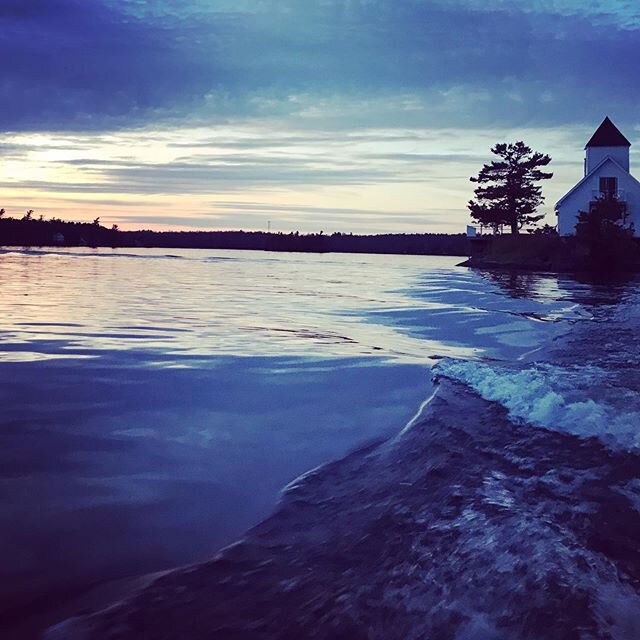
Perfect day.
Earth Day. ✌🏽🌍
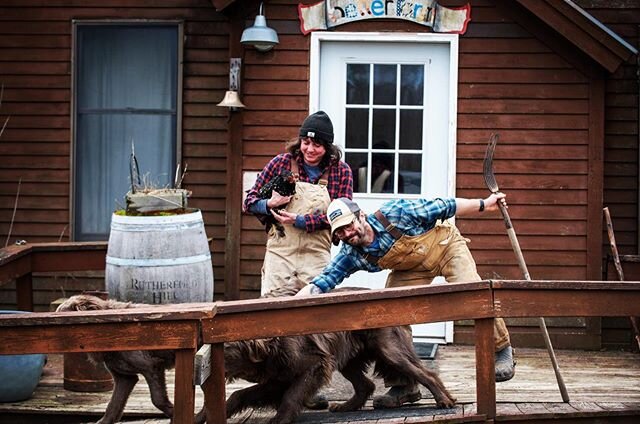
Our friend @martasphotoshop has been working on a project snapping photos of people during these wild times, mapping routes out by car and pulling over to capture some stillness against a backdrop of a lot of change. She sent us a bunch of great compositions and happy poses, and this perfect shot of us doing what we’re all doing: hanging on as best we can. ❤️❤️❤️
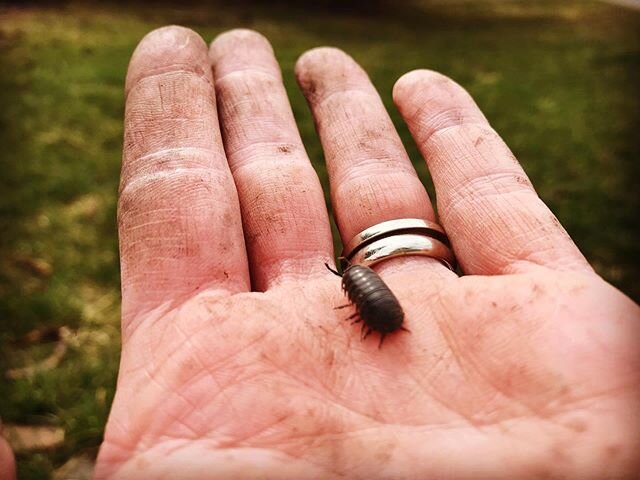
Roly poly❤️
New favorite Friday night activity: organizing my piano sheet music. Huge ❤️ to Rochelle Mazze and Betsy Maxwell for all those lessons and for pushing me to keep playing. There’s a lot of peace in these pages. Hope everyone is finding time to play and challenge themselves amidst all this chaos.