Throwing a Zero-Waste Party

One of the obvious hazards of having a bunch of wonderful people over is dealing with everything those wonders leave behind.

So few of us want to spend time with loved ones washing dishes and cleaning, we often opt for what seems easiest: disposable everything.  Yet, we just threw a party with six bands and hundreds of people and ended up with less than one full bag of garbage. How on earth did we pull that off?

First, the problem.

From Styrofoam plates to plastic cups, we are so accustomed to throwaway meal items that we barely give a second thought to utilizing stuff that we only use for minutes (sometimes seconds) before tossing it along on its dead-end course with a landfill. Here are the facts (from reuseit.com):
  • In 2009, the United States generated 13 million tons of plastics waste from containers and packaging, and 7 million tons of nondurable plastic waste (for example plates and cups). The combined total of nondurable disposables exceeded the 11 million tons of plastic durable goods, such as appliances [EPA]. Only 7 percent was recovered for recycling.
  • Plastic cutlery is non-biodegradable, can leach toxic chemicals when handled improperly, and is widely used. Worldcentric.org estimates 40 billion plastic utensils are used every year in just the United States. The majority of these are thrown out after just one use.
  • 3,460,000 tons of tissues and paper towels wound up in landfills in 2008.
  • The Environmental Protection Agency estimates that 780,000 tons of plastic and polystyrene cups and plates were discarded in 2008.
  • Americans produce enough Styrofoam cups every year to circle the earth 436 times. These cups are completely non-biodegradable, deplete the Earth’s ozone layer, waste enormous amounts of landfill, and are deadly to marine life.
  • The Container Recycling Institute claims that 2.81 million juice boxes were sold in the U.S. in 2006, most of which cannot be recycled due to the inseparability of the cardboard, plastic, and aluminum foil used in the product.
  • According to the EPA, Americans discarded about 2.7 million tons of aluminum, the largest source being used beverage and packaging containers. And in the time it takes you to read this sentence, more than 50,000 12-oz. aluminum cans were made. 
  • The Container Recycling Institute estimates that supplying plastic water bottles to American consumers in one year requires more than 47 million gallons of oil, the equivalent of one billion pounds of carbon dioxide that is released into the atmosphere. 
So what's the solution?
At last week's Summerfest, we welcomed hundreds of people to Better Farm to help support betterArts' mission of arts and cultural outreach against a backdrop of responsible environmentalism and practical sustainability.

So what did we do to steer away from such a disposable-obsessed culture?
  • Instead of Styrofoam plates, we went with compostable ones that will turn into dirt by next spring.
  • We opted to invest in real silverware and cutlery, along with heavy-duty plastic tubs for bussing dirty silverware.
  • We utilized real glasses for iced tea, lemonade, water, beer and wine.
  • We ditched all the single-serving bottles. That means no water bottles, no bottles of juice. We filled pitchers and loaded people up with glasses.
  • We put out carefully marked garbage pails: compost, burnable, washable, recyclable. That left cigarette butts and empty bags of ice as the party's only actual trash items.
  • We made our food from actual ingredients, not pre-packaged or store-bought stuff. That meant no cellophane, Styrofoam, or even plastics to contend with. As a bonus, most of the side-dish items came from just a few feet away in Better Farm's garden!
For a party of several hundred people over the course of 12 hours, there were about six trips to the kitchen sink to wash glasses and cutlery. We divided up the responsibilities on this, so no one was stuck doing it more than once. The few minutes it took to clean everything and bring it all back to the party makes the investment more than worthwhile—over the course of several years, betterArts is saving hundreds of dollars by not having to buy disposable items. That's more money that can be spent doing arts outreach in the North Country—and less junk clogging up the environment. We can all feel good about that.
Got some great ideas for throwing zero-waste parties? Email us at info@betterfarm.org.
Comment

Nicole Caldwell

Nicole Caldwell is a self-taught environmentalist, green-living savant and sustainability educator with more than a decade of professional writing experience. She is also the co-founder of Better Farm and president of betterArts. Nicole’s work has been featured in Mother Earth News, Reader’s Digest, Time Out New York, and many other publications. Her first book, Better: The Everyday Art of Sustainable Living, is due out this July through New Society Publishers.

The Humanure Compost Toilet System

One of the most wasteful uses of fresh, drinkable water in the world is that of flushing the toilet. Residential toilets alone account for roughly 30 percent of indoor residential water use in the United States—that's equal to more than 2.1 trillion gallons of freshwater each year, according to the EPA. There's got to be a better way.

Why would we use fresh, drinkable water—which, by the way, is in limited supply—to flush humanure away into some unknowable place for endless processing, especially at a time when we are increasingly aware of the benefits of at-home composting systems? Why do people insist on being the only animals on the planet to live so far removed from any natural systems?

There is a better way. Whether you 're hosting an event and need a few extra porta-potties, in need of a toilet out by your work room or garage, re-doing your camp on the lake and lack a bathroom, or if you're ready to transition from a water-based septic or sewer system, the "humanure" compost toilet is a simple, cheap, ecologically responsible way to deal with human waste.

Over the course of your lifetime, you will likely flush the toilet nearly 140,000 times; with each flush using somewhere between 1.28 gallons (if high-efficiency) and 7 gallons of fresh water. Leaking toilets (even the ones you only hear at night) can lose 30 to 500 gallons per day.

Joseph Jenkin's amazingly informative website The Humanure Handbook offers tons of ideas for alternatives to traditional, flush toilets—none of which are so gross that the average person can't figure out how to maintain, clean, and utilize the system in his or her everyday life. Although most of the world's humanure is quickly flushed down a drain, or discarded into the environment as a pollutant, it could instead be converted, through composting, into lush vegetative growth, and used to feed humanity.

The humanure process involves a compost toilet, a compost bin and cover material. Toilet instructions are simple. There are a variety of ways to make a humanure toilet (or you can buy one).

One of the Better Farm projects last year was to teach students how to construct a basic humanure compost system utilizing discarded scraps of lumber, a 5-gallon pail, and sawdust.

The popularity of that project fostered a second workshop this year. It was also my first time using power tools… thankfully, no fingers were hurt in the process.

First, we constructed the base.

Then, we added the sides.

Next, we added the top with the toilet seat and hinges.

Voila! Our completed compost bin (dubbed Shitty Prototype II):

Who knew that recycled wood, a bucket, and an old toilet seat could come in so handy? 

Debunking the Dishwasher Myth


By PAUL WHEATON
Originally published at permies.com

I had a painfully awkward week. In one week, five different people told me “the fact” that dishwashers use less water than washing dishes by hand. I wanted to say that I think I use less water than a dishwasher, but in all five cases I was immediately hushed and reminded that this is “a fact” therefore not open to any discussion.

After the fifth time, something fun popped into my head... So I made this video. I just had to. I needed to express my position. I needed to prove my point! Proof dammit! So I set up my camera and proceeded to wash a load of dishes by hand. And when the dishes were clean, I used the dishwasher as a sort of drying rack. And PRESTO! I crushed a lame, so-called “fact”.

The common misconception, that washing dishes with a dishwasher (versus by hand) saves on water usage, is an excellent example, in my mind, of how some of the greenest people succumb to the greenwashing of Madison Avenue.

The doing-it-by-hand technique that beats the most eco dishwasher under any circumstances is pretty simple: use a dishpan and run just a tiny amount of water (quarter cup) to wash the first thing. Then use a tiny amount of water to rinse that one thing, with the rinse water running into the dishpan. As you are on to the fifth thing, you have a bit more soapy water in the bottom of the pan. So you can start washing bigger things.

By the time you are done washing and rinsing everything, there should be about two quarts of water used.
Eco dishwashers set to eco mode use about nine gallons of water and usually don’t get the dishes clean unless you clean them first. Granted, it is possible for a person to wash dishes by hand where they leave the water running and waste lots and lots of water. I am certainly not advocating that.
Hand washing vs. dishwasher: Which wins on water conservation?

There are some new dishwashers that will use only three gallons of water, but these are very expense and there are still some who say they don’t do a good job of cleaning.
I do agree with those who say washing by hand, or not, can also be just a matter of personal choice. Beyond the water usage issue, I prefer washing dishes by hand for many other reasons:
  1. I like to wash dishes by hand because when I am done, the dishes are all done. I am not burdening my future self to finish loading. Or to unload. Nor am I leaving a “to do” for somebody else.
  2. Each piece meets my cleanliness standards.
  3. It’s the way my grandad did it – and I’m always keen on doing things the way my grandad did.
Paul Wheaton is is the tyrannical ruler of two on-line communities. One is about permaculture  and one is about software engineering. There is even one for Missoula. Paul has written several permaculture articles starting with one on lawn care that he presented at the MUD Project 17 years ago, including articles on raising chickenscast iron and diatomaceous earth. Paul also regularly uploads permaculture videos and permaculture podcasts. In his spare time, Paul has plans for world domination and is currently shopping for a hollowed out volcano in the Missoula area, with good submarine access. See all of Paul’s contributions to Make it Missoula here.

Comment

Nicole Caldwell

Nicole Caldwell is a self-taught environmentalist, green-living savant and sustainability educator with more than a decade of professional writing experience. She is also the co-founder of Better Farm and president of betterArts. Nicole’s work has been featured in Mother Earth News, Reader’s Digest, Time Out New York, and many other publications. Her first book, Better: The Everyday Art of Sustainable Living, is due out this July through New Society Publishers.

Doing the Dirty Work of Better Farm

The author, cleaning out one of Better Farm's chicken coops. Photo/Lily Chiu
By Jackson Pittman
Here at Better Farm, we have a lot of things that stink. Stinky compost bins, the stinky dogs, and of course, stinky chickens. In fact, it's not that our chickens reek especially bad, its more that they leave a lot of droppings—and for a chicken, steering clear of its own excrement doesn't rate high on the priority list. Some of you may wonder why we have so many chickens when they produce so much more poop than eggs. Well, the answer is simple—and beautiful.
The chicken poop (as most gardeners would know) is excellent fertilizer! Once it is broken down, chicken manure has 4 times as much nitrogen, 11 times as much phosphorous, and 2.5 times as much potassium than horse manure (2.8 percent nitrogen,2.3 phosphorous, 1.7 potassium). While it's true that we don't want to put the dung directly onto the crops because the nitrogen and bacteria levels are so high it can damage or contaminate the vegetables we grow, we still have plenty of other things we can do with our vast amounts of chicken droppings (really... they poop a lot... it's 33 chickens).

At this time of year, when the garden isn't producing nearly as many vegetables as it does at its peak, there's plenty of open space that we're mulching with hay and cardboard (the cardboard is to keep weeds from popping up, and the hay is to get broken down by the snow and turn to fresh soil). Since we have our chickens pooping on hay, on top of cardboard, it's ridiculously easy to find a nice empty spot that could used some extra insulation and let the fertile chicken manure get broken down with the hay over the winter to make the soil all the richer. This is our current technique, but there are plenty of other uses for the chicken poop we have in such abundance. So this is the short list of chicken manure uses that I (as the farm intern) was surprised and interested by:

  •  Biogas!! Whaaat! It's crazy, right?... The same chicken poop that can easily gross out the inexperienced onlooker can be converted to natural fuel? This innovative process is done by mixing the droppings with a by-product of ethanol production to produce a powerful biogas, but the real magic of it is done simply by the bacteria living in the poop! It's just three simple steps... Stage one: One bacteria type reduces the manure to fatty acids. Stage two: Another bacteria type reduces the fatty acids to acetic acid. Stage three: The third bacteria type turns the acetic acid into bio-methane gas. Incredible, right? Bio-methane gas out of poop through the natural cycle of anaerobic bacteria... life is beautiful.
  • Bio-Oil?!? Let's leave this one to the expert's explanation: "First, the manure needs to be dried so it can be burned... That makes it possible to move to the next step: rapidly heating the mixture in a bubbling, fluidized bed reactor that has no oxygen. It's a process called fast pyrolysis. The process thermochemically breaks the molecular bonds in the mixture. It produces charcoal that can be used to enrich soil. And it produces vapors that are condensed to a thick, dark bio-oil." Wow... all that from chicken poop. I'm practically speechless. Although this process doesn't sound like something we're ready to do at Better Farmyet, it really changes the way you see the manure, and the way we treat dispose of our waste.
  • Chicken Manure TEA?!?!? Not the kind you can drink! During the growing season, the compost pile can get full pretty quickly and when there's tons of chicken poop it can be nice to find a more direct use for it without having to way for it to decompose. Now there are many ways to make fertilizer, but this one in particular is nice because it creates a liquid you can spray your crops with to give them nutrients! To make fertilizer tea, scoop the chicken manure into a burlap bag. Then, throw a rock into the bag to weigh it down and place the whole thing into a 35-gallon garbage can. Fill the garbage can with water and let it sit for about three weeks. Once the three weeks are over, you will have nutrient-rich chicken manure fertilizer tea as the water becomes infused with the nutrients from the chicken manure. You can use this fertilizer tea to water your plants to give them a vitamin boost. 
Well, that about wraps up our summary on the fun side of poop. I hope you guys enjoyed it as much as I enjoy it twice a week! Remember, all waste has a purpose! 

All photography by Lily Chiu
Comment

Nicole Caldwell

Nicole Caldwell is a self-taught environmentalist, green-living savant and sustainability educator with more than a decade of professional writing experience. She is also the co-founder of Better Farm and president of betterArts. Nicole’s work has been featured in Mother Earth News, Reader’s Digest, Time Out New York, and many other publications. Her first book, Better: The Everyday Art of Sustainable Living, is due out this July through New Society Publishers.

Five Things You Can Do Right Now to Lessen Your Eco Footprint

Let's review the basic tenet of sustainability, which demands that one action be capable of going on indefinitely. Example:

Food Scraps — Chickens — Fresh Eggs and Fertilizer — Garden and Dinner Table — Food Scraps

In the above example, food scraps and free-range roaming is nourishing chickens, who provide fertilizer and food for the system supporting them. That fertilizer nourishes the plants growing in the garden, which feeds the people, who turn the food scraps back over to the birds. This system is sustainable; as long as there are an appropriate amount of chickens, food scraps, and gardens, all branches of the chain stay in business. Another example, using our aquaponics setup:

Fish in Tank — Fish Poop in Water Fertilizing Plants in Grow Bed — Plants Filter Water and Send Nutrients Back into Tank

But any system where there is more going out than coming in, or vice versa, ceases to be sustainable. Example:

Massive Drilling for Natural Resources > Heating, Fuel, etc. in Homes > No More Natural Resource

In the above example, oil or natural gas is a finite resource not being replenished at an equal rate of removal; similar to the depletion of rainforests and old-growth forests.  In sustainability, what you take needs to be replaced in order for you to take and give it all over again. So in your daily life, how much more are you taking out than putting in? Below are some quick, extremely simplistic things you can do right now that will limit what you're taking out. Next time, we'll talk about ways to put back in.

1.

Stop Using Tissue Pape

r

Paper napkins, paper towels, facial tissue, and yes, even toilet paper account for a huge amount of all trees cut down annually. As per the records of WWF, 10 percent of the 270,000 trees cut every day are used in the manufacturing of toilet

paper

. It doesn’t come as a surprise that an average American household uses more tissue

paper

than the rest anywhere in the world: The North American usage of tissue

paper

was estimated in 2005 to be 24 kg per capita which is six times higher than the global average of 3.9 kg consumption per capita. And while it's great to buy recycled tissue paper, there's still an awful lot of energy and fresh water (and, often, natural resources like fuel) going into the process of recycling. There's really no "green" way to use disposable products. Some people really go all the way with removing tissue paper entirely from their lives (

family cloth

, anyone?!), but I'm not quite there yet. How about easing into this transition with these three ideas:

  • Handkerchiefs Back in the day, Kleenex didn't exist. Everyone had handkerchiefs! Ladies and gents carried lovely, embroidered hankies, hankies of different silks and cottons, hankies of every color. King Richard II of England, who reigned from 1377 to 1399, is widely believed to have invented the cloth handkerchief, as surviving documents written by his courtiers describe his use of square pieces of cloth to wipe his nose. Certainly they were in existence by Shakespeare's time, and a handkerchief is an important plot device in his play Othello. The use of a cloth handkerchief is occasionally considered old-fashioned or unhygienic, or both, in some parts of the world, mainly due to the popularization of disposable paper handkerchiefs (talk about subversive marketing!) and the fact that they are stored in a pocket or a purse after being used. However, they are a potentially more environment-conscious choice, as cloth handkerchiefs are reusable. I don't know of a single person who has ever been made sicker by having a hanky on-hand. Try it out and see if you don't also agree they're much gentler on the face.

  • Rags Companies like Bounty have made mega fortunes off of convincing you that spills need to be picked up with soft, super-absorbent, disposable paper towels. But you know what works better than paper to pick up liquid? Fabric. Every single time. Those old, stained, ripped T-shirts, sweatshirts, towels, and sheets that you'd otherwise throw in the trash make perfect rags that you can use, wash, and reuse hundreds and hundreds of times. For cleaning windows and mirrors, crumpled-up newspaper works just as well. Ditto for absorbing oil run-off on bacon, fried green tomatoes, or deep-fried anything. Keep a pile of folded rags in a kitchen drawer, or hang a decent-looking one on a hook near the kitchen sink.

  • Cloth Napkins Whether you want to buy your cloth napkins at a store or make your own, this is such a no-brainer it's ridiculous everyone's not already made the switch. Why are cloth napkins reserved for fancy dinner parties only? You can toss your entire family's cloth napkins into the laundry pile after a meal, they take up minimum space, and it's so easy to make your own out of old clothing garments and fabric scraps, there's really no excuse not to.

2.

Stop Bagging your Purchases in Disposable Bags

I know this one gets kicked around a lot, and I know a lot of us now have more than our fair share of reusable, adorable totes with cutesie messages like "Save Our Mother"—but it still always amazes me how few people stand in line at the supermarket with reusable bags; or at the pharmacy, clothing store, or pet shop. Most commonly, people walk out of their homes without remembering to grab their totes. My suggestion: Keep three or four reusable bags in your car at all times. No car? No problem—put a hook near your front door and hang your bags there so you're always reminded to grab one (or several) on your way out.

3.

BYO Doggy Bag

Here's another big one. There's really no reason to send any food back into the kitchen at a restaurant, only for it to be tossed right in the trash. Whether you take the food home to be your leftovers, tossed to the chickens or dogs or pigs, or thrown into your compost bin, no food should ever go to waste! Up the ante by bringing your own to-go box so as to avoid the completely unnecessary, grotesquely outdated and unsustainable Styrofoam container.

4.

Get Your Feminine Hygiene Products Right

Ladies, listen up.

Landfills are over-taxed with feminine hygiene products.

In 2000, more than 55.9 million women (in the U.S. alone) were monthly users of disposable feminine hygiene products. The 41 year menstruation span (11-52 years) creates billions of pounds of disposable feminine hygiene products being "dumped" into the environment each year

.  Want to make a switch? Good. You've got lots of options. 

There's a whole category of disposable menstrual products made by companies like Seventh Generation and Natracare that are unbleached, made with less plastic, made with plant materials, etc. While they are still disposable, if you are not ready to try reusables then this is a good way to go. Eliminating these nasty ingredients from the manufacturing process (and keeping them away from your tender bits) can only be a positive. But please take 'biodegradable' claims with a grain of salt. If you're composting your biodegradeables in your yard, then these claims may apply (though how long it takes for a "biodegradable" product to actually break down can vary wildly). Please, please remember that in a modern landfill, nothing is breaking down. No air and water reaches any of those products, so they never get to fall apart and turn into dirt. 

If you want to take your feminine hygiene to the next level, there are a lot of

reusable options. You've got your reusable menstrual cups, like the

Diva Cup

made from silicone, and

The Keeper

made from natural rubber (they also make a silicone version for women allergic to latex). Then there are the reusable cloth pads that you wash and wear, like

Glad Rags

,

Lunapads

and

homemade varieties

 (or

make your own

).

Grist did a comparison of various types of pads

that might be helpful. There are also

sea sponge tampons

, made from, yes, sea sponges.

5.

Entertain in Style

It's tempting to have red Solo cups, plastic cutlery, and paper plates at your next backyard barbecue, New Year's Eve party, or kid's birthday party. But this creates an unseemly amount of waste that's just going to require a lot of energy to recycle (yes, you

should

be recycling all those plastic cups, forks, and knives) or—you guessed it—end up in a landfill somewhere far, far away.

My top recommendation here is to use real dishes, real forks and knives, and real glassware. For easy cleanup, put a few rubber tubs out and a pail with designations marked on them: plates, glasses, compost, etc. When they're full, just pour warm soapy water into the tubs for easy cleaning and empty your pail into your compost pile (or feed your chickens, they love love love table scraps!). We do this at all our gallery openings, and have never had an issue with an inconvenient clean-up. And I guarantee your guests will take notice should you serve them in glassware with cloth napkins—this is a simple way to class up any occasion.

If you are having a big guest list, please consider using biodegradable plates, cutlery, and napkins. And don't send them to a landfill (see reasons above)!. When your party's over, put your biodegradables into your compost pile or bury them.

Click here

for a cornucopia of biodegradable items for entertaining.

Comment

Nicole Caldwell

Nicole Caldwell is a self-taught environmentalist, green-living savant and sustainability educator with more than a decade of professional writing experience. She is also the co-founder of Better Farm and president of betterArts. Nicole’s work has been featured in Mother Earth News, Reader’s Digest, Time Out New York, and many other publications. Her first book, Better: The Everyday Art of Sustainable Living, is due out this July through New Society Publishers.

Building With Bottles

Bottle Jug House

We've been brainstorming design ideas for a new structure to sit alongside the Birdhouse and greenhouse next to Better Farm's main garden. The long list of possibilities has been narrowed down to two: an earthship made from reclaimed tires, or a small cottage made entirely out of glass bottles and mortar.
To build a basic wall out of glass bottles, you lay the items out like bricks and use mortar between the rows. For a structure, you'd need to frame out windows and ceilings.
Photo from Instructables.com

Here are some great photos we found on unusuallife.com of particularly excellent bottle construction:

Bottle-end shower
Instead of throwing those glass bottles away, many folks have wondered how to recycle and build with these ubiquitous items.
This photo show walls being constructed on a build in New Mexico by Mike Reynolds at one of his “earthships”.
Bottle Wall
Bottle Bricks
Apparently back in the 60’s Mr. Heineken came up with the idea of makeing the beer bottles and size and shape of bricks, while concerned about the about of litter and wastage beer bottles were causing. They never came to be, however.

Building with bottles has often been a choice of folk artists, early settlers and the poor in some countries, as they used whatever resources they had to build shelter. Agility Nut has a wonderful website featuring bottle houses around the world.
Airlie Gardens Bottle House
The Airlie Gardens Bottle House was created by a local artist, Virginia Wright-Frierson in 2004. It is officially named the “Minnie Evans Sculpture Garden Bottle House” after an artist/gatekeeper that worked at Airlie for many years. This bottle house is also referred to as the “chapel”. Frierson used bottles of all shapes and sizes as well as cement and chicken wire in its creation.
Riverside Chapel by Martin Sanchez
Beer Bottle Chapel created by Martin Sanchez of Riverside California
Ann’s Bottle House B&B in Arizona
Tom Kelly’s Rhyolite Bottle House
The Bottle Houses of Prince Edward Island

Stay tuned for our own plans!
1 Comment

Nicole Caldwell

Nicole Caldwell is a self-taught environmentalist, green-living savant and sustainability educator with more than a decade of professional writing experience. She is also the co-founder of Better Farm and president of betterArts. Nicole’s work has been featured in Mother Earth News, Reader’s Digest, Time Out New York, and many other publications. Her first book, Better: The Everyday Art of Sustainable Living, is due out this July through New Society Publishers.

Vermicompost Project: Update

We reported in February on an upcoming vermicompost project to be undertaken by Matt Smith at Better Farm this year.

The scope of that undertaking is to develop a low-cost vermicomposting system that is scalable for municipal and commercial use. By collaborating with local supermarkets and convenience stores to pick up their food waste on a weekly basis, Matt's goal is to utilize earthworms to break food wastes down into dirt fit for potting soil that can then be sold and distributed to the public for low-cost.

Matt got started last week with his research, and began building the compost bins. Here are photos of him and volunteer Nick Bellman putting the project together:


The boxes Nick and Matt built last week will function as the bottom shelf of a multi-tiered system. The finished product will look something like this:

The next step was securing businesses to donate their food waste to Better Farm. Matt made some calls and visits to places in Alexandria Bay and Watertown, N.Y. Here's our list of confirmed businesses so far:
We're expecting a few more to sign up this week. Stay tuned for more information!
Comment

Nicole Caldwell

Nicole Caldwell is a self-taught environmentalist, green-living savant and sustainability educator with more than a decade of professional writing experience. She is also the co-founder of Better Farm and president of betterArts. Nicole’s work has been featured in Mother Earth News, Reader’s Digest, Time Out New York, and many other publications. Her first book, Better: The Everyday Art of Sustainable Living, is due out this July through New Society Publishers.

The Art of Regrowth

Image/Squidoo
Why should your cans, plastic, and paper have all the fun? If you've got a sunny south-facing window in your home, you can recycle the otherwise discarded parts of many everyday pieces of produce to regrow delicious scallions, potatoes, and even mangoes. Check out the tutorials referenced below for full information on having an indoor garden all year round.

(Editor's note: When regrowing any of the below-listed items, be sure to use only organic plants. Non-organic plants not guaranteed to grow. But consider that if you buy one organic piece of produce, such as an onion, each time you regrow it you're getting your money back!)


  •  Scallions: Did you know scallions will regrow indefinitely in a glass of water on your kitchen counter? Lifehacker recently posted the following:
If you like to cook with scallions (aka green onions or green shallots), did you know you can keep the white root ends from purchased scallions in a glass of water and they will regrow almost indefinitely? Household weblog Homemade Serenity shares how scallion ends can regrow in in a glass of water. Just put the root ends in a glass of water and put that glass in a sunny window. After a few days you should be able to begin harvesting the green ends of the scallions. Make sure you change the water every so often and cut what you need with scissors before cooking.
  • Potatoes Got an old potato that's started sprouting eyes? Click here to learn how to turn that into a whole new plant.
  • Onions  Instead of tossing those onion bottoms into the compost heap, why not grow your own fresh onions out of them? You can theoretically create an endless supply of onions without ever having to buy bulbs or seeds—check out how over at Instructables.com. You can also regrow onions in a simple glass of water—click here to learn how.
If you like those, here are a few more ideas for re-growing food right on your kitchen counter (from Cornell's "Trash Goes to School" instructable).

  • White Potato in Soil: Take a white potato that is showing "eyes" and cut a section that includes an eye (about 1 square inch). Place it in a pot of moist soil, about 2" deep. Keep the plant moist but do not "drown" it. Field potatoes are planted this way. 
  • Sweet Potato in Water: In the middle of a sweet potato, stick 3 to 4 toothpicks evenly spaced. Place the potato in a glass of water and put it in a sunny window. Either end can be rooted. Keep the water level high, and after a week or more the potato will usually sprout roots and vine-like stems and leaves. At this point, you need to replant the potato into a pot with soil. 
  • Carrot Top in Water: Cut about 1" - 1 1/2" off the top of 4 to 6 carrots. Fill a shallow bowl 2/3 full of washed pebbles (pebbles help support the tops.) Place the carrot tops over the pebbles. Add water to the level of the pebbles and maintain this level at all times. Soon the tops will sprout pretty foliage. 
  • Pineapple in Water: To separate the top from the fruit, hold the fruit firmly with one hand and twist the leafy head with the other. The top should come right off. Remove the lower leaves until the stump is about 1 1/2" long. Put the top in a glass of water and change the water weekly. When roots are 3" to 4" long, transplant to a pot.
Plants from Seeds:

  • Avocado Pits: Remove the pit from an avocado and allow it to dry for 2-3 days. Peel away as much of the onion-like skin as possible. One-third of the way down, inset four toothpicks at regular intervals. The flat end is the bottom and the pointed end is the top. Put the pit in a glass of water so that 1/2" of water covers the base of the pit. When the roots are 4" long, transplant the pit to a pot and keep it in a bright, warm window. Keep the soil evenly moist at all times. 
  • Mini-Fruit Trees: Citrus plants can be grown from seeds removed from oranges, grapefruits, lemons, and tangerines. Soak the seeds overnight in water. Plant 1/2" in moist potting soil. Cover the pot with a plastic bag or a piece of plastic wrap, and put in a warm spot. When the seeds start to grow (in a few weeks), remove the plastic. Keep the plant in a warm, sunny window. 
  • Beans, Peas, and Lentils: Soak dried beans, peas, or lentils overnight in warm water. Fill a pot 2/3 full with potting soil. Place three seeds on the top of the soil and cover with 1/2" of soil. Cover the pot with plastic wrap. After the seeds start to grow, remove the plastic. Put the plant in a warm, sunny window, and keep the soil evenly moist. It may be necessary to tie the plants to a small stake as they grow. 
  • Herbs: Use anise, caraway, coriander, celery, dill, or fennel seed. Fill a 6" pot 2/3 full with moist potting soil. Place six seeds on top of the soil and cover with 1/2" of soil. Cover the pot with plastic wrap and place in a warm spot. After the seeds begin to grow (3-8 days), remove the plastic and place the plant in a sunny window. After a few weeks, you will have a lovely feathery foliage that can be snipped and used in cooking. 
  • Peanuts: Make sure you use fresh, unroasted peanuts. Fill a large, 4" deep plastic bowl 2/3 full with moist potting soil. Shell four peanuts and place them on top of the soil, covering them with 1" of soil. The plant will sprout quickly. In a couple of months small, yellow, pealike flowers will develop along the lower part of the stem. After the flower fades, the ovary swells and starts to grow toward the ground and pushes into the soil. Peanuts will be ready to harvest in about six months.
Plants from Exotic Fruits:

  • Mango: In the center of the mango, there is a large hairy husk with a pit in it. Scrape off all the excess flesh from the husk and gently pry open with a dull knife. The pit is best started in a sphagnum bag. Fill a Ziploc bag with dampened peat moss or sphagnum. Place the pit in the bag and make sure it is completely surrounded by moss. Check every day to make sure the pit is not dried out or rotted from too much moisture. When the roots are 4" long, transplant to a pot that is at least 1" larger than the pit. 
  • Papaya: Papayas are not easy to grow because the plants have a tendency to dampen off (die) at about 6" tall. When you cut the papaya open, you will find hundreds of black seeds surrounded by a gelatinous aril (seed covering). To remove the aril, spread some seeds on a paper towel and roll them with your fingers until the aril squashes off. Plant the seeds immediately in a container with sterile potting soil. Give them bottom heat and high humidity until they pass the critical stage of 6" high. Papayas are rapid growers, and once they are established, they will not need a lot of water and fertilizer. 
  • Tamarind: Tamarind pods look like brown lima beans. The outer shell is brittle and easily peels back, revealing a sticky, brown, pulp. Within this pulp there are five or six shiny black pits. Nick the pits (with a nail file) and soak them until they swell, usually in a few hours. Plant the pits in a container with potting soil and place in a sunny window. Tamarinds are water-loving plants and should never be allowed to dry out. As they grow, pinch them back to make the plant fuller.
Comment

Nicole Caldwell

Nicole Caldwell is a self-taught environmentalist, green-living savant and sustainability educator with more than a decade of professional writing experience. She is also the co-founder of Better Farm and president of betterArts. Nicole’s work has been featured in Mother Earth News, Reader’s Digest, Time Out New York, and many other publications. Her first book, Better: The Everyday Art of Sustainable Living, is due out this July through New Society Publishers.

How to Afford Better Food

Originally published at Mother Earth News

There’s growing evidence that industrial food just ain’t what it oughta be. Lucky for us, the path to super-nutritious food at affordable prices offers many entry points. We’ll pilot you through the diverse options in this guide to shopping smart and eating better food.
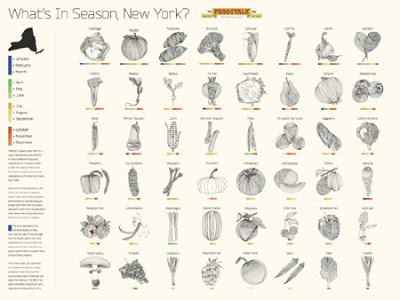
Buy In Season
WHY? Like most goods and services, foods cost less when they’re abundant. Eat foods during their peak season for scaled-down price plus amped-up quality. Foods that get to you quickly lose less flavor and nutrients, and you can enjoy varieties of produce that can’t survive long-distance shipping. Buying in-season foods directly from farmers is the easiest way to save money on better food — especially at the end of market day, and especially if you’re willing to buy less-than-perfect items. Buying in season is also the best way to get good prices on more-expensive organic produce. 

HOW? Arm yourself with strategies for eating fresh during any season with the comprehensive resources we’ve compiled for you on our website at How to Eat Seasonally. 


Buy Locally
WHY? When you spend $1 on supermarket food, not much of it goes to the actual producer. Some of your dollar goes to the person who grew it, while some goes to the person who picked it. Some goes to the companies who processed, packaged and transported it, and some to the firm that designed the packaging and advertising. Finally, some of your dollar ends up in the hands of the grocery store owner, and also in the hands of the store’s employees. The fewer middlemen, the less the seller will have to charge you.

HOW? Find farms, restaurants, co-ops, farmers markets and other great local-food resources on our website (see How to Find Local Food and Farmers). In addition, locally owned specialty shops can often help you find things that local farmers can’t grow, such as fresh-roasted coffee.

Join Forces With Community Supported Agriculture
WHY? Community supported agriculture (CSA) programs used to be charming novelties in certain neighborhoods that enjoyed eco-abundance, but their huge surge in popularity in recent years means CSA programs are now available nationwide — more than 4,000 are listed in the Local Harvest database. A CSA program is essentially a local-farm subscription service, in which a group pays the farmer directly for the food she delivers. You can save money on super-fresh, high-quality produce, and many CSAs also offer meat, eggs, dairy, honey, flowers and herbs. Some offer free or lower-cost subscriptions to those who donate time or qualify for low-income shares.

HOW? Find a CSA program in your area through the Robyn Van En Center or Local Harvest and start buying better food now.

Cook Your Own Food
WHY? The absolute fastest route to grocery savings is the path to your kitchen. Avoid eating out or buying packaged foods by cooking your own meals from whole, unprocessed ingredients. Simple breakfasts of whole grains, fruit and eggs eaten at home will kick-start your day with long-lasting energy. Take your own lunch to work or school for a meal guaranteed to be much more flavorful than fast-food or vending machine fare. Save time at dinner by spreading the work among family members and prepping double batches of dinners that freeze well. And save money all around by making your own staples, such as stock, pasta sauce, butter, condiments, yogurt and many others. You'll learn quickly that you can make better food than any of those packaged versions at the grocery store.

Did you know you could save at least half the cost of fancy fresh cheese by making it yourself? Plus it’s fun, I promise. And what about fancy artisan bread? Whoa nelly! Delicious rustic loaves from fine bakeries can cost up to $7 a loaf, but you can make your own loaves of comparable quality — again, I promise — for about 50 cents each. You’ll also be able to use more nutritious flour made with whole grains. Really serious about getting high-quality food at awesome prices? Grind your own grains for peak freshness and flavor. Grain mills start around $25 (though some nicer ones are in the hundreds), and if you buy 50-pound bags of whole grains, you could make that back with your first grain purchase.

HOW? Just search for “whole grains” at the MOTHER EARTH NEWS website, and keep reading for links to several fabulous homemade bread recipes, plus easy tips to keep more lunch money in your pocket. Check out a long list of our reader’s excellent grocery budget tips in How Do You Save Money on Groceries? and while you’re on our website, visit our Real Food page for all kinds of recipes and cooking information. 
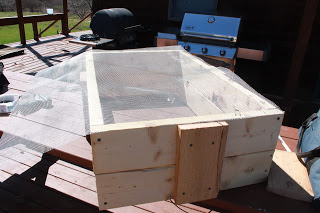
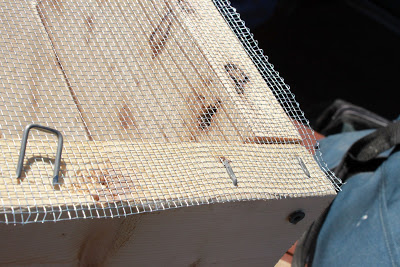
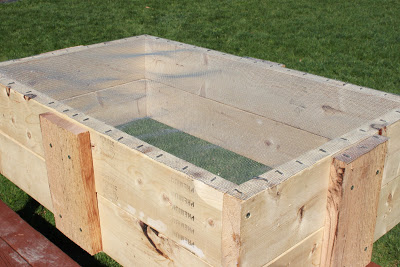
Grow Your Own Food 

WHY? A sure way to rock your world with superior flavor and better nutrition, and still save money, is by growing your own food. Rosalind Creasy, author of Edible Landscaping, saved $700 on groceries in 2008 when she grew a simple, 100-square-foot garden. Roger Doiron, founder of Kitchen Gardeners International, saved $2,000 from a 1,500-square-foot plot in 2009. Just think — grocery prices are even higher now.

Accumulating evidence is revealing the sad truth that today’s commercial fruits, veggies and grains contain fewer nutrients than their counterparts of yore, and many heirloom varieties are nutritionally superior to modern hybrids. Growing food yourself — with time-tested heirloom varieties, in healthy soil — is the best way to get those nutrients back into your diet.

If you’re unsure, start small! Try radishes, greens, zucchini, tomatoes, peppers and potatoes to start. Even a modest herb garden could save you big bucks, as fresh herbs are usually pricey. If you’re adventurous, start big! You can grow whopping quantities of food by using your front yard, too (if your community doesn't forbid it). Many edibles, such as rainbow chard and climbing beans, are as beautiful as they are useful. No sun? Join one of the 18,000 community gardens dotted all over North America. Live in an apartment? You may be lucky enough to find a rooftop garden sprouting up near you.

HOW? Learn to grow better food and find gardens that need you with our deep archives (see Learn to Grow Food).

Preserve Your Own Food
WHY? Even if you’re not growing food yourself, you can save up to 75 percent on home-canned and up to 80 percent on home-frozen foods if you buy the produce fresh during peak season. They’ll taste better than store-bought convenience foods to boot.

Drying foods is another way to concentrate flavor and nutrition. Dried fruits and veggies make wonderful, easy snacks, and you can save quite a bit on pricey mushrooms by buying them when you spot a sale, then drying them yourself to reconstitute later.

HOW? Search for “canning,” “drying” and “freezing” at MOTHER EARTH NEWS online to find plenty of articles about the basics. Download our canning app for smartphones and tablets at Free MOTHER EARTH NEWS How to Can App. You can learn how to ferment delicious beverages at home, too (see Home Brewing), and you’ll find a neat kit for a hybrid solar/electric food dryer at All About the SunWorks Solar Food Dryer Kit.

 Buy In Bulk
WHY? The price differences between packaged foods and plain, whole foods sold in bulk can be astounding. For example, you can save about 50 percent on pasta and peanut butter, and up to 70 percent on oats and popcorn. You may be surprised at how much you can find in bulk sections these days — everything from spices, herbs, tea and coffee to beans, grains, flour, olive oil and more. Buying clubs and food co-ops also offer tremendous savings to grocery shoppers who don’t mind planning ahead and working with others.

HOW? Look for the bulk section in your grocery or natural foods store. Connect with a food co-op or buying club through Coop Directory Service or United Buying Clubs. Go to Dry Goods and Staples: Costs for Packaged vs. Case vs. Bulk to see a detailed look at the cost savings of bulk items. See Get to Know the Wonder-Working, Timesaving Pressure Cooker to learn how you can save even more by preparing foods efficiently with a pressure cooker.

Choose Wisely
WHY? Supporting a reduction in our nation’s pesticide dependence by choosing organic foods is worthwhile — the effects of industrial, chemical-based agriculture reach much further than what we ingest as individuals and the effects it has on our personal health. But sometimes we must make strictly budget-conscious decisions. If you can only access organically grown food some of the time, you’ll want to make the best choices. For example, fruits with permeable skin, such as strawberries, absorb more chemicals than thick-skinned onions and eggplants. And did you know that apples and celery top the list of pesticide-laden foods, while mushrooms and sweet potatoes are consistently clean?

HOW? The Environmental Working Group maintains the most up-to-date list of which conventionally grown foods are likely to be contaminated with pesticides and which are safest to eat: EWG’s 2011 Shopper’s Guide to Pesticides in Produce.

Go Grass-Fed
WHY? Foods from animals that were raised humanely on healthy pastures are no doubt more expensive than their factory-farmed counterparts, but that cost is coming down as more consumers become aware of the multiple benefits (tell your friends!). Along with top-notch flavor, pastured products offer better nutrition than industrial animal products. You can save money by choosing cuts of meat that are less expensive but still healthy and flavorful, such as bone-in chuck roasts, shoulder and shank cuts, round roasts, stew meat, and organ meats. You can also save a bundle by buying larger portions directly from the farmer, or by choosing to pay for what you value and simply eating meat less often. You might also consider investing in a deep freezer so you can store that quarter of a cow, half a pig or whole lamb that will provide many meals. Or split a large meat purchase with friends.

HOW? Use Eatwild to find farms and butchers in your area, or check with your local county extension for potential sources. For more information on sourcing and cooking all cuts of grass-fed meat, check out Good Meat by Deborah Krasner and Pasture Perfect by Jo Robinson.

Raise Your Own Animals
WHY? Pastured meat, eggs and dairy are tremendously more nutritious than their industrially farmed versions. The meats are leaner and have a fatty-acid profile that helps combat heart disease rather than contributing to it. Pastured eggs also contain these beneficial omega fatty acids, plus vitamins and minerals that are deficient in factory farmed eggs, including vitamin D, which many Americans may not realize they are lacking. Most importantly, homegrown meats usually taste better than products that come from the animals raised in crowded, stressful conditions in feedlots and factory farms.

Taking care of chickens is not much more complicated or expensive than taking care of a dog, and many urban and suburban areas are now allowing residents to do so. Plan on harvesting about one egg per hen per day. Sustainable agriculture expert Gwen Roland has raised her own flavorful broiler chickens at a cost of only $1 per pound of meat produced. If you decide to keep a dairy cow and calf, you’ll spend up to a couple grand, but will recoup between $4,000 and $6,000 in delicious, healthy grass-fed milk and beef. Plus, you’ll be among the lucky few who truly understand all that is required to bring meat to our tables.

HOW? Learn about grass-based farming at Choosing Natural, Grass-fed Meat and The Chicken and Egg Page. You’ll also find a wealth of information about raising pastured animals through one of our favorite magazines, The Stockman Grass Farmer, and via the National Sustainable Agriculture Information Service.
Comment

Nicole Caldwell

Nicole Caldwell is a self-taught environmentalist, green-living savant and sustainability educator with more than a decade of professional writing experience. She is also the co-founder of Better Farm and president of betterArts. Nicole’s work has been featured in Mother Earth News, Reader’s Digest, Time Out New York, and many other publications. Her first book, Better: The Everyday Art of Sustainable Living, is due out this July through New Society Publishers.

Aquaponic Gardening: Phase II

Goldfish and minnows get acquainted with the Buddha. Photo/Nicole Caldwell
We told you last week about our plans to create an aquaponic grow station at Better Farm in order to grow salad greens, tomatoes, and peppers year-round.

Marching orders from our aquaponic/hydroponic setup consultant, Marco Centola of Brooklyn Farms, included getting our hands on at least a 40-gallon fish tank with two corner filters, gravel, and air circulator, letting water sit in the tank for two days, then adding a bunch of feeder fish to get the nitrogen cycle started.

I hit the pet store the next day to assess our options and make a note of prices, then scoured Craigslist to find great deals. We scored a 70-gallon tank and stand from Craigslist for $180—about $100 less than the cost of a new, 40-gallon tank and stand at the local big-box pet store in Watertown. Next up was picking out filters:
We also grabbed a pH test kit with "pH Up" and "pH Down" control additives, a bunch of fish food, gravel, awesome Indian sculptures, and even a few bulbs that will allegedly grow plants:


Here's an excerpt from an e-mail Marco sent to me outlining the process:
The first thing you should do is to setup the aquarium:
  • Rinse the tank well
  • Rinse the gravel well, food strainer makes the job easier
  • Place a flexible airstone at the bottom with the air line coming out and cover it with gravel (this is still on our to-do list!)
  • Fill the tank with water and begin aerating and filtering the water.
  • After 24 hours you can introduce the first feeder fish or you can put a couple of raw dead shrimp into the tank to begin the nitrogen cycle. 
After four days, you can take the dead fish out and replace with feeder fish.  From here you need to check ammonia, nitrite, and nitrate levels once a week. Feeder fish are cheap and WILL die but the purpose of them is to see when they can survive for more than four days. It should take from four to eight weeks to establish a strong enough nitrogen cycle to get some nice fish in there.  When testing, you will see ammonia spike high at first then nitrite, and finally nitrate. 

Though nitrate is safer, it is still toxic in large quantities and regular water changes are a must.  when you change water in a fish tank you must make sure there is no chlorine or you will kill all the beneficial bacteria that has already colonized.  I usually let water sit out 24 hours, which allows the chlorine to evaporate.  You should also only change 20 percent of the water at a time.  Fish are sensitive to temp, pH, and any drastic change, so this should soften the blow.

Is he the best, or what?! We added the fish yesterday (the woman at the pet store warned us the water would get pretty cloudy once the fish went in, which she said was normal as the nitrogen cycle begins and levels out. "Don't do anything when that happens!" she told me, "after a few days the water will clear.") Now, we wait a few days to see how the little fish fare. So far they've made it 24 hours with no fatalities (thank goodness for Better Farm's well water? Or is the good luck of our statuary?).


For more great information about aquaponics, visit Backyard Aquaponics.

More about our aquaponics experiment:
Aquaponic Gardening: Phase I

Occupy Wall Street Turns to Pedal Power


One of the most notable disconnects of the green movement is the continued reliance on fossil fuels and gas even as we protest the United States (and world's) reliance on fossil fuels and gas.

We heat our home with natural gas and protest fracking; drive cars everywhere while purporting to be against drilling for oil; and buy food from less-than-green companies in order to save a buck, even while decrying corporate agriculture and factory farming.

So it's a great relief to see some of the folks participating in Occupy Wall Street changing the rules.

For the first leg of these protests, gas-powered generators were indispensable: for lights, for charging up computers and cell phones, for providing heat. But last week, New York City confiscated many of the generators being used (Mayor Bloomberg cited a safety issue). Those generators won't be allowed back into the park, so environmental action group Time's Up! came up with a new solution: bicycle-powered generators.

The video above will do much by way of explanation; but basically the group needs 11 bikes in total to power the whole park. Any money raised for the bikes that goes beyond what they need will be used to build more energy bikes, which will be sent to other occupations. Awesome. 

Click here to donate.
Comment

Nicole Caldwell

Nicole Caldwell is a self-taught environmentalist, green-living savant and sustainability educator with more than a decade of professional writing experience. She is also the co-founder of Better Farm and president of betterArts. Nicole’s work has been featured in Mother Earth News, Reader’s Digest, Time Out New York, and many other publications. Her first book, Better: The Everyday Art of Sustainable Living, is due out this July through New Society Publishers.

Warming up to Soy Spray Insulation

Better Farm is up to two totally off-grid structures, the Birdhouse (powered with a small DIY solar setup and built with locally mined wood) and the Greenhouse (built with donated old windows and locally mined lumber, and utilizing passive solar).

But our biggest project to date, the Art Barn, is a task totally unlike the other two in that it involves a complete overhaul of an existing, on-grid structure: taking a 1,400 square-foot hay barn and transforming it into a totally green, state-of-the-line artspace, studio, and gallery. We've utilized found materials, upcycled items like overstock and/or discarded windows from a local hardware store and storage lockers marked for the dump over at Fort Drum, done much of the work ourselves, sought out energy efficient means to power the space, and scheduled our first on-site visit next week with

One Block of the Grid for our upcoming 10-panel solar system.

All of this is very well and good, but left out a major player in any renovation project: Insulation.

For smaller projects in and around the house, we've utilized 100% recycled cotton batting insulation, which is so eco-friendly and nontoxic you can actually rub your face in it. Makes for a very pleasant change from the days of masks, gloves, and long sleeves and pants to avoid fiberglass fill and other nasties.

Disadvantages to the recycled batting insulation are cost and effectiveness—the stuff we got from Lowe's was only R-19. So I began looking into other green options. Spray-in fiber fill is good and cheap, but continually settles over time

and doesn't add anything to the integrity of your walls. Then I discovered spray foam installation, which can strengthen walls but is often a toxic mix of chemicals you wouldn't want blown your way in a breeze let alone left to sit in the walls that literally surround you.

Then betterArts board member Scott Mueller tipped us off to Demilec.

These guys offer a Heatlok Soy 200 spray foam barrier that adds to the integrity of your walls, seals in all the gaps and cracks that might exist in your structure, is made from recycled plastic bottles and soybeans, and is in general just a totally amazing way to insulate your home or office. For each inch of sprayed soy insulation, you get an Aged R-Value of 7.4 (we're doing three inches on all the walls and the ceiling of the Art Barn's first floor). This insulation also offers five barriers: air barrier, insulation, water barrier, vapor barrier, and drain plane.

The company estimates that its Heatlok Soy 200 sprayfoam helped to keep 12 million plastic bottles out of landfills in the last year alone. It's not cheap, but adding to the barn's strength as a building, offering a great water barrier to the elements, and potentially (with wood stove installation) keeping the Art Barn at a sweet 75 degrees all winter long are all very attractive options.

Needless to say, we've decided to give them a try. Negotiations are underway for our Heatlok Soy 200 application to be completed in the next couple of weeks. We'll of course be documenting the process—and our thoughts—along the way. Stay tuned!

Want to find out more?

Demilec USA

1BOG Home Solar Power Discounts

Photos of Better Farm's Art Barn renovation so far