Four-Season Farming: Greenhouse-Chicken Synergy Experiment Underway

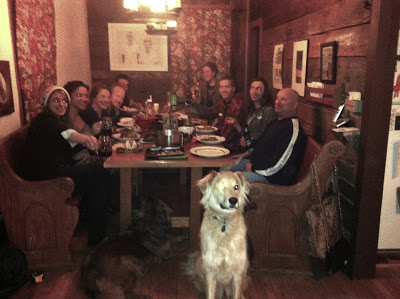
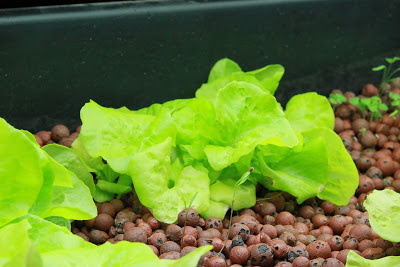
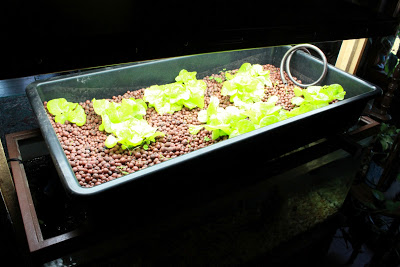
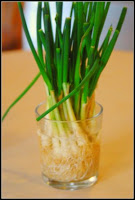
Chickens enjoy a warmer climate where they can still scratch on the ground, while the plants get a heated home in which to grow.
We've utilized cold frames, mulching and greenhouses in the past at Better Farm to extend the growing season for our produce; but have had yet to stumble upon something that would truly allow production to continue year-round for our use and the use of the people we serve.

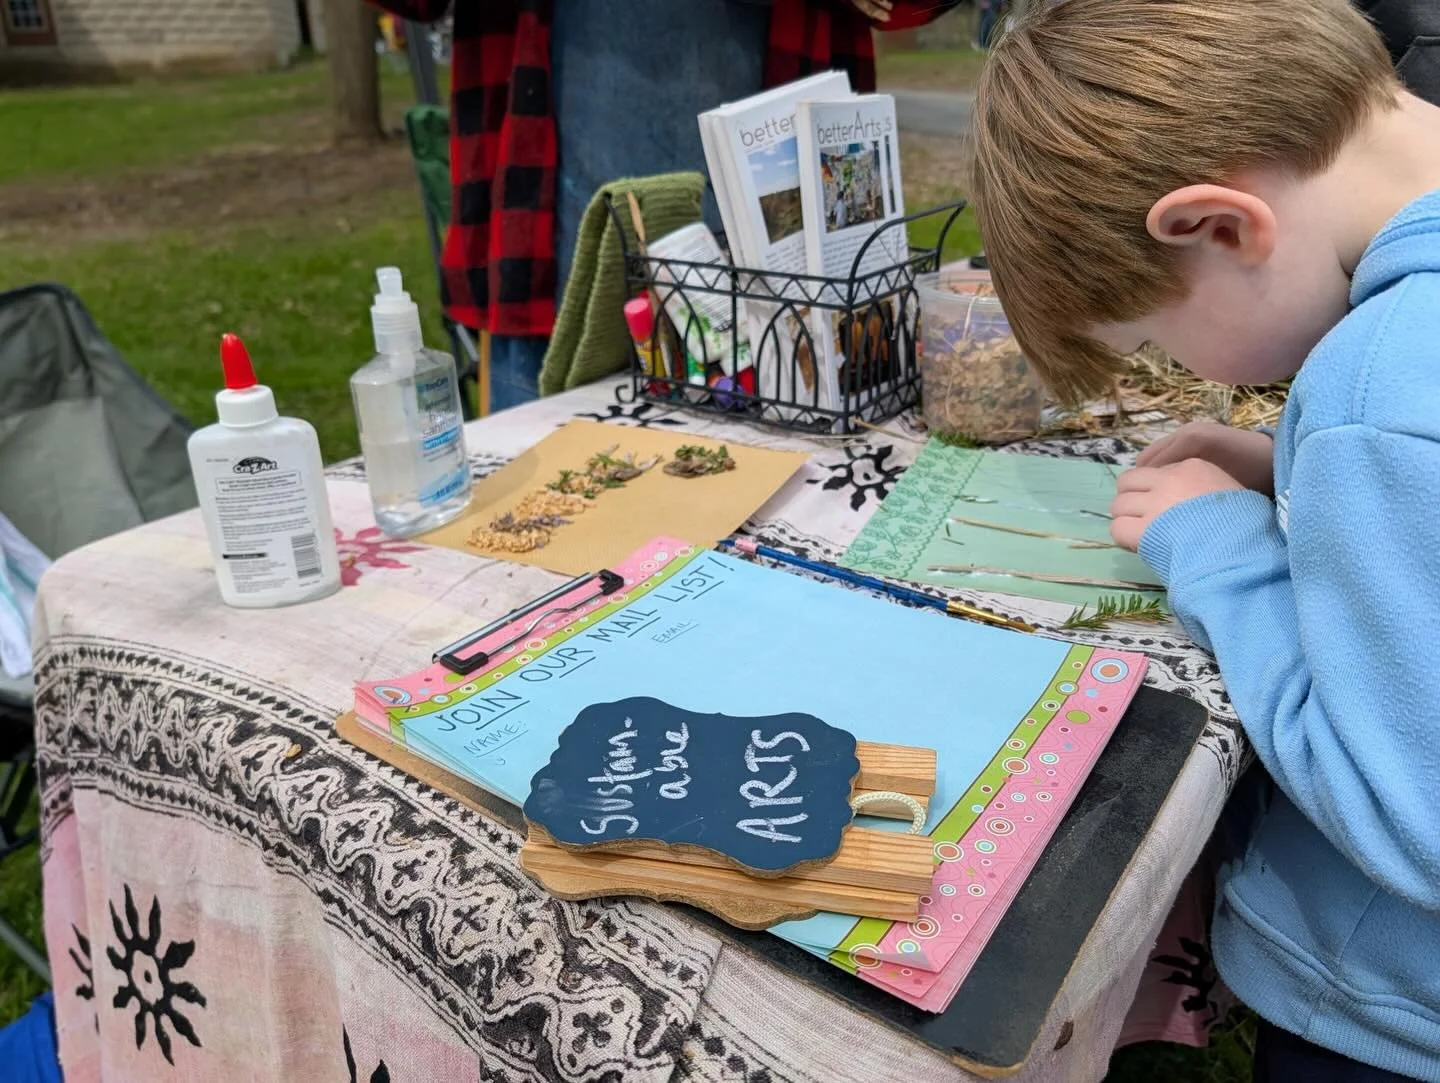
A recent partnership between Redwood's food pantry, Hearts for Youth, the Redwood Neighborhood Association, and Better Farm utilizes Redwood's Community Greenhouse to cultivate food that will be donated to the food pantry for disbursement to those in need. That greenhouse was moved to Better Farm, where the people staying here have agreed to tend to the garden and provide daily care for the plants as they grow.
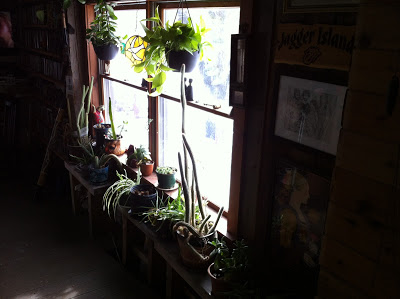
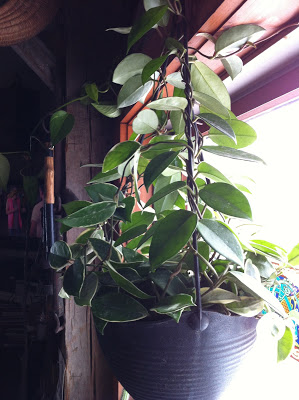
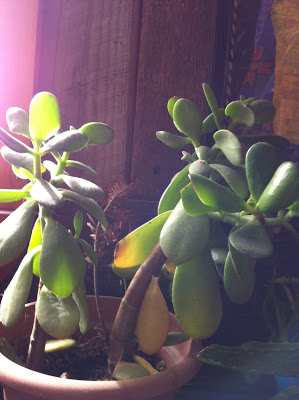
Community greenhouse.
But how to contribute year-round to the food pantry?

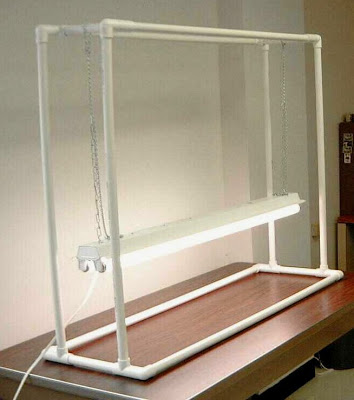
I began looking into ways to heat greenhouses year round and found a ton of information on heaters, solar panels, fans and insulation. But all potential solutions fell by the wayside when I discovered Anna Edey and her work on Martha's Vineyard with her Solviva Greenhouse.

A basic Solviva greenhouse design, as found at Backyard Chickens.
Anna, who has been an organic farming pioneer since founding her business, Solviva, in 1984. One of the most stunning project's she's worked on has been a combination greenhouse-chicken house, where chickens heat the space with their body heat and manure (which is composted along with hay). Rumor has it that on 0-degree days, Anna's greenhouse is a lovely 80 degrees.

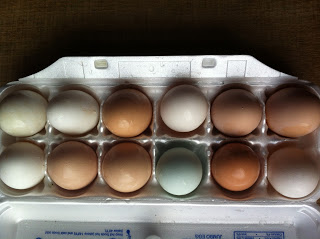
Awed by this potential, I brainstormed ways to protect plants while keeping them in the greenhouse with chickens. There are a lot of added bonuses to this chicken-greenhouse setup besides the plants, of course. The chickens also enjoy a break from all the cold and wind, which will boost their egg production throughout the winter. Plus, all the bedding and compost will be perfect to shovel into the garden come spring.

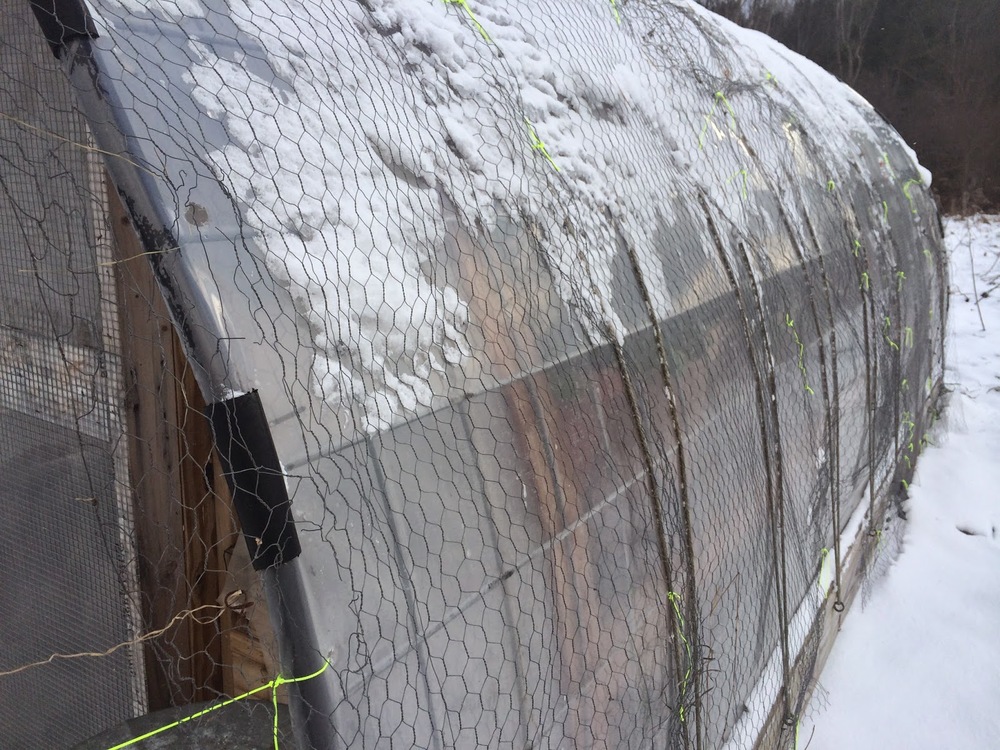
To prep the greenhouse, a few things had to be done first. The outside of the structure had to be wrapped in chicken wire to prevent predators from simply scratching through the plastic:

A trap door was added next to the front door to allow birds access outside on manageable winter days (accomplished here without having to leave the main door open and potentially subjecting plants to a chill):
Plants (broccoli, radishes, peas, spinach, lettuce and beets) had to be covered with protective netting so plucky chickens wouldn't damage the produce:

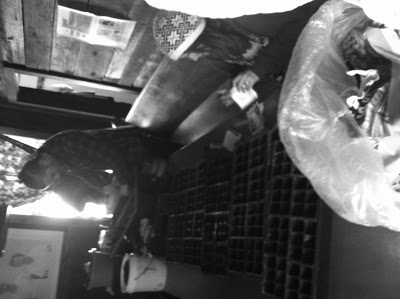
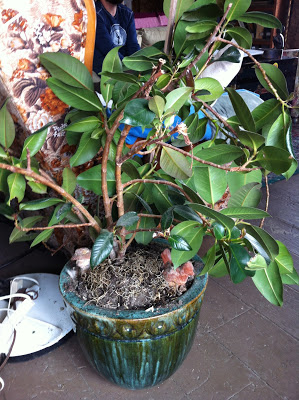
And lastly, the birds needed a protected space to sleep and lay that even a weasle can't get into in the middle of the night:
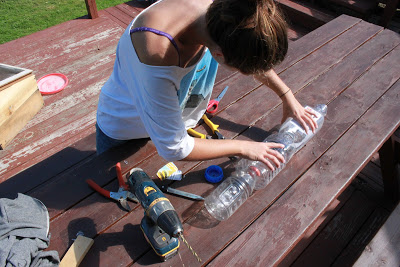
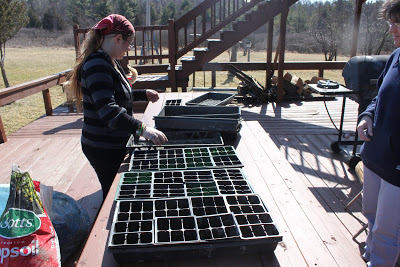
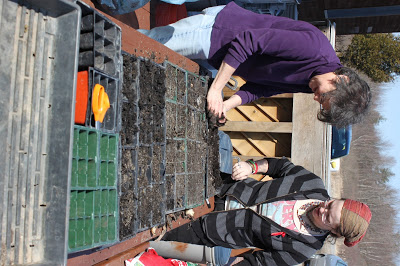
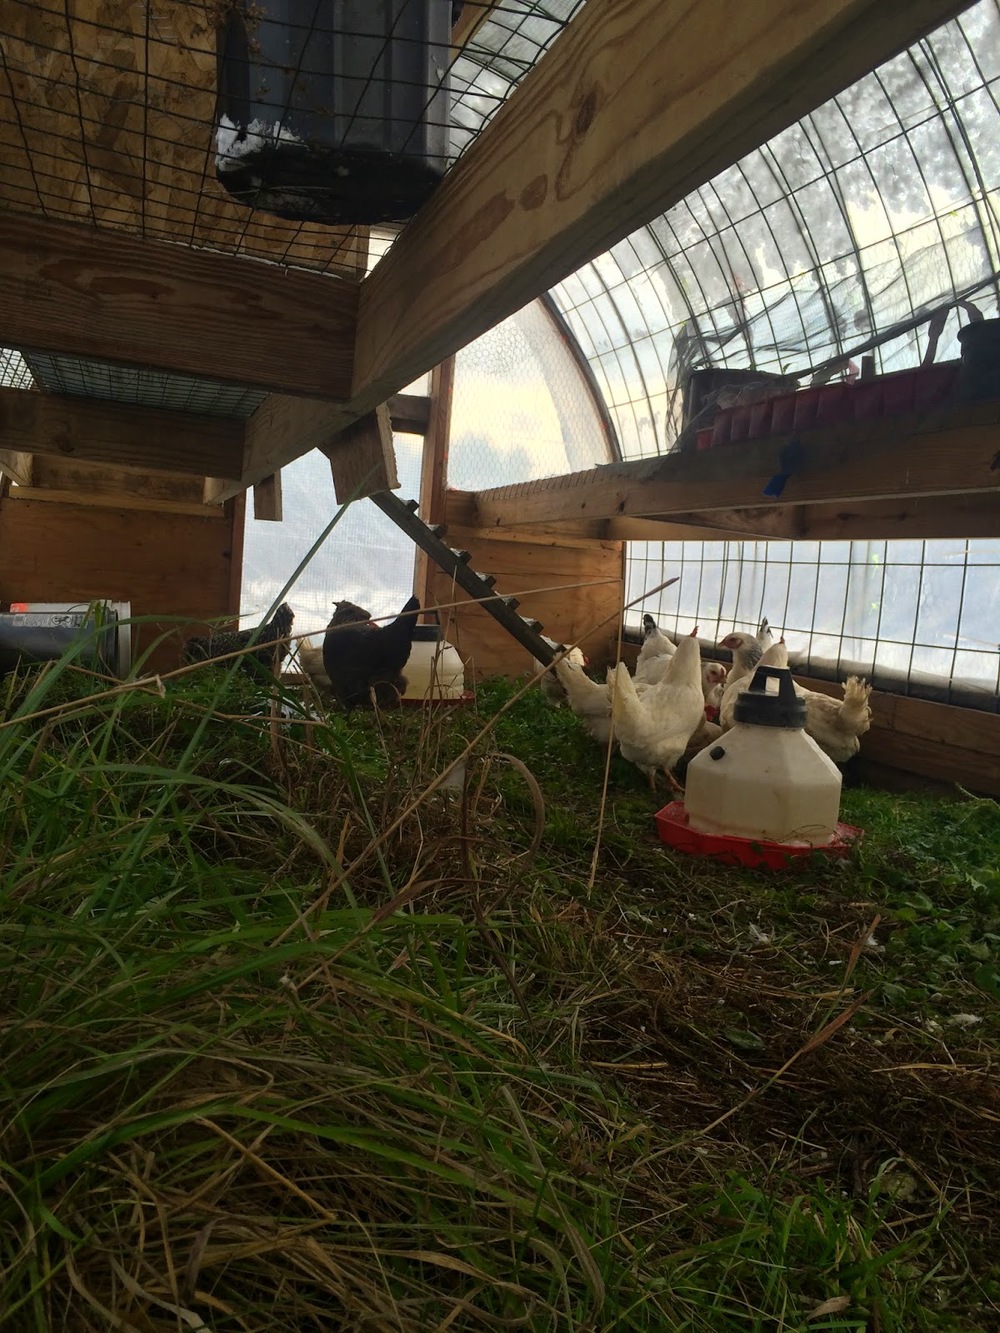
All the materials we used for this project were upcycled scraps of chicken wire from the herb gardens, handles from a kitchen demolition project on Fishermans Rest Island, and plywood scraps leftover from a construction project in June. We pulled a ramp from one of the other chicken coops, moved the water dishes and food to the greenhouse, and began catching birds we found huddled up outside. They couldn't be happier to discover there are still some places with green grass:


The project is officially underway.  In the coming weeks we'll be tracking overall temperature in the greenhouse to determine whether the birds are able to produce enough heat, along with passive solar, to keep the greenhouse above 60 degrees all winter long. If early findings are promising, we'll be adding shelving in the greenhouse to fill it top-to-bottom with yummy plants for food pantry patrons.

Want to design a Solviva Greenhouse of your own? Get in touch with us at info@betterfarm.org.

Garden Guide: How Much to Plant, and When

It's already the second week of March! That means all you gardeners are getting geared up to start some of your plants indoors, get your peas going outside, turn your compost, and plot out your grow beds. But where to begin?

We're here to help you with your timing, seed selection, compost, and everything else involved in growing your own food.

Your spring-planting calendar will vary according to your planting zone. At the

Farmer's Almanac website you can plug in your zip code

to see exactly when you should be planting what in accordance with your plant-hardiness zone.

Click here to give it a try

. Knowing when to start your seeds is a major game-changer for home gardeners. Gardening smarter, not necessarily harder, will save you a bunch of time in the long run and increase your success rate exponentially.

For loads of information for you to access year-round, click on the "gardening" tab on the right of this page. If you'd like a more personalized approach, get in touch with us about a private garden consultation. We will come to you and go over garden mapping, seed selection, landscape design, compost, and answer all your specific questions.

But how much should you plant? Well, it depends. How much food do you want to produce? Enough to garnish your dishes? Enough to feed your whole family? And for how long? Here's a basic guide to figuring out how much you should grow to feed yourself for a year, gleaned from the classic homesteading book,

Reader’s Digest: Back to Basics

:

Asparagus: about 10-15 plants per person

Beans (Bush): about 15 plants per person

Beans (Pole): 2-4 poles of beans per person (each pole with the four strongest seedlings growing)

Beets: about 36 plants per person.

Broccoli: 3-5 plants per person

Cabbage: 2-3 plants per person

Cantaloupe: figure on about 4 fruits per plant (estimate how much your family would eat)

Carrots: about 100 seeds per person (1/4 oz would be plenty for a family of six)

Cauliflower: 2-3 plants per person

Collards: about 5 plants per person

Corn: start out with 1/2 lb. seeds for the family and adjust as needed

Cucumbers: 3-6 plants per family

Eggplant: 3-6 plants per family

Lettuce: 4-5 plants per person

Okra: 3-4 plants per person

Onions: 12-15 plants per person

Parsnips: 12-15 plants per person

Peas: about 120 plants per person

Peppers: 3-5 plants per person

Spinach: about 15 plants per person

Squash (including Zucchini): about 10 per family

Sweet Potatoes: about 75 plants per family

Tomatoes: about 20 plants per family

Turnips: about 1/4 lb seeds per family

Watermelon: about 1/2 oz. seeds per family

For more help planning your garden,

contact us

—or check out

this great resource at Farmer's Almanac

.

Comment

Nicole Caldwell

Nicole Caldwell is a self-taught environmentalist, green-living savant and sustainability educator with more than a decade of professional writing experience. She is also the co-founder of Better Farm and president of betterArts. Nicole’s work has been featured in Mother Earth News, Reader’s Digest, Time Out New York, and many other publications. Her first book, Better: The Everyday Art of Sustainable Living, is due out this July through New Society Publishers.

Season Kick-Off Weekend at Better Farm

Community potluck dinner-party season has started back up!
We've got spring fever at Better Farm, and have kicked the season off right by getting seed flats planted, harvesting an aquaponic bounty and copious amounts of free-range eggs, rehabilitating some unwanted plants, making signs for our new trails system, and pasteurizing last year's compost.

Seed Planting
Our artichokes, peppers, mulberries, huckleberries, leeks,  and several other varieties of produce have been planted in flats throughout the main house at the farm. Aloe plants have been divided and repotted to encourage growth for a budding skincare and essential oil line (stay tuned for more information about that!).


Aquaponic Harvest
We have a variety of beautiful, organic lettuces ready to go! Please contact us at (315) 482-2536 or info@betterfarm.org if you would like to place an order.

Egg Heads
The chickens are hip to the season shift and are laying dozens upon dozens of beautiful Ameraucana, Leghorn, and Bard Rock eggs. A dozen eggs is $3 and includes a variety of all the above-listed varieties

Plant Rehab
A trip to Watertown on Friday yielded a handful of sick cactuses and orchids being discarded at a local store that we'll be rehabilitating over the next several months. This "plant hospital" will afford us the opportunity to educated visitors on bringing plants back to life—and keep these beauties from ending up in the garbage.

New Trail-System Signs
Over the weekend a group of us walked the new trail system in Better Farm's woods—and made trailhead signs to guide the way. By summer, we'll have a map to go along with the trails, as well as trail markers and camping sites. E-mail us if you'd like to volunteer on this project.

Compost Pasteurization
We blogged in February about how pasteurizing your compost can benefit from pasteurization:
Many people choose the safest route to prevent hitchhiking seeds and damping-off by buying a pre-sterilized package of potting soil, if you have a large amount of pots and flats to fill, this could be expensive. By taking a couple of extra steps before you begin, you can use your own rich, organic compost. Some people "bake" their soil in their oven to kill micro-organisms. But this process of sterilization kills everything, even the healthy organisms that you have worked so hard to create. The answer is simple: Instead of sterilizing compost and garden soil, pasteurize it. While sterilizing kills virtually all surface-dwelling microorganisms, when you pasteurize your potting mixture, it is only heated to a temperature that kills harmful organisms and leaves beneficial organisms alone.
We experimented with this process, which wasn't as smelly as you might initially imagine; and we've been left with fluffy black soil that's going to be very very good to our seeds and seedlings in the garden.

Pre-Spring Houseplant Care

With spring planting just around the corner, we used this week to shake the dust from our houseplants with some transplanting into larger containers, trimming leaves back, and waking up some bulbs. In this blog we'll give you some simple DIY fertilizer recipes for your houseplants, and a quick run-down of what's going on inside at Better Farm.

DIY Plant Steroids
Here are some simple homemade fertilizer recipes for your houseplants:
  • Give houseplants your leftover, cold coffee. This works particularly well for ivy plants.
  • Once a month, you can water your houseplants with a mixture of: 1 tablespoon Epsom Salts, 1 tsp. baking powder, 1 tsp. salt, 1/2 tsp. household ammonia, and 1 gallon of water.
  • Another method is to collect eggshells after baking and place them in a glass jar covered with water. Don't put the lid on tight. Let the eggshells sit for about a month and keep adding additional egg shells as you acquire them. Add more water if necessary. When you are ready to fertilize, dilute it (1 cup egg shell solution to 1 gallon plain water) and use it to water all of your plants. Or, mix finely crushed, rinsed eggshells into your potting soil to give your houseplants a good boost. The eggshells are a good substitute for bonemeal.
  • If you have a fish tank, when you change the water in the tank, use the water you take out to water your plants.
  • Once a month, pour room-temperature beer onto your plants.
  • A wonderful plant food is regular green tea. Dilute the tea with two gallons of water. You can use this every time you water.
  • Another homemade plant food recipe featuring beer is: 1 cup beer, 1 cup epsom salts, 1/2 cup ammonia, and 2 cups water. Use 1/2 oz. on each plant every two weeks. Great for all houseplants, especially orchids.
  • One last recipe is: 1 cup used coffee grounds, egg shells from 2 eggs (process in coffee grinder), 1/16 oz. ammonia, 1 cup water, 1/8 tsp. Epson salts. Stir together until well mixed. You can spoon this mixture around the base of most flowering plants, except for African Violets. Don't mix it into the soil, just let is sit on top if the soil. Apply this mixture monthly.
Bulbs
Bulbs are watered, edged in moss, and kept in a sunny location with much anticipation. This bulb was a Christmas gift from the Cohens in Ridgewood, N.J.
Bulbs given to us last fall from neighbor Al Streeter were stored in the basement all winter. Now four pots of bulbs are fully hydrated and enjoying sunnier days. Stay tuned for pics in the coming weeks!
 Air Purifiers and Vines
Leaves on this air purifier are trained up the hanger and will eventually run throughout the kitchen.

This Neon Pothos is a new addition (thanks to Amberlee Clement for bringing us several plants!) that will climb the library walls.

This pot is bursting with various kinds of ivy that will travel along library walls.

These jade and cactus plants are clippings from larger plants.

...another angle of the jade and cactus.
A succulent given to us by Jaci Collins
Teeming cactus plants

Hens and chicks.
Another jade plant.

A freshly re-potted plant that has been growing in leaps and bounds

Here's what we do during our pre-spring houseplant clean-up:
  • Overcrowded plants get bigger vessels in which to grow
  • Dusty leaves are wiped off
  • Fresh compost and soil is added to pots in need
  • Water from our aquaponics is used to give the plants a high dose of vitamins and minerals
  • Dead leaves are trimmed
  • Some plants are cut and those trimmings planted to establish new growth
1 Comment

Nicole Caldwell

Nicole Caldwell is a self-taught environmentalist, green-living savant and sustainability educator with more than a decade of professional writing experience. She is also the co-founder of Better Farm and president of betterArts. Nicole’s work has been featured in Mother Earth News, Reader’s Digest, Time Out New York, and many other publications. Her first book, Better: The Everyday Art of Sustainable Living, is due out this July through New Society Publishers.

Spring Prep

Spring is barreling at us full-speed-ahead, thank goodness!

It's time to get the gardens, raised beds, and compost prepped for next week, when we'll begin planting in Better Farm's greenhouse.

There are a lot of moving parts involved with keeping several gardens going, so it helps around here to keep a careful to-do list in order to make sure everything gets taken care of. From seed selection to dirt prep to planting, here's what we'll be busy with in the next few weeks.


All the Moving Parts
Our garden map has been a huge help keeping ideas organized for seed selection, companion planting pairs, and placement. This year we'll also be keeping track of how much food in pounds we produce; and the cost-effectiveness of keeping backyard birds for mini-tilling, egg production, and garden fertilization. Here are the other pieces to the puzzle:

Pasteurization of Compost
We blogged earlier in the week about the importance of pasteurizing any compost you plan to start seeds in, in order to prevent a harmful phenomenon called "damping off" and the sprouting of any errant seeds from your compost heap.

Seed Selection
This week we ordered our seeds, which will arrive in the next 4 to 6 days. Here's what we've got to plant:

Herb Beds 
Amaranth, Arugula, Asparagus, Chia, Chives, Cilantro, Cumin, Dill, Garlic, Lemon Balm, Lettuce, Marjoram, Mint, Mustard Greens, Oregano, Rosemary, Sage, Spinach, Swiss Chard

Main Garden
Artichoke, Asparagus Bean, Beets, Black Beans, Bok Choy, Broccoli, Brussel Sprouts, Cabbage, Cannelini Beans, Cauliflower, Carrot, Celery, Chick Peas, Corn, Cucumber, Edamame, Hubbard Squash, Kale, Kidney Beans, Leek , Lentils, Onion, Peanuts, Peas, Peppers, Potatoes, Radishes, Squash, Sweet Potatoes, Tomatoes, Watermelons

Mandala Garden
Artichoke, Cantaloupe, Eggplant, Lavender, Marigolds, Mulberry Trees, Nasturtiums, Okra, Pumpkin, Rhubarb

Aquaponics
Lettuce, Spinach, Various Herbs

Sprouts
Alfalfa, Broccoli, Chia

Grounds Prep
With a mulch garden outside, four big raised herb beds, and an aquaponics setup, there's a lot of ground to cover and enrich. As soon as some of this snow gets going, the chicken tractors will begin their migrations throughout the gardens so the birds can get things good and turned over between now and June. More hay will also be added to the rows (along with the compost heap that's been working itself over all winter.

The herb beds will be raked out (we've been mulching with wood chips and hay throughout the winter) to allow space for garlic, leeks, chives, mint, and asparagus to re-assert themselves.

The aquaponics pea gravel will need to be cleaned, the filters changed, and a new round of greens planted.

Scheduling
Next week we'll get a big chunk of our seeds into potting soil and out to the greenhouse. Peas will go directly into the ground in mid-March, and (weather permitting), direct-plant seeds will go into the garden in late May and early June. Potatoes will go into dirt in April.

If you are interested in volunteering in Better Farm's gardens once or on an ongoing basis, please contact us at info@betterfarm.org.
Comment

Nicole Caldwell

Nicole Caldwell is a self-taught environmentalist, green-living savant and sustainability educator with more than a decade of professional writing experience. She is also the co-founder of Better Farm and president of betterArts. Nicole’s work has been featured in Mother Earth News, Reader’s Digest, Time Out New York, and many other publications. Her first book, Better: The Everyday Art of Sustainable Living, is due out this July through New Society Publishers.

Green Thumb: Pasteurize Your Compost

We've run into some issues in the last few years when compost being used as po

tting soil

for new seeds has

led to

all kinds of erran

t seedlings sprouting

(we're looking at you, cherry tomatoes!). The compost has harbored seeds of all kinds that were thrown out, only to hang around until spring when we try to grow other seeds out of the

newly formed dirt.

While this may be welcome in some instances, in others i

t's important that your compost not sprout unwanted weeds or plants you

d

on

't intend to take care of

.

We've al

so learned that

"damping-off" (a horticultural condition caused by pathogens killing or weakening seed

s and seedlings)

can zap your seedlings before they have a fighting chan

ce to grow. 

These issues can be solved in one fell

swoop by paste

urizing your compost before

using it for p

otting soil

.

A

bout "Damping

-

Off"

Most prevalent in wet and cool conditions,

damping-off

happens when pathogens kill or weaken seeds and seedlings.All symptoms result in the death of at least some seedlings in any given population. Groups of seedlings may die in roughly circular patches, the seedlings sometimes having stem lesions at ground level. Stems of seedlings may also become thin and tough ("wire-stem") resulting in reduced seedling vigor. Leaf spotting sometimes accompanies other symptoms, as does a grey mold growth on stems and leaves. Roots sometimes rot completely or back to just discolored stumps.

Seeds that are infected with damping off will not germinate and plant stems shrivel causing seedlings to topple over and die. If you have waited an unusually long time for a particular seed to germinate, brush the soil away and carefully take a peak. If it is dark and mushy it has damping off and the only thing left to do is start over, this time with clean potting soil.

This problem happens everywhere things grow, no matter where you live and there is absolutely no remedy once plants and seeds are infected. The answer is prevention.

Damping off can be prevented or controlled in several different ways. Sowing seeds in a sterilized growing medium can be effective, although fungal spores may still be introduced to the medium, either on the seeds themselves or after sowing (in water or on the wind). Maintaining drier conditions with better air circulation helps prevent the spread of the disease, although it can also prevent or slow down germination. Spraying or drenching the soil with a recommended anti-fungal treatment (such as

copper oxychloride

) also helps suppress the disease. Homemade solutions (including ones made from

chamomile tea

or

garlic

) are used by some gardeners for this purpose.

Pasteurizing Compost

Note: the following

tips were gleaned from

Aradacee.

Many people choose the safest route to prevent hitchhiking see

ds and damping-off by

buying a pre-sterilized package of potting soil, if you have a large amount of pots and flats to fill, this could be expensive. By taking a couple of extra steps before you begin, you can use your own rich, organic compost.

Some people "bake

"

their soil in their oven to kill micro-organisms. But this process of sterilization kills everything, even the healthy organisms that you have worked so hard to create.

The answer is simple: Instead of sterilizing compost and garden soil, pasteurize it. While sterilizing kills virtually all surface-dwelling microorganisms, when you pasteurize your potting mixture, it is only heated to a temperature that kills harmful organisms and leaves beneficial organisms alone.

How-To

To pasteurize, take a large aluminum-baking pan and cover it with three to four inches of potting soil, insert a meat thermometer in the center and place in a preheated oven, at 200°F., once the center reads 160°F., bake for 30 minutes. Allow mixture to cool thoroughly before using

.

Comment

Nicole Caldwell

Nicole Caldwell is a self-taught environmentalist, green-living savant and sustainability educator with more than a decade of professional writing experience. She is also the co-founder of Better Farm and president of betterArts. Nicole’s work has been featured in Mother Earth News, Reader’s Digest, Time Out New York, and many other publications. Her first book, Better: The Everyday Art of Sustainable Living, is due out this July through New Society Publishers.

DIY Upcycled Planter Design

Elyna's vertical garden in Better Farm's library.
We wrote last week about a simple vertical gardening project utilizing discarded plastic bottles. Intern extraordinaire Elyna Grapstein came up with another system over the weekend that she applied in Better Farm's library. And to get into the mix of things, betterArts resident Kevin Carr upcycled some plastic bottle caps to make us a colorful planter for our overgrown aloe plants.


It was simple serendipity that in the midst of all this going on, summer Millsite Lake-dweller Tammy Leach Lueck stopped in at Better Farm to drop off some herbs she grew over the summer in her garden (she and her husband headed back to Florida Saturday and couldn't talk all the plants with them). Basil, nasturtium, oregano, rosemary, and parsley plants filled out our planters systems quite nicely.

Here are some photos of Elyna putting the vertical garden together. For this design, you cut a hole in the bottom of a bottle, put the top of the next bottle through that hole, and screw the top on:


And the finished pieces:


For Kevin's design, he attached bottle caps with hot glue:


Got a great DIY idea? Share it with us at info@betterfarm.org.
Comment

Nicole Caldwell

Nicole Caldwell is a self-taught environmentalist, green-living savant and sustainability educator with more than a decade of professional writing experience. She is also the co-founder of Better Farm and president of betterArts. Nicole’s work has been featured in Mother Earth News, Reader’s Digest, Time Out New York, and many other publications. Her first book, Better: The Everyday Art of Sustainable Living, is due out this July through New Society Publishers.

Vertical Garden Update

One of Better Farm's vertical garden setups is finally under way! Yesterday in the greenhouse, three beautifully painted plastic bottles were hung with just a few nails and some wire along a wall in the greenhouse. Not only is it exciting to have started a living, growing, space saving garden, but the bottles certainly brighten the greenhouse, as well.


The next step is to figure out the proper way to take care of these plants. One piece of advice we've been given is to mist the leafy green plants everyday instead of watering them like any outdoor plant. Leafy plants will get mites when grown indoors if natural growing conditions are not reproduced (like morning dew). Misting will keep the mites away, and more than that, it will also allow for fresh air flow.

There is also always an issue of getting your indoor plants the proper amount of sunlight. Vegetable plants generally need at least 6 hours of sunlight per day in order to produce vegetables at all. However, light can be increased in a number of ways. Mirrors or any kind of reflective surface, like mylar for example, can nearly double the amount of lumens reaching your plants.

Our next project is going to be a vertical herb garden in the kitchen—possibly also using plastic bottles. The only difference will be the goal of creating a vertical garden while also implementing a drip irrigation system. But don't worry, we'll keep you all updated on that too!

Lettuce Present: Aquaponic harvest

Lettuce and baby herbs in our aquaponic grow bed.
Back in July we finished our aquaponic setup in Better Farm's library, complete with grow light, grow bed, light stand, and 70-gallon fish tank which also served as a home to a dozen or more koi, goldfish, minnows, and one friendly sucker fish.

Just one month later, our crop of organic, loose-leaf lettuce is ready for harvest. That's a full month earlier than most lettuce grown in dirt! The leaves on our aquaponic lettuce are unbelievably delicate and nutritious—be sure to stop by our farm stand and see for yourself! You can read all about the benefits of aquaponic gardening here.

Here are some photos of our setup:


For more information on setting up an aquaponic system in your own home, school, or office, click here.
Comment

Nicole Caldwell

Nicole Caldwell is a self-taught environmentalist, green-living savant and sustainability educator with more than a decade of professional writing experience. She is also the co-founder of Better Farm and president of betterArts. Nicole’s work has been featured in Mother Earth News, Reader’s Digest, Time Out New York, and many other publications. Her first book, Better: The Everyday Art of Sustainable Living, is due out this July through New Society Publishers.

Aquaponics Part IV: Why Aquaponics?

The aquaponic setup at Better Farm.
By Noah Bogdonoff
In case you missed it, Better Farm has been steadily working on setting up an indoor aquaponic garden. We’ve taken you through the set-up and installation of our own system, but one big question remains: Why aquaponics? What can this type of system give us that we don’t already get from our (beautiful!) garden?


Firstly, aquaponic gardening is space-efficient. This isn’t so much an issue up in the North Country, where land is easy to come by, but in urban areas aquaponic gardening could revolutionize the way people think about food. Because aquaponic systems don’t require soil, all one needs to garden is enough space for a fish tank and a growing container that can fit atop it. This is also space-efficient in that it builds vertically, preserving precious floor space! Since many residents and interns (myself included) hail from cities, this is a perfect way for them to get started with sustainability when they return to their natural habitats.

Secondly, this system provides us with food year-round. North Country winters are notoriously harsh and the availability of fresh produce could save us from a winter of frozen and canned foods. For people living far away from grocery stores or those who don’t have easy access to organic and local foods, aquaponics is a surefire way to add some fresh, healthy food to your diet without having to go on a road trip. And, speaking of road trips, aquaponic gardening is a beautiful form of “lifestyle activism”—by growing food in your own home, you can avoid wasting the energy required to transport the food as well as the energy required to drive to the store.

The third big advantage of aquaponic gardening is that, given all of the above, it actually saves you money and time. As with outdoor gardens, growing your own food can save you hundreds or thousands of dollars every year. The average payback time for an aquaponic garden has been estimated at two years, meaning that after two years, you’ll have saved the amount of money you spent on the system. After that, your average cost of living per year will decrease. Unlike traditional gardens, however, which require laborious hours of weeding, watering, and tending, aquaponic gardens are extremely low maintenance. Once the nitrogen cycle is set up and the seeds are planted, the closed-loop nature of the system allows it function mostly on its own, as long as you’re feeding your fish. Once a plant is fully grown, just pull it up and pop another seed in its place.  

There are many more reasons to go aquaponic, but it’s easy to see why the above three could completely change the landscape of food politics in cities, suburbs, and harsh climates. Stop by the farm later on in the summer to see the fruits (well, vegetables) of our labor!

Aquaponic Gardening Phase III: Build your light stand

Our aquaponics set-up has been enjoyed an ideal nitrogen level for months now, with the ecosystem of various fish and water plants settling into a healthy regimen and routine. Our grow light arrived two weeks ago (ordered through the newly opened North Country Hydroponics in Waterotown), and we scooped up some gravel for inside the grow bed. All that's left to do is build our light stand, add seeds, and watch 'em grow.


There are tons of designs on the market for building a grow light stand, or you can buy your own for a pretty penny. We liked the simple, lightweight construction afforded by plastic pipes; though you could create a similar design with 1x1's as long as your light isn't too heavy.

Here are some easy plans for building a 24-inch grow light stand, courtesy of Cornell University. If you're like us and have a different size grow bed/light system/tank, be sure to adjust the measurements listed below to accommodate your system.

Before you start:

Before making any connection, make sure that the pipe and fitting are correctly positioned. (See diagrams.) Insert the pipe into the fitting as far as you can by hand. The fitting has an internal ridge. The end of the pipe should touch this ridge. Hit the fitting with a block of wood until the pipe is snug against the ridge. Several blows with some force will probably be necessary.

Cut the pipe:

Most types of saws will make the cuts. A miter box is helpful to make straight cuts.

  1. From one 10' pipe length saw two 49" pieces and two 8" pieces.
  2. From a second 10' pipe length saw three 36" pieces.
  3. From the third 10' pipe length saw one 36" piece, two 8" pieces and eight short pieces.
    To determine the length of the short pieces: Measure the depth a pipe will enter an elbow from the edge of the elbow to its internal ridge. (This depth varies depending on the manufacturer of the fitting.) Measure the similar internal depth in a Tee. Add the two depths together and subtract 1/8". This will be the length of the eight short pieces to be cut.
  4. From the fourth 10' pipe length two other pieces will be cut after their lengths are determined.
Assemble the base:
  1. Connect one 90º elbow to a 49" pipe. Connect another elbow to other end of the pipe in the same direction as the first elbow. Connect elbows to other 49" pipe in the same manner.
  2. Figure 2

  3. Position a Tee in the proper direction. Insert a short piece of pipe between them and force the fittings together. Connect three other Tees in the appropriate directions.
  4. Figure 3

  5. Connect two 8" pipes (one fitting at a time) between the Tees on each side of the base.
  6. Figure 4
Assemble the top:

The front assembly of the top should have the same width as the front assembly of the base.
  1. Place an elbow and a Tee touching each other along one end of the front of the base. Place another Tee and an elbow touching each other along the other end of the front of the base.
  2. Measure the distance between the edges of the Tees and then add to this measure the depths the pipe will fit into the two Tees. (This depth varies depending on the manufacturer of the fittings.) The total is the length of each of the two pieces of pipe remaining to be cut.
  3. Figure 5

  4. Cut the two pieces. With two elbows, two Tees, two short pieces of pipe and one of the new pieces of pipe, connect the front assembly of the top. Connect the back assembly of the top with similar pipes and fittings.
  5. Figure 6

  6. Connect the front and back assemblies of the top with two 8" pieces of pipe.
  7. Figure 7
Final assembly:

Connect each of the four 36" pipes to the four Tees on the base. Position the top assembly onto the 36" pipes. Connect the four Tees of the top, one at a time, to the 36" pipes.

Figure 8

Hang the shop light

Loop the chain around a top 8" pipe and close the loop by connecting the end of the chain to one of its links with an S hook. Similarly loop the other piece of chain around the other top 8" pipe. With S hooks attach the lower end of the chains to the slots on the shop light.

The distance between the top of the plants and the shop light can be adjusted by changing the lengths of the loops.

Double shoplight option
If you would like to double the depth of the unit described, cut and use four 17" pieces of pipe instead of the four 8" pieces. Purchase a second 48" fluorescent shop light (2 lamp) (40 watt), one 48"cool white fluorescent bulb (40 watt), one 48" daylight (warm) fluorescent bulb (40 watt), (4) S hooks ( 1" size) and (2) 2 ½ feet of chain ( loops large enough for S hooks).

This system of using two shop lights will allow you to adjust the height of each set of lights independently and provide light to both short and tall plants within the same unit.

24-inch model:
If you have limited space, you can construct a frame that will accomodate a 24" shop light. This smaller version requires only 3 10' sections of PVC pipe. Follow these initial cutting instructions:

  1. From one 10' pipe length saw two 25" pieces and two 34" pieces.
  2. From a second 10' pipe length saw two 34" pieces. Two other pieces will be cut from this pipe after their lengths are determined.
  3. From the third 10' pipe length saw four 6" pieces and eight short pieces. Follow instructions above for determining the length of the short pieces.
  4. Follow the assembly instructions above, only substitute the 25" pieces for the 49" pieces, and the 34" pieces for the 36" pieces.

Read about our aquaponic set-up in its entirety:
Aquaponic Gardening: Phase I
Aquaponic Gardening: Phase II
Building a Grow Bed for your Aquaponic Garden
Comment

Nicole Caldwell

Nicole Caldwell is a self-taught environmentalist, green-living savant and sustainability educator with more than a decade of professional writing experience. She is also the co-founder of Better Farm and president of betterArts. Nicole’s work has been featured in Mother Earth News, Reader’s Digest, Time Out New York, and many other publications. Her first book, Better: The Everyday Art of Sustainable Living, is due out this July through New Society Publishers.

Signs of Spring

Hands in dirt: sure sign of spring.
The first week of March marks the very beginning of the growing season up here in the North Country: prepping and planting seeds, stocking the greenhouse, turning our compost, and getting the rows in the garden ready.

First, we went out to the compost heap and shoveled beautiful, black dirt into old plastic bags to use as potting soil. Then we took all our flats out of the greenhouse and set them up on the picnic table:
Our weekend intern, Shani, at left, and our latest resident, Sue.
Here are Shani and Susan filling the trays with dirt:

To make labels for the plants, Shani cut up empty plastic water bottles and Susan used a Sharpie to write out the names of the veggies we were planting. Once we pushed the seeds into the dirt, it was out to the greenhouse with the soon-to-be sprouts:

To keep the babies hydrated, we're utilizing rainwater from the catchment system installed last summer:

This week we'll be filling the greenhouse, moving the compost heap, and beginning construction on a new chicken coop for our incoming feathered friends. Spring is upon us!

If you'd like to volunteer with us, e-mail info@betterfarm.org.
Comment

Nicole Caldwell

Nicole Caldwell is a self-taught environmentalist, green-living savant and sustainability educator with more than a decade of professional writing experience. She is also the co-founder of Better Farm and president of betterArts. Nicole’s work has been featured in Mother Earth News, Reader’s Digest, Time Out New York, and many other publications. Her first book, Better: The Everyday Art of Sustainable Living, is due out this July through New Society Publishers.

The Art of Regrowth

Image/Squidoo
Why should your cans, plastic, and paper have all the fun? If you've got a sunny south-facing window in your home, you can recycle the otherwise discarded parts of many everyday pieces of produce to regrow delicious scallions, potatoes, and even mangoes. Check out the tutorials referenced below for full information on having an indoor garden all year round.

(Editor's note: When regrowing any of the below-listed items, be sure to use only organic plants. Non-organic plants not guaranteed to grow. But consider that if you buy one organic piece of produce, such as an onion, each time you regrow it you're getting your money back!)


  •  Scallions: Did you know scallions will regrow indefinitely in a glass of water on your kitchen counter? Lifehacker recently posted the following:
If you like to cook with scallions (aka green onions or green shallots), did you know you can keep the white root ends from purchased scallions in a glass of water and they will regrow almost indefinitely? Household weblog Homemade Serenity shares how scallion ends can regrow in in a glass of water. Just put the root ends in a glass of water and put that glass in a sunny window. After a few days you should be able to begin harvesting the green ends of the scallions. Make sure you change the water every so often and cut what you need with scissors before cooking.
  • Potatoes Got an old potato that's started sprouting eyes? Click here to learn how to turn that into a whole new plant.
  • Onions  Instead of tossing those onion bottoms into the compost heap, why not grow your own fresh onions out of them? You can theoretically create an endless supply of onions without ever having to buy bulbs or seeds—check out how over at Instructables.com. You can also regrow onions in a simple glass of water—click here to learn how.
If you like those, here are a few more ideas for re-growing food right on your kitchen counter (from Cornell's "Trash Goes to School" instructable).

  • White Potato in Soil: Take a white potato that is showing "eyes" and cut a section that includes an eye (about 1 square inch). Place it in a pot of moist soil, about 2" deep. Keep the plant moist but do not "drown" it. Field potatoes are planted this way. 
  • Sweet Potato in Water: In the middle of a sweet potato, stick 3 to 4 toothpicks evenly spaced. Place the potato in a glass of water and put it in a sunny window. Either end can be rooted. Keep the water level high, and after a week or more the potato will usually sprout roots and vine-like stems and leaves. At this point, you need to replant the potato into a pot with soil. 
  • Carrot Top in Water: Cut about 1" - 1 1/2" off the top of 4 to 6 carrots. Fill a shallow bowl 2/3 full of washed pebbles (pebbles help support the tops.) Place the carrot tops over the pebbles. Add water to the level of the pebbles and maintain this level at all times. Soon the tops will sprout pretty foliage. 
  • Pineapple in Water: To separate the top from the fruit, hold the fruit firmly with one hand and twist the leafy head with the other. The top should come right off. Remove the lower leaves until the stump is about 1 1/2" long. Put the top in a glass of water and change the water weekly. When roots are 3" to 4" long, transplant to a pot.
Plants from Seeds:

  • Avocado Pits: Remove the pit from an avocado and allow it to dry for 2-3 days. Peel away as much of the onion-like skin as possible. One-third of the way down, inset four toothpicks at regular intervals. The flat end is the bottom and the pointed end is the top. Put the pit in a glass of water so that 1/2" of water covers the base of the pit. When the roots are 4" long, transplant the pit to a pot and keep it in a bright, warm window. Keep the soil evenly moist at all times. 
  • Mini-Fruit Trees: Citrus plants can be grown from seeds removed from oranges, grapefruits, lemons, and tangerines. Soak the seeds overnight in water. Plant 1/2" in moist potting soil. Cover the pot with a plastic bag or a piece of plastic wrap, and put in a warm spot. When the seeds start to grow (in a few weeks), remove the plastic. Keep the plant in a warm, sunny window. 
  • Beans, Peas, and Lentils: Soak dried beans, peas, or lentils overnight in warm water. Fill a pot 2/3 full with potting soil. Place three seeds on the top of the soil and cover with 1/2" of soil. Cover the pot with plastic wrap. After the seeds start to grow, remove the plastic. Put the plant in a warm, sunny window, and keep the soil evenly moist. It may be necessary to tie the plants to a small stake as they grow. 
  • Herbs: Use anise, caraway, coriander, celery, dill, or fennel seed. Fill a 6" pot 2/3 full with moist potting soil. Place six seeds on top of the soil and cover with 1/2" of soil. Cover the pot with plastic wrap and place in a warm spot. After the seeds begin to grow (3-8 days), remove the plastic and place the plant in a sunny window. After a few weeks, you will have a lovely feathery foliage that can be snipped and used in cooking. 
  • Peanuts: Make sure you use fresh, unroasted peanuts. Fill a large, 4" deep plastic bowl 2/3 full with moist potting soil. Shell four peanuts and place them on top of the soil, covering them with 1" of soil. The plant will sprout quickly. In a couple of months small, yellow, pealike flowers will develop along the lower part of the stem. After the flower fades, the ovary swells and starts to grow toward the ground and pushes into the soil. Peanuts will be ready to harvest in about six months.
Plants from Exotic Fruits:

  • Mango: In the center of the mango, there is a large hairy husk with a pit in it. Scrape off all the excess flesh from the husk and gently pry open with a dull knife. The pit is best started in a sphagnum bag. Fill a Ziploc bag with dampened peat moss or sphagnum. Place the pit in the bag and make sure it is completely surrounded by moss. Check every day to make sure the pit is not dried out or rotted from too much moisture. When the roots are 4" long, transplant to a pot that is at least 1" larger than the pit. 
  • Papaya: Papayas are not easy to grow because the plants have a tendency to dampen off (die) at about 6" tall. When you cut the papaya open, you will find hundreds of black seeds surrounded by a gelatinous aril (seed covering). To remove the aril, spread some seeds on a paper towel and roll them with your fingers until the aril squashes off. Plant the seeds immediately in a container with sterile potting soil. Give them bottom heat and high humidity until they pass the critical stage of 6" high. Papayas are rapid growers, and once they are established, they will not need a lot of water and fertilizer. 
  • Tamarind: Tamarind pods look like brown lima beans. The outer shell is brittle and easily peels back, revealing a sticky, brown, pulp. Within this pulp there are five or six shiny black pits. Nick the pits (with a nail file) and soak them until they swell, usually in a few hours. Plant the pits in a container with potting soil and place in a sunny window. Tamarinds are water-loving plants and should never be allowed to dry out. As they grow, pinch them back to make the plant fuller.
Comment

Nicole Caldwell

Nicole Caldwell is a self-taught environmentalist, green-living savant and sustainability educator with more than a decade of professional writing experience. She is also the co-founder of Better Farm and president of betterArts. Nicole’s work has been featured in Mother Earth News, Reader’s Digest, Time Out New York, and many other publications. Her first book, Better: The Everyday Art of Sustainable Living, is due out this July through New Society Publishers.