|
| Solar radiation map of Better Farm by Elyna Grapstein. |
Elyna Grapstein studied sustainability at
Better Farm in September of 2012 before going on to study at
SUNY-ESF's ranger school in Wanakena, N.Y.
While there, her projects have included land-cover mapping (as we
showcased in December on our blog), and more recently, solar radiation mapping of Better Farm's property. Below are her findings.
 |
| Elyna Grapstein's completed solar radiation map and guide. |
Solar Radiation on Better Farm Property
by Elyna Grapstein
INTRODUCTION:
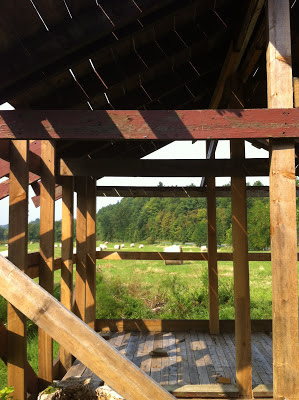
Better Farm, a sustainability education center and artist colony, exists as a place where visitors and residents have the opportunity to experiment in a way which will "[enhance] the local and regional community by offering each individual the opportunity to expand, grow, and flourish sustainably." I feel that one productive way in which Better Farm may choose to experiment is with renewable sources of energy—specifically solar power. These maps were made with the intention of displaying where solar radiation is strongest and weakest on Better Farm's property in the case of wanting to install solar panels in the future, and where those panels would be be placed based on solar radiation strength and current land conditions.
STUDY AREA:
Better Farm is located in the
Indian River Lakes region of Jefferson County, New York, in the hamlet of Redwood. It is set in the center of several lakes: east of
Butterfield Lake, west of Lake of the Woods, northeast of
Millsite Lake, and southwest of Grass Lake. Set west of the Adirondack Region, Redwood's topography consists of hills and wetland.
METHODS:
First, I set up ArcMap 10 through
ArcGIS so that I could use the basemap feature, World Imagery. I then navigated to the
Jefferson County website and located the Better Farm property parcel number and boundaries through interpreting Jefferson County's tax parcel. Once the property was located, I took a screen shot and saved the image as a .jpeg. Doing so allowed me to crop and edit the screen shot so only the necessary image components were present. I added tax parcel data, adjusted its transparency so I could see the parcel's outline and base layer for georeferencing. Once that was done, I was able to heads-up digitize a polygon shapefile of Better Farm's property.
The other piece of downloaded data was a Digital Elevation Model (DEM) of Redwood. This was necessary to map solar radiation. I was also able to access this data from the Jefferson County website.
After the polygon of the property was made, I began to cut the polygon using the "cut polygons" tool to distinguish different land uses. This was done through interpretation of orthoimages and my own knowledge of the property. Once this was done, I added the necessary features to make it a complete map (Fig. 1). Figure 2 is designed to portray the amount of solar radiation that comes in contact with the property. This map was created by turning on the spatial analyst extension property and then extracting the mask so only the DEM raster cells that are within the property parcel would be exercised. My downloaded DEM file was the "input raster" and the polygon of the Better Farm property that I had digitized was the feature mask data.
From here, deriving solar radiation was straight forward. After selecting "Area Solar Radiation" under "Spatial Analyst Tools", inputting the extracted Better Farm DEM and selecting the time configuration for the year 2013, I was able to create a map of solar radiation.
To create Figure 3, figures 1 and 2 were overlapped, the solar radiation map was made transparent use the "Effects" toolbar, and the spaces that had the highest solar radiation were marked using a "points" shapefile.
RESULTS:
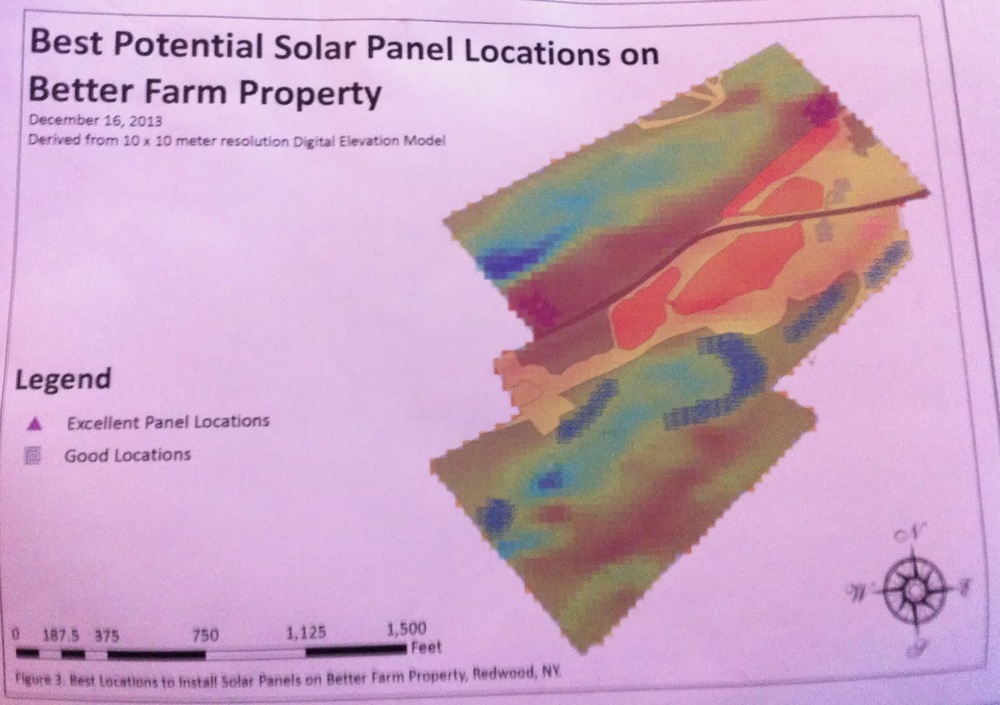 |
| Fig. 3 |
Based on these map overviews, it seems the spaces that experience the highest amounts of solar radiation are located on the forested portions of the property. This is not unexpected, as approximately 73 percent of the property is forested (Fig. 1, Table 3). However, the areas experiencing the strongest amount of solar impact also happen to be located on edges; so if solar is ever to be installed at these locations, getting to these spots and clearing forested spaces would not be nearly as involved relative to other locations on the property.
The areas with the second-greatest amounts of solar radiation are generally located in more remote zones and are more difficult to access; however there is one location on the southern end of the property's lawn that would make a good location to set up solar panels. No land clearing would be necessary, as the space is vacant and there is little slope to interfere with the installation (Fig. 3).
Though solar power may not be in Better Farm's immediate future, these three maps may be used as references for numerous other projects involving property management and planning—be it for organizing crop locations for Better Farm's garden, building trails through the forest, or even as an educational tool for visiting students and guests.
 |
| Fig. 1. |
|
| Fig. 2. |