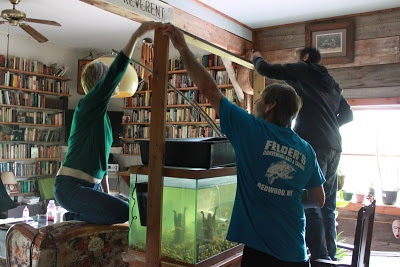
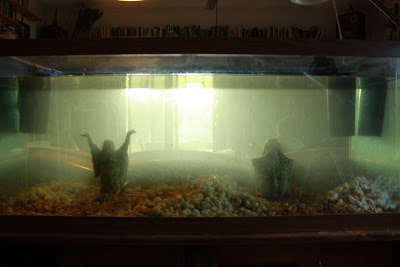
Troubleshooting At-Home Hydroponics and Aquaponics Kits

Better Farm's aquaponics tanks.
Aquaponics is the method of growing aquatic animals and crops simultaneously in a closed system. Water from the aquaculture component transfers to the hydroponics component, where nitrogen-fixing bacteria break down the byproducts into nitrates and nitrites (which the plants use as nutrients). The clean water then recirculates back into the aquaculture component, and the process starts again.


With Better Farm’s aquaponics system, a bed of lettuce and tomato rests above a fish tank, and pea gravel is used in place of soil. A tube transports water from the fish tank to the bed, and because the bed tilts at an angle, excess water drains back into the tank. Essentially, aquaponics requires no soil, fertilizers, weeding, or direct watering to grow the plants—and the fish tank gets cleaned out, too. Pretty darn cool.

Here's our first aquaponic tomato:
In any basic hydroponic or aquaponic system, you want to keep a close eye on a few major factors: one, the nutrients getting to your plants; two, the health of your water (and fish in aquaponics); and three, the life cycle of your plants and timing regular clean-outs for your setup.
 
We learned by trial-and-error that in an aquaponics setup, you need to be careful how much food you are feeding your fish. Too much, and you'll be dealing with a disastrously cloudy tank.  We dealt with this last month by doing a thorough cleaning-out of the entire grow bed. Rinsing out the pea gravel and scrubbing the container (and scrubbing the walls of fish tank, and changing the tank's filters) gave us a pristine system in which to continue growing.

Yesterday, we did our annual maintenance of the hydroponic setup, which involves cleaning out the grow bed and water tank, scrubbing the gravel, and refilling the tank with fresh water.


The annual or semi-annual maintenance required for aquaponics and hydroponics makes these methods some of the easiest for growing fresh, organic produce.

Further reading:
Aquaponics at Better Farm
Hydroponics

Hydroponics Update

Baby buttercrunch lettuce in Better Farm's new hydroponics setup.
Three weeks after hooking up a hydroponics kit in Better Farm's library, baby buttercrunch lettuce is thriving!

Buttercrunch is a heat-tolerant variety of lettuce with silky green leaves. A great salad choice, buttercrunch is a good source of vitamin A and phytonutrients. We like it because of its ability to grow year-round in any medium: all summer long outside, early spring in raised beds, and throughout the winter in our aquaponics and hydroponics.

We had a couple minor troubleshooting issues with the hydroponics, mostly dealing with water levels and amounts of pea gravel. Too little gravel and too much water at first threatened to drown the immature plants. I added pea gravel last night to each container, which helped—but was extremely tedious because I had to first carefully remove the plants and then add additional gravel. To offset this additional mass, I removed some of the water and added it to some houseplants. The organic nutrients in the hydroponics water should work as steroids for those other plants.

The buttercrunch seedlings first appeared less than a week after we set up the tank; and are now firmly rooted in the pea gravel. In three to four  more weeks, we should have our first bumper crop of lettuce. We're replenishing our nutrients every two weeks to keep the plants hearty and healthy. Stay tuned for our taste test in a couple of weeks!

Got a group interested in learning how to set up aquaponics or hydroponics? Better Farm offers private workshops! Get in touch at info@betterfarm.org.
Comment

Nicole Caldwell

Nicole Caldwell is a self-taught environmentalist, green-living savant and sustainability educator with more than a decade of professional writing experience. She is also the co-founder of Better Farm and president of betterArts. Nicole’s work has been featured in Mother Earth News, Reader’s Digest, Time Out New York, and many other publications. Her first book, Better: The Everyday Art of Sustainable Living, is due out this July through New Society Publishers.

DIY Pollination

Pollinating tomato plants in Better Farm's aquaponic garden.
Gardening applications such as indoor aquaponics and hydroponics are wonderful for a host of reasons: temperature and climate control, the absence of pests and weeds, and control over the grow cycle. But playing garden god has its consequences; not the least of which being the utter lack of pollinators and helpers-along, namely bees and the wind.


Put simply, there are two types of pollination: same-flower pollination, and multi-flower pollination.
  • Same-flower pollination Veggies and fruits in this category include peppers, tomatoes, and eggplants. In these plants, pollen just needs to be released from one part of a flower to another part in the same flower in order for pollination to occur. Wind is the most common pollinator here, literally “shaking loose” the pollen. Insects, like bees, also help with the vibration of their wings or the physical action of their climbing on flowers moving the pollen around.
  • Multi-flower pollination Plants in this category include cucumbers, melons and squash. These plants produce both male and female flowers. For pollination to occur, pollen must move from the male flower to the female flower. Generally, this is accomplished by insects flying or crawling from one flower to another.
With same-flower pollination, gently shaking or vibrating the plants or individual flowers a few times a week (daily is best) after flowers appear is the most straight-forward way to ensure pollinations.

For plants with male and female flowers, you're going to have to manually transport pollen from male flowers to females. Can't tell which is which?  Male flowers are smaller and you can often see the pollen as “dust” inside. Female flowers tend to be larger and often have a small, unfertilized fruit at their base. For example, with cucumbers, you can actually see a small ½ inch long cucumber at the base of the female flowers. If left unpollinated, this will drop off. If pollinated, it grows into a full-sized fruit.

To fertilize these plants, you can use a Q-tip or tiny paintbrush. Just dab the male flowers a few times and then dab the female flowers and buds. This morning I pollinated tomato plants and clovers using both methods just for due diligence. I'll be knee-deep in aquaponics for the next few weeks repeating the process and capturing pics of the progress. Here are some action shots:


Comment

Nicole Caldwell

Nicole Caldwell is a self-taught environmentalist, green-living savant and sustainability educator with more than a decade of professional writing experience. She is also the co-founder of Better Farm and president of betterArts. Nicole’s work has been featured in Mother Earth News, Reader’s Digest, Time Out New York, and many other publications. Her first book, Better: The Everyday Art of Sustainable Living, is due out this July through New Society Publishers.

Hydroponics System in Place

Better Farm's newly installed hydroponics kit.
A neighbor last year donated a gently used hydroponic kit to Better Farm for us to grow fresh produce in year-round. This, in addition to our existing aquaponics setup, allows students visiting the farm to learn about small-scale indoor agricultural production: a perfect application for those living in homes without outdoor garden space, or for anyone who wants fresh produce year-round. The hydroponics system is an alternative method to aquaponics, which required fish to make the plants grow.

We waited until this winter to install the hydroponics kit, as we had our hands full all spring, summer, and fall with outdoor agricultural adventures. Now with this additional growing space, we've dedicated the aquaponics tank to grow tomatoes through the winter and tasked the hydroponics tank with lettuce and other salad greens. Because the hydroponics tank runs without the use of fish, we have to artificially add organic fertilizers and growth boosters in order to nourish the plant life.


The setup:
A FluoroWing Hydrofarm compact fluorescent system:

A two-tier grow bed, "Ebb and Flow" Hydrofarm system (water tank in bottom with pump to bring water to top growing layer; another filter to bring water back down into lower tub):

 Pea gravel:

Nutritents (we are using FloraDuo from General Hydroponics):


How the system works:
Our hydroponic "garden" is based out of a 22"x22"x10" tub. The Ebb & Flow System pumps nutrient solution up from a reservoir to a controlled water-level tray. All plants are watered uniformly. To determine how much nutrient to put in the water, we referred to the easy-to-follow instructions on the FloraDuo packaging. Nutrients need to be replenished every one to two weeks, and we'd encourage regular water tests to make sure you've got the right pH and nitrogen levels to make your plants fluorish.

While we're pretty well-versed in aquaponics at this point, hydroponics is a new adventure for Better Farm. With that in mind, this first go-round will include only buttercrunch lettuce for its adaptability and hardiness. We've got our grow light set on a 12-hour cycle, and should have sprouts in the next few days. We'll post our results in a future blog.

If you or a group would be interested in attending a small workshop on how to make aquaponics or hydroponics work for you, please contact us at info@betterfarm.org or (315) 482-2536.
Comment

Nicole Caldwell

Nicole Caldwell is a self-taught environmentalist, green-living savant and sustainability educator with more than a decade of professional writing experience. She is also the co-founder of Better Farm and president of betterArts. Nicole’s work has been featured in Mother Earth News, Reader’s Digest, Time Out New York, and many other publications. Her first book, Better: The Everyday Art of Sustainable Living, is due out this July through New Society Publishers.

Setting up Simple Hydroponics

We decided to raise the bar this year from our aquaponics system, which provides us with fresh herbs and salad greens year-round, to include a hydroponic garden that will grow tomatoes all winter long.

Here's our already established aquaponics setup (

freshly cleaned and replanted

!):

Hydroponic gardening works just like aquaculture; but instead of getting nutrients from fish waste, hydroponics relies on added organic fertilizers to keep plants healthy. We got our setup from a neighbor, which utilizes a

Hydrofarm fluorescent grow system

and individual planters for our tomatoes.

Water will run out of the lower chamber and up over the individual pots, filled with pea gravel, and run back into the lower tank. We ordered a new grow light today for the system, and will be fully set up next week. Perfect timing, since the tomato seeds we saved are in the process of drying out for a few more days.

Comment

Nicole Caldwell

Nicole Caldwell is a self-taught environmentalist, green-living savant and sustainability educator with more than a decade of professional writing experience. She is also the co-founder of Better Farm and president of betterArts. Nicole’s work has been featured in Mother Earth News, Reader’s Digest, Time Out New York, and many other publications. Her first book, Better: The Everyday Art of Sustainable Living, is due out this July through New Society Publishers.

Hydroponic Tomatoes

In addition to the

aquaponics

setup at Better Farm, we're installing a hydroponics system this year in order to grow tomatoes all winter long. While researching the best methods for a prolific crop, I came across a great tutorial at

Vertical Hydroponic

that walks you through the whole process. Those instructions are below.

Tomatoes are one of the most popular species of plants to grow hydroponically. Although many types of plants exhibit faster growth rates and accelerated fruit development in hydroponic systems, soft-tissue plants like tomatoes do especially well.

<!-- @page { margin: 0.79in } P { margin-bottom: 0.08in }

-->

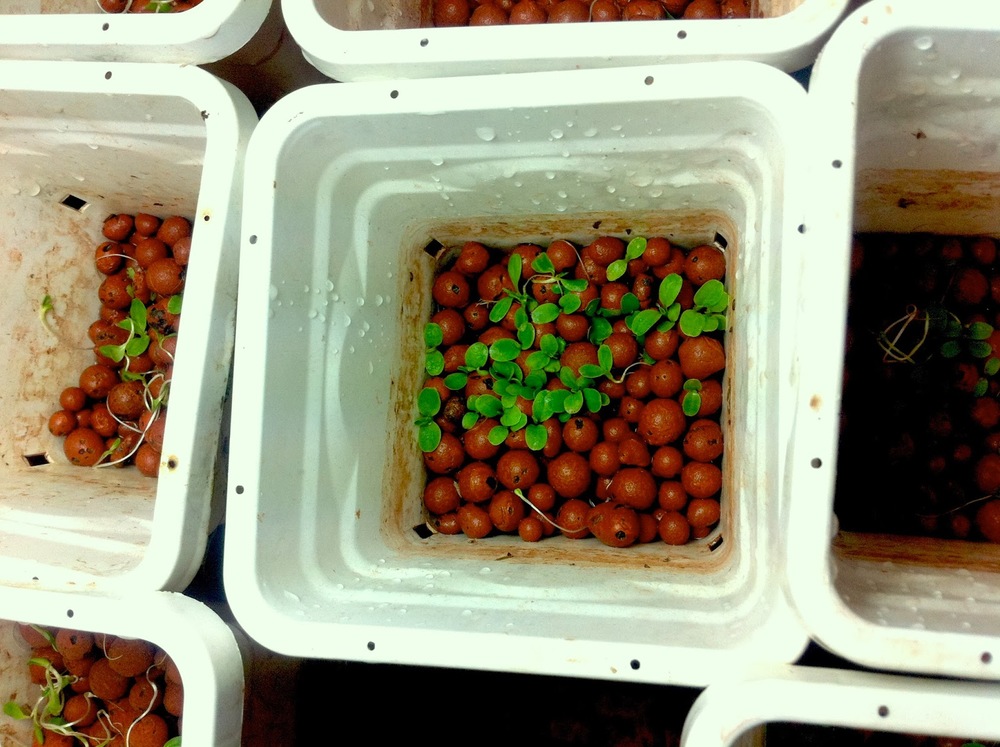
Tomato Seeds or Starts

Since tomato seeds germinate relatively rapidly, most growers will begin their tomato plants from seed. Tomatoes seeds take approximately 10 to 14 days to germinate. A tomato plant will become fully mature in about two months. There are hundreds of different cultivars of tomatoes, including determinate and indeterminate varieties. Cherry, Roma, and Beefsteak are just some of the many popular tomato cultivars. Determinate varieties produce a large crop of tomatoes all at once and may also top off at a specific height. Indeterminate varieties produce multiple crops that grow in overlapping stages. Most heirloom varieties of tomatoes are indeterminate. It’s a good idea to research the different cultivars to find out which variety works best for your gardening situation. After about two weeks, your tomato plants should be ready to transplant into your hydroponic system.

After inserting the strongest plant starts into your hydroponic system, your tomato plants will begin to produce fruit within 60 days. Make sure you plan ahead and have an appropriate support system for your tomato plants. Tomatoes are a soft-tissue vining plant that requires a lot of support. Without a trellis or support stakes, the stems of your plants will most likely break under the weight of the tomato fruits.

Although spacing will depend on the particular variety that you are growing, typically tomato plants should be spaced about 18 to 24 inches apart. However, you can place the plants closer together if you train the vines appropriately to allow enough room for the fruits to develop. Vertical hydroponic systems such as the Bio-Tower are especially well suited to growing vining plants like tomatoes since the vines can easily hang off the sides of the growing containers.

Like many other fruiting plants, tomatoes require pollination in order to develop fruits. This will naturally occur in an outdoor environment from wind movement or bee activity. If you are growing indoors, you can either manually pollinate your flowers by touching different flowers with a small brush, or you can use alternating wind currents to induce cross-pollination.
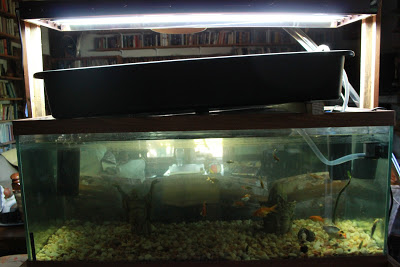
Light

Tomatoes like a lot of light but can thrive with as little as seven hours of sunlight per day. However, tomatoes in too much strong direct sunlight may eventually show signs of heat stress.

Temperature

Ideally the temperature for tomatoes should remain between 65 to 80 degrees Fahrenheit during the day and between 55 to 65 degrees during the nighttime.

Nutrients

As a fruit-producing plant, most tomato varieties require relatively high levels of phosphorous and potassium. A typical hydroponic nutrient solution for tomatoes has a pH between 5.5 and 6.5. Tomatoes may also require a calcium supplement since the creation of fruit uses significant amounts of this secondary nutrient. However, make sure to follow the instructions for your particular brand of nutrients before adding any supplements to your reservoir.

Harvesting

After approximately 60 days, you should begin to have tomatoes that are large enough to harvest. Although there are many different varieties, most tomatoes turn red when they become ripe. You can pick off immature fruits and blossoms to maximize the size of the remaining fruits. You can also increase your harvest by “suckering” your tomato plants. “Suckering” is simply removing internodal branches that are not producing fruit. This encourages the plant to devote more nutrients to the branches that are producing fruit.

Pests and Diseases

Tomatoes are susceptible to a variety of plant diseases; including tobacco mosaic virus, fusarium wilt, and various other mildews and fungi. Tomato plants require significant amounts of calcium for fruit development so blossom end rot is another common problem that growers encounter. Common pests include the cutworm, aphids, and the tomato hornworm. Check with your local garden supplier to find the best pest prevention treatments for your particular environment. Remember, birds, squirrels, and deer will also eat tomatoes if they can get access.

2 Comments

Nicole Caldwell

Nicole Caldwell is a self-taught environmentalist, green-living savant and sustainability educator with more than a decade of professional writing experience. She is also the co-founder of Better Farm and president of betterArts. Nicole’s work has been featured in Mother Earth News, Reader’s Digest, Time Out New York, and many other publications. Her first book, Better: The Everyday Art of Sustainable Living, is due out this July through New Society Publishers.

Hydroponics: Reservoir method

Up here in Redwood we're receiving frost every night and expecting snow anytime. During these times when the garden doesn't produce as much we like, we have come up with simple instructions for creating a homemade hydroponic system.

To create hydroponics using the reservoir method is surprisingly easy. The first thing needed is a tub to hold the water and the plants, it can be a fish tank or a large bin or container. Following this, a sheet of Styrofoam should be cut out to the bottom dimensions of the tub with a quarter inch less than each dimension. Then, the plant pots should be appropriately arranged on the Styrofoam tray and traced in a formation that will allow each plant to get the light they need. Cut a hole in the Styrofoam along the tracings so that the plant containers can rest on the tray easily.

The next step is to get an air pump specific for the amount of water in the tub (be sure to measure how many gallons it takes to fill your reservoir). Connect the pump to the tub so the airline is well below the tray so that the oxygen flow can reach the roots of the plants.

The plant containers used can be filled with soil or another growing agent or they can simply support the seeds from falling in the water.

Make sure to supplement the water with nutrients depending on the growing material used for the plants. Once the air pump, tray and containers are complete, fill the halfway to two thirds with water and drop the tray in. Add the pots, and place a grow lamp overhead, turning it on and off every 12 hours. That's the basics for deep water culture hydroponics! We'll be back with more ways to keep your kitchen full of greens in the winter!

For detailed information on creating your own aquaponics setup, click here

.

Comment

Nicole Caldwell

Nicole Caldwell is a self-taught environmentalist, green-living savant and sustainability educator with more than a decade of professional writing experience. She is also the co-founder of Better Farm and president of betterArts. Nicole’s work has been featured in Mother Earth News, Reader’s Digest, Time Out New York, and many other publications. Her first book, Better: The Everyday Art of Sustainable Living, is due out this July through New Society Publishers.

Aquaponic Setup Complete!


Aquaponics in action!
Our aquaponic growing experiment is complete! The seeds are planted, the light is on, the water is circulating, and the fish are doing what they do best—swimming around in the water, eating, hanging out, and fertilizing the tank system.

Here's a quick synopsis of how we got to where we are:

First, we consulted with a dear friend who works for Brooklyn Farms about how to set up our tank, what supplies we needed, and how the whole thing works. He started us out with these marching orders:
  • Purchase at least a 40-gallon fish tank, with two corner filters and gravel for the bottom
  • Fill the tank with water
  • Two days later, add fish. At first, only add feeder fish. Some will die—and when they do, leave them floating in the water. As the feeder fish break down, they'll be ammonia-based waste. Bacteria will slowly colonize and turn ammonia into nitrite (ammonia and nitrite are both toxic to plants). After that, more bacteria will colonize and change nitrite into nitrate, which is usable fertilizer.
Next up was letting the whole system grow into itself, so to speak. The water underwent weekly nitrogen and pH tests until everything was just right. Then it was time to pick up our grow bed, water pump, tubing, light and grow bed medium. The last two on that list came from the newly opened North Country Hydroponics in Watertown. With all the supplies at the ready, it was time to build the stand for our grow bed, borrowing from a design that utilized PVC tubing. We instead used wood scraps we had on the property:
Intern Director Jaci Collins, left, with Carl Frizzell and Noah Bogdonoff
Then we hooked up the pump and tubes so the water came up out of the tank and over the pea gravel in the grow bed (we also poked holes at one end of the grow bed so the water could drain back out into the tank):

Finally, it was time to plant the seeds. But how do you plant seeds directly into gravel? Here are some tips we gleaned online:
  1. Select your seeds. To grow directly from seed rather than seedling, use small seeds such as carrots, herbs, radishes, lettuce or other salad greens.
  2. “Broadcast” the seeds over your aquaponic system by gently tossing them on the growing surface -- in this case, the water of the growing beds. Allow the seeds to settle into the gravel at the bottom of the bed. Distribute the seeds as evenly as possible.
  3. Insert seeds into seed-starting media if you're attempting to grow larger plants such as beans, cucumbers, melons or peas. With your index finger, push seeds into the center of starting media such as rockwool or peat sponges. Distribute the media evenly throughout the growing beds.
  4. Clean young seedlings thoroughly under a water faucet, removing all dirt before attempting to plant them in your aquaponic system. Arrange seedlings evenly, gently securing their roots with the gravel of the growing beds.
  5. Keep the fish-to-tank volume ratio at about 2:1 as you grow your seeds. Feed the fish daily -- fish consume about 1.5 percent of their body weight each day. Maintain consistent water quality and pH levels, and clean your filtration system and tubing once a month. When plants appear, trim or harvest them as needed for each individual plant type.
(Tip: Seeds that require lots of acid, such as blueberries, generally don't perform well in aquaponic systems.)

Now we wait for the seedlings to appear. Stay tuned!

For more information on this process, click here.
Comment

Nicole Caldwell

Nicole Caldwell is a self-taught environmentalist, green-living savant and sustainability educator with more than a decade of professional writing experience. She is also the co-founder of Better Farm and president of betterArts. Nicole’s work has been featured in Mother Earth News, Reader’s Digest, Time Out New York, and many other publications. Her first book, Better: The Everyday Art of Sustainable Living, is due out this July through New Society Publishers.

Hydroponics Store Opens in Watertown


North Country Hydroponics, a one-stop shop for learning about and purchasing items for hydroponics, will host its grand opening next Saturday, May 19, at its Arsenal Street location.

Kelly and Thomas Mason are opening the store at 1283 Arsenal St. (in the Price Chopper plaza) in order to provide all of the necessary hydroponics needs for the North Country.

Be sure to stop in next Saturday to learn about how you can grow hydroponically in any sized home (this is a particularly great method for those of us living in small, dimly lit apartments!). The website, www.northcountryhydroponics.com, will feature products available for sale and general information about hydroponics. You can also "like" the business on Facebook by clicking here.

Want to learn more? E-mail Kelly Mason at  kelly@northcountryhydroponics.com.
Comment

Nicole Caldwell

Nicole Caldwell is a self-taught environmentalist, green-living savant and sustainability educator with more than a decade of professional writing experience. She is also the co-founder of Better Farm and president of betterArts. Nicole’s work has been featured in Mother Earth News, Reader’s Digest, Time Out New York, and many other publications. Her first book, Better: The Everyday Art of Sustainable Living, is due out this July through New Society Publishers.

The Art of Regrowth

Image/Squidoo
Why should your cans, plastic, and paper have all the fun? If you've got a sunny south-facing window in your home, you can recycle the otherwise discarded parts of many everyday pieces of produce to regrow delicious scallions, potatoes, and even mangoes. Check out the tutorials referenced below for full information on having an indoor garden all year round.

(Editor's note: When regrowing any of the below-listed items, be sure to use only organic plants. Non-organic plants not guaranteed to grow. But consider that if you buy one organic piece of produce, such as an onion, each time you regrow it you're getting your money back!)


  •  Scallions: Did you know scallions will regrow indefinitely in a glass of water on your kitchen counter? Lifehacker recently posted the following:
If you like to cook with scallions (aka green onions or green shallots), did you know you can keep the white root ends from purchased scallions in a glass of water and they will regrow almost indefinitely? Household weblog Homemade Serenity shares how scallion ends can regrow in in a glass of water. Just put the root ends in a glass of water and put that glass in a sunny window. After a few days you should be able to begin harvesting the green ends of the scallions. Make sure you change the water every so often and cut what you need with scissors before cooking.
  • Potatoes Got an old potato that's started sprouting eyes? Click here to learn how to turn that into a whole new plant.
  • Onions  Instead of tossing those onion bottoms into the compost heap, why not grow your own fresh onions out of them? You can theoretically create an endless supply of onions without ever having to buy bulbs or seeds—check out how over at Instructables.com. You can also regrow onions in a simple glass of water—click here to learn how.
If you like those, here are a few more ideas for re-growing food right on your kitchen counter (from Cornell's "Trash Goes to School" instructable).

  • White Potato in Soil: Take a white potato that is showing "eyes" and cut a section that includes an eye (about 1 square inch). Place it in a pot of moist soil, about 2" deep. Keep the plant moist but do not "drown" it. Field potatoes are planted this way. 
  • Sweet Potato in Water: In the middle of a sweet potato, stick 3 to 4 toothpicks evenly spaced. Place the potato in a glass of water and put it in a sunny window. Either end can be rooted. Keep the water level high, and after a week or more the potato will usually sprout roots and vine-like stems and leaves. At this point, you need to replant the potato into a pot with soil. 
  • Carrot Top in Water: Cut about 1" - 1 1/2" off the top of 4 to 6 carrots. Fill a shallow bowl 2/3 full of washed pebbles (pebbles help support the tops.) Place the carrot tops over the pebbles. Add water to the level of the pebbles and maintain this level at all times. Soon the tops will sprout pretty foliage. 
  • Pineapple in Water: To separate the top from the fruit, hold the fruit firmly with one hand and twist the leafy head with the other. The top should come right off. Remove the lower leaves until the stump is about 1 1/2" long. Put the top in a glass of water and change the water weekly. When roots are 3" to 4" long, transplant to a pot.
Plants from Seeds:

  • Avocado Pits: Remove the pit from an avocado and allow it to dry for 2-3 days. Peel away as much of the onion-like skin as possible. One-third of the way down, inset four toothpicks at regular intervals. The flat end is the bottom and the pointed end is the top. Put the pit in a glass of water so that 1/2" of water covers the base of the pit. When the roots are 4" long, transplant the pit to a pot and keep it in a bright, warm window. Keep the soil evenly moist at all times. 
  • Mini-Fruit Trees: Citrus plants can be grown from seeds removed from oranges, grapefruits, lemons, and tangerines. Soak the seeds overnight in water. Plant 1/2" in moist potting soil. Cover the pot with a plastic bag or a piece of plastic wrap, and put in a warm spot. When the seeds start to grow (in a few weeks), remove the plastic. Keep the plant in a warm, sunny window. 
  • Beans, Peas, and Lentils: Soak dried beans, peas, or lentils overnight in warm water. Fill a pot 2/3 full with potting soil. Place three seeds on the top of the soil and cover with 1/2" of soil. Cover the pot with plastic wrap. After the seeds start to grow, remove the plastic. Put the plant in a warm, sunny window, and keep the soil evenly moist. It may be necessary to tie the plants to a small stake as they grow. 
  • Herbs: Use anise, caraway, coriander, celery, dill, or fennel seed. Fill a 6" pot 2/3 full with moist potting soil. Place six seeds on top of the soil and cover with 1/2" of soil. Cover the pot with plastic wrap and place in a warm spot. After the seeds begin to grow (3-8 days), remove the plastic and place the plant in a sunny window. After a few weeks, you will have a lovely feathery foliage that can be snipped and used in cooking. 
  • Peanuts: Make sure you use fresh, unroasted peanuts. Fill a large, 4" deep plastic bowl 2/3 full with moist potting soil. Shell four peanuts and place them on top of the soil, covering them with 1" of soil. The plant will sprout quickly. In a couple of months small, yellow, pealike flowers will develop along the lower part of the stem. After the flower fades, the ovary swells and starts to grow toward the ground and pushes into the soil. Peanuts will be ready to harvest in about six months.
Plants from Exotic Fruits:

  • Mango: In the center of the mango, there is a large hairy husk with a pit in it. Scrape off all the excess flesh from the husk and gently pry open with a dull knife. The pit is best started in a sphagnum bag. Fill a Ziploc bag with dampened peat moss or sphagnum. Place the pit in the bag and make sure it is completely surrounded by moss. Check every day to make sure the pit is not dried out or rotted from too much moisture. When the roots are 4" long, transplant to a pot that is at least 1" larger than the pit. 
  • Papaya: Papayas are not easy to grow because the plants have a tendency to dampen off (die) at about 6" tall. When you cut the papaya open, you will find hundreds of black seeds surrounded by a gelatinous aril (seed covering). To remove the aril, spread some seeds on a paper towel and roll them with your fingers until the aril squashes off. Plant the seeds immediately in a container with sterile potting soil. Give them bottom heat and high humidity until they pass the critical stage of 6" high. Papayas are rapid growers, and once they are established, they will not need a lot of water and fertilizer. 
  • Tamarind: Tamarind pods look like brown lima beans. The outer shell is brittle and easily peels back, revealing a sticky, brown, pulp. Within this pulp there are five or six shiny black pits. Nick the pits (with a nail file) and soak them until they swell, usually in a few hours. Plant the pits in a container with potting soil and place in a sunny window. Tamarinds are water-loving plants and should never be allowed to dry out. As they grow, pinch them back to make the plant fuller.
Comment

Nicole Caldwell

Nicole Caldwell is a self-taught environmentalist, green-living savant and sustainability educator with more than a decade of professional writing experience. She is also the co-founder of Better Farm and president of betterArts. Nicole’s work has been featured in Mother Earth News, Reader’s Digest, Time Out New York, and many other publications. Her first book, Better: The Everyday Art of Sustainable Living, is due out this July through New Society Publishers.

Aquaponic Gardening: Phase II

Goldfish and minnows get acquainted with the Buddha. Photo/Nicole Caldwell
We told you last week about our plans to create an aquaponic grow station at Better Farm in order to grow salad greens, tomatoes, and peppers year-round.

Marching orders from our aquaponic/hydroponic setup consultant, Marco Centola of Brooklyn Farms, included getting our hands on at least a 40-gallon fish tank with two corner filters, gravel, and air circulator, letting water sit in the tank for two days, then adding a bunch of feeder fish to get the nitrogen cycle started.

I hit the pet store the next day to assess our options and make a note of prices, then scoured Craigslist to find great deals. We scored a 70-gallon tank and stand from Craigslist for $180—about $100 less than the cost of a new, 40-gallon tank and stand at the local big-box pet store in Watertown. Next up was picking out filters:
We also grabbed a pH test kit with "pH Up" and "pH Down" control additives, a bunch of fish food, gravel, awesome Indian sculptures, and even a few bulbs that will allegedly grow plants:


Here's an excerpt from an e-mail Marco sent to me outlining the process:
The first thing you should do is to setup the aquarium:
  • Rinse the tank well
  • Rinse the gravel well, food strainer makes the job easier
  • Place a flexible airstone at the bottom with the air line coming out and cover it with gravel (this is still on our to-do list!)
  • Fill the tank with water and begin aerating and filtering the water.
  • After 24 hours you can introduce the first feeder fish or you can put a couple of raw dead shrimp into the tank to begin the nitrogen cycle. 
After four days, you can take the dead fish out and replace with feeder fish.  From here you need to check ammonia, nitrite, and nitrate levels once a week. Feeder fish are cheap and WILL die but the purpose of them is to see when they can survive for more than four days. It should take from four to eight weeks to establish a strong enough nitrogen cycle to get some nice fish in there.  When testing, you will see ammonia spike high at first then nitrite, and finally nitrate. 

Though nitrate is safer, it is still toxic in large quantities and regular water changes are a must.  when you change water in a fish tank you must make sure there is no chlorine or you will kill all the beneficial bacteria that has already colonized.  I usually let water sit out 24 hours, which allows the chlorine to evaporate.  You should also only change 20 percent of the water at a time.  Fish are sensitive to temp, pH, and any drastic change, so this should soften the blow.

Is he the best, or what?! We added the fish yesterday (the woman at the pet store warned us the water would get pretty cloudy once the fish went in, which she said was normal as the nitrogen cycle begins and levels out. "Don't do anything when that happens!" she told me, "after a few days the water will clear.") Now, we wait a few days to see how the little fish fare. So far they've made it 24 hours with no fatalities (thank goodness for Better Farm's well water? Or is the good luck of our statuary?).


For more great information about aquaponics, visit Backyard Aquaponics.

More about our aquaponics experiment:
Aquaponic Gardening: Phase I

Aquaponic Gardening: Phase I

With winter coming, we're down to cauliflower, leeks, Brussels sprouts, cabbage, and celery out in the garden—which means our tomatoes are canned and blanched, our string beans are canned (and some sauteed and frozen), and soybeans are frozen (ready for

edamame

).

Instead of being reduced to (gasp!) shopping for all our produce at the grocery store, and since we've got a stellar intern riding out the cold months with us in the North Country, I consulted this morning with dear friend Marco Centola of

Brooklyn Farms

about creating a hydroponic setup at

Better Farm

to grow fresh salad greens (and even a tomato or pepper plant) year-round.

We're very interested in not just going hydroponic, but in utilizing earth systems to make this happen. Marco brilliantly suggested we create an

aquaponic

setup with a fishtank where we could raise any kind of freshwater fish we wanted, including—if we go large, with a 100-gallon tank or bigger—trout or other edible fish for the omnivores of the house.

Marco explained that setting up the fish tank has to happen about a month before introducing plants to the system. Here are my marching orders for the next few weeks before Marco comes up to initiate the full system with us:

  • Purchase at least a 40-gallon fish tank, with two corner filters

  • Fill the tank with water

  • Two days later, add fish. At first, Marco explained, we should only add feeder fish. He says these fish will die ("Bad genetics and bad water quality," he explained); and that when they do, we should leave them floating in the water. As the feeder fish break down, they'll be ammonia-based waste. Bacteria will slowly colonize and turn ammonia into nitrite (ammonia and nitrite are both toxic to plants). After that, more bacteria will colonize and change nitrite into nitrate, which is usable fertilizer.

So, I'm off this afternoon to pick up a tank, filter, and a few bags of gravel, and of course, cool under-the-sea decorations. In a couple of days I'll pick up a ton of feeder fish (which, if my past pet-rearing experience holds true, will never die, not for years and years). I'm also going to get Intern May started on researching the

nitrogen cycle

so she's a regular aquaponics expert by the time Marco shows up in November. First phase of the experiment underway, stay tuned for photos and updates!

To learn more about Better Farm's sustainability internship program or to apply,

click here

.

1 Comment

Nicole Caldwell

Nicole Caldwell is a self-taught environmentalist, green-living savant and sustainability educator with more than a decade of professional writing experience. She is also the co-founder of Better Farm and president of betterArts. Nicole’s work has been featured in Mother Earth News, Reader’s Digest, Time Out New York, and many other publications. Her first book, Better: The Everyday Art of Sustainable Living, is due out this July through New Society Publishers.

Ones to Watch: Brooklyn Farms

Dear old friend to Better Farm Marco Centola is part of an exciting initiative in Brooklyn to encourage people to grow their own food, compost, and eat locally.

Brooklyn Farms, a hydroponic superstore in Cobble Hill, is expanding to include a consulting and installation firm, a learning center where they'll teach less-fortunate city kids how to grow food, and a hydroponic community garden where people can rent a small plot and come garden year-round.

"Being a sustainability center," says Marco, "we plan on running most of our electricity off solar and wind power and we want to offer composting for the community. The business model is being put together as we speak."

Marco recently launched an installation at his other place of business,

The Brooklyn Kitchen

, so the restaurant can grow its own herbs for its recipes:

From our herb garden, you can pick up hydroponically grown basil, mint, sage or thyme: cut to order and sold by weight. Buy just what you need, so you don’t have to store or toss unused herbs! And watch as we expand our selection to include lovage, thai basil and more! Long associated with the more (ahem) illicit side of agriculture, hydroponic gardening is also a fairly practical way to grow your own food, a very gratifying activity too often unavailable to city folk. There are so many crops you can grow hydroponically, even exotic edibles that aren’t normally native to our region, that your garden will quickly pay for itself in saved grocery store costs.

Stay tuned for partnership information between Brooklyn Farms and Better Farm including workshops, free tips, information on building your own hydroponic garden, community outreach initiatives, and more. And feel free to e-mail

Marco

with any questions you have about hydroponics.

Comment

Nicole Caldwell

Nicole Caldwell is a self-taught environmentalist, green-living savant and sustainability educator with more than a decade of professional writing experience. She is also the co-founder of Better Farm and president of betterArts. Nicole’s work has been featured in Mother Earth News, Reader’s Digest, Time Out New York, and many other publications. Her first book, Better: The Everyday Art of Sustainable Living, is due out this July through New Society Publishers.