Sustainable Ways to Save Energy and Water

Sustainable Ways to Save Energy and Water

Whether you have a cabin in the woods or simply want to reduce your utility bills, saving energy and water can be done relatively cheaply, it just takes some creative thinking and a little work. Many of us have the desire to live totally off grid, or are already living the life of being energy efficient and farming but either way here are some steps you can take to push your sustainability further, help the planet and save some money while you do it.

Read More

Keeping A Modern Farm Eco-Efficient Isn't Difficult If You Know How

Keeping A Modern Farm Eco-Efficient Isn't Difficult If You Know How

Is running a farm that has a high eco-efficiency  level a massive challenge? You might not think so, but many farmers would disagree. They are under the impression that keeping their farm green and making it efficient is a steep slope to climb. Is it really, though? Of course not. In fact, we would argue that as long as you know the right steps to take, going green is easy. We are living in an age where farms are more intensive than ever. A lot of the processes are not completed by machines. But even with that machinery, it’s possible to keep your farm eco friendly.

Read More

Heating the Home with Renewable Resources

In the United States, energy use accounts for 82 percent of our greenhouse gas emissions. Fracking for shale gas brings with it a host of environmental concerns (shale gas is expected to comprise 50 percent of all natural gas produced in the U.S. by 2035, by the way), while our continued reliance on coal and oil are killing the planet (if you want to ruin your day, check out this ever-timely article by Bill McKibben in Rolling Stone). But there are renewable resources we could be tapping into in order to heat our homes this winter.

To get Better Farm off its fuel-oil furnace, we're now sporting a wood stove (utilizing standing-dead trees on the property and logs from a woodlot three miles away) and pellet stove. We of course realize these options aren't available to everyone. So depending on where you live and what's available to you, consider looking into one of these options for producing heat in your home this year.

Geothermal

Geothermal solutions are prized for their efficiency. These all-in-one 'forced-air' or 'water-to-air' systems can provide comfort to your home more efficiently than any other type of ordinary system. Put simply, geothermal is a method for heating and cooling a structure using the constant ground temperature. In reality the Earth is the world’s largest solar collector and at depths of roughly 5 feet below grade the Earth has stored enough energy to maintain about a 50 degree temperature ( in our area of Pennsylvania) year round. Geothermal heating and cooling utilizes a ‘ground source’ heat pump to either extract heat from the ground during the winter or reject heat into the ground during the summer. While the geothermal setup will pull additional electric, a solar kit can change all that.

(Western Pennsylvania Geothermal Heating and Cooling, Inc.)

Solar-Powered Heat Pump

Modern ductless, mini-split air source heat pumps (ASHPs) run 2-3x as efficiently as traditional 'resistive' electric heat, making the cost to run the units equivalent to buying oil at $1.68/gallon.

Simultaneously, they provide air conditioning using half the energy as traditional window or central air conditioning systems. Best yet—by installing a solar electric array to power the electric consumption of the heat pumps, you effectively have a solar space-heating system. Your solar array will generate credits in the summertime (when it is sunniest) which allow you to run the heat pumps in the wintertime (when it is coldest). Your system will effortlessly generate all the 'fuel' it ever needs from clean, abundant sunshine!

(From ReVision Energy)

Pellet Stoves

The new pellet stove coming soon to Better Farm's library.

For those who like wood stoves but don't love handling firewood and tending the fire, pellet stoves are great options and utilize totally renewable resources. Pellets for these stoves are made from  compressed wood byproducts and other biomass. The appliances vary from designs that are lit manually, with heat output controlled directly by the homeowner using a dial or buttons, to those units that ignite electrically, with pellet supply and heat output controlled automatically by a wall-mounted thermostat. Wood pellets produce almost no net climate-changing carbon dioxide if they are used as fuel — although some fossil fuels typically are used in the manufacture and transportation of pellets. The technology for modern residential pellet heating systems was invented back in 1983. This technology is now reliable, mature, and effective. The main question left to answer is whether the pellet lifestyle makes sense for you. And to answer this question you need a glimpse inside the process.

(Mother Earth News)

Wood Heat

Wood is a totally renewable resource. If you live on a lot of property, there are seemingly endless reserves of standing-dead trees that can be harvested in a responsible way. We scored more than eight cords this year by doing responsible tree-felling in the woods at Better Farm alone, and there is plenty more where that came from. A few wood heat facts:

  • Wood-burning stoves are better in environmental terms as the amount of carbon dioxide released into the atmosphere is the same as that absorbed by the tree during growth.

  • Trees are a renewable resource (particularly when derived from plantations and cultivated woodland; or in our case, when you plant new trees and only cut down standing-dead ones). 

  • Wood ashes can be used very successfully in the vegetable garden (except in the area where you plan to grow potatoes). Mix the ash thoroughly with your soil. Tomatoes seem to benefit especially from soil that has been mixed with a small quantity of wood ash.

  • Nothing is cozier than sitting around inside on a frigid day in front of a toasty-warm wood stove. Nothing.

Care to share your methods of alternative heat? Email info@betterfarm.org.

DIY Soda Can Solar Heater

If you're looking for something to do as the temperatures drop away, why not give this passive solar soda can heater a try? All you'll need is some black spray paint, a bunch of empty aluminum cans, some 2x4s, and a few basic tools.

The solar soda can heater works by bringing in cool air from your home, garage, or shop through an intake hose at the bottom of the unit. Air rises through the system, which is warm from absorbing sunlight. Air comes out the top and back inside through the outtake hose—some bloggers are

reporting at as much as 120 degrees hotter than when it entered

!

We found a few variations on the design from

Hemmings Daily

,

Fair Companies

and

Instructables

. Here's the basic gist; write to us with your variations and photos on the project! And yes, it works: There's even a Canadian company,

Cansolair, Inc.

, selling the things.

Materials

  • 240 aluminum cans

  • 3 - 8 ft. 2x4s

  • 4 ft. x 8 ft. x 1/2 in. sheet of plywood

  • High-temperature silicon

  • 4 ft. x 8 ft. sheet of Plexiglas or Lexan

  • A can of heat-resistant flat black spray paint.

  • Plastic tubing

  • Drill Press with wide drill bits

  • Screws

  • Optional Air Blower (consider a solar-powered unit)

Instructions

  1. Construct a wooden frame out the the 2x4s, approx. 4 ft. wide x 8 ft. high x 3 1/2 in. deep. 

  2. Cut a piece of plywood this size and nail it to the back of the frame.

  3. Drill a hole in the top center of the frame - this is where you'll connect your outlet hose.

  4. Drill a hole in the bottom of the frame - this is where your inlet hose will be connected.

  5. Drill large holes in the tops and bottoms from all the cans except for 16 which will be on the bottom row.  For those, drill the holes in the tops and sides.  Caution! Aluminum cans are sharp - use heavy work gloves or other means to hold them in place as you cut the holes out.

  6. Start placing your cans into the frame.  Create 16 columns of 15 cans each.  Stack them one at at time, sealing them together as you go along.  Make sure the ones with side holes are on the bottom row.  Allow the silicone sealant to cure.

  7. Spray the cans and frame with the heat-resistant flat black paint.

  8. Cover the frame with the sheet of Plexiglas or Lexan.

  9. Cut holes in the side of the building that line up with holes in the top and bottom of the solar panel.  Air will be drawn from the building through the lower hole, which should be just above floor level, and be returned through the upper hole.

  10. Mount the completed panel on the exterior wall of the home.  Alternatively, you might mount the panel in a separate frame that will allow it to be tilted more toward the sun for better exposure.

  11. Install the blower at either the inlet or outlet.  This is not essential, but will increase the efficiency of your solar heater.

This unit allows air to flow all around the cans as it moves through the panel. A more efficient design will force all the air through the inside of the cans.  This will also avoid exposure of the air to the black paint.

Comment

Nicole Caldwell

Nicole Caldwell is a self-taught environmentalist, green-living savant and sustainability educator with more than a decade of professional writing experience. She is also the co-founder of Better Farm and president of betterArts. Nicole’s work has been featured in Mother Earth News, Reader’s Digest, Time Out New York, and many other publications. Her first book, Better: The Everyday Art of Sustainable Living, is due out this July through New Society Publishers.

Do These DIYs: Cooling the Home with Less Energy

Stills from the 1959 Twilight Zone episode "Midnight Sun".
As the thermometer dial climbs in the North Country this summer, we can only imagine what you city dwellers downstate and across the country are dealing with. But instead of automatically flicking on the AC the next time temperatures hit 80, consider using one of these easy DIY tricks instead—and save the big guns for the next extreme heat wave.

Homemade AC Designs
The folks over at the Good Survivalist have come up with a genius way to make a $454 air conditioner for about $15. Keeping your home cool in the summer can be very expensive if you use your air conditioner. This air conditioner is very simple to make, and can be made in a few minutes if your are handy.

Even if you are not handy you’ll be able to make one of these DIY air conditioners. One of the nice things about this air conditioner is that it will give you up to 6 hours of coolness. This thing works so well you may need to put on a sweatshirt! To make one of these babies you need a few simple tools, a couple of 5 gallon buckets, along with a few other items. Everything is shown in the video:


The crew at Snapguide has an alternative design, this one using a Styrofoam cooler:
Here's a great list of great, cooling life hacks anyone can do at home or work as alternatives to actual air conditioners, as gleaned from Life Hacker:
  • Create a Makeshift Air Conditioner—If you don't have an air conditioner, hopefully you have a fan. On its own, however, a fan isn't always sufficiently cooling. If your home is a hot air trap, blowing that hot air around isn't going to help much. Instead of just running the fan and hoping for the best, take a shallow bowl and fill it with ice. Place the bowl in front of the fan and as the ice evaporates, it will cool the air. 
  • Cool Your Drapes—If it isn't hotter outside than it is in your home, you've probably cracked a window already to at least cool things down a little bit. If you're finding an open window isn't sufficient, spray a sheet with cold water and use it to cover the window's opening. As the breeze passes through, the cold and damp sheet will cool it bringing in chilled air and further helping to reduce the temperature in your home. 
  • Schedule Your Windows—If all you have are windows to work with, you can still use them to your advantage. While the difference is more significant in arid environments, the temperature outdoors cools at night, and that's the air you want to let into your home. If you keep your windows closed while the sun is up and open them while the sun is down, you can trap the cooler air in your home and keep the temperature a few degrees lower. Even better: Set up a couple of inexpensive box fans in windows on opposite sides of a room to create a nice through-breeze. 
  • Do Nothing—Much of the heat in your home comes from heat-generating sources within it. If you avoid generating large amounts of heat you won't have as much of a need to cool. Things like air drying your clothes, skipping the dry cycle on your dishwasher, and turning off your computer(s) when they aren't in use are all good ways to keep the temperature down.
Comment

Nicole Caldwell

Nicole Caldwell is a self-taught environmentalist, green-living savant and sustainability educator with more than a decade of professional writing experience. She is also the co-founder of Better Farm and president of betterArts. Nicole’s work has been featured in Mother Earth News, Reader’s Digest, Time Out New York, and many other publications. Her first book, Better: The Everyday Art of Sustainable Living, is due out this July through New Society Publishers.

Home Energy Audits

Nothing like a good, ol'-fashioned winter to bring to light all the places in a home that don't hold heat. Whether you've got old windows, outdated insulation (or a total lackthereof), breaks in caulking or weatherstripping or gaps under doors, inefficiency in the home can account for major heat loss.

For those of us untrained in heating and cooling, figuring out where your home is most inefficient can be a daunting task. So states, many of them for free, offer home energy audits to individuals and families to figure out exactly where a house is losing energy—and money. Here's how it works: You fill out a form to apply for a home assessment. Based on income level, it is determined whether you will pay a low fee or none at all to have a professional come to your house for an inspection. Once you've been approved, you call up a certified contractor and arrange for the assessment.

Here's the information for those of you in New York.

The technician will perform a series of tests in order to create a full report on your home's energy efficiency. He or she will look for air leaks, examine insulation, inspect the furnace and duct work, perform a blower door test, and even use an infrared heat camera. With your report in hand, you can apply for tax credits or low-interest loans to help cover upgrade costs. Another option is to apply for on-bill recovery financing, in which you pay off a loan through payments made on your utility bill. Often, your energy savings will cover most of the cost of the work.

The nicest thing about this home energy audit is that it puts the power in your hands. You'll know what the most cost-effective angle is to take for increasing your home's energy efficiency because you'll know which aspect of your home's energy use is the least efficient and therefore the most cost-effective to correct. Many energy-saving upgrades pay for themselves in the first couple of years. That's a fast turnaround on a relatively minor investment!

Resources/Further Reading:

Comment

Nicole Caldwell

Nicole Caldwell is a self-taught environmentalist, green-living savant and sustainability educator with more than a decade of professional writing experience. She is also the co-founder of Better Farm and president of betterArts. Nicole’s work has been featured in Mother Earth News, Reader’s Digest, Time Out New York, and many other publications. Her first book, Better: The Everyday Art of Sustainable Living, is due out this July through New Society Publishers.

DIY Furnace and Duct Care for Energy Efficiency

More than $5 billion is wasted annually in America on energy literally slipping through the cracks. Leaky ductwork can account for up to hundreds of dollars wasted, and up to 30 percent of energy costs accrued by a single home during the coldest and warmest months every year.

The average home in Arizona, for example, has the equivalent of a gaping 3.5-square-foot hole in the middle of the house.

To have a truly energy efficient home, you have to be sure your ductwork is airtight. The truth is, very few homes with ductwork don't

lose some energy through the spaces in ducts. But as air escapes through leaks, you will miss out on the full impact of your heating or cooling system—and you're wasting a whole lot of energy. But it doesn't have to cost you hundreds to have a specialist come out. You can take certain home energy efficiency steps all on your own.

Symptoms of Leaky Ductwork

The only way to know what is happening in and around your home's air ducts is to have a professional home energy inspection, or energy audit. But there are some easy signs that leaks are present:

  • Your cooling system makes a lot of noise

  • Rooms never get properly heated or cooled

  • You notice higher humidity in your house

  • After a storm, you notice worse indoor allergies

  • Your HVAC system continuously needs repairing

  • You don't overdo it on heat or AC and yet your energy bills remain high

  • You don't feel the same level of airflow coming out of vents

In general, if your HVAC system isn't doing what it is supposed to do, you are likely to have problems with ductwork.

DIY Ways to Correct Furnace and Ductwork Issues

Seal Your Ductwork

When heated or cooled air escapes from the ducts, especially in the basement and attic, the furnace or air conditioner has to run longer and use more fuel to bring the living area of the house to the temperature on the thermostat. There's an easy fix:

foil tape

.

Simply wrap the foil tape around every duct seam in your basement or attic. DON'T USE DUCT TAPE! Despite its name, it isn't approved for duct sealing and it doesn't hold up well over the long term. Trust us on this—all the duct tape we found in the basement at Better Farm on the ducts had to be removed and replaced with foil tape.

Change Your Furnace Filter

Your furnace is pulling cool air from your house through its system, filtering it, and blowing it back out through ducts as warm air in the winter. While most people have their furnace filters changed annually, many homes could use a switch every few months.

Click here for a tutorial on changing your own air filter on your furnace

.

4 Comments

Nicole Caldwell

Nicole Caldwell is a self-taught environmentalist, green-living savant and sustainability educator with more than a decade of professional writing experience. She is also the co-founder of Better Farm and president of betterArts. Nicole’s work has been featured in Mother Earth News, Reader’s Digest, Time Out New York, and many other publications. Her first book, Better: The Everyday Art of Sustainable Living, is due out this July through New Society Publishers.

Winterizing the Farm

Are you cold yet?

Up here in Northern New York the temperatures have started dropping. I have had the pleasure of spending the last few days living at Better Farm to learn about sustainability and daily farming tasks. The first day I was here it was actually still in 40's, though it was a little drizzly and dreary. The next day the snow started to fall. While I have fallen in love with the wood-burning stove, I can't spend all day huddled in front of it.

With a large, older house, keeping the heat inside can sometimes be a challenge. Even in newer buildings, there are usually small gaps in insulation that can let in a cold draft. One surprising source of these drafts is the "dead space" behind electrical outlets and switch plates. While the amount of heat lost from a poorly insulated outlet is small, consider the number of outlets and light switches the average home has. When added together, the amount of heat loss adds up—statistics suggest each outlet or switchplate accounts for 2 percent of energy loss. One of my (thankfully indoor) tasks was to install pre-cut foam outlets in the farmhouse. It was really simple, and didn't take much time at all.
Removing lightswitch covers to insert foam insulation takes only a couple of seconds.
Outlet covers.
I could really feel a difference, especially with the outlets located on the exterior walls of the house. I also covered a window with insulating plastic sheeting. The plastic sheet shrank when heated with a hair dryer to seal all the way around the window. The plastic film can even be taken off later and reused if stored properly. There are many window and outlet insulation kits available on the market, and they don't appear do be very expensive. The most important thing to remember when trying to insulate against the cold is that the heat will try to find a way out. It is best to try and insulate every possible avenue of escape, even the little ones like outlet covers.

Other winterization activities around Better Farm included turning off the water to outside hoses, installing draft guards on infrequently used doors to the outside, hanging insulating curtains in front of windows in bedrooms, bathrooms and the kitchen, changing directions of the ceiling fans in the house, and sealing off rooms that won't be used this winter.

Speaking of winterizing, we also moved the chicken coops closer to the house yesterday in order to make cleaning them and feeding the chickens easier once the snow really starts to fall.

We didn't move the coops very far, but apparently the chickens didn't get the memo. I had been warned that the chickens might not be able to find their way home, but I don't think I was entirely prepared for it. There they sat, huddled together in the empty space where the coops used to be, while the newly cleaned coops sat empty. We actually had to go outside and try to catch them up, one by one, and place them in the coop. And they weren't keen on going quietly. We had three of us out there trying to herd the chickens home. It was a riot! It was so absurd it was hilarious. I haven't had a lot of experience with chickens, but I do want my own flock eventually. This was definitely a great bit of practice. Luckily for us, this is a sharp group of birds—by the next day, all 31 of them had adjusted to their reassignment:

As for me, I think I am going to spend a little time by the fire before heading back out into the tundra. Stay warm, everyone!

Using Fans in Winter

Fans: They're not just for summer anymore.

While fans can be great for dispersing cool air during summer months, it's important to realize they can also spread heat through a home all winter long. Most ceiling fans use about the

same amount of electricity as a 100-watt light bulb

; making fans a cheap, effective way to supplement temperature control in your home.

Keep in mind that fans should only be on when people are in the room to benefit from the air movement—fans do take up energy, and they even produce a little heat—a 1996 study in Florida (

not

Redwood!) determined that using ceiling fans appropriately could allow people to

raise the temperature inside

by 2°F, resulting in about a 14-percent annual cooling energy savings. However, the same study found that most people do not adjust their thermostats when using ceiling fans, actually increasing their energy use rather than reducing it. Something to keep in mind throughout the year!

We'll go over ceiling fans below; but also remember that smaller box fans and

doorway fans

can really help to distribute heat throughout your h

ouse. If you've got a fireplace

, wood stove or pellet stove—or if your forced-air furn

ace

vents aren't spread e

ven

ly throughout your house—these

small fans can make a huge

difference in distributing warmer a

ir (and returning cool air) in your ho

me.

Ceiling Fan Direction in Summer and Winter

The below information is gleaned from the

Ceiling Fan website

.

Ceiling Fan Direction in Summer – Forward / Counter Clockwise

ceiling fan direction for summer

image via Emerson

A ceiling fan’s direction in the summer should be rotating counter clockwise or forward to produce a

Wind Chill

effect by the downward airflow. The thermostat won’t actually change but the room will seem several degrees cooler due to the wind chill factor. You can save on air conditioning bills by placing ceiling fans throughout your home.  According to

Casablanca Fan Company

when you are using a ceiling fan you can then “raise the thermostat setting, resulting in reduced air conditioning energy consumption of 40 percent or more” while still keeping your room cool.

Ceiling Fan Direction in Winter – Reverse / Clockwise

ceiling fan direction for Winter

image via Emerson

The ceiling fan direction in winter should be rotating clockwise or reverse. Warm air rises and gets trapped near the ceiling so when the ceiling fan direction is in reverse mode it circulates the warm air from the ceiling to the floor helping take the chill out of the air. Without a ceiling Fan the warm air would continue to be trapped near the ceiling and the floor level would continue to stay cold. The reverse mode only works if the fan is on low. If you have the fan on a higher speed you will create a wind chill effect that you don’t want since it is already cold. Some ceiling fans now come with a wall or remote control that has a forward/reverse option so you can change the direction of the Fan with a push of a button.

Exceptions for Ceiling Fan Directions

There are some exceptions that you should keep in mind when it comes to ceiling fan direction.  If your ceiling fan is installed in a room with a high ceiling you still put the ceiling fan direction on clockwise or reverse motion in the winter although you should put the speed on medium or high. With higher ceilings it takes more than low speed to help re-circulate the warm air down to floor level.

Also if you have a ceiling fan directly over a dining room table or a desk you should have the ceiling fan direction rotating clockwise/reverse on a higher speed. By having the ceiling fan direction in reverse on a higher speed you will still get the wind chill effect that helps cool you off but will save you from a cold dinner or papers flying all over the place.

Check out

Energy Star’s Ceiling Fan Usage Tips

on how to help save energy with ceiling fans.

Comment

Nicole Caldwell

Nicole Caldwell is a self-taught environmentalist, green-living savant and sustainability educator with more than a decade of professional writing experience. She is also the co-founder of Better Farm and president of betterArts. Nicole’s work has been featured in Mother Earth News, Reader’s Digest, Time Out New York, and many other publications. Her first book, Better: The Everyday Art of Sustainable Living, is due out this July through New Society Publishers.

Space Heater that Uses Zero Energy

In many older homes, supplemental heat is an ongoing issue. While you work to retroactively replace insulation, upgrade wood stoves, pellet stoves, or furnaces and make your place more efficient, a

space heater

is a great way to boost heat where you need it most. The only problem? A lot of them are energy hogs, driving up electric costs quick. So it was a great surprise to stumble on

this video outlining how four tea lights can warm an entire room

in your house!

If you're set on going electric, please be sure to check out

this list of the most energy-efficient space heaters on the market

.

Comment

Nicole Caldwell

Nicole Caldwell is a self-taught environmentalist, green-living savant and sustainability educator with more than a decade of professional writing experience. She is also the co-founder of Better Farm and president of betterArts. Nicole’s work has been featured in Mother Earth News, Reader’s Digest, Time Out New York, and many other publications. Her first book, Better: The Everyday Art of Sustainable Living, is due out this July through New Society Publishers.

Happy April 12! Tips for the Frost-Bitten Green Thumb

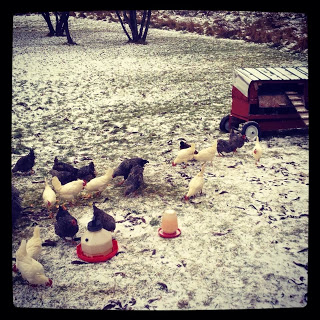
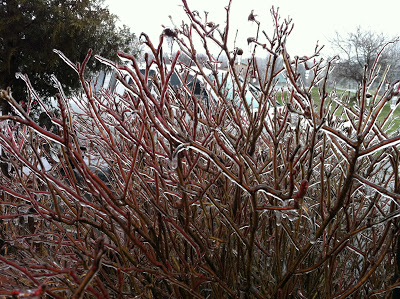
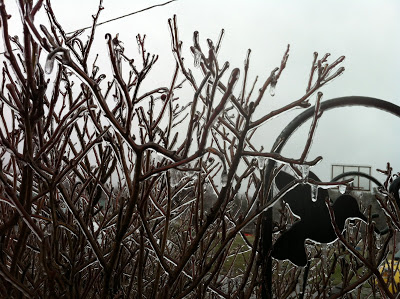
We waked this morning to a coating of ice on everything: tree branches, decks, grass, and chicken coops. What an April.

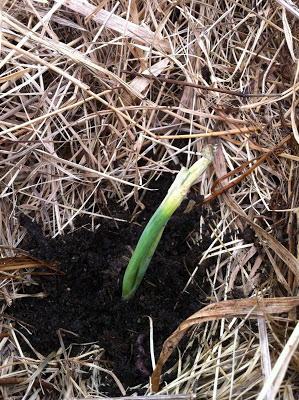
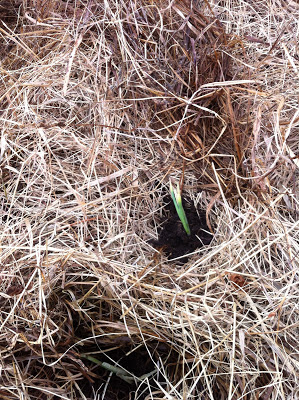
Just yesterday we were tending to some immature onion plants out in the garden:

Between the onion, spinach, garlic, chives, and asparagus all waking up outside, and the young plants in our greenhouse, we've got a lot of babies to take care of during this cold snap. Here are a few tips for all your green thumbs battling this (hopefully last) winter rant.

Outdoor Plants: Insulation is Key

For green thumbs like us utilizing mulch-gardening methods, keeping plants toasty warm on chilly spring evenings is as simple as pulling some hay around and over your seedlings. We can't stress this method of gardening enough—especially if you live in a place with hard-to-love soil. For us, planting is so simple you don't need tools. Nor do you need any fertilizer, undue amounts of irrigation, or weeding. Read more about mulch gardening here.

If you don't utilize mulch-gardening methods, you'd be wise to keep your plants well-mulched at least throughout early spring. To do this, simply buy a square of hay (or more if you have a big garden) and put a couple handfuls around each of your plants. Don't have access to hay or straw? Other great insulators are bark, sawdust, newspaper, and compost.

Cold Frames are another great way to protect your outdoor plants early in the season. But don't bother spending upwards of $200 for one—just scavenge some old windows and scrap wood to make a cold frame all on your own. For more information on this, click here.

Don't have any of the above, and anticipate a frost? Track down an old blanket, tarp, or drop cloth and throw that over your plants. In a pinch, this simple act can save all your precious plants. Just be sure to take the cover off during the day to allow your plants access to light and air.

Greenhouse Plants: Turn Up the Heat
While your greenhouse may soak up the sun during the day, on a really cold night your plants will still be susceptible to early Spring chills.

Some gardeners beat this issue by heating their greenhouse with compost. That's right—they just make a hot compost pile right in the center of all the action. This is certainly a practical way to go—but we avoid it because of the potential for it to attract additional mice (mice have a particular fondness for young squash plants and seeds).

You can also find some discarded, 50-gallon drums or horse-tub waterers, paint them black, fill them with water, and put those in the greenhouse along the south wall. They will absorb the heat during the day, and release the heat all night long. The same will work if you paint some plastic juice bottles black, fill them with water, and put them on the same shelves as your plants.

When you buy your plant flats, buy them with clear, plastic lids. These lids are great for insulating your seedlings when they're still very young.
Comment

Nicole Caldwell

Nicole Caldwell is a self-taught environmentalist, green-living savant and sustainability educator with more than a decade of professional writing experience. She is also the co-founder of Better Farm and president of betterArts. Nicole’s work has been featured in Mother Earth News, Reader’s Digest, Time Out New York, and many other publications. Her first book, Better: The Everyday Art of Sustainable Living, is due out this July through New Society Publishers.

Update on Home Winterization: Weather stripping

We

wrote last week

about great options for weatherproofing your home. Those tips—designed to save you money and energy

heating your house—included talk of sealing cracks in doors. That line item was taken on the other day when we noticed cheap, old weather strips had worn down on the farm's front door.

Going forward, we'd recommend buying high-quality weather stripping that will last more than a year or two. Paying up-front costs will save you money in the long run, we promise. We used adhesive strips first time around. This time, we used rigid strips that get screwed into the door and frame.

Before:

After:

Statistics show that s

omewhere between 10% and 30% of energy costs are due to air leaks that could’ve been sealed

.  Detecting and sealing air leaks by simple

energy conservation techniques

such as weatherstripping and caulking will save you money in the long run. Other air leaks might require more complex techniques, but sealing them is most likely well worth it as well! Costs of air sealing are usually paid back within a few years. Sealing air leaks can save you up to $80 a year! This weather stripping will therefore pay for itself in a matter of months. That's an investment you can feel good about.

1 Comment

Nicole Caldwell

Nicole Caldwell is a self-taught environmentalist, green-living savant and sustainability educator with more than a decade of professional writing experience. She is also the co-founder of Better Farm and president of betterArts. Nicole’s work has been featured in Mother Earth News, Reader’s Digest, Time Out New York, and many other publications. Her first book, Better: The Everyday Art of Sustainable Living, is due out this July through New Society Publishers.

Winterization Station

In the endless journey to green our homes, wintertime is often one of the most wasteful. We produce hot air through baseboard heat, wood stoves, furnaces, monitors or space heaters, then lose it through poorly insulated walls and roofs, outdated windows, and drafty doors. Toeing the line between frugality and sustainability, we're all faced with countless choices of how to hold desirable temperatures in and keep extreme temperatures out.

Changing windows is expensive and costs $133.88 per ton of carbon saved; changing to a programmable thermostat is cheap and comes in at $ 9.34 per ton of carbon saved. So before the vinyl window salesman tells you to fix your windows, do all of the cheap and effective stuff second—do all the

free

and effective stuff first

.

Free Stuff

  1. Lower water heater temperature to 120°F

  2. Increase AC thermostat by 3°F

  3. Wash clothes in cold water

  4. Air dry clothes during summer

  5. Turn off unneeded lights

Just doing that will save 1600 tons of carbon and $250 per year.

Below is a winter checklist we can all follow to ensure we have a snuggly warm, green winter.

Windows

  • Keep them in the locked position (this seals them from the weather and makes them airtight in most cases)

  • Cover your windows with thermal curtains and/or blinds (this can block up to 80 percent of heat loss)

  • Use of window insulation: brand-name items from a store or cellophane or plastic bags

  • Stop the Air Leaks (with a savings of $10.77 per ton CO2 saved): In an old, pre-1945 house, the air leaks can add up to the equivalent of a hole in your wall 21 inches in diameter! Natural Resources Canada (NRC) says that in a house vintage 1946-80 the hole is 16 inches, and in a modern conventional home, 14 inches. When you think about it that way it becomes obvious that there is a lot of heat loss, it is like leaving a window open all winter. 

  • Heat-shrinking film(save 25.02 per ton of CO2 saved). The window salesman may tell you to replace those old wood windows, but they are often part of the character and charm of the house, the replacements are usually vinyl, and it costs a lot of money. Instead, look into a seal-and-peel caulk (wonderful stuff; no matter how bad you are at caulking it just peels off in the spring) and heat-shrinking film. There are also magnetic, interior storm windows but they cost much more money. Click here for application instructions.

Programmable

Thermostat

Savings: $9.34 per ton CO2 saved

A setback, or programmable thermostat has the biggest bang for the buck of any single thing you can do; it costs only $9.34 per ton of carbon saved, and is getting better all the time as the price of the electronics drop. A setback thermostat can save up to 15 percent on your heating bill. For houses with radiant floors or old hot water radiator systems, there is a really slow response time because of the thermal inertia in the systems. I used to say that setbacks wouldn't work for these, but new thermostats track the performance of your heating system, figure out when to turn it on, and basically plan ahead. After all, nothing makes you want to jump under the covers than a cool house before you go to bed!

Insulation

  • Insulate your water heater(save $12.66 per ton CO2 saved): You can buy kits at hardware stores that come with straightforward instructions; but basically you just wrap the insulating sleeve around your water heater.

  • Add attic insulation (save $15.56 per ton CO2 saved): Many houses have attics that are accessible via a hatch in the hall or a cupboard; if you have this, insulating your attic is not that hard, and delivers a good bang for the buck. You want about R-50 up there to prevent heat loss.

  • Install efficient showerheads (save $18.02 per ton of CO2 saved): Okay, this isn't exactly insulation. But it functions just like wrapping your water heater or insulating your hot water pipes in the basement. The U.S. Environmental Protection Agency (EPA) notes that showers use about 17 percent of residential water use, totaling 1.2 trillion gallons per year. If you like long, hot showers, this is a great way to use less energy to heat the water, and less water in general. We have the Evolve shower head at Better Farm, which automatically shuts off when it reaches 98 degrees while you're getting ready to hop in the shower. 

  • Fill drafts and holes throughout your house. Look for light shining through the walls inside during the day or light shining outside during the night. On cold winter nights walk around in shorts and a tee shirt (or naked, we won't tell) and you'll certainly find cold drafts. Find these areas and insulate them however you can. Areas under doors can be controlled with a rolled up towel or rug over the opening. If the drafts around doors are especially bad consider purchasing foam insulation made to stop the draft in this area. An easy way to deal with this is to place masking tape over the cracks around the door each night, but this can be a pain.

  • Insulate your body! Wear sweaters, sweat pants, socks and slippers in your home and just let it be cold.

Comment

Nicole Caldwell

Nicole Caldwell is a self-taught environmentalist, green-living savant and sustainability educator with more than a decade of professional writing experience. She is also the co-founder of Better Farm and president of betterArts. Nicole’s work has been featured in Mother Earth News, Reader’s Digest, Time Out New York, and many other publications. Her first book, Better: The Everyday Art of Sustainable Living, is due out this July through New Society Publishers.