DIY Organic Lawn Care for the Cheap and Lazy

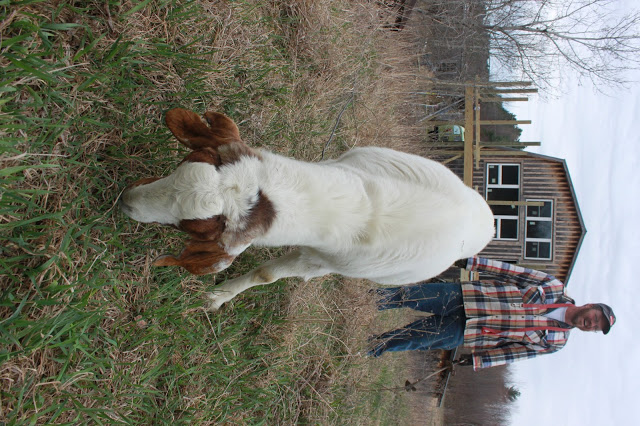
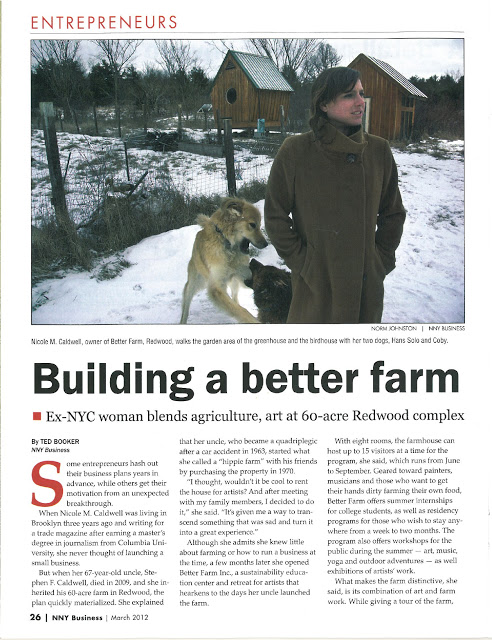
Rick Lopez lets us borrow his goat, Tonka, to help mow the grassy knoll behind the Art Barn.

lawn care clover woman

By Paul Wheaton

Lawn care in a nutshell:

    Must do:
    • Set your mower as high as it will go (3 to 4 inches).
    • Water only when your grass shows signs of drought stress and then water deeply (put a cup in your sprinkler zone and make sure it gets at least an inch of water).
    Optional:
    • Fertilize with an organic fertilizer in the fall and spring. I recommend the Ringer brand.
    • Have the pH of your soil professionally tested. Add lime if it is below 6.0 and gardener's sulfur if it is above 7.0.
    • How much top soil do you have? See how deep a shovel will go into the soil. How deep can you dig a hole in one minute? Four inches of topsoil will make for an okay lawn. Eight or more inches of topsoil will make for a great lawn.

Now for the verbose details on lawn care:

A little knowledge makes it so damn near anything can qualify for the "cheap and lazy" label. Including lawn care. Organic is just a bonus.
grass vs. weed competitionThe key to the lawn care game is competition. You want to make things favorable for the grass and unfavorable for the weeds so the grass will choke out the weeds. Naturally.


lawn care must do: mow high

grass mow high weeds
    There is a fight for sun. If the grass doesn't shade the weed, the weed will shade the grass. Sun is food. Food is strength and life. Shade is weakness, disease and death. Grass will shade the weeds only if it is tall enough. The shade of tall, dense grass turf will prevent essential light from reaching most weeds and, will aid in the destruction of new baby weed seedlings (such as the notorius dandelion). lawn care mow high one week later MYTH: "If I mow short, it will be longer until I have to mow again." False! Wrong! (SLAP! SLAP! SLAP!) Your grass needs grass blades to do photosynthesis (convert sunshine into sugar) to feed the roots. When you whack the blades off, the grass has to RACE to make more blades to make sugar. It then grows amazingly fast. This fast growth uses up a lot of the grass's stored sugar, and weakens the plant. It is now vulnerable to disease and pests! Tall grass is healthier and can use the extra sugar to make rhizomes (more grass plants) thus thickening the turf. Have you ever noticed that short grass in the summer is always riddled with dead brown patches? If you have a serious weed infestation, consider mowing twice as frequently as you normally do. The sensitive growing point for grass is near the soil. The sensitive growing point for most weeds is near the top of the plant. So when you mow, it's as if you are giving your grass a haircut and cutting the heads off of the weeds. Finally, when mowing, be sure to leave the clippings on the lawn. It adds organic matter and nutrients back into the soil. If you don't leave the clippings, your soil will begin to look more like "dirt" than soil. Soon it will be a form of cement that nothing will grow in and you will have the world's most pitiful lawn. Some people are concerned about "clumping" - that only happens when you mow too short or when you don't mow often enough. Mowing higher gives the following perks:
    • more shade to the soil leads to less watering
    • deeper roots which leads to less watering
    • thicker turf which leads to fewer weeds
    • slower growth which leads to less mowing
    Check out this pic. Someone started to mow and then I convinced them, as an experiment, to set their mower higher. This pic was taken about six days later as summer is setting in. Can you see the difference? mow high!

lawn mower

    My lawn care mower of choice? The "Scott's Classic" manual mower. When you mow high, it doesn't take much effort to mow. It is easier with a manual than a heavy, noisy, stinky gas mower. The Scott's Classic is the only manual mower that I know of that can mow three inches. The others top out at 2.5 inches or less. It's at amazon.com. Update!
      A recent series of wacky events led me to try a cordless electric mower. Wow! Exceptionally lightweight and quiet! I definitely prefer it over the manual mower. Despite the higher price, I bought one! I like it that much! There is a bigger one with more whizbangery, if that's what you're into.
    It is my opinion that when it comes to lawn care, mowing high is, by far, the most important thing. There has been a lot of discussion about this in our forum. Visit the thread about lawn mowers.

lawn care must do: water infrequently

    This will force your grass roots to go deep into the soil. Deeper than most weed roots. As the top few inches of soil becomes bone dry, the weeds and weed seedlings up there die while the grass still enjoys moisture from a little deeper. Shallow, frequent watering encourages "thatch" (the grass propogates with above-soil runners (like strawberry runners) rather than rhizomes under the soil - there gets to be so many runners that they weave a mat that chokes out water and air). Since the roots are in the top inch or two of soil, a hot day will quickly dry the soil and much of the grass will brown. Weeds and weed seedlings looooove a daily watering. It's just what they need for a good start. Two methods to tell when it is time to water:
    • The grass will start to curl before it turns brown. When it starts to curl, that is the best time to water. Anything after that is time for "intensive care watering" (water half an inch, wait three hours and water an inch).
    • Take a shovel and stick it into the soil about six inches. Keep the sun to your left or to your right when you do this. Push the handle forward. If you can see any moisture, wait. If it's all dry, water. If you can't get your shovel to go into the soil this deep, you need more soil.
    The first method is the best - especially if you have not yet trained your grass to make deep roots. Watering on a schedule does not help in the war on weeds. A tip for lawn care experts: If you have a good feel for how often your lawn needs watering and it is almost that time and there is a rain shower - maybe a quarter of an inch - that is the BEST time to water your lawn and give it that other 3/4 of an inch. Remember, the grass roots are down deep and most weed roots are near the surface. The idea is to keep the top three inches of soil as dry as you can for as long as you can. That quarter of an inch might make it so that your top three inches is well watered but the lower 9 to 20 inches is on the edge of being pretty dry. This gives the weeds some advantage over your grass! Another thing about lawn care watering: I have discovered that if you are going to water an inch, it is better to water half an inch, wait 90 minutes and then water another half an inch. Maybe do this once a month. Sometimes when the soil gets really dry, it will repel water. This is called "superdeflocculation" (I think Mary Poppins would be impressed with this word!). If you put a little water in first, wait, and then put more, the soil is better prepared to take in more water. Imagine a dry sponge - so dry it is stiff. And another sponge, slightly damp - soft and well wrung out. Now pour a cup of water onto each. The water runs off of the first sponge and all over the table. The water is soaked into the second sponge, not a drop is lost. Remember: water has a strange and powerful attraction to itself. It would much rather stick to itself than disperse through the soil. Another perk: every time you water, you wash away soil nutrients. So the less you water, the more fertile your soil! One last point about watering deeply: If your topsoil is only two inches deep, laying down an inch of water is a bad idea. An inch of water is good for watering 12 inches of soil. Further, an inch of water will effectively carry a lot of soil nutrients down deeper. So if your soil is only two inches deep, this rinses away a lot of your soil nutrients! So deep watering should be done only in conjunction with deep soil.

Lawn Care Fertilizer:

Grass is a nitrogen pig. Legumes (such as clover and black medic) can get their nitrogen from the air (remember that the air we breathe is 80% nitrogen!). So, when you see legumes taking over your lawn (clover, medic, etc.), you know that your soil is nitrogen poor. If your lawn needs fertilizer, sprinkle a little Ringer lawn fertilizer in the spring and fall. Why this brand? Well, there is nothing scary in the ingredients list; it is a very slow release fertilizer without salts; the company appears to have passions well aligned with my own; and it works great.
If your lawn is in serious need of fertilizer, use a third of what the package recommends every three weeks in the spring and fall. Otherwise, use half of what the package recommends at the beginning of spring and the beginning of fall.
Cool season grasses are semi-dormant in the summer. Fertilizing in the summer feeds the weeds, not the grass.
If your soil already seems like dirt or cement, add an inch of compost in the early fall. If you can see wood products in the compost sprinkle the Ringer fertilizer on top, otherwise, use only half as much of the Ringer fertilizer. (composts with wood products will feed your lawn for a week or two and then start sucking the nitrogen back out)
I've been getting heaps of e-mail asking about "where do I get the Ringer fertilizer?" I used to get mine at the local home improvement stores. Lately it has been harder to find. But if you need to, try this. I've also talked to people about finding it in thislawn fertilizer discussion thread.

A lot of folks ask about what difference it makes using organic fertilizers in lawn care. Consider a couple of things:
    1) Ever hear about centuries ago when people would salt the land so nothing would grow? Nearly all chemical fertilizers are a salt. As you use it, year after year, your soil becomes poorer and poorer. 2) Healthy soil is loaded with heaps of microbial and macrobial life. Most of these critters are working hard for your grass. Most of those critters don't like salt.
      lawn care wormLet's take a quick look at an earthworm. I'm going to call him ... Fernando. Fernando tunnels through the soil, eating as he goes. He gets to the surface and poops out a lot of dirt and digested organic matter. His travels make it so the grass roots get air and water. He eats organic matter like dead leaves and dead blades of grass. He converts them to materials the plants can take up as nutrients. In an organic yard, Fernando takes a decaying blade of grass down in his burrow and munches on it "These things are my favorite!" says Fernando. "I need some more!" Back at the surface, Fernando finds some home made compost "What is this? Oh my! This is my new favorite! (munch munch) It's so good! (munch munch) How can this be crunchy and chewy AT THE SAME TIME! Oof, I'm so full. I wanna have sex and have lots of babies so they can enjoy the crunchy chewy stuff." In a yard that uses chemical fertilizers, Fernando says "AAAIIIIIIIIEEEEEEE!!!! THE PAIN! THE HORRIBLE, HIDEOUS PAIN! I NEED TO GET AWAY FROM IT, BUT IT IS EVERYWHERE! ACK! ACK! HEEEEEELP MEEEEEEE! URK!" (this dramatization brought to you by ... compost! It's yummy!)
So I'm making a strong recommendation to not use chemical fertilizers. For lawn care or for anything.
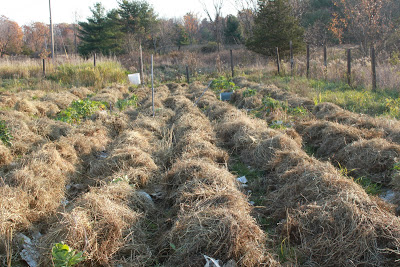
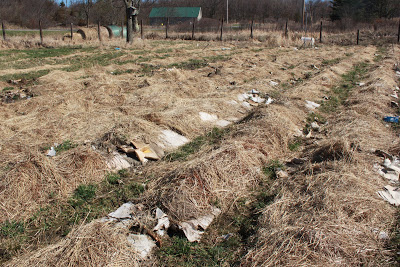
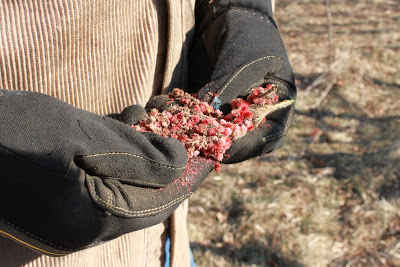
Here is possibly the world's very best lawn fertilizer. I get tons of this stuff for free! Really! Tons! Free! Moldy hay:


lawn care pH:

    Dandelions love a pH of about 7.5. Grass loves a pH of about 6.5. So if your pH is 7.5 or higher, your grass will probably never beat out the dandelion. Lower the pH to 6.5 and your grass has the advantage! Be sure to have your pH tested professionally. The kits that you can buy in the store will often give you the wrong information. I once spent $18 on a pH meter that told me that my lawn pH was 6.0 when it was really 7.8. So I should have added gardeners sulfur, but instead I added lime! Call your local extension office. My local extension office will test pH for free. I've heard of some that charge ten bucks. If you're going to buy a pH tester, be prepared to spend around $85 for the tester and the calibration solutions. A long time ago I bought the Oakton pHTestr 2 plus 4.0 and 7.0 solutions. I looked it up and found it here. I think most folks will wanna keep their $85 and just pack some soil samples to the local extension office. I wrote more on pH here A little side note: a dusting of lime on the soil surface has been shown, in most cases, to nearly double earthworm reproduction.

lawn care soil depth:

    My soil was only half an inch deep. Even weeds had a tough time growing. Below my half inch of soil was huge river rocks seperated by smaller rocks, sperated by sand. It bore no resemblance to soil. I added four inches of topsoil. This was done with two dumptruck loads at $100 a pop. It covered all of the weeds with enough soil that they could not work through - I could start from scratch with my grass seed of choice! lawn care soil depth 18 inches or more soil would be optimal. I have a friend that has soil this deep. While everyone else waters a dozen times or more over the summer, she waters just once or twice. She uses no fertilizer or pesticides. She has thick, dark green, weed-free grass which requires frequent mowing. Her lawn is about as "no-brainer lawn care" as you could get. This is a good time to talk about soil quality too. There is a big difference between dirt and soil. Soil is rich in microbial life and has a lot of organic matter in it. Dirt comes in many forms and it's a challenge to get anything to grow in it. If you are getting "topsoil" delivered to your house, be prepared for it to bear more resemblance to "dirt". You may want to have compost also delivered to your house so that you can mix the two and have the beginnings for "soil". One part compost to two parts dirt is a good mix for lawn care.

lawn care weeds:

    The above lawn care advice will eliminate 95% to 99% of your weed problem. But there are some weeds that are almost impossible to get rid of, no matter what. Some of these are even resistant to the chemical army. The two to be careful of in my area are BINDWEED (looks like white or pink morning glory) and CANADIAN THISTLE. These two have HUGE root systems that might go as deep as thirty feet into the soil. They spread with rhizomes, just like your grass. The above techniques will discourage them enough to go to your neigbor's instead. They don't like tall grass or mowing. They might try to pop up on fences or other lawn borders. Fifty outcroppings could all be part of the same plant, so you really have to get as much of them as you can. The key is to remove the green plant that provides it with sugar. It needs sun and sugar to support that massive root system. Repeated digging will weaken it to the point that bugs and bacteria can take over. I once moved to a house that was infested with both bindweed and thistle. Imagine my yard as a big rectangle. I started pulling weeds on the left and stopped about ten percent of the way across. A few days later, I started at the left again and picked out anything that cropped up in the last few days and then made a little progresss into the rest of the rectangle. Each brief weeding trip gets me another 5% of new territory. The important thing is to always weed the area you already weeded first. If I didn't do it this way, then the weed would recover in the first section while I was attacking another section. DANDELIONS are a sign of alkaline soil. Refer to the pH stuff above. The above methods will prevent dandelions from propogating. Since dandelions live about five years, the mature dandelions will struggle with the tall, thick turf and die off in two to three years. I now think that a few dandelions poking up once in a while are kinda nice and I leave them alone. BLACK MEDIC is a sign of low nitrogen soil. Refer to fertilizing above. The above methods will keep black medic in check. You will occassionally see a little once in a while, but it is kinda pretty when it isn't taking over your lawn. This stuff is sometimes called "yellow clover". When it's taking over, it will choke out grass and make flat mats about a foot in diameter. I found a litte in my current lawn and it was a single tiny strand with little yellow flowers. CLOVER is a sign of low nitrogen soil. Refer to fertilizing above. White and pink clover is often desired in a lawn. It contributes nitrogen to the soil and doesn't compete strongly with the grass. Yellow clover is actually "black medic" (see above). For more on controlling clover, see "getting rid of clover" in our lawn care forum. KNAPWEED tries to poison plants around it with niacin. A little water washes the niacin away and the plants around it can have a fighting chance. Especially if mowing is involved. Mow a little more frequently in late june and early july to wipe out knapweed.

Lawn Care Enhancements:
    Now that you aren't dumping toxic gick on your lawn, you can enhance it with some other growth. CROCUSES: These flowers pop up in the spring while the grass is still dormant. They're done blooming long before the first mow. These are bulbs that are planted in the fall. Go ahead and plant a few dozen right in the middle of your lawn. lawn care with crocuses To buy some bulbs, click here ROMAN CHAMOMILE: They look like little daisies. When you mow, it smells like green apples. lawn care with roman chamomile To buy some seed, click here YARROW: This herb makes your grass extra spongy. It feels really cool to walk on with bare feet. lawn care with yarrow To buy some seed, click here For more about fun stuff to grow, check our lawn care forum for this thread.

Lawn Care Summary:

    With these methods you will mow less, water less, never buy pesticides and have the best looking lawn on your block. A little lawn care side trip: Some entertaining perspective on why you should care about how you care for your lawn. Before my master gardener training I thought that herbicide use had a time and place. The training covered not only the time and place, but also covered the details of toxicity. 2-4D is considered one of the safest herbicides. A quantity of 2-4D that would be about the same as a roll of life savers rubbed on the skin of four kindergarten children would kill two of them. This is not getting it in their mouth, but just rubbed on their skin. My reading on this subject has exposed far too many nightmares than I care to share here. My closing opinion is that I can see no time and no place to ever use herbicides. Especially not for anything as frivolous as lawn care. I would rather have weeds. I actively participate in these permaculture forums. And there is a whole forum dedicated to nothing but doing lawn care the way I advocate. Feel free to pop over and ask questions any time.

Lawn Care Providers

I am compiling a list of lawn care providers that fully subscribe to my philosophies and techniques! Please visit my lawn care providers page.

Frequently Asked Lawn Care Questions:

    What variety of grass should I plant?
      I recommend "tall fescue". Be sure to check the label and make sure it is pure tall fescue. Some outfits that sell seed mix in some annual ryegrass and call it "nursury grass - it will care for the tall fescue which takes longer to germinate." I don't agree with that. Note that tall fescue seed is significantly more expensive than annual ryegrass ... Tall fescue makes deeeeeep roots and is one of the most drought tolerant species. Combining this species of grass with the infrequent watering makes it one of the best lawn care species for fighting weeds. It also means you can have a lovely lawn using less water. Tall fescue is one of the most durable grasses. It stands up well to the abuse of football games and pets. It will also stand proud at three inches, four inches and five inches! Kentucky Bluegrass starts to waver at three inches. Tall fescue does well in shade and sun! Downsides of tall fescue:
        It is slow to germinate. It could be two weeks until you see the baby grasses. In the meantime, weed seeds have probably germinated. Some people think it is not the prettiest type of grass. The fine fescues (very different from tall fescue) have thin blades and the tall fescues have broad blades. I have to admit that a lawn with the fine blades does look better - as long as nobody ever walks on it. But who wants grass that you're not allowed to walk on? Some people think that tall fescue doesn't feel as good under bare feet. This is true. Tall fescue is a stiffer grass. The grasses that feel better are the ones that won't compete with weeds as well. Besides, I think most folks won't notice the difference in feel between tall fescue and Kentucky Bluegrass.
      Note that Tall Fescue is a cool season grass (for areas that get a frost). I'm not very familiar with warm season grasses to make a recommendation. You can get some tall fescue seed here.
    What's an extension office?
      Nearly every county in the United States has a county extension office. The word "extension" means that the office is an extension of the the state agricultural school. This office is staffed by people who are paid to answer questions about plant life in the county (including lawns). If people don't call, they could lose their jobs! Call! Ask lots of questions! Visit! Take weed samples to them for identification! Bugs too! Sometimes the phones are manned by volunteers. Folks that love gardening and horticulture so much, that they are itching to share their lawn care expertise with you. Many of these folks have completed the master gardener training offered by the extension office. If nothing else, a visit to the office can be worthwhile because they have loads of brochures about issues in your area. To find them, open your phone book to "the blue pages" (government listings) under "County Government" and look for "Extension Office", "Extension Agent" or "County Extension".
    I think I have grubs. What do I do?
      Grubs are the larvae of certain species of beetles. Grubs think grass roots are yummy. If you dig up dead patches of grass you just might see a bunch of grubs munching away. This is where birds are your friends. Birds think grubs are yummy. I have never had to personally deal with grubs. And I have yet to encounter an organic grower that has had to deal with them. But I have had many people write to me and ask how to deal with grubs organically. Nearly all of them have mentioned "Last year I sprayed toxic goo to get rid of the grubs and now they're back". While I did not see what happened, my guess is that birds and other natural grub control ate the dead grubs and died. No more natural grub control. So the trick is to kill the grubs, but don't harm anything that eats grubs. The answer is to bring in more grub predators. Having done a little reading on this topic, "Milky Spore" (Bacillus popilliae) and/or predatory nematodes appear to be the organic control. "Milky Spore" is a naturally occuring bacteria that makes the grubs puke their guts out, but it doesn't seem to bother anything else. So if a bird eats a dead grub, the bird will be fat and happy. Predatory nematodes (also called "beneficial nematodes") are like micro worms that crawl through the soil and eat a variety of different organisms, including grubs. Here it is for sale: click here
    My soil is more like dirt. How do I improve it?
      If you have an inch of "dirt" and everything under that is big rocks or rock-hard clay, improving your "dirt" isn't going to make much difference. You are probably going to need to import some top soil. If you have the bucks, you can have a foot and a half of topsoil dropped on your existing lawn and then plant new grass seed and start over. Soil on top of dirt ain't bad. If you have patience and think that your dirt can be renovated into soil, you can:
      • fertilize and mow high. The fertilizer helps to make more grass. If you have any worms in your dirt/soil, they will take blades of cut grass down lower, munch on it, and leave organic matter down low. The fertilizer helps to make more grass.
      • Add an inch of compost every spring and fall. It ain't cheap and it makes your lawn look like crap for a week or so, but again, the worms will work it in.
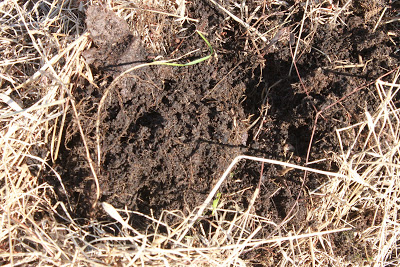
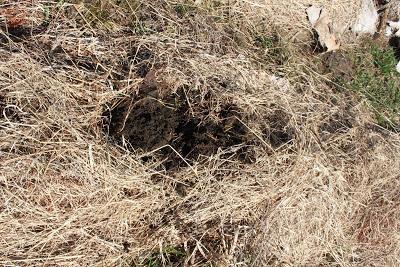
      • I have this weird idea that I have never tried, but I've told several people about in e-mail and have yet to hear back from anybody if they tried it.
          Take a post hole digger and dig a hole about two feet deep. Re-fill the hole with 50% compost and 50% of what you took out of the hole. Stir a little grass seed into the top quarter inch of soil. I think that by doing this, you will create a wonderful home for worms and a great place for deeeeeep grass roots. Over time, the roots and the worms will convert the neighboring dirt into soil. If anybody tries this, I hope you'll write me and tell me how it turned out.
    How do I get rid of mushrooms?
      People that are trying to grow mushrooms will provide the mushrooms with rotting sawdust or rotting logs. Generous moisture and a lack of direct sunlight can help too. In the horticultural world "rot" almost always mean "composting". To properly compost, you need a certain mixture of carbon heavy organic matter (wood, dried leaves, straw, etc.) and nitrogen heavy organic matter (manure, grass clippings, table scraps, weeds, etc.). If you get just the right mix, you get hot composting happening. Too much nitrogen and it gets a little stinky. Too much carbon and the composting takes a very long time. To get rid of mushrooms, you just need to get your lawn to outcompete them. Grass loves a nitrogen rich soil. Mushrooms love a carbon rich soil. Lawn fertilizer has heaps of nitrogen and hardly any carbon. Time to fertilize! Twenty bucks and ten minutes of time will do wonders for your lawn care strategy. Here's something that can be a kick: take a close look at your mushrooms. If there are a bunch of them, are they growing in a circle? If so, this is called "fairy ring". The ring will grow larger and larger as the spores from the current mushrooms land just outside of the ring. Consider for a moment that if you have a lot of mushrooms in your lawn, this is most likely a sign that you have really excellent soil! Further, the mushrooms you see are the fruiting bodies of a much bigger fungus organism under the soil. Most fungus organisms help your grass be healthier - so I'm usually glad to see a few mushrooms in my lawn now and then. The mushrooms are usually gone as soon as things dry out a bit. For more on getting rid of mushrooms, see "mushrooms on lawn" in our lawn care forum.
    How do I deal with burn spots in my lawn from my dog?
      Dog poop and dog pee are both high in nitrogen. But if you give your lawn too much nitrogen, you'll kill it. Not the whole lawn. Just the spot with too much nitrogen. Usually there will be a load of dog poop and the grass under it will be dead. And the grass immediately around it will be greener, taller, thicker and healthier than all the rest of the lawn. So the stuff immediately under the crap is "too much" and the stuff surrounding the crap is "optimal". Same thing for pee only there won't be a pile of poop in the middle. Solution 1
        This solution is reserved for the Zen Masters of the school of the cheap and lazy lawn care. Do nothing. For dog pee, the grass is tall enough that it hides the dead spot. Rain and irrigation will eventually rinse enough nitrogen out that they grass will grow back into that spot. I leave the poop to the worms and the microbials in the soil. Birds will also work it over a bit (looking for the worms and other bugs attracted by it). How quickly the poop disappears on its own shows how healthy your lawn is. Just be careful not to step on the fresh stuff. An added benefit is that you can remain on great terms with your neighbors. If your spousal unit says "go clean up that dog crap in the yard!" You can now say "I looked it up on the internet and it said the best solution was to leave it!"
      Solution 2
        Sprinkle a little sawdust on the spot and give the spot a little attention from your hose. The sawdust will hide the poop and it will counter the excess nitrogen. Combining with the nitrogen, it will, in time, turn into compost - enriching the soil. The sawdust will also reduce any odor by about 95%. The water will wet the sawdust and dilute the nitrogen source a bit, thus helping the beginning of the composting process.
      Solution 3
        Remove the poop, dig an inch into the soil and mix sawdust into the soil. This is the same as solution 2, but the sawdust will be more effective this way.
      Anal Retentive Solution
        Remove the poop and an inch of affected soil. Replace with compost and some grass seed. A lot of people do this. I think it's pretty dumb. I think that removing the dog poop and watering the area is more effective than this. The water will dilute the excess nitrogen in the soil. The surrounding grass will spread into the area using grass rhizomes. There is no need for seed. If you put seed here, you will be saddling yourself with the responsibility of watering it every day for two weeks. Reading the rest of this lawn care essay will tell you that that's a great way to get weeds. Plus, it's work! Now let's look at the compost: compost is wonderful, magical stuff. But in this case, you've just added nitrogen to an excess nitrogen problem. Further, seeds don't germinate well in a high nitrogen medium like compost. The germinate better in something like pH adjusted peat moss. Or plain topsoil. The plants like nitrogen after they've gotten past the seedling stage.
      Some people have written to me asking about what to do about their dogs pee "burning" their lawn. They explain that female dogs have ultra acidic pee and it kills whatever it touches. I think the treatement is still going to be the same. Leave it and let the tall grass hide it. If it still bothers you, use a little sawdust and/or water.
    My grass is all thin and dead-ish, what is your advice on overseeding?
      Don't. I mean it. Put overseeding out of your mind. Your "dirt" has such terrible issues that adult grass is struggling to survive and now you want to put babies there? I am, right now, trying really hard to think of one case where overseeding will do any good for any lawn care situation .... nope - can't think of a single case. Seeding bare patches that are are at least a foot or two wide makes sense - but that's not "overseeding" (tossing seed onto an existing patch of grass). Improve your soil and your existing grass will thrive. Then there is no need for seed. Please take a look at this thread of discussion I've been in on overseeding in our lawn care forum.
Still not convinced? Here is a page called organic lawn care tips that I like.

This article was originally published at Permies.com by Paul Wheaton.

New USDA Plant Hardiness Map Reflects Warming

The new USDA plant hardiness zone map, unveiled in January.
As may or may not surprise you, the colorful United States map of planting zones is being updated for a warmer 21st Century.

Hardiness zone maps for the United States were developed during the 1920s and 1930s to help farmers plan for their regions' growing seasons. The first USDA Map was published in 1960 (USDA Miscellaneous Publication No. 814 "Plant Hardiness Zone Map.") and was developed by Henry Skinner while he was the Director of the U.S. National Arboretum. The map showed ten broad hardiness zones based on 10 degree F. gradients:

By 1990, the USDA version of hardiness zone maps became the primary source for zone identification. That same year, H. Marc Cathey completed a major overhaul of the USDA map using temperature data from 1974 to 1986. One new zone was added to coincide with adding Mexico and Canada to the map and the prior 10-degree gradients were broken down into 5- degree a and b zones. One of the primary reasons given for the update was that, "We have been losing from our landscapes plants that apparently survived the 1940's to the 1960's. Many of the hardiness zone classifications of plants are no longer considered valid. In North America, the ranges of temperature and moisture for the past decade were wider than those recorded for the 1940s through the 1960s."

That statement—made more than 20 years ago—is interesting for two reasons: One, it presages the current debate over the proposed update to the old 1990 USDA map—and two, for its implication that the hardiness zones need to reflect recent global warming.

The latest update to the hardiness zone map unveiled in January, is the first since that 1990 overhaul and includes two new zones added in hotter climates, bringing the number of mapped zones up to 13.

The new map is located on the USDA website and was designed for the Web, allowing people to enter their ZIP code and see their zone down to half-mile segments. That eliminates the guesswork for the nation's 82 million gardeners.

Catherine Woteki, agriculture undersecretary for research, education and economics, said the changes to the map don't indicate permanent climate change. No section of the country changed more than half a zone, according to Woteki. She says scientists used the latest complete data, adding they performed an analysis to see if incomplete data from the past five years would require alterations.

"We saw it would not change the map," she told USA Today.

The USDA website notes: "Climate changes are usually based on trends in overall average temperatures recorded over 50-100 years. Because the (new map) represents 30-year averages of what are essentially extreme weather events (the coldest temperature of the year), changes in zones are not reliable evidence of whether there has been global warming."

Needless to say, something's amiss. Check out this cheat-sheet of changes:
  • Much of the Northeast is half-zone warmer. For example, Pennsylvania, which was about equally divided between zone 5 and zone 6 in the 1990 map is now about 70% zone 6 and 30% zone 5.
  • Nebraska was mostly zone 4 and is now almost entirely zone 5.
  • Ohio was mostly zone 5 and now is mostly zone 6.
  • South Florida and Southern California have new hotter areas around cities, but California also has some colder areas in the mountains.
Check out this news report:


What do you think?
Comment

Nicole Caldwell

Nicole Caldwell is a self-taught environmentalist, green-living savant and sustainability educator with more than a decade of professional writing experience. She is also the co-founder of Better Farm and president of betterArts. Nicole’s work has been featured in Mother Earth News, Reader’s Digest, Time Out New York, and many other publications. Her first book, Better: The Everyday Art of Sustainable Living, is due out this July through New Society Publishers.

Getting Garden-Ready is a Snap with Mulch Gardening Methods

Old tires double as planters. Different layers of mulch gardening visible clockwise from top left: wood ash, grass clippings, cardboard, and worm dirt.
You wouldn't know it by this week's forecast, but last week's spring fever grabbed ahold of the North Country and sent people in droves out to their gardens to turn soil, mulch, plant, and even weed—in mid-March!

Having been warned of Mother's Day blizzards and three feet of snow in April, Better Farm just dipped a toe into the spring excitement by getting seeds out in the greenhouse and clearing out some raised beds for incoming leeks, carrots, potatoes, herbs, and beets. Here's what we've accomplished so far with our mulch gardening system at Better Farm:

Mulch Gardening: RESULTS
We've had a lot of posts on this blog about the wonders of mulch gardening; and in the fall we walked you through our winter-prep process of laying some old, degrading hay over our garden rows. Here's a shot from Nov. 3:

When we went out to work in the garden last week, here's what those same rows looked like:


Reduced from three fluffy feet of hay to about one foot, upon closer inspection here's the dirt we discovered underneath:
Black gold! This soil—derived from the rotting hay and layers of compost and cardboard, is rich in nutrients and ready to be planted.

We also weeded the raised beds—an easy job because of cardboard weed barriers, compost manure, and layers of compost:

Our upcycled tires, used last year for tomatoes and sunflowers, will grow potatoes this year. In them last fall we layered cardboard, hay, compost, wood ash, grass clippings and dead leaves, worm dirt, and a top layer of cardboard to encourage decomposition:


Next week we'll be layering more hay, compost, and cardboard in new garden rows we're creating, adding some sawdust into the mix, building new beds, and constructing a brandy-new composting system that will allow us to provide organic potting soil to the masses. Stay tuned!
Comment

Nicole Caldwell

Nicole Caldwell is a self-taught environmentalist, green-living savant and sustainability educator with more than a decade of professional writing experience. She is also the co-founder of Better Farm and president of betterArts. Nicole’s work has been featured in Mother Earth News, Reader’s Digest, Time Out New York, and many other publications. Her first book, Better: The Everyday Art of Sustainable Living, is due out this July through New Society Publishers.

betterArts Membership Drive: Support art and music outreach in the North Country!


Your membership contribution to betterArts will support vital services and events, increase economic vitality to the community, promote access to the arts in the North Country regardless of economic status, enhance cultural tourism, and improve the quality of life in our region. All membership contributions are tax-deductible to the fullest extent of the law. Membership moneys go directly into our programming, which includes:

  • Artist Residencies: betterArts seeks to provide an opportunity for creative exploration and growth to artists, writers, and musicians within the context of Better Farm's dynamic environment through a year-round, low-cost artist residency program. 
  • Free and Low-Cost Music and Art Instruction: We are in the process of designing private music and art instruction for all age groups. These programs will be offered in Better Farm's Art Barn year-round. Moneys we raise allow us to pay teachers fair wages while offering the public reduced-cost or free instruction.
  •  Workshops, Performances, and Events: As part of our outreach efforts, we offer concerts, gallery openings, and performances to the public for free. We also have studio space available for artists and musicians at low cost, and ongoing group art projects including murals and sculptures that we invite the public to participate in year-round.
All levels of membership include the following benefits:
  • Online delivery of the seasonal betterArts/Better Farm newsletter
  • Access to monthly membership meetings
  • Invitations to members-only mixers, special events, and gallery previews
Rates are as follows:
  • Individual, $25/year
  • Family, $30/year
  • Friend, $50/year: Also includes betterArts mug and one-of-a-kind betterArts postcard
  • Arts Organization, $100/year: Also includes mug, postcard, 20% off coupon for the gallery, and free table set-up with your organization's information at betterArts events.
  • Patron, $200/year: Also includes mug, postcard, 20% off coupon for the gallery,  free table set-up with your company's information at betterArts events throughout the year, and one free ticket to our annual, end-of-summer, formal dinner party fundraiser.
  • Corporate Patron, $500/year: Also includes mug, postcard, 20% off coupon for the gallery,  free table set-up with your company's information at betterArts events throughout the year, and two free tickets to our annual, end-of-summer, formal dinner party fundraiser.
Click here to sign up!
Comment

Nicole Caldwell

Nicole Caldwell is a self-taught environmentalist, green-living savant and sustainability educator with more than a decade of professional writing experience. She is also the co-founder of Better Farm and president of betterArts. Nicole’s work has been featured in Mother Earth News, Reader’s Digest, Time Out New York, and many other publications. Her first book, Better: The Everyday Art of Sustainable Living, is due out this July through New Society Publishers.

Breaking Ground on Art Barn Deck

The men of Passerino Painting and Contracting dig holes for 6x6 posts that will hold up our new Art Barn deck.
It was a little more than one year ago when we began putting together plans for Better Farm's new Art Barn. Continuing from those ideas (several new banks of windows and sliding doors, gallery walls, track lighting, and recycled spray foam soy insulation), Passerino Painting and Contracting stopped by the farm yesterday to break ground on the Art Barn's brand-new custom, second-floor deck. Spanning more than 26 feet by 12 and overlooking a lovely natural amphitheater, this is going to be our new outdoor concert hall: bands on the deck, crowd on the hill...

The materials.
The decking material we decided on is MoistureShield, environmentally friendly composite decking that utilizes 95 percent recycled materials. Here are some fast facts about this company:
  • No new trees are cut down to make MoistureShield Decking.
  • Their process stops more than 270 million pounds of trash from entering landfills every year—that's 36 football fields of trash, each stacked 10 feet high!
  • They save more than 5.3 trillion BTUs of energy per year.
  • MoistureShield's process saves 1 million gallons of gas a year.
  • Not only does a 12´ x 12´ MoistureShield deck save 110 gallons of gas, but it also reduces greenhouse gas by 619 lbs. CO2 equivalent.
  • The plastic and wood A.E.R.T. recycles annually is comparable to taking 54,000 vehicles off the road.
Here's what goes into each board of MoistureShield:


The deck is going to run up the side of the barn:

Then across the entire back of the barn:

And overlook a natural amphitheater behind it:

As the guys get the deck in ship shape, we're going to bring in a friendly neighborhood goat to clear out all that brush and burdock (seriously). Stay tuned for more photos!

To schedule an estimate for one of your at-home projects, contact Passerino Painting and Contracting at passerinojm@gmail.com or (315) 783-3994.
Comment

Nicole Caldwell

Nicole Caldwell is a self-taught environmentalist, green-living savant and sustainability educator with more than a decade of professional writing experience. She is also the co-founder of Better Farm and president of betterArts. Nicole’s work has been featured in Mother Earth News, Reader’s Digest, Time Out New York, and many other publications. Her first book, Better: The Everyday Art of Sustainable Living, is due out this July through New Society Publishers.

Seeking Sponsors, Talent for Our Annual Open House

betterArts, a new arts and music not-for-profit offering free and low-cost workshops, private instruction, artist residencies, and events out of its location at Better Farm in Redwood, NY, is seeking musicians and artists to participate in its Second Annual Open House and Fundraiser from 10 a.m.-8 p.m. Saturday, May 26.

This event will feature live music and performances, interactive art projects, information on upcoming workshops and private instruction, arts and crafts stations, a gallery of work by local and visiting artists, a tour of our studios, a potluck barbecue, and raffles. A cash bar will also be available. Entrance is free and open to the public.

Visitors can also tour the grounds of Better Farm, step inside “green” buildings and learn about construction methods, check out the no-till, organic gardens and composting stations, and meet the staff.

The open house is in conjunction with the First Annual Artists' Studio Tour scheduled for the Thousand Islands Region from 10 a.m.-5 p.m. May 26 and 27.

Better Farm and betterArts are seeking the following participants for the event (click here to RSVP!):
  • Bands/Musicians: If you and/or your band is interested in volunteering your time for this cause, please send an e-mail to info@betterarts.org. Those musicians who are also interested in teaching for betterArts in future programming efforts (private instruction, group workshops or lessons) can visit http://www.betterarts.org/teach-for-us to download a form.
  • Artists: There is no charge for artists who would like to display their work in the gallery on this date. betterArts will recoup 20 percent of all art sales. Price your work accordingly! All work must be brought to Better Farm by May 20. To arrange for a drop-off, call (315) 482-2536 or e-mail nicole.caldwell@betterarts.org. Every piece must have the following information with it: Full name of artist, title of piece, medium (watercolor, 35 mm, mixed media, etc.), price, and contact information.
  • Sponsors: Individuals, businesses, or organizations interested in donating items for raffle or making a monetary contribution to defray costs will be cited in all press releases and advertisements, as well as on Better Farm and betterArts' websites and blog. Their names will also be displayed prominently at the event. To offer a sponsorship, e-mail info@betterarts.org or call (315) 482-2536.
  • Volunteers: Anyone willing to run an arts & crafts table, membership sign-up, clean-up/set-up, or the beer tent is asked to please e-mail info@betterfarm.org or call (315) 482-2536. There are five shifts: 10 a.m.-12 p.m., 12-2 p.m., 2-4 p.m., 4-6 p.m., and 6-8 p.m.
  • Organizations: Any local organizations or businesses are welcome to set up a table at this event. Tables cost $10/group. To register your group or organization for this event, contact Nicole Caldwell at (315) 482-2536 or nicole.caldwell@betterfarm.org.
The betterArts board meets at 7 p.m. the first Thursday of every month at Better Farm, 31060 Cottage Hill Road, in Redwood. All meetings are open to the public.

betterArts is a 501c3 non-profit organization dedicated to increasing access to the arts throughout Redwood, N.Y., and surrounding areas. The group's purpose is to offer art and music education through the provision of workshops, residencies, internships, and low-cost or free art instruction, studio, and gallery space for residents. betterArts, Inc. affords people the opportunity to discover and develop their creative and artistic spirit while offering educational opportunities in land stewardship and sustainable agriculture. betterArts, Inc. is committed to promoting the sustainable management of environmental resources while fostering individual and collaborative creative expression for the enjoyment and education of the people of Redwood, the region, and beyond.
Comment

Nicole Caldwell

Nicole Caldwell is a self-taught environmentalist, green-living savant and sustainability educator with more than a decade of professional writing experience. She is also the co-founder of Better Farm and president of betterArts. Nicole’s work has been featured in Mother Earth News, Reader’s Digest, Time Out New York, and many other publications. Her first book, Better: The Everyday Art of Sustainable Living, is due out this July through New Society Publishers.

Spotlight On: New York State Bluebird Society

Mr. Nicol from the New York State Blue Bird Society stopped in at Better Farm on Sunday to introduce himself and give us some literature on his group (and to give us a BEAUTIFUL new bluebird house, see photo above!).

The New York State Bluebird Society is a non-profit organization dedicated to the conservation of the Eastern Bluebird (Sialia sialis), New York's state bird. It is the group's mission to:
  1. monitor and increase production of Eastern Bluebirds and certain other cavity nesting birds through a statewide nestbox program.
  2. educate or inform people of New York on the ecology and management of Eastern Bluebirds.
  3. conduct research on bluebirds and bluebird habitat selection, including nest box preference studies.
  4. cooperate and coordinate with other organizations with purposes similar to those set forth above.
  5. the corporation is organized exclusively for charitible, educational, or scientific purposes within the meaning of Section 501(C) of the United States Internal Revenue code.
Mr. Nicol said he'd spoken with my Uncle Steve about the organization once or twice in the past, which was what inspired him to stop by—extra fitting, as Sunday was also the day after the three-year anniversary of Steve's death. After Mr. Nicol's left, I set about reading the literature he'd left behind:


Then took to hanging the bluebird house he so generously gave Better Farm:


Below is information on everything you'd ever want to know about bluebirds. If you're in New York (or not) and would like to support the valuable work of the New York State Bluebird Society, click here to become a member.

Eastern Bluebird (Sialia sialis)

  • The Eastern Bluebird is a member of the thrush family, as is the Robin.
  • Adult males are a dark blue color on their head, back, wings and tail. Theyare a reddish-brown color on their chin and breast. Their belly is white.
  • Adult females are a duller blueish-gray color on the head, dull brown on their backand blue on the tail and wings. They are a light reddish-bown on the chin and breast.Their belly is white.
  • The Eastern Bluebird is found throughout the eastern US and southern Canada.
  • Eastern Bluebirds in the north will remain as far north during the winter as they can as long as they can find food, water and shelter. The harder the winter, or the more scarce food, water and shelter are, the further south they will migrate till winter breaks.
  • Eastern Bluebirds generally return north to the state of New York in early to mid-March.

Range


NestBox Location

  • Bluebirds nest in open fields or orchards. They don't generally nest in cities or suburbs.
  • Place the box in an open an area as possible, do not mount on trees or buildings. Keep away from the edge of woods as house wrens will fill them up with sticks.
  • mount the box 4 to 6 feet up a pole or board
  • put a guard on the pole to keep out raccoons, snakes and other potential predators.
  • Try to face the box opening towards a tree or bush to give thefledglings something to fledge to
  • Do not face the box opening INTO the prevailing wind direction
  • Place boxes 100 yards from each other to minimize bluebird territory overlap. This distance can be reduced if there are trees/shrubs/landscape that break up the line of sight between the boxes.
  • Consider placing boxes in pairs, either back to back or within 4-6 feet of each other to encourage tree swallows and bluebirds to both nest. They will tolerate each other but not pairs of their same species.
  • If you don't get bluebirds in some boxes (or too many house wrens) after a couple seasons, consider moving them to another location.


NestBox Dimensions

There are many styles and shapes of bluebird boxes. Some made of wood,others PVC. Some general criteria are:
  • Inside dimensions of 4x4 for the eastern bluebird, 5x5 for themountain/western bluebirds.
  • entrance hole of 1.5 inches for the eastern bluebirds, slightly largerfor the mountain/western bluebirds.
  • bottom of entrance hole should be around 6 inches above the floor
  • no perch
  • box should open from top or side to allow for monitoring
  • ventilation at top of sides, drainage holes in bottom


Average Activity Periods

Many of these periods are subject to delay or extension due to inclimate weather and availability of food.
  • Courtship - 3 to 5 days
  • Nest building - 4 to 5 days
  • Egg Laying - starts 1 or 2 days after nest is completed. One egg is laid each day until the clutch is completed. Average clutch size is 5 eggs.
  • Incubation - starts when last egg is laid, lasts on average around 14 days
  • Brooding - starts when eggs hatch, lasts on average around 18 days. Stop nest checks after 12 days to prevent premature fledging


NestBox Monitoring

  • Try to monitor at least once a week
  • Stop monitoring 12 days after the eggs hatch. The young *may* prematurely fledge at this time
  • Minimize your time at the nest, especially in wet/cold weather
  • Tapping on side of box may help flush out brooding parent
  • Take note of eggs and nestlings and dates when laid, hatched and fledged
  • Remove nest after nestlings fledge to promote a subsequent nesting. Bluebirds will nest up to 3 times a season.
  • Join your state bluebird society or the North America Bluebird Society. The society will provide valuable information and birders with similair interests. Your data will help to understand the bluebird's breeding success.


Competing Species

Tree Swallows, Chickadees, Wrens and House Sparrows my attempt to nest in your box. The first three are tolerable. House Sparrows ARE NOT. Please do not "settle" for house sparrows. If you let them breed, you are actually working AGAINST bluebirds and other native cavity nesting birds.
  • Tree Swallows: mount a 2nd box on the same pole or on a pole 4-6 feet away. Tree swallows will nest in one, bluebirds in the other.
  • Wrens: move the box out in the open, away from the edge of the woods
  • Sparrows: keep removing their nests to deter them. They are a non-native unprotected species so you can deal with them as you see fit. We have in-house trap plans if you areso inclined.


Predator Deterrance

  • Put a pole guard on the pole to keep climbing predators out
  • some people grease the poles as well
  • Have the roof of the box overhang the front around 4 inches tomake it harder for predators to reach the entrance hole
  • If birds of prey attack your bluebirds, move the boxes away fromtrees where the prey birds may be launching their attacks
  • keep grass/weeds trimmed near box to remove predator hiding spots
  • deter feral/stray cats. They prey on many bird species.


Food Supply

Bluebirds eat mainly insects that they capture on the ground. They do noteat bird seed. They will eat berries, currants, raisins and mealworms when insects are not readily available.
  • keep some areas mowed to provide ground insects more readily
  • supply some of the materials listed above in bad weather (early spring,late fall, during winter) to supplement insect food.
  • place materials on a covered, open sided tray
  • plant berry-bearing shrubs/trees (holly, olive, mulberry, cherry, honeysuckle)


The NYS DEC sells berry producing seedlings each spring. Check out their link in our links section.

Here's a list of native trees/shrubs bluebirds are known to utilize for food:
Summer or Fall Fruits Winter Fruits
Trees:Trees:
Serviceberry
Flowering dogwood
hawthorn
Serviceberry
red mulberry
black gum
pin cherry
black cherry
choke cherry
sassafras
hackberry
winterberry holly
American holly
eastern red-cedar
American Mt. Ash
Shrubs & Herbs:Shrubs:
Hercules club
red-osier dogwood
hucklebery
spicebush
pokeberry
blackberry/raspberry
American Elderberry
blueberry
arrowwood
red chokeberry
wax myrtle
bayberry
mistletoe
dwarf sumac
staghorn sumac
smooth sumac
blackhaw viburnum
Vines:Vines:
wild grape
american bittersweet
Virgina creeper
poison ivy
coral honeysuckle


Wintering Over

Bluebirds will winter over if the weather does not get too harsh and they have (1) shelter,(2) food and (3) water.

For shelter, bluebirds will roost in empty nestboxes. You can add clean dried grass in thefall if you wish for bedding material. You can also plug up air vent holes to help prevent heat loss. You can also build roosting boxes.
For food, you can plant berry bearing trees and shrubs so the bluebirds will have fresh food available. The also eat raisins and currents.

Martha Sargent suet recipe:
  • 1 cup crunchy peanut butter
  • 1 cup lard
  • 2 cups quick-cook oats
  • 2 cups cornmeal
  • 1 cup regular (white) flour
  • 1/3 cup sugar
Melt the lard and peanut butter together in the microwave or on the stove top. Stir in the remaining ingredients. Pour (actually its more like “plop”) the mixtureinto square freezer containers that will fit your suet basket. Or cool it in the fridge and crumble for a feeding platform. Store it in the freezer or refrigerator (depending on how much you use daily) until you are ready to use it. This recipe makes about six cakes. Only use the peanut butter in a mixture, not alone, as it may stick to the birds' crop.
For water, you can put fresh water out daily if there is not running water available. There are also products available to heat or vibrate the water to help prevent freezing.
Comment

Nicole Caldwell

Nicole Caldwell is a self-taught environmentalist, green-living savant and sustainability educator with more than a decade of professional writing experience. She is also the co-founder of Better Farm and president of betterArts. Nicole’s work has been featured in Mother Earth News, Reader’s Digest, Time Out New York, and many other publications. Her first book, Better: The Everyday Art of Sustainable Living, is due out this July through New Society Publishers.

Grounds Keepers

Chives wake up in one of our raised beds.
It was April last year when enough snow had melted away for us to start working on the grounds at Better Farm and get ready for the spring season. Well, things have started early this year; and on Saturday a bunch of us got busy with the seasonal yard work required to make way for the spring, summer, and fall rush.

Here are pictures from the first week of April, 2011:
Tiger lilies bed at the front of the main house.


And here are pictures this morning—still the middle of March!
Tiger lilies in the front yard.
Onion and garlic sprouts.

Here's a quick "honey-done" list from the last week:
  • Got the materials delivered for construction of the Art Barn's second-story deck and staircase
  • Raked twigs and wood chips away from wood piles and added to compost
  • Turned compost and bagged rich, black dirt for seed planting
  • Planted seeds, stocked greenhouse
  • Raked away brush from sprouting tiger lilies
  • Cleaned out raised herb beds to make way for rising-and-shining chives, garlic, and onions
  • Moved the chicken coop to another section of garden
  • Inventoried bicycles and the work they need to be road-ready this spring
  • Loaded all the bird feeders with seed
  • Inventoried wood for new chicken coop
  • Scooped gravel onto potholes in Art Barn driveway
  • Began organizing things in the Art Barn
  • Dragged some of the patio chairs and loungers out of the car port so we can really get the full effect of these beautiful days
Big thanks to Sue Kerbel, Brian Purwin, Nick Bellman, Tyler Howe, and Shani Abromowitz for getting the proverbial ball rolling. To volunteer at Better Farm, e-mail info@betterfarm.org or call (315) 482-2536.
Comment

Nicole Caldwell

Nicole Caldwell is a self-taught environmentalist, green-living savant and sustainability educator with more than a decade of professional writing experience. She is also the co-founder of Better Farm and president of betterArts. Nicole’s work has been featured in Mother Earth News, Reader’s Digest, Time Out New York, and many other publications. Her first book, Better: The Everyday Art of Sustainable Living, is due out this July through New Society Publishers.

DIY Planetarium

A DIY planetarium model with its Environmentaland crew, posted at Treehugger.com.
Written by Adam Goss for diyplanetarium.blogspot.com.

I've always enjoyed working with planetariums and have recently taken them up as a hobby. As I'm also a member of the Yahoo Groups Small Planetarium blog, I thought it would be fitting to create a blog on my project, documenting the steps for anyone who would like to replicate them. Most recently I constructed a 5-meter diameter Gore Dome inflatable Planetarium out of a thin, lightweight tablecloth plastic.

There are several methods for building a planetarium, but some methods are obviously better than others. A typical amateur approach to planetarium construction is the geodesic dome, constructed of cardboard pentagons. Although this is a perfectly valid approach, it does a poor job of representing a hemisphere as there are many flat sides.

A better approach to planetarium design is a pattern called Gore Domes. Although there is little literature on Gore Domes, the design is used in most planetariums around the world. I am a native of Colorado and live close to the Denver Museum of Nature and Science who recently renovated their planetarium. Their new all digital Gates Planetarium is constructed from a thin sheets of aluminum using the Gore Dome design. Gore domes are unique in that they take flat objects and stitch them together to create a three dimensional dome. The dome itself is constructed from many bulging triangular shaped pieces called 'Gores.' A good representation of this that many of us have done is the elementary orange peel trick; trying to make a 3D object flat (the opposite of what we want to do).


The Gores in this project will look almost exactly like these below:


MATERIALS:

The following materials will be needed when constructing this planetarium:
  • Marker
  • Pen
  • Scissors
  • Ruler (Metric)
  • 40'' wide roll of white tablecloth plastic
  • Masking tape (1.25'' wide)
  • Duct Tape
  • Blue Painters Tape
  • Calculator


STEP 1:
By using the pattern provided by the July 1973 Popular Science Article (here) on Gore Domes, scale all measurements to fit the diameter of the dome being built. The diameter of the dome in the article is 25 Feet, so in order to make my dome (5 meters), I had to multiply all of the dimensions by a scale factor of 0.656167979. This multiplier scaled all dimensions down to a 5 meter diameter, but kept units in English measurement. This is fine if you're comfortable with English units, however I find metric units to be easier to work with on a project like this. I simply set up an excel spreadsheet to calculate the proper dimensions at each height level. A link to a PDF of my calculations can be found here.


STEP2:
Setting up a solid template for cutting out the Gores is crucial when aiming towards a 'perfect' dome. After calculating the dimensions of my Gores, I found it easy to make a template out of tape on the floor. This made cutting and fabricating the sections easy. I laid out plastic over the pattern, put a few books on the top to hold things in place and just ran scissors around the edge for a nice clean cut.


STEP3:
Taping together the Gores is tedious work. If you're taping on the ground (easiest) I would recommend a pair of knee pads to combat the hours of brutality they would otherwise endure (I learned the hard way). Taping the gores together can be done on a table, but is difficult because they keep sliding around. I haven't found a cut and dried method for taping together the sections, but small strips at a time seem to work well as the curvature of the gores is always changing. In my procedure, I started with the top of the gores and worked down to the bottom. On the last section, I brought around the ends and taped them together. After the main body of the dome has been taped together, the pieces can be spread out to reveal the circle left in the top of the dome. Simply cut out a circle to fit in the top (see dimensions PDF) and tape it in.


STEP 4:
The final step of the planetarium process is the fan/inflation procedure. For my setup, I created a pipe that fitted onto a common everyday house fan with the excess plastic. I taped one end to the fan and the other to the ground. Taping the bottom of the output pipe to the ground and narrowing the top (taping parts of the top edges to the ground) creates a very steady non-turbulent airflow ideal for planetariums. After I had the inflation system in place, I laid out the planetarium on the floor so that the inflation pipe was sticking under one of the edges of the dome. The edges were held down with soup cans, but I recommend anything from tape to sandbags (the smaller the footprint the better).


STEP 5:
Enjoy...

My basement was too small for this dome to fully inflate. When I head back up to CSU next week I will be testing this dome in full capacity in one of the ballrooms, complete with a mirrordome projection system. Until then, questions and comments are welcome. I will keep this blog updated as this project progresses. My email is adamthomasgoss@gmail.com. Thanks for reading and happy building!
1 Comment

Nicole Caldwell

Nicole Caldwell is a self-taught environmentalist, green-living savant and sustainability educator with more than a decade of professional writing experience. She is also the co-founder of Better Farm and president of betterArts. Nicole’s work has been featured in Mother Earth News, Reader’s Digest, Time Out New York, and many other publications. Her first book, Better: The Everyday Art of Sustainable Living, is due out this July through New Society Publishers.

Tomorrow: Thousand Islands Central School Wellness Fair

Better Farm will participate tomorrow in the Thousand Islands Central School Wellness Fair, slated from 11 a.m.-2:30 p.m. for students and 3-6 p.m. for the public Friday, March 16, in the Thousand Islands High School gymnasium.


Every student in the high school is expected to attend the event, which is funded by the Carol M. White Physical Education Program Grant. That grant is designed to initiate, expand, and enhance physical education programs, including after-school programs for students in kindergarten through twelfth grade. The event will also feature tours of the new wellness center at the high school.

Grant recipients must implement programs that instruct students in healthy eating habits, good nutrition, and physical fitness activities. This includes fitness education and assessment to help students understand, improve, or maintain their physical well-being. Students will receive instruction in a variety of health, motor skills, and physical activities designed to enhance the physical, mental, and social or emotional development of every student, and to promote physical fitness that supports a lifelong healthy lifestyle.

Better Farm will have a booth at this event with trail guides and maps of hiking opportunities within the Indian River Lakes Conservancy, information about our sustainability internship program and betterArts residencies, a sign-up sheet for the upcoming Earth Day cleanup in Redwood, Better Farm membership opportunities and merchandise, and tons of information about ways individuals can start living healthier, more sustainable lifestyles. Hope to see you there!

Thousand Islands Central School is located at 8481 County Route 9 in Clayton, N.Y., 13624.
Comment

Nicole Caldwell

Nicole Caldwell is a self-taught environmentalist, green-living savant and sustainability educator with more than a decade of professional writing experience. She is also the co-founder of Better Farm and president of betterArts. Nicole’s work has been featured in Mother Earth News, Reader’s Digest, Time Out New York, and many other publications. Her first book, Better: The Everyday Art of Sustainable Living, is due out this July through New Society Publishers.

Building a Better Farm


Article originally published in NNY Business Magazine. Article by Ted Booker. To subscribe to NNY Business Magazine, call (315) 782-1012.

Signs of Spring

Hands in dirt: sure sign of spring.
The first week of March marks the very beginning of the growing season up here in the North Country: prepping and planting seeds, stocking the greenhouse, turning our compost, and getting the rows in the garden ready.

First, we went out to the compost heap and shoveled beautiful, black dirt into old plastic bags to use as potting soil. Then we took all our flats out of the greenhouse and set them up on the picnic table:
Our weekend intern, Shani, at left, and our latest resident, Sue.
Here are Shani and Susan filling the trays with dirt:

To make labels for the plants, Shani cut up empty plastic water bottles and Susan used a Sharpie to write out the names of the veggies we were planting. Once we pushed the seeds into the dirt, it was out to the greenhouse with the soon-to-be sprouts:

To keep the babies hydrated, we're utilizing rainwater from the catchment system installed last summer:

This week we'll be filling the greenhouse, moving the compost heap, and beginning construction on a new chicken coop for our incoming feathered friends. Spring is upon us!

If you'd like to volunteer with us, e-mail info@betterfarm.org.
Comment

Nicole Caldwell

Nicole Caldwell is a self-taught environmentalist, green-living savant and sustainability educator with more than a decade of professional writing experience. She is also the co-founder of Better Farm and president of betterArts. Nicole’s work has been featured in Mother Earth News, Reader’s Digest, Time Out New York, and many other publications. Her first book, Better: The Everyday Art of Sustainable Living, is due out this July through New Society Publishers.

Wild Edible Plants: Eat your sumac

Sumac plants in winter.

There are 250 species of sumac growing in subtropical and temperate regions all over the world. The fruits of the genus Rhus are ground into a deep-red or purple powder used as a spice in Middle Eastern cuisine to add a lemony taste to salads and meat.

In Arab cuisine, sumac is used as a garnish on dishes such as hummus and added to salads in the Levant. Iranian food features sumac on kebabs and lahmacun. In North America, the smooth sumac and staghorn sumac can be used to make "sumac-ade", "Indian lemonade", or "rhus juice". This drink is made by soaking the berries in cool water, rubbing them to extract the essence, straining the liquid through a cotton cloth and sweetening it. Native Americans also used the leaves and drupes of the smooth and staghorn sumacs combined with tobacco in traditional smoking mixtures.
Photo of sumac berries drying out from First Ways. Blogger Rebecca Lerner suggests spreading the berries out on a shelf in a warm, dry room.
A lot of people mistakenly assume all sumac plants are poisonous. But poison sumac, while related to the sumac trees this post is about, is not the same thing and actually looks very different. Poison sumac has smooth leaves and white berries, while edible sumac has tightly clumped red berries and jagged, toothy leaves:

Sumac contains calcium, potassium, magnesium, citric acid and antioxidants, according to a plant physiology study conducted by the Bulgarian Academy of Sciences. Sumac bark is useful medicinally as an astringent tea for anti-diarrhea purposes. It’s also antibacterial.

Sumac makes a great, healthy lemonade alternative. Just soak the berries in cold water, rub them to release the juice, and then leave them for several hours to infuse into the water. You can also heat it up to speed the process. You can also freeze the liquid in ice cube trays and use it year-round like lemon juice. “Wildman” Steve Brill’s Wild Vegan Cookbook offers several interesting recipes for sumac concentrate. 

If you dry the sumac berries out and grind them into a spice powder, it will last year-round without refrigeration. Sprinkle the powder on rice, hummus, or kebabs. 

Here's our friend Bob Laisdell showing how to retrieve the drupes (clusters of berries): 

And our friend Rick Lopez showing off the berries up-close:
 
Want to give it a go? Here's an easy recipe for sumac tea:


Fresh Sumac Iced Tea
Serves 4
6 cups near-boiling water
2 drupes of staghorn sumac berries
Honey or other sweetener to taste 
  1. Remove the berries from the drupes.
  2. Pour nearly boiling water over the berries and steep for an hour. Smoosh the berries in with the water. Strain the berries.
  3. Chill the drink.
  4. Take the warm berries and add to an ice cube tray. Fill with halfway spring water or with the drink itself and freeze.
  5. A few hours later fill up the ice cube tray. This way the berries will be prevented from floating to the top. Freeze again.
  6. Add the ice cubes to your glass and fill with the chilled drink. Add sweetener if you like.
3 Comments

Nicole Caldwell

Nicole Caldwell is a self-taught environmentalist, green-living savant and sustainability educator with more than a decade of professional writing experience. She is also the co-founder of Better Farm and president of betterArts. Nicole’s work has been featured in Mother Earth News, Reader’s Digest, Time Out New York, and many other publications. Her first book, Better: The Everyday Art of Sustainable Living, is due out this July through New Society Publishers.