DIY Simple Graywater System

We use

rainwater catchment

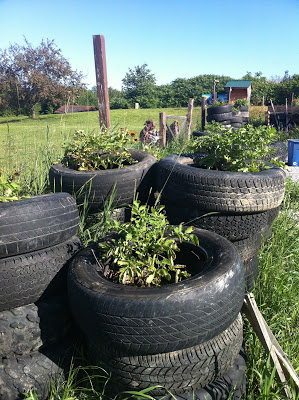
barrels and gutters on various outbuildings at

Better Farm

to trap water for use in irrigation and basic washing stations, like over at the

Art Barn

.

But recently, I acquired a small cottage that has no

graywater

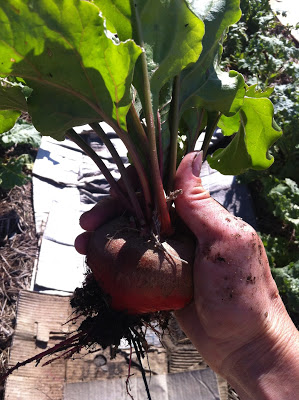
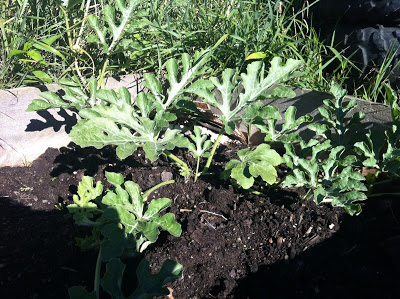
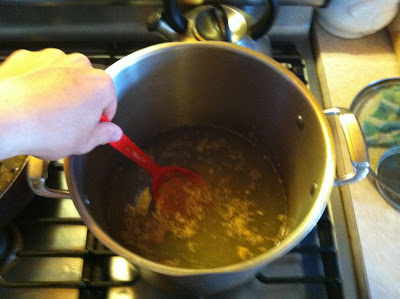
solutions to speak of. The only running water comes off the kitchen sink, where I'm of course using natural biodegradable dish soap free of dyes and perfumes. Still, I wanted to filter the nutrients from the water so they didn't end up in the ground—or worse still—the lake the cottage is surrounded by. There's a larger renovation project looming; but for now, I wanted a temporary fix for how I deal with graywater from that kitchen sink.

With a little muscle, the help of the crew at Better Farm, and a lot of Google searches, we came up with a very simple, temporary system that could see a multitude of applications for anyone interested in filtering collected rainwater, or for filtering graywater from a shower or washing machine. Keep in mind that more sophisticated filtration systems are necessary if you plan to drink the water you're filtering; or for brown water like that coming from toilets. Also, remember that having a graywater filtration system doesn't exempt you from needing to be mindful about what you put

into

the drain—specifically, that with so many biodegradable, scent-free options out there, there's really no reason to still be using cleaning products chock-full of chemicals that are harmful to the environment (and more specifically, you).

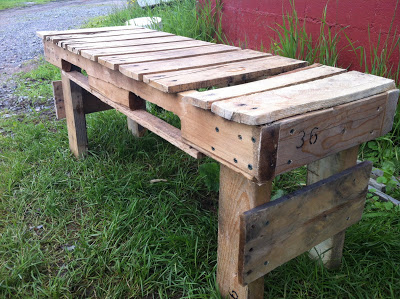
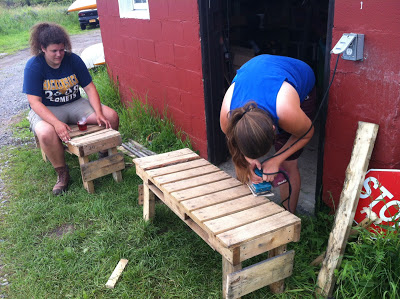
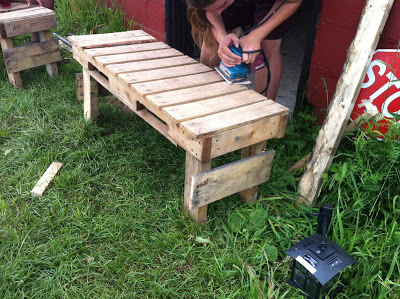
Because the system I was working with is so small, we used a 5-gallon bucket instead of the recommended 55-gallon drum. You can adjust your needs accordingly. Here's what we did (instructions gleaned, and slightly tweaked, from over at

eHow

, with photos from

EcoExist

):

Materials

  • 55-gallon barrel (we used a 5-gallon bucket)

  • Plastic spigot

  • Hose clamp

  • Nylon hose

  • Sand

  • Crushed stone

  • Weed mat

  • Gravel

  • Garden hose

Instructions

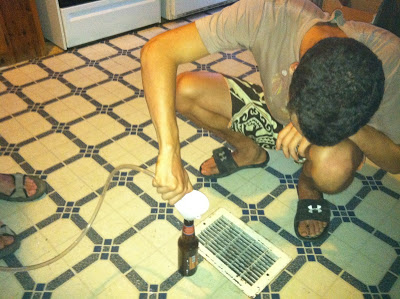
Install a spigot at the bottom of your barrel using a drill with appropriate-sized bit. Be sure to put a rubber washer between your spigot and barrel to create a good seal.

Pour a 6-inch layer of stone into the container once your spigot is in place. Put a sheet of weed mat or window screen (or other mesh or filter) on top of the stone, cut to fit the circular barrel. Pour in a 10-inch layer of sand on top of the weed mat. Put a 1-inch layer of gravel over top to hold the sand in place. This will be the filtering system of your gray water.

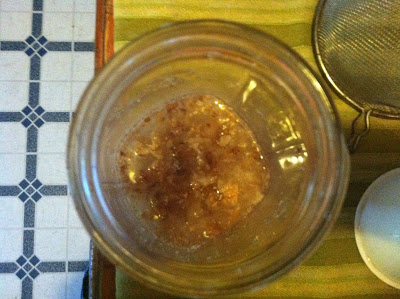
Divert your water. A discharge hose can go directly into your drum with a hose attached to the bottom spigot. You can leave the spigot open with the hose running directly to plants or the ground, or it can go into another barrel for use later in the day. Be sure to use the water as soon as possible, as the bacteria present in the water will multiply quickly, which would make the water unusable on edible plants and foul-smelling. 

Here's a more comprehensive, long-term design that utilizes living plants in a soil-box planter that's hooked to your filtration system to further clean the water before it's dispersed for irrigation. We found this design over at

SuperForest

:

The recycled water from your shower filtered through a grey water system that uses plants, microbes, and passive materials like sand and gravel to clean it. The water is then used in the laundry system, and then recycled once more into the garden. In permaculture we call this function stacking; in this case the function we are stacking is share and clever use and re-use of water. The simplicity of the system is delightful. From human to garden to human to garden, as long as the water passes from one to the next in the proper sequence, the theoretical yield of this wonderfully precious water is limitless. We could conceivably design our buildings (i.e. homes) to collect, store, filter, heat and distribute hot water. Our buildings could also house our gardens, baths, kitchens, and laundry systems. All systems that we humans share that require the use of water must be consolidated and streamlined with an eye toward creative re-use and shared access.

For information on recommended biodegradable products suitable for graywater systems,

click here

.

The recycled water from your shower filtered through a grey water system that uses plants, microbes, and passive materials like sand and gravel to clean it. The water is then used in the laundry system, and then recycled once more into the garden. In permaculture we call this function stacking; in this case the function we are stacking is share and clever use and re-use of water. The simplicity of the system is delightful. From human to garden to human to garden, as long as the water passes from one to the next in the proper sequence, the theoretical yield of this wonderfully precious water is limitless. We could conceivably design our buildings (i.e. homes) to collect, store, filter, heat and distribute hot water. Our buildings could also house our gardens, baths, kitchens, and laundry systems. All systems that we humans share that require the use of water must be consolidated and streamlined with an eye towards creative re-use and shared access. - See more at: http://superforest.org/tag/water-recycling/#sthash.PTH3YLg6.dpuf

4 Comments

Nicole Caldwell

Nicole Caldwell is a self-taught environmentalist, green-living savant and sustainability educator with more than a decade of professional writing experience. She is also the co-founder of Better Farm and president of betterArts. Nicole’s work has been featured in Mother Earth News, Reader’s Digest, Time Out New York, and many other publications. Her first book, Better: The Everyday Art of Sustainable Living, is due out this July through New Society Publishers.

Incoming Bounty

Organic beets!
The North Country saw a late start to gardening season this year, with a ridiculously wet spring and cool start to summer. Now that things have settled down and we're on the brink of August, the food crops are finally catching up to the season. Here's a quick tour of how plants at Better Farm are faring:
Reliance peach trees in the fruit orchard are going wild, though it will be another year or two before they start bearing fruit:


 ...and our newly planted fig trees are doing beautifully:

We have a TON of salad greens that are all doing very well, including this Asian variety:
 ..and look at all this buttercrunch lettuce!


Our peppers have flowers and should be taking shape in the next week or two:

...ditto for our pole and bush beans:

We've got gorgeous organic cabbage coming in:


 ...and bunches of multi-colored Swiss chard:

Even the zucchini, which seemed to take forever, is finally waking up after a long battle with squash bugs:


...and in the next week or two, we promise to have a bazillion tomatoes:

 A personal favorite, ARTICHOKES!

...and oodles of onions:

Carrots are almost ready:

...and asparagus beans:

 Sugar baby watermelons are on their way as well:

...and our first batch of potatoes are just about ready to tumble out of their tires:

Be sure to check our farm stand for fresh produce daily, or call ahead at (315) 482-2536 or email info@betterfarm.org for custom orders.

Comment

Nicole Caldwell

Nicole Caldwell is a self-taught environmentalist, green-living savant and sustainability educator with more than a decade of professional writing experience. She is also the co-founder of Better Farm and president of betterArts. Nicole’s work has been featured in Mother Earth News, Reader’s Digest, Time Out New York, and many other publications. Her first book, Better: The Everyday Art of Sustainable Living, is due out this July through New Society Publishers.

Music Festival Set Aug. 17 at Better Farm

betterArts

presents its second music festival of the summer starting at 4 p.m. Saturday, Aug. 17, at

Better Farm

in Redwood.

The event will feature live musical acts, including headliners

The Aristocrats

and

The Great Fraud

. Concession stands will offer food and beverages for purchase, with all proceeds benefiting arts and sustainability outreach in the North Country. Campsites are also available for overnight lodging at a rate of $10/person/night; please email

info@betterfarm.org

for further information.

The event is free and open to the public. For the most up-to-date information and directions, visit

www.betterarts.org/summerfest

.

The set schedule is as follows:

  • Stone White, 4:30 p.m.

  • Crow's Landing, 5:30 p.m.

  • Fox Richardson, 6:30 p.m.

  • The Aristocrats, 7:30 p.m.

  • Robert J. Finch, 9 p.m. 

  • The Great Fraud 10 p.m.

betterArts is a 501(c)3 non-profit whose purpose is to increase access to the arts in the North Country and beyond through the provisions of free and low-cost workshops, gallery openings, performances, festivals, and artist residencies. To learn more or to make a donation, visit

www.betterarts.org

.

Better Farm is located at 31060 Cottage Hill Road in Redwood, N.Y. Musical acts interested in performing are encouraged to email

info@betterarts.org

.

Comment

Nicole Caldwell

Nicole Caldwell is a self-taught environmentalist, green-living savant and sustainability educator with more than a decade of professional writing experience. She is also the co-founder of Better Farm and president of betterArts. Nicole’s work has been featured in Mother Earth News, Reader’s Digest, Time Out New York, and many other publications. Her first book, Better: The Everyday Art of Sustainable Living, is due out this July through New Society Publishers.

Better Bouldering

From left: Bradley Harrison Smith, Kara Colarusso, Jacob Firman, Sean Durning, Nicole Caldwell, and Rebekah Kosier install a bouldering wall on Better Farm's Art Barn.
We've got a brand-spanking-new bouldering wall at Better Farm, perched along an outside wall of the Art Barn.

Bouldering is a branch of rock climbing that involves climbing low rocks and boulders. It is often designed to be extremely challenging; so that while the climber may not go very high, he or she will have to be physically fit and very skilled. Bouldering is usually practiced with a large mat, so that if the climber falls, he or she will not be injured. It is also generally done in pairs, in case an emergency arises.

A bouldering wall is a type of rock-climbing wall designed specifically for the practice of bouldering. Like a conventional climbing wall, a bouldering wall is constructed with a sturdy wooden backing, and is designed to accommodate climbing holds of various shapes and sizes. Indoor and outdoor versions can be found around the world for practice, fitness, and recreation, and it is also possible to build your own bouldering wall. (Info from WiseGeek)
  
For our setup at Better Farm, we didn't build anything onto the existing wall; instead we simply used studs to anchor our hand and footholds. Most of what we did involved guesswork: stretching ourselves out to determine where the next piece should go, retracing our steps to pick alternative spots for additional pieces.

Check out Metolius Climbing for a great tutorial on constructing a bouldering gym at home.
Comment

Nicole Caldwell

Nicole Caldwell is a self-taught environmentalist, green-living savant and sustainability educator with more than a decade of professional writing experience. She is also the co-founder of Better Farm and president of betterArts. Nicole’s work has been featured in Mother Earth News, Reader’s Digest, Time Out New York, and many other publications. Her first book, Better: The Everyday Art of Sustainable Living, is due out this July through New Society Publishers.

Trellising Tips

Homemade tomato trellises.
We've all seen tomato cages before, but there are much cheaper, more common-sense ways to trellis your fruits and veggies using discarded items you can find around your house.

Tomato Trellis: The "Stake-A-Cage"
The Old World Garden Farms' website has a great set of comprehensive instructions for building a tomato "Stake-A-Cage" trellis system for tomatoes and peppers. The simple plans involve nothing more than chicken wire, wooden stakes, and fencing nails. Each trellis will run you about $2 if you have to buy materials—but at Better Farm we had no problem tracking down some chicken wire and wood scraps to make the whole thing. Click here for full instructions. Here are a few shots of our finished Stake-A-Cages:


Other Simple Trellis Ideas
The basic premis of trellises couldn't be simpler: give viney, climbing plants something to grow onto. That can mean old dog gates, bed frames, ladders, poles, fencing, chicken wire, and many other items fair game for upcycling into trellises. Here are a few we're employing at Better Farm:
Asparagus beans climb a baby gate turned sideways.

A kiwi vine climbs the garden fence at Better Farm.
Loofah sponges make their way across a raised bed and up a wooden post.

Pole beans make their way along a bunk bed frame.
Got a great DIY tip for the garden? Email us at info@betterfarm.org.
Comment

Nicole Caldwell

Nicole Caldwell is a self-taught environmentalist, green-living savant and sustainability educator with more than a decade of professional writing experience. She is also the co-founder of Better Farm and president of betterArts. Nicole’s work has been featured in Mother Earth News, Reader’s Digest, Time Out New York, and many other publications. Her first book, Better: The Everyday Art of Sustainable Living, is due out this July through New Society Publishers.

Art Show, Poetry Reading, Graduation Ceremonies This Saturday!

"A Mobile Lifestyle", Ashley Jones.
"Toolbox Diptych", Ashley Jones.
Please join us for Better Farm's July commencement ceremonies at 7 p.m. this Saturday, July 27 at Better Farm's Art Barn!

The event, free and open to the public, will feature a gallery showing of paintings by betterArts resident Ashley Jones; poetry reading by betterArts resident Bradley Harrison Smith; and a commencement ceremony for Better Farm's June and July interns Kara Colarusso, Jacob Firman, and Rebekah Kosier. Hors d'ouvres and refreshments will be provided. This is a great opportunity to see (and hear!) locally produced art, meet the cast of characters at Better Farm, and learn more about the programming available right here in Redwood.

About the Artists
 
-->
Bradley Harrison Smith graduated in May with an MFA in Creative Writing from the University of Texas. The Colfax, Iowa, native recently completed his first full-length poetry collection, which is pending publication, and has published a chapbook of poems called "Diorama of a People, Burning" through Ricochet Editions at the University of Southern California. He worked during his residency on new poems he seeks to develop into a second, full-length collection.

Ashley Jones is a visual artist who with a BFA in printmaking from California College of the Arts. She attended Clayworks on Columbia in Brooklyn, N.Y., and Diablo Valley College in Pleasonton, Calif. Her work has been shown extensively at galleries from coast to coast and she has been the recipient of several scholarships and awards for her art. Ashley lives in Brooklyn, N.Y. See more of her work here.

About the Sustainability Students

Kara Colarusso is a graduate of Eckerd College in St. Petersburg, Fla., where she majored in environmental studies. Her experience with environmental education through a program called "Edible Peace Patch" and her volunteer work at Eckerd's campus garden prepared her to spend the past month gaining a sustainability education at Better Farm. Kara seeks to pursue her interests in sustainability, as well as become certified as a yoga instructor.

Jacob Firman is a student at Oberlin College in Oberlin, Ohio, where his focus is on environmental studies. During his time at Better Farm, he became particularly interested in topics he could pay forward when he returns to school in the fall; namely, compost and aquaponics. He also created his own independent study in fermentation; facilitating projects to create sauerkraut and ginger beer, among other fermentation projects. He plans to present proposals at Oberlin to initiate a compost system for food halls on-campus, and install aquaponics systems in on-campus housing.

Rebekah Kosier is a political science student at Wells College in Aurora, N.Y. She grew up in rural Alabama, where she had the opportunity to witness the process of farming and to know many farmers; but sought an education in sustainability at Better Farm in order to connect sustainable farming practices to her interest in food sovereignty. Her goal in college is to learn about ways to transform how people interact with political institutions through the use of food and farming. 

Better Farm's Art Barn is located at 31060 Cottage Hill Road in Redwood, N.Y. For further information, please call (315) 482-2536 or email info@betterfarm.org. To learn more about betterArts' residency program or Better Farm's sustainability education program, follow these links: www.betterarts.org/residencies and www.betterfarm.org/sustainability-internship.

Comment

Nicole Caldwell

Nicole Caldwell is a self-taught environmentalist, green-living savant and sustainability educator with more than a decade of professional writing experience. She is also the co-founder of Better Farm and president of betterArts. Nicole’s work has been featured in Mother Earth News, Reader’s Digest, Time Out New York, and many other publications. Her first book, Better: The Everyday Art of Sustainable Living, is due out this July through New Society Publishers.

We've Got Chicks!

 
There is new life on the farm! We have eight baby chickens who hatched last week after 21 days in the incubator.
To prepare for the babies' arrival, we borrowed a heat lamp and metal trough from our friends Penny and Steve in Clayton. It's very important that new hatchlings be kept in a circular container in order to avoid anyone getting crushed in a corner (the birds have a tendency to "pile on" and stay huddled together). Water for newborns is kept in ice cube trays to prevent drowning; and food (specially formulated for babies) is kept in a small trough or in the ring of a waterer.

It was only hours after we'd stocked up on supplies that I went to check on the eggs and saw four had cracks. I was so excited, I kept vigil overnight in the room with the incubator. The next day around 10 a.m., one of the baby chick started to make her way out of the shell. It took the little lady about 15 minutes to break free from the shell: I became a mother! Later that day we had four more chicks; the next day, two more hatched. 

When a chick hatches, it's very important to leave it alone while it dries off. A chick can live up to two days in an incubator after hatching, living off the innards of the egg it came from. Our chicks took 24 hours to dry off completely, at which point we moved them to the metal trough. We suspended the heat lamp approximately 18 inches off the ground, and adjusted accordingly. If the chicks are all huddled directly under the light, they are too cold and the light needs to be lowered. If they avoid the light altogether, that means it's too hot and needs to be raised. As the chicks grow, the light will gradually be raised more and more until it is no longer needed.

All told, we had eight chicks hatch from the eggs. Let’s hope they all love me as much as I love them!

Making Blueberry Wine


Alcohol fermenter Paul Jennings came to Better Farm this past Saturday, July 13, to teach a workshop on how to make two gallons of blueberry spice wine. It was much faster and simpler than I could have ever imagined! Anyone can do it in their own homes with the proper equipment. 

Here is the breakdown of ingredients:

4 - 6 lbs. of blueberries 4.5 lbs. sugar
1 tsp. ginger 1 tsp. nutmeg
1 tsp. cinnamon 2 tsp. acid blend
2 tsp. yeast nutrient 1 tsp. tannin
1 tsp. pectic acid Nylon mesh bag
Montrachet yeast Stabilizer

Directions:

1)   Chill 1 gallon of water. 
2)   Boil the 1 gallon of water, spices and sugar
3)   Wash berries and place them into mesh bags and place in primary fermenter. Mash      
      berries.
4)   Pour boiled sugar water over berries in primary (this will set the color). Add 1 gallon
      of cool/cold water. Add tannin, acid blend, and yeast nutrient.
5)   When temperature of liquid has cooled, add the pectic enzyme and check and 
      record of the S.G.
6)   24 hours later, add yeast
7)   Stir daily
8)   When S.G. is about 1.030 (about 1 week), remove the berries and rack to 
      secondary after about 4 weeks, S.G. should be at 1.000 (this means that the 
      fermentation is complete). Rack again. Add clearing agent.
9)   Check clarity in about 1 month. If not clear at this point, wait another 2 weeks and
      re-check.
10)  When must is ready to bottle, add stabilizer
11)  If sweetening is needed, boil 4 - 12 oz. sugar in water and add
12)  Bottle!

NOTE: the longer the wine "ages," the better it will taste. Since this wine has no preservatives added, it should be consumed within one year.

What was really special about this wine-making workshop was that residents at Better Farm were able to go out and pick local wild blueberries growing a town over in Plessis! It was a very sustainable and educational experience that provided a unique way to utilize local agriculture.

Making Natural Plant Dyes

After recently learning how to identify different types of edible wild plants, I decided to find wild plants that could be used to make natural fabric dyes. One of the main benefits of creating natural dyes is that the process is completely safe and allows you the ability to create your own colors and dye your own fabrics. To begin the process, I took a walk through the woods by the farm and picked a variety of flowers and berries, planning to identify them and determine if they would be suitable for fabric dyes. Although certain plants that are harmful when eaten remain suitable for dyeing, others can cause skin irritations so it is important to have a basic knowledge of the plants you intend to use in the dye.

Pioneer Thinking’s website has a great list of different plants, including which colors and shades they make when used for dyeing.

When using plant dyes, you first need to set the fabric that you will be dyeing with a salt fixative. I used ¼ cup of salt because I was only testing the dye on a small piece of fabric,

but most instructions recommend ¾ cup of plain salt.

Mix the salt with several cups of water and bring to a boil, then submerge your fabric and allow it to simmer for an hour. When the fabric is through, you should rinse it with cold water and ring out. For my dye, I used about 2 cups of red berries I found in the woods, along with a handful of petals from purple clovers and purple loosestrife. If any of the ingredients you are using as dye could be harmful if ingested or irritate skin, use an old pot that you don’t use for cooking anymore when boiling the plants. For the berry and petal mixture, I boiled them for about an hour and then let the berries soak in the water for another half hour before straining them and soaking the cloth in the mixture. The berries and petals created a light pink tint on the cloth I used, although I had hoped it would be darker. 

Home-Brewed, Jamaican Ginger Beer

Artist-in-residence Brad Smith helps out with ginger beer bottling.
With the over-21-ers enjoying beer in the house, I figured I'd make a lil' something for the kids. Ginger beer has the carbonation and sweetness of soda without all the preservatives and processed ingredients.

Sustainability intern Jacob Firman bottles ginger beer.
All you need is ginger root, lemon, and sugar. No commercial yeasts necessary-- this process utilizes omnipresent free-floating yeasts and bacteria, a process called wild fermentation.
This recipe is from Chelsea Green:

TIMEFRAME: 2 to 3 weeks
INGREDIENTS (for 1 gallon/4 liters):
  • 3 inches/8 centimeters or more fresh gingerroot
  • 2 cups/500 milliliters sugar
  • 2 lemons
  • Water
TIMEFRAME: 2 to 3 weeks
INGREDIENTS (for 1 gallon/4 liters):
  • 3 inches/8 centimeters or more fresh gingerroot
  • 2 cups/500 milliliters sugar
  • 2 lemons
  • Water
PROCESS:
  1. Start the “ginger bug”: Add 2 teaspoons (10 milliliters) grated ginger (skin and all) and 2 teaspoons (10 milliliters) sugar to 1 cup (250 milliliters) of water. Stir well and leave in a warm spot, covered with cheesecloth to allow free circulation of air while keeping flies out. Add this amount of ginger and sugar every day or two and stir, until the bug starts bubbling, in 2 days to about a week.
  2. Make the ginger beer any time after the bug becomes active. (If you wait more than a couple of days, keep feeding the bug fresh ginger and sugar every 2 days.) Boil 2 quarts (2 liters) of water. Add about 2 inches (5 centimeters) of gingerroot, grated, for a mild ginger flavor (up to 6 inches/15 centimeters for an intense ginger flavor) and 11/2 cups (375 milliliters) sugar. Boil this mixture for about 15 minutes. Cool.
  3. Once the ginger-sugar-water mixture has cooled, strain the ginger out and add the juice of the lemons and the strained ginger bug. (If you intend to make this process an ongoing rhythm, reserve a few tablespoons of the active bug as a starter and replenish it with additional water, grated ginger, and sugar.) Add enough water to make 1 gallon (4 liters).
  4. Bottle in sealable bottles: Recycle plastic soda bottles with screw tops; rubber gasket “bail-top” bottles that Grolsch and some other premium beers use; sealable juice jugs; or capped beer bottles, as described in chapter 11. Leave bottles to ferment in a warm spot for about 2 weeks.
  5. Cool before opening. When you open ginger beer, be prepared with a glass, since carbonation can be strong and force liquid rushing out of the bottle.
- See more at: http://www.chelseagreen.com/content/recipe-ginger-beer/#sthash.61GhEqXl.dpuf

Recipe: Ginger Beer

Categories: Food & Health
Posted on Thursday, October 18th, 2012 at 9:00 am by jmccharen

Ginger is a spice perfect for fall weather. Its fragrance can perk up everything from chai tea to apple pie. This humble root can also add a gentle kick of heat to stir fries or soups.
The natural yeasts in the root can also be used to kick start a bubbly ginger beer. Give it a try!
The following recipe is from Wild Fermentation: The Flavor, Nutrition, and Craft of Live-Culture Foods, by Sandor Katz.
This Caribbean-style soft drink uses a “ginger bug” to start the fermentation. I got this idea from Sally Fallon’s Nourishing Traditions. The ginger bug is simply water, sugar, and grated ginger, which starts actively fermenting within a couple of days. This easy starter can be used as yeast in any alcohol ferment, or to start a sourdough.
This ginger beer is a soft drink, fermented just enough to create carbonation but not enough to contribute any appreciable level of alcohol. If the ginger is mild, kids love it.
TIMEFRAME: 2 to 3 weeks
INGREDIENTS (for 1 gallon/4 liters):
  • 3 inches/8 centimeters or more fresh gingerroot
  • 2 cups/500 milliliters sugar
  • 2 lemons
  • Water
PROCESS:
  1. Start the “ginger bug”: Add 2 teaspoons (10 milliliters) grated ginger (skin and all) and 2 teaspoons (10 milliliters) sugar to 1 cup (250 milliliters) of water. Stir well and leave in a warm spot, covered with cheesecloth to allow free circulation of air while keeping flies out. Add this amount of ginger and sugar every day or two and stir, until the bug starts bubbling, in 2 days to about a week.
  2. Make the ginger beer any time after the bug becomes active. (If you wait more than a couple of days, keep feeding the bug fresh ginger and sugar every 2 days.) Boil 2 quarts (2 liters) of water. Add about 2 inches (5 centimeters) of gingerroot, grated, for a mild ginger flavor (up to 6 inches/15 centimeters for an intense ginger flavor) and 11/2 cups (375 milliliters) sugar. Boil this mixture for about 15 minutes. Cool.
  3. Once the ginger-sugar-water mixture has cooled, strain the ginger out and add the juice of the lemons and the strained ginger bug. (If you intend to make this process an ongoing rhythm, reserve a few tablespoons of the active bug as a starter and replenish it with additional water, grated ginger, and sugar.) Add enough water to make 1 gallon (4 liters).
  4. Bottle in sealable bottles: Recycle plastic soda bottles with screw tops; rubber gasket “bail-top” bottles that Grolsch and some other premium beers use; sealable juice jugs; or capped beer bottles, as described in chapter 11. Leave bottles to ferment in a warm spot for about 2 weeks.
  5. Cool before opening. When you open ginger beer, be prepared with a glass, since carbonation can be strong and force liquid rushing out of the bottle.
- See more at: http://www.chelseagreen.com/content/recipe-ginger-beer/#sthash.61GhEqXl.dpuf 
PROCESS:
  1. Start the “ginger bug”: Add 2 teaspoons (10 milliliters) grated ginger (skin and all) and 2 teaspoons (10 milliliters) sugar to 1 cup (250 milliliters) of water. Stir well and leave in a warm spot, covered with cheesecloth to allow free circulation of air while keeping flies out. Add this amount of ginger and sugar every day or two and stir, until the bug starts bubbling, in 2 days to about a week.
  2. Make the ginger beer any time after the bug becomes active. (If you wait more than a couple of days, keep feeding the bug fresh ginger and sugar every 2 days.) Boil 2 quarts (2 liters) of water. Add about 2 inches (5 centimeters) of gingerroot, grated, for a mild ginger flavor (up to 6 inches/15 centimeters for an intense ginger flavor) and 11/2 cups (375 milliliters) sugar. Boil this mixture for about 15 minutes. Cool.
  3. Once the ginger-sugar-water mixture has cooled, strain the ginger out and add the juice of the lemons and the strained ginger bug. (If you intend to make this process an ongoing rhythm, reserve a few tablespoons of the active bug as a starter and replenish it with additional water, grated ginger, and sugar.) Add enough water to make 1 gallon (4 liters).
  4. Bottle in sealable bottles: Recycle plastic soda bottles with screw tops; rubber gasket “bail-top” bottles that Grolsch and some other premium beers use; sealable juice jugs; or capped beer bottles, as described in chapter 11. Leave bottles to ferment in a warm spot for about 2 weeks.
  5. Cool before opening. When you open ginger beer, be prepared with a glass, since carbonation can be strong and force liquid rushing out of the bottle.
TIMEFRAME: 2 to 3 weeks
INGREDIENTS (for 1 gallon/4 liters):
  • 3 inches/8 centimeters or more fresh gingerroot
  • 2 cups/500 milliliters sugar
  • 2 lemons
  • Water
- See more at: http://www.chelseagreen.com/content/recipe-ginger-beer/#sthash.61GhEqXl.dpuf

Recipe: Ginger Beer

Categories: Food & Health
Posted on Thursday, October 18th, 2012 at 9:00 am by jmccharen

Ginger is a spice perfect for fall weather. Its fragrance can perk up everything from chai tea to apple pie. This humble root can also add a gentle kick of heat to stir fries or soups.
The natural yeasts in the root can also be used to kick start a bubbly ginger beer. Give it a try!
The following recipe is from Wild Fermentation: The Flavor, Nutrition, and Craft of Live-Culture Foods, by Sandor Katz.
This Caribbean-style soft drink uses a “ginger bug” to start the fermentation. I got this idea from Sally Fallon’s Nourishing Traditions. The ginger bug is simply water, sugar, and grated ginger, which starts actively fermenting within a couple of days. This easy starter can be used as yeast in any alcohol ferment, or to start a sourdough.
This ginger beer is a soft drink, fermented just enough to create carbonation but not enough to contribute any appreciable level of alcohol. If the ginger is mild, kids love it.
TIMEFRAME: 2 to 3 weeks
INGREDIENTS (for 1 gallon/4 liters):
  • 3 inches/8 centimeters or more fresh gingerroot
  • 2 cups/500 milliliters sugar
  • 2 lemons
  • Water
PROCESS:
  1. Start the “ginger bug”: Add 2 teaspoons (10 milliliters) grated ginger (skin and all) and 2 teaspoons (10 milliliters) sugar to 1 cup (250 milliliters) of water. Stir well and leave in a warm spot, covered with cheesecloth to allow free circulation of air while keeping flies out. Add this amount of ginger and sugar every day or two and stir, until the bug starts bubbling, in 2 days to about a week.
  2. Make the ginger beer any time after the bug becomes active. (If you wait more than a couple of days, keep feeding the bug fresh ginger and sugar every 2 days.) Boil 2 quarts (2 liters) of water. Add about 2 inches (5 centimeters) of gingerroot, grated, for a mild ginger flavor (up to 6 inches/15 centimeters for an intense ginger flavor) and 11/2 cups (375 milliliters) sugar. Boil this mixture for about 15 minutes. Cool.
  3. Once the ginger-sugar-water mixture has cooled, strain the ginger out and add the juice of the lemons and the strained ginger bug. (If you intend to make this process an ongoing rhythm, reserve a few tablespoons of the active bug as a starter and replenish it with additional water, grated ginger, and sugar.) Add enough water to make 1 gallon (4 liters).
  4. Bottle in sealable bottles: Recycle plastic soda bottles with screw tops; rubber gasket “bail-top” bottles that Grolsch and some other premium beers use; sealable juice jugs; or capped beer bottles, as described in chapter 11. Leave bottles to ferment in a warm spot for about 2 weeks.
  5. Cool before opening. When you open ginger beer, be prepared with a glass, since carbonation can be strong and force liquid rushing out of the bottle.
- See more at: http://www.chelseagreen.com/content/recipe-ginger-beer/#sthash.61GhEqXl.dpuf
Some notes on what I learned from this experience:
  • Make sure the bottle caps are compatible with the bottles.
I mistakenly used european bottles (stella artois) with American style bottle caps which are not compatible.
  • Flip top bottles or Grolsch bottles are great because they are glass and the seal is reusable and easy to apply.
  • Be sure to leave plenty of space (two inches or more) in the neck because I had one bottle blow up. Fortunately, the bottom of the bottle blew off so I didn’t have to mop up the walls and ceiling. Which brings me to another lesson— be sure to put the bottles in a bucket or box so that in case they do explode, the mess is contained.
  •  
  • Old plastic bottles with twist tops work for bottling but I prefer glass for the taste.
  •   Get a friend to help you with bottling. It takes two to tango.
    Some of the best things in life require a little patience. In two weeks you'll be in a gingery heaven.

    DIY Pallet Benches

    I stumbled last year upon a DIY webpage that had plans for a bunch of different furniture all made from wood pallets. I instantly decided that I would start making things. Right before I came to Better Farm I constructed a poorly designed bed frame from pallets because I had no idea what I was doing and didn’t have the right tools. After learning a few things here at Better Farm, I was ready to try again; this time, with benches. I found the perfect pallet and grabbed some extra 2x4s that had been pulled off of other pallets that we were using for the sauna.

    I took a circular saw and cut the pallet at the edge of the middle board so that I now had two separate pieces. From there I took a 2x4 and reconnected the boards that had just been cut with nails so I had two skinny pallets which would be used for the seat of the bench. I filled in the ends of each pallet with a 2x4 that had been cut to size so that I had a rectangular frame on the bottom.

    The 2x4s were all roughly 36 inches in length so I cut 8 legs from them that measured roughly 18 inches. Each bench has four legs, which I attached in the corners after making sure they were square. I then attached a scrap piece at the ends of the benches on the legs for a little bit of extra support. The benches were made in about 2 hours and it was pretty simple.
    To keep them looking rustic I gave them a light sanding and put some polyurethane on them. The first bench was more of a prototype so I just put it together without taking note of the writing that was on the pallets. The second time around I made a point to put the writing on the outside to give the bench more of a handmade look. It was a great project that anyone can do and I can’t wait to make more.     

    This Saturday: Blueberry Wine Workshop

    Our second annual Blueberry Winemaking Workshop is slated for 11 a.m. this Saturday, July 13, at Better Farm in Redwood.

    Students will go through the entire first phase of fermenting their own wine utilizing locally harvested fruit. This is a great class for the novice winemaker; or the wine hobbyist who would like to come out and compare notes. There is a suggested $10 donation for this course.

    Instructor: Paul Jennings

    Better Farm is located at 31060 Cottage Hill Road in Redwood. To see our full roster of upcoming workshops, please

    click here

    .

    Comment

    Nicole Caldwell

    Nicole Caldwell is a self-taught environmentalist, green-living savant and sustainability educator with more than a decade of professional writing experience. She is also the co-founder of Better Farm and president of betterArts. Nicole’s work has been featured in Mother Earth News, Reader’s Digest, Time Out New York, and many other publications. Her first book, Better: The Everyday Art of Sustainable Living, is due out this July through New Society Publishers.

    Mushroom Hunt

    One afternoon last week, the Better Farm crew and I went out for a hike to find mushrooms (and maybe my truck keys, which I'd lost in the woods a week earlier). The hike is part of our outdoor survival unit, which includes foraging and identifying edible wild plants.

    Once we got into the woods, we started to really fight with the bugs. But we also started to see a bunch of mushrooms: two on the hillside, and three more on the flat ground. 

    After walking for a little while, we found another mushroom in a clearing then a few more on a stick. Three more were growing in decaying bark. Another grew in the shade of a rock, and lastly there was one growing among the grass. All together we found 10 mushrooms. Here's what we identified:

    1.       Pluteus
    2.       Eucocoprinns Bimbanmii
    3.       Unkown
    4.       Hygrocybe Vitellina (inedible)
    5.       False Chanterelle (edible)
    6.       Gymnopilus
    7.       Atramentaria
    8.       Galerina Autumnails (inedible)
    9.       Literocybe Clari
    10.   Amanita
    11.   Laccaria Amethystea (Edible)