Upcycling Workshop

Before coming to Better Farm, I had heard of the idea of upcycling, but had never participated in it before Saturday's workshop: Creative Upcycling and the Art of Transforming Junk.

Upcycling is the process of converting waste materials or useless products into new materials or products of better quality or for better environmental value.  Upcycling is the process of converting waste materials or useless products into new materials or products of better quality or for better environmental value.  Upcycling is taking the recyclable materials and using them directly to benefit you, or your environment.

This past Saturday on July 6, Stephanie DeJoseph of La Mia Designs came to Better Farm to involve the Better Farm community in upcycling through a workshop sponsored by betterArts.  Through "Creative Upcycling and the Art of Transforming Junk," Stephanie helped the students to think outside of the box and create something new from recycled materials. The idea of upcycling is an alternative to recycling, where the recycled materials are sent to a recycling center.

Some of the upcycling projects that the interns participated in was an old rundown lampshade turned into a new improved functioning lampshade, a broken table turned into a beautiful tile mosaic, a wooden table turned into a Charlie Brown modge-podge, and a wine bottle turned into a flower vase.


For our full schedule of summer workshops, visit www.betterfarm.org/upcoming-workshops.

'Creative Upcycling and the Art of Transforming Junk' Workshop this Saturday!

A workshop dedicated to the art of transforming junk is slated from 11 a.m.-1:30 p.m. Saturday, July 6 at Better Farm in Redwood.

In "Creative Upcyling and the Art of Transforming Junk",each student will bring an old, tired furniture or clothing piece to transform into something else that is functional. From sketches to the final product, instructor Stephanie DeJoseph of La Mia Designs will help students visualize, create, transform, and finalize an upcycled piece. Encouraged materials (anyone without the following is not excluded from attending): one piece to upcycle, sewing machine, fabric scraps, old clothing, small furniture pieces. Ages 15 and up. This workshop is being put on in partnership with betterArts.

There is a suggested $10 donation for all workshops held at Better Farm. To register or for more information, call (315) 482-2536 or email info@betterarts.org. Better Farm is located at 31060 Cottage Hill Road in Redwood.

Comment

Nicole Caldwell

Nicole Caldwell is a self-taught environmentalist, green-living savant and sustainability educator with more than a decade of professional writing experience. She is also the co-founder of Better Farm and president of betterArts. Nicole’s work has been featured in Mother Earth News, Reader’s Digest, Time Out New York, and many other publications. Her first book, Better: The Everyday Art of Sustainable Living, is due out this July through New Society Publishers.

We're having babies!

Candling one of Bernadette's eggs after one week.
Last Tuesday I had chicken duty and noticed that Bernadette, one of our barred rock chickens, was missing. I looked around thinking she had simply stayed outside of coop overnight, but she was gone. Later that day I saw her alongside the other birds; but the next morning she was missing again. 

We found her next to the farm stand, sitting on a nest of nine eggs! After discussing all the pros and cons of letting her sit it out or hatching the eggs in an incubator, we decided to incubate the babies ourselves. We took a roadtrip out to Agway in Lafargeville and picked up an incubator with fan and automatic egg turner. 

It took about 12 hours for us to get the optimal 99.5-degree temperature in the incubator with 50- to 60-percent humidity. Once we were ready, Nicole and I scared Bernadette of the eggs and herded her into her coop, where she could relax and un-brood (a task that took overnight: By morning, she was back to normal). 

Eggs in hand, we loaded the incubator; along with a bunch of eggs from the other chickens (freshly laid).

After a week of carefully checking the heat and humidity, we candled the eggs to see if any of them were developing into baby birds. Out of all of them, we think only two are not fertilized.

Stay tuned for Week Two!!

DIY Sauna: Day One

The beginnings of Better Farm's new sauna!
We started building a sauna last weekend that utilizes recycled and new lumber, upcycled insulation, as well as incorporating an old tree stump into the design as one of the corner posts.

Our workshop instructor, Bob Laisdell, started out with a basic design that utilizes a tree stump left over after a wind storm two years ago knocked over a tree on Better Farm's property:
 The stump in this drawing is being re-imagined as a corner bench seat. Here's the rough materials list:
To start, we began clearing the ground where the sauna will be: mostly getting rid of large clumps of weeds and roots.
The chickens love to be around when we're shoveling: It's like a worm/grub/bug buffet!
Then we cruised over to Redwood Lumber Co. (next door at our neighbor John Grisanti's place) to pick up the wood we'd need:

Next, we determined where each of the corners would be, using the stump as a starting point, and dug holes for cinder blocks where the other corner posts would be. While that was getting done, Katie and AmberLee notched 4x4's that would be pieced together to create the shape of the sauna.


After that, we placed floor joists and a center beam, and nailed small pieces of boards from a wood pallet onto the sides of the floor joists to hold the insulation. Simultaneously, another group was putting up the wooden beams for the side walls and temporarily nailing them in place with a crossways board.


Insulation going in:


After measuring the distance across the base of the sauna, we began cutting boards from the wood pallets into our different sizes in order to create an alternating flooring pattern and nailing down the boards as they were being cut.


 Here's our progress after Day One:

For a full listing of upcoming workshops, click here. Care to join us as we finish constructing the sauna? Email us at info@betterfarm.org.

Firman's Fermentation Adventures: Sauerkraut

Jacob Firman makes sauerkraut.


To ferment means ‘to bubble’ or excite; and boy have I become fermented about fermentation—mostly thanks to the guru of fermentation Sandor Katz, author of Wild Fermentation and The Art of Fermentation. I intend this summer to ferment a variety of things. Last week I did sourdough and this week, I ventured into the world of vegetable ferments with sauerkraut.
My biggest challenge in making sauerkraut was finding the right container. You need a cylindrical container such as crock or a jar and something flat like a plate that fits snug into the container to keep the vegetables submerged. Ideally you would use a ceramic crock like the recipe suggests but I couldn’t find one so I used a mason jar, a smaller jar lid that fit inside and a glass to push it down.

I took the most basic route to make sauerkraut, using just cabbage and salt. It tasted wonderful! Sour, tangy, and alive with bacteria. Judging by how fast we went through the jar, the rest of the house must have thought so too. Next time I make kraut I'll be sure to use a larger container.

Here's a simple recipe for making your own sauerkraut: 

From Wild Fermentation:
Timeframe: 1-4 weeks
Special Equipment: ceramic crock or food-grade plastic bucket, one gallon capacity or greater; plate to fit inside crock or bucket; gallon jug filled with water; cloth cover (dish towel will work)


Ingredients:
5 pounds cabbage
3 Tbsp. sea salt

Instructions:
Chop or grate cabbage, finely or coarsely, with or without hearts, however you like it. Place cabbage in a large bowl as you chop it. Sprinkle salt on the cabbage as you go. The salt pulls water out of the cabbage (through osmosis), and this creates the brine in which the cabbage can ferment and sour without rotting. The salt also has the effect of keeping the cabbage crunchy, by inhibiting organisms and enzymes that soften it. 3 tablespoons of salt is a rough guideline for 5 pounds of cabbage. I never measure the salt; I just shake some on after I chop up each cabbage. I use more salt in summer, less in winter.

Add other vegetables. Grate carrots for a coleslaw-like kraut. Other vegetables I’ve added include onions, garlic, seaweed, greens, Brussels sprouts, small whole heads of cabbage, turnips, beets, and burdock roots. You can also add fruits (apples, whole or sliced, are classic), and herbs and spices (caraway seeds, dill seeds, celery seeds, and juniper berries are classic, but anything you like will work). Experiment.

Mix ingredients together and pack into crock. Pack just a bit into the crock at a time and tamp it down hard using your fists or any (other) sturdy kitchen implement. The tamping packs the kraut tight in the crock and helps force water out of the cabbage.

Cover kraut with a plate or some other lid that fits snugly inside the crock. Place a clean weight (a glass jug filled with water) on the cover. This weight is to force water out of the cabbage and then keep the cabbage submerged under the brine. Cover the whole thing with a cloth to keep dust and flies out.

Press down on the weight to add pressure to the cabbage and help force water out of it. Continue doing this periodically (as often as you think of it, every few hours), until the brine rises above the cover. This can take up to about 24 hours, as the salt draws water out of the cabbage slowly. Some cabbage, particularly if it is old, simply contains less water. If the brine does not rise above the plate level by the next day, add enough salt water to bring the brine level above the plate. Add about a teaspoon of salt to a cup of water and stir until it’s completely dissolved.

Leave the crock to ferment. I generally store the crock in an unobtrusive corner of the kitchen where I won’t forget about it, but where it won’t be in anybody’s way. You could also store it in a cool basement if you want a slower fermentation that will preserve for longer.

Check the kraut every day or two. The volume reduces as the fermentation proceeds. Sometimes mold appears on the surface. Many books refer to this mold as “scum,” but I prefer to think of it as a bloom. Skim what you can off of the surface; it will break up and you will probably not be able to remove all of it. Don’t worry about this. It’s just a surface phenomenon, a result of contact with the air. The kraut itself is under the anaerobic protection of the brine. Rinse off the plate and the weight. Taste the kraut. Generally it starts to be tangy after a few days, and the taste gets stronger as time passes. In the cool temperatures of a cellar in winter, kraut can keep improving for months and months. In the summer or in a heated room, its life cycle is more rapid. Eventually it becomes soft and the flavor turns less pleasant.

Enjoy! I generally scoop out a bowl- or jarful at a time and keep it in the fridge. I start when the kraut is young and enjoy its evolving flavor over the course of a few weeks. Try the sauerkraut juice that will be left in the bowl after the kraut is eaten. Sauerkraut juice is a rare delicacy and unparalleled digestive tonic. Each time you scoop some kraut out of the crock, you have to repack it carefully. Make sure the kraut is packed tight in the crock, the surface is level, and the cover and weight are clean. Sometimes brine evaporates, so if the kraut is not submerged below brine just add salted water as necessary. Some people preserve kraut by canning and heat-processing it. This can be done; but so much of the power of sauerkraut is its aliveness that I wonder: Why kill it?

Develop a rhythm. I try to start a new batch before the previous batch runs out. I remove the remaining kraut from the crock, repack it with fresh salted cabbage, then pour the old kraut and its juices over the new kraut. This gives the new batch a boost with an active culture starter.

DIY Hinged Bench from Old Doors

This bench, made from old, discarded doors, has a hinged top for huge amounts of storage space.

We kept busy last Saturday building the frame for a sauna, installing a lot of lights and new sound equipment in the Art Barn, and increasing storage in the barn's studio space. For that, Greg and I made a hinged bench that doubles as seating and storage.

For the sides of the bench, Greg cut one side of pocket door in half, using the other half as the front of the bench. He reinforced the walls and front by nailing the pieces together and screwing them into a small wood frame running along the floor and wall.  

When the base was all put together, we started on the top. We realized pretty quickly that we'd need a support beam running along the length of its center; and we had to put a piece of wood into the wall so the whole thing wouldn't move. 


We hinged the top door to a piece of wood screwed into the back of the frame so that the entire top of the bench can lift up for storage. We plan to make another one of these so we have two long benches underneath the bank of windows on the second floor. In total, this project cost us $0, the only expenses being hinges (which we had), and the correct screws for the job (we used 2.5").


Got a great DIY project you'd like to share? Email us at info@beterfarm.org.

Homemade Soybean Burgers

Soybean slider!

Soybean slider!

I wrote last week about making soy milk from scratch. With the leftover mash, I experimented with a previously used chickpea slider recipe to create soybean sliders. The results were great, and the burgers are easy to freeze—but I'd recommend making way more than you need because they go fast!

I put the soybean mash in a bowl and added onions, shreddd carrots, and anythind else I could find in the fridge (potatoes, turnips, radishes—anything will work!). I added two eggs from our chickens, some bread crumbs, and lots of spices from the garden (sage, oregano, mint, and lots of chives). After I mixed it up, I added flour until I had the right consistency and put some vegetable oil in a pan to warm up. 

I formed the mash into patties and fried them until they were golden-brown. Served up with a bunch of fixings, they were delicious! Meat-eaters and vegetarians alike will love this recipe.

Inspiration: Keyhole Garden

A keyhole garden is a raised, circular garden with a compost basket in the center, which gives it a keyhole shape when viewed from above. Keyhole gardens are often used in dry climates where the topsoil is very thin and rainfall is infrequent because it can survive with very little watering due to the compost basket.

The keyhole garden was initially developed in Africa by humanitarian organizations in order to create a sustainable food source that would be relatively unaffected by climate.

According to the BBC, “three keyhole gardens can feed a family of 10”for an entire year.

The placement of the compost basket makes the garden easily accessible and allows the layers of the garden to retain moisture and nutrients that run off from the compost basket. Keyhole gardens can be constructed with recycled materials, making them ideal for people looking for sustainable alternatives to traditional gardens. The soil of keyhole gardens can be constructed of mostly compost or the traditional layering method can be used.

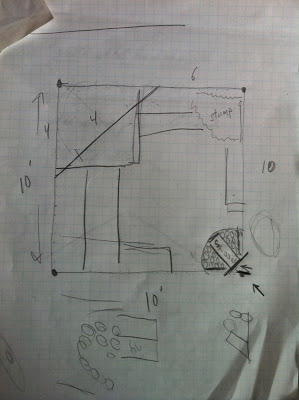
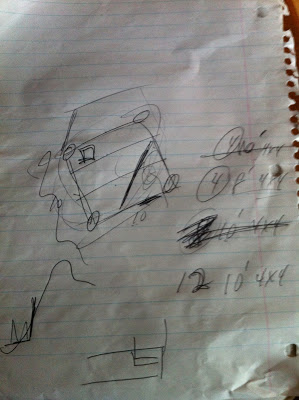
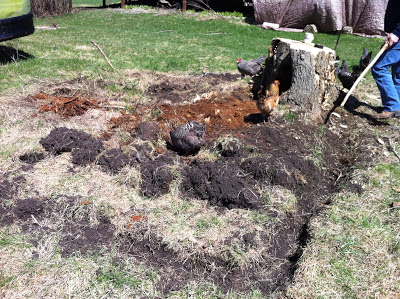
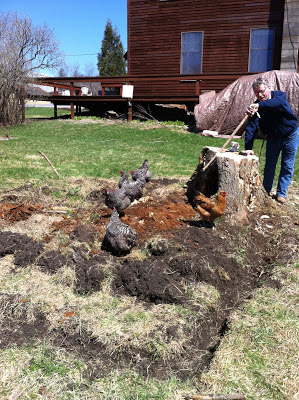
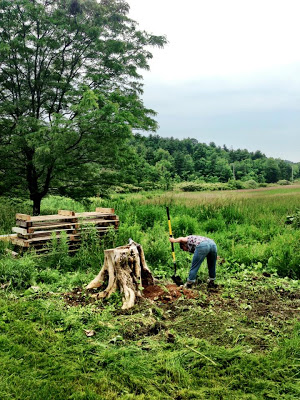
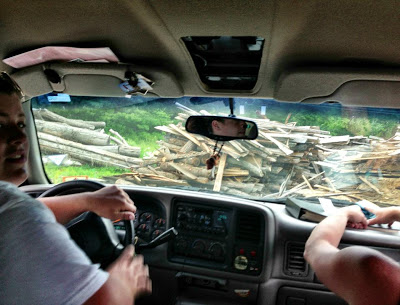
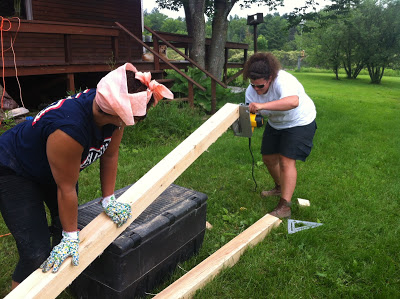
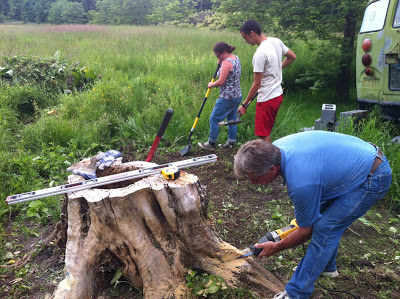
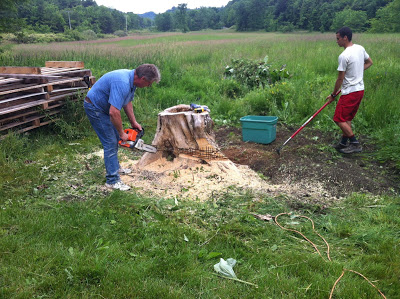
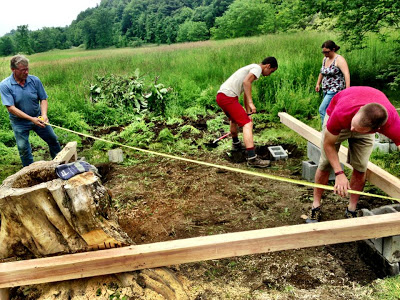
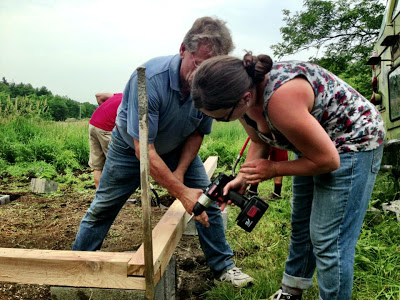
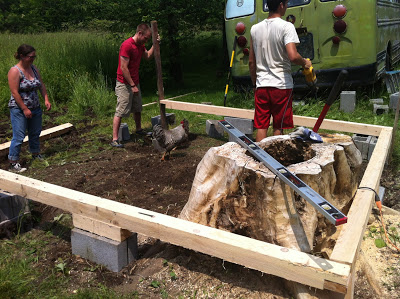
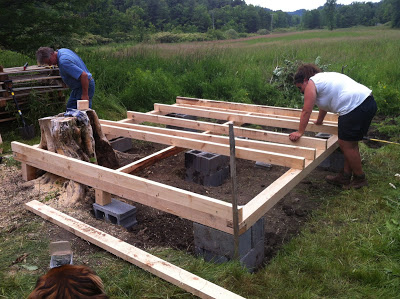
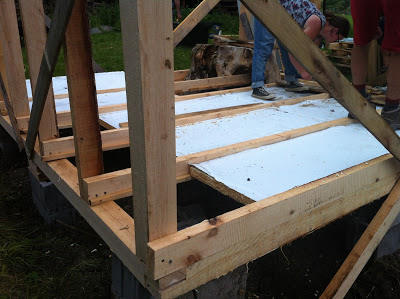
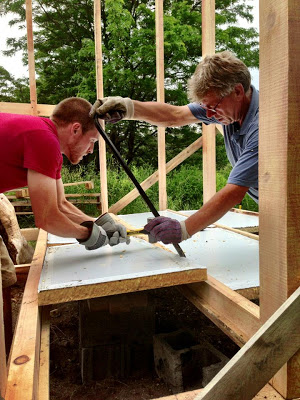
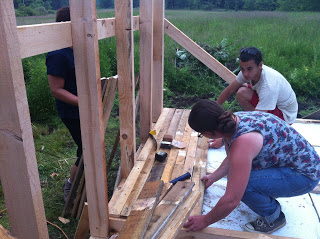
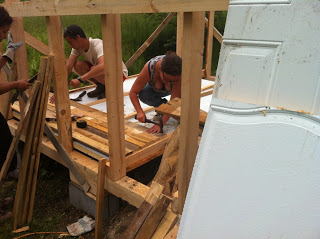
To build a keyhole garden, you need to first mark the outline of the garden and place four corner posts in the center; the corner posts will be used to construct the compost basket. The outline of the garden will dip into the center on one side so the compost basket will be easily accessible. The basket is encircled with rope and can also be thatched to allow water poured into the basket to seep out into the rest of the garden. For the first layer of the garden, you can use iron scraps such as empty food or soda cans, dry animal bones, or fist-sized stones. These materials provide drainage in the rain and minerals to the soil. The first layer can be covered with soil or compost, thatching grass to retain moisture, and wood ash to provide potassium. This layer can be covered with another layer of soil or compost. Each layer should slope downward from the basket so water can flow into the soil. A thick layer of mixed soil and dry manure can be added on top and stones should be added to the outer wall as the layers grow taller.

Although keyhole gardens can produce all-year round depending on climate and what types of plants are planted in the garden, in the winter, plants should be protected by using either thatching grass or an old carpet that can be removed during the day to allow them to receive sunlight.

The 'Humanure' Compost Toilet System

Our humanure toilet prototype, built in about two hours for $0.

Whether you 're hosting an event and need a few extra porta-potties, in need of a toilet out by your work room or garage, re-doing your camp on the lake and lack a bathroom, or if you're ready to transition from a water-based septic or sewer system, the "humanure" compost toilet is a simple, cheap, ecologically responsible way to deal with human waste.

First, the stats:

  • Residential toilets account for approximately 30% of indoor residential water use in the United States—equivalent to more than 2.1 trillion gallons of water consumed each year. (EPA)

  • Over the course of your lifetime, you will likely flush the toilet nearly 140,000 times. (EPA)

  • Leaking toilets (even the ones you only hear at night) can lose 30 to 500 gallons per day. (American Water Works Foundation)

  • Many of our toilets have a constant leak — somewhere around 22 gallons per day. This translates into about 8,000 gallons per year of wasted water, water that could be saved. (United States Geological Survey)

Our main resource for constructing a humanure toilet was Joseph Jenkins' site, The Humanure Handbook. In addition to free compost-toilet plans and tons of great information,  he's got humanure toilets for sale, books available on the subject, and informational videos about emptying bins, layering materials, and more.

From that site:

Although most of the world's humanure is quickly flushed down a drain, or discarded into the environment as a pollutant, it could instead be converted, through composting, into lush vegetative growth, and used to feed humanity. The humanure process involves a compost toilet, a compost bin and cover material. Toilet instructions are simple. There are a variety of ways to make a humanure toilet (or you can buy one).

Here are a few images of completed humanure toilets.

There's not a whole lot to the design: You've got a 5-gallon bucket in a wooden box with hinged top, connected to a toilet seat. Next to the toilet, you keep a container filled with sawdust. After each use, a scoop of sawdust is added to help with decomposition and neutralize any odors. When the toilet is full, you empty it into a compost heap outside, add a thick layer of hay or straw (or weeds, dead leaves, or grass clippings), and wash the bin out. How gross is that? Not as bad as you might guess: Click here for full instructions (and video) on emptying and cleaning receptacles.

The purposes for composting humanure include preventing water pollution, recycling human excrement to prevent fecal contamination of the environment, and recovering soil nutrients for the purpose of growing food. It is recommended that you keep a two- or even three-sectioned composting system so that you can let your compost decompose for up to a year before it is broken down completely for use in a flower or vegetable garden. The compost system can be used for all compostable home items (from grass clippings to veggie scraps to humanure).

For our humanure toilet, we used a 5-gallon bucket, plywood scraps we found in the wood shed, an old toilet seat cover, and a few screws. We used the directions available for free at Jenkins' website (click here for those plans). Here's Greg making the fit for the top of the box:

...Greg and Jacob fitting the pieces of the box together:

...Jacob and Katie cutting the legs:

...Rebekah and Jacob throwing a coat of primer onto the box:

 ... And our finished prototype. After being in use for four days, we report only a slight odor of sawdust, and no bug attraction.

1 Comment

Nicole Caldwell

Nicole Caldwell is a self-taught environmentalist, green-living savant and sustainability educator with more than a decade of professional writing experience. She is also the co-founder of Better Farm and president of betterArts. Nicole’s work has been featured in Mother Earth News, Reader’s Digest, Time Out New York, and many other publications. Her first book, Better: The Everyday Art of Sustainable Living, is due out this July through New Society Publishers.

Sauna Workshop Tomorrow!

Note: There is a suggested $10 donation for any workshop at Better Farm.

A sauna construction workshop is slated at 11 a.m. Saturday, June, 22, at

Better Farm

.

Students will learn to create a sauna with all the amenities using only recycled/reclaimed/upcycled/local materials. This hands-on class will examine materials, ways to refurbish discarded materials, and basic tool tutorials; culminating in the construction of a sauna on-site at Better Farm.

Materials to be used: locally sourced wood from sawmill next door, a tree stump reappropriated as seating, upcycled foam core insulation, refurbished cast-iron woodstove, discarded cinder blocks, and discarded slab wood.

Students are encourage to bring safety goggles, work gloves, and a bagged lunch. Please note that this workshop will break ground and establish the sauna's foundation; with completion of the sauna slated for a second workshop at a later date.

  Instructor: Bob Laisdell

To RSVP for this workshop, please call (315) 482-2536 or email info@betterfarm.org.

Comment

Nicole Caldwell

Nicole Caldwell is a self-taught environmentalist, green-living savant and sustainability educator with more than a decade of professional writing experience. She is also the co-founder of Better Farm and president of betterArts. Nicole’s work has been featured in Mother Earth News, Reader’s Digest, Time Out New York, and many other publications. Her first book, Better: The Everyday Art of Sustainable Living, is due out this July through New Society Publishers.

Homemade Soy Milk

I decided last week to make a vegan cake and I need soy milk. We'd run of soy milk out at the house, but we did have a lot of dried soybeans given to us last year by a local farmer. 

I cleaned the soybeans, then put them in two bowls of water overnight to rehydrate. Once they were ready to go, I drained the soybeans and put them in a food processor, adding water as needed. Then I put the mash in a big pot to cook for 45 minutes at a low simmer. I drained the mash (see a subsequent post for an easy soybean slider recipe), and the remaining liquid was my

soy milk.

To make about 2 quarts and 1 1/2 pints of soy milk, you will need:

  • 1 cup of soybeans (Soybeans are generally about 89 cents a pound, so this recipe would only cost about 50 cents)

  • 11 total cups of water (this will be added two to three cups at a time)

  • 1/4 cup of sugar (this probably will be adjusted according to your tastes)

Some basic equipment is also needed:

  • A blender

  • A pot (should be fairly big and be able to hold at least 11 cups)

  • Multiple bowls

  • A cheesecloth (this is for straining the mixture so other items could be used in place of this, like a strainer)

  • A wooden spatula for stirring

  • A container for holding the finished soy milk

Sourdough Sage Flatbread with Homemade Starter

Sure, you can make sourdough bread with store-bought yeast. But you can also make your own sourdough starter, making use of unique wild yeast floating around in your kitchen—and especially in the flour itself. A sourdough starter serves the same function store-bought yeast would, but gives your bread a unique flavor by utilizing that wild yeast available all around you.


Wild yeast spores and lactic-acid bacteria are airborne all around you and are ever-present in flour. Making your own sourdough starter is as simple as combining flour (unsterilized, grain-based flour is best for the most amount of wild yeast spores) and water and leaving the mix covered for a week, creating ideal conditions for those airborne spores and bacteria to multiply.

Mix flour and water together, cover it with a cheesecloth of coffee filter and rubber band to keep bugs and dust out, and wait a week for the microorganisms to colonize your container and begin the fermentation process. Mix at least once daily. After a couple of days, when it begins bubbling, you should feed it a few table spoons of flour to keep it going.


Be sure to go for a bigger container than you think you might need or you may come back in the afternoon to find something like this!


The sage was harvested from Better Farm's herb garden and the microorganisms from the kitchen. Can't get much more local than that!

Read more about making your own sourdough starter here.

Building an Insect Hotel


An insect hotel is an ideal way to attract beneficial insects to your garden. A few days ago, we decided to build our own insect hotel so the interns set off around the farm to find materials like hollow sticks, pipes, rocks, and anything that looked like it could be used to house insects.


We found an old dresser out in the wood shed and decided to use it as the main base for our insect hotel because of the conveniently located shelves where we could place our assortment of sticks, rocks, and pipes. To make a sturdier back for the dresser, we cut some pieces of oddly-shaped plywood into nearly identical pieces and screwed them in.

Next, we drilled holes in some of the larger pieces of wood that we found to create more places for the insects to live.

Then we moved the hotel into the back of the garden and placed the different objects onto the shelves and the ground nearby for particularly large sticks and other objects that would not fit in the rest of the dresser. The insect hotel is open for business!


Read more about insect hotels and get some great ideas for building your own here.