Homemade Soybean Burgers

Soybean slider!

Soybean slider!

I wrote last week about making soy milk from scratch. With the leftover mash, I experimented with a previously used chickpea slider recipe to create soybean sliders. The results were great, and the burgers are easy to freeze—but I'd recommend making way more than you need because they go fast!

I put the soybean mash in a bowl and added onions, shreddd carrots, and anythind else I could find in the fridge (potatoes, turnips, radishes—anything will work!). I added two eggs from our chickens, some bread crumbs, and lots of spices from the garden (sage, oregano, mint, and lots of chives). After I mixed it up, I added flour until I had the right consistency and put some vegetable oil in a pan to warm up. 

I formed the mash into patties and fried them until they were golden-brown. Served up with a bunch of fixings, they were delicious! Meat-eaters and vegetarians alike will love this recipe.

Inspiration: Keyhole Garden

A keyhole garden is a raised, circular garden with a compost basket in the center, which gives it a keyhole shape when viewed from above. Keyhole gardens are often used in dry climates where the topsoil is very thin and rainfall is infrequent because it can survive with very little watering due to the compost basket.

The keyhole garden was initially developed in Africa by humanitarian organizations in order to create a sustainable food source that would be relatively unaffected by climate.

According to the BBC, “three keyhole gardens can feed a family of 10”for an entire year.

The placement of the compost basket makes the garden easily accessible and allows the layers of the garden to retain moisture and nutrients that run off from the compost basket. Keyhole gardens can be constructed with recycled materials, making them ideal for people looking for sustainable alternatives to traditional gardens. The soil of keyhole gardens can be constructed of mostly compost or the traditional layering method can be used.

To build a keyhole garden, you need to first mark the outline of the garden and place four corner posts in the center; the corner posts will be used to construct the compost basket. The outline of the garden will dip into the center on one side so the compost basket will be easily accessible. The basket is encircled with rope and can also be thatched to allow water poured into the basket to seep out into the rest of the garden. For the first layer of the garden, you can use iron scraps such as empty food or soda cans, dry animal bones, or fist-sized stones. These materials provide drainage in the rain and minerals to the soil. The first layer can be covered with soil or compost, thatching grass to retain moisture, and wood ash to provide potassium. This layer can be covered with another layer of soil or compost. Each layer should slope downward from the basket so water can flow into the soil. A thick layer of mixed soil and dry manure can be added on top and stones should be added to the outer wall as the layers grow taller.

Although keyhole gardens can produce all-year round depending on climate and what types of plants are planted in the garden, in the winter, plants should be protected by using either thatching grass or an old carpet that can be removed during the day to allow them to receive sunlight.

The 'Humanure' Compost Toilet System

Our humanure toilet prototype, built in about two hours for $0.

Whether you 're hosting an event and need a few extra porta-potties, in need of a toilet out by your work room or garage, re-doing your camp on the lake and lack a bathroom, or if you're ready to transition from a water-based septic or sewer system, the "humanure" compost toilet is a simple, cheap, ecologically responsible way to deal with human waste.

First, the stats:

  • Residential toilets account for approximately 30% of indoor residential water use in the United States—equivalent to more than 2.1 trillion gallons of water consumed each year. (EPA)

  • Over the course of your lifetime, you will likely flush the toilet nearly 140,000 times. (EPA)

  • Leaking toilets (even the ones you only hear at night) can lose 30 to 500 gallons per day. (American Water Works Foundation)

  • Many of our toilets have a constant leak — somewhere around 22 gallons per day. This translates into about 8,000 gallons per year of wasted water, water that could be saved. (United States Geological Survey)

Our main resource for constructing a humanure toilet was Joseph Jenkins' site, The Humanure Handbook. In addition to free compost-toilet plans and tons of great information,  he's got humanure toilets for sale, books available on the subject, and informational videos about emptying bins, layering materials, and more.

From that site:

Although most of the world's humanure is quickly flushed down a drain, or discarded into the environment as a pollutant, it could instead be converted, through composting, into lush vegetative growth, and used to feed humanity. The humanure process involves a compost toilet, a compost bin and cover material. Toilet instructions are simple. There are a variety of ways to make a humanure toilet (or you can buy one).

Here are a few images of completed humanure toilets.

There's not a whole lot to the design: You've got a 5-gallon bucket in a wooden box with hinged top, connected to a toilet seat. Next to the toilet, you keep a container filled with sawdust. After each use, a scoop of sawdust is added to help with decomposition and neutralize any odors. When the toilet is full, you empty it into a compost heap outside, add a thick layer of hay or straw (or weeds, dead leaves, or grass clippings), and wash the bin out. How gross is that? Not as bad as you might guess: Click here for full instructions (and video) on emptying and cleaning receptacles.

The purposes for composting humanure include preventing water pollution, recycling human excrement to prevent fecal contamination of the environment, and recovering soil nutrients for the purpose of growing food. It is recommended that you keep a two- or even three-sectioned composting system so that you can let your compost decompose for up to a year before it is broken down completely for use in a flower or vegetable garden. The compost system can be used for all compostable home items (from grass clippings to veggie scraps to humanure).

For our humanure toilet, we used a 5-gallon bucket, plywood scraps we found in the wood shed, an old toilet seat cover, and a few screws. We used the directions available for free at Jenkins' website (click here for those plans). Here's Greg making the fit for the top of the box:

...Greg and Jacob fitting the pieces of the box together:

...Jacob and Katie cutting the legs:

...Rebekah and Jacob throwing a coat of primer onto the box:

 ... And our finished prototype. After being in use for four days, we report only a slight odor of sawdust, and no bug attraction.

1 Comment

Nicole Caldwell

Nicole Caldwell is a self-taught environmentalist, green-living savant and sustainability educator with more than a decade of professional writing experience. She is also the co-founder of Better Farm and president of betterArts. Nicole’s work has been featured in Mother Earth News, Reader’s Digest, Time Out New York, and many other publications. Her first book, Better: The Everyday Art of Sustainable Living, is due out this July through New Society Publishers.

Sauna Workshop Tomorrow!

Note: There is a suggested $10 donation for any workshop at Better Farm.

A sauna construction workshop is slated at 11 a.m. Saturday, June, 22, at

Better Farm

.

Students will learn to create a sauna with all the amenities using only recycled/reclaimed/upcycled/local materials. This hands-on class will examine materials, ways to refurbish discarded materials, and basic tool tutorials; culminating in the construction of a sauna on-site at Better Farm.

Materials to be used: locally sourced wood from sawmill next door, a tree stump reappropriated as seating, upcycled foam core insulation, refurbished cast-iron woodstove, discarded cinder blocks, and discarded slab wood.

Students are encourage to bring safety goggles, work gloves, and a bagged lunch. Please note that this workshop will break ground and establish the sauna's foundation; with completion of the sauna slated for a second workshop at a later date.

  Instructor: Bob Laisdell

To RSVP for this workshop, please call (315) 482-2536 or email info@betterfarm.org.

Comment

Nicole Caldwell

Nicole Caldwell is a self-taught environmentalist, green-living savant and sustainability educator with more than a decade of professional writing experience. She is also the co-founder of Better Farm and president of betterArts. Nicole’s work has been featured in Mother Earth News, Reader’s Digest, Time Out New York, and many other publications. Her first book, Better: The Everyday Art of Sustainable Living, is due out this July through New Society Publishers.

Homemade Soy Milk

I decided last week to make a vegan cake and I need soy milk. We'd run of soy milk out at the house, but we did have a lot of dried soybeans given to us last year by a local farmer. 

I cleaned the soybeans, then put them in two bowls of water overnight to rehydrate. Once they were ready to go, I drained the soybeans and put them in a food processor, adding water as needed. Then I put the mash in a big pot to cook for 45 minutes at a low simmer. I drained the mash (see a subsequent post for an easy soybean slider recipe), and the remaining liquid was my

soy milk.

To make about 2 quarts and 1 1/2 pints of soy milk, you will need:

  • 1 cup of soybeans (Soybeans are generally about 89 cents a pound, so this recipe would only cost about 50 cents)

  • 11 total cups of water (this will be added two to three cups at a time)

  • 1/4 cup of sugar (this probably will be adjusted according to your tastes)

Some basic equipment is also needed:

  • A blender

  • A pot (should be fairly big and be able to hold at least 11 cups)

  • Multiple bowls

  • A cheesecloth (this is for straining the mixture so other items could be used in place of this, like a strainer)

  • A wooden spatula for stirring

  • A container for holding the finished soy milk

Sourdough Sage Flatbread with Homemade Starter

Sure, you can make sourdough bread with store-bought yeast. But you can also make your own sourdough starter, making use of unique wild yeast floating around in your kitchen—and especially in the flour itself. A sourdough starter serves the same function store-bought yeast would, but gives your bread a unique flavor by utilizing that wild yeast available all around you.


Wild yeast spores and lactic-acid bacteria are airborne all around you and are ever-present in flour. Making your own sourdough starter is as simple as combining flour (unsterilized, grain-based flour is best for the most amount of wild yeast spores) and water and leaving the mix covered for a week, creating ideal conditions for those airborne spores and bacteria to multiply.

Mix flour and water together, cover it with a cheesecloth of coffee filter and rubber band to keep bugs and dust out, and wait a week for the microorganisms to colonize your container and begin the fermentation process. Mix at least once daily. After a couple of days, when it begins bubbling, you should feed it a few table spoons of flour to keep it going.


Be sure to go for a bigger container than you think you might need or you may come back in the afternoon to find something like this!


The sage was harvested from Better Farm's herb garden and the microorganisms from the kitchen. Can't get much more local than that!

Read more about making your own sourdough starter here.

Building an Insect Hotel


An insect hotel is an ideal way to attract beneficial insects to your garden. A few days ago, we decided to build our own insect hotel so the interns set off around the farm to find materials like hollow sticks, pipes, rocks, and anything that looked like it could be used to house insects.


We found an old dresser out in the wood shed and decided to use it as the main base for our insect hotel because of the conveniently located shelves where we could place our assortment of sticks, rocks, and pipes. To make a sturdier back for the dresser, we cut some pieces of oddly-shaped plywood into nearly identical pieces and screwed them in.

Next, we drilled holes in some of the larger pieces of wood that we found to create more places for the insects to live.

Then we moved the hotel into the back of the garden and placed the different objects onto the shelves and the ground nearby for particularly large sticks and other objects that would not fit in the rest of the dresser. The insect hotel is open for business!


Read more about insect hotels and get some great ideas for building your own here.

Beer Brewing 101: Oatmeal Stout

Students at Saturday oatmeal stout brewing workshop add molasses to the mix.
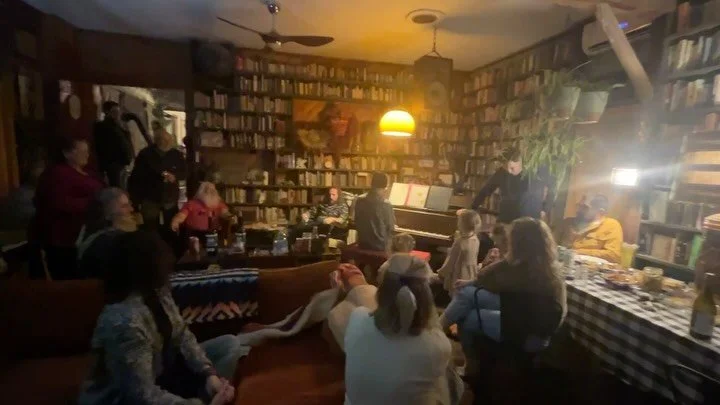
Our workshop season kicked off Saturday with a beer-brewing workshop taught by Master Brewer Paul Jennings. This was part one of a three-part brewing series Paul is offering at Better Farm this summer (wine making is slated for July 13—you don't want to miss it!), and the focus was on getting a batch of oatmeal stout started.


We used a basic stout recipe for this, and got the first steps completed in one morning. We added yeast the following day, and are now enjoying the process of watching the mixture ferment. We'll be able to carbonate the beer in a few weeks. Here's the recipe we followed:

Ingredients
1 pound dry light malt extract
1 pound oatmeal
1 cup brown sugar
2 cups molasses
2 oz. Keng Golding hops
1 packet Lallemand Windsor yeast
1 1/4 cups priming sugar or cane sugar
1 hops bag for oatmeal

Directions
Bring 2 gallons of water to a boil.
Turn off burner and add bagged oatmeal to the water.
Let sit for 1 hour.
Remove oatmeal from the water.
Add all other ingredients to the water.
Heat the mixture (wort) almost to boiling and simmer for 1 hour.
Bring the mixture to a boil and let wort boil for 1/2 hour.
Add wort to primary fermenter and top off to the 5-gallon mark with boiled water.
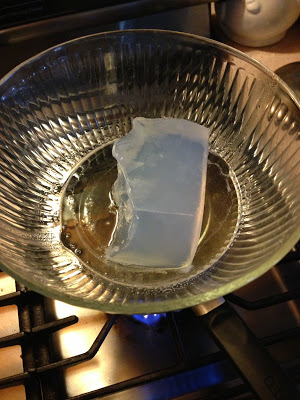
Add yeast when cooled. (Temperature should be down to 70 degrees—click here to learn how to make your own wort chiller, which will cool the wort quickly. The faster you can cool the wort, the better the beer's clarity and flavor, and reduces the risk of contamination).
At bottling time, add priming sugar 3 hours prior.

Some photos of the process:


Primary fermenter, left, and at plastic bin with other supplies like thermometers.
Pouring the wort into a primary fermenter.
We'll check back in a few weeks to show you the carbonation and bottling process! If you plan to be in the North Country this Saturday, be sure to sign up for our sauna-building workshop!

To find out more about upcoming fermentation workshops and other educational opportunities at Better Farm this summer, click here.
Comment

Nicole Caldwell

Nicole Caldwell is a self-taught environmentalist, green-living savant and sustainability educator with more than a decade of professional writing experience. She is also the co-founder of Better Farm and president of betterArts. Nicole’s work has been featured in Mother Earth News, Reader’s Digest, Time Out New York, and many other publications. Her first book, Better: The Everyday Art of Sustainable Living, is due out this July through New Society Publishers.

Paying it Forward

From left Rebekah Kosier, Jacob Firman, and Nicole Caldwell work in a neighbor's garden.
An integral part of Better Farm's Sustainability Education Program is community service work. These activities serve dual functions: to pay manpower forward and to teach students new skills that can be applied to future projects (and paid forward in future community service activities). Our belief is that a successful, sustainable community utilizes bartering, volunteerism, and the sharing of specialized skills to propel neighborhoods forward. This has been proven time and time again at Better Farm; where the volunteerism of our neighbors is largely responsible for how far the "better" project has come in four short years.

Here are the service projects we all took part in last week.

Home Repair and Revitalization
We helped a neighbor scrape old exterior paint on his house to prepare for a fresh coat. Several of the people working on this project hadn't done a scraping project before, so this was a new skill for some of us. Understanding the basics of scraping, powerwashing, and painting will allow you to take care of your own home throughout your life; and will save you thousands (yes, thousands) every time you DIY your paint jobs. Keep in mind that when figuring out paint costs, the paint only accounts for between 15 and 25 percent of total costs (the rest is labor). We'll be back at this property later this week to finish the scraping and start the painting... stay tuned!

Garden Work
Working in other people's gardens and seeing how they do things allows our students to gain a broader perspective on options for their own gardens when they go back home. We talk a lot about different versions of permaculture gardens, basic components of growing organically, options for getting rid of weeds, and more, but nothing trumps hands-on experience. For that, last Friday we visited a garden a few towns away to mound dirt into hills for pumpkins, stretch black plastic over rows, and get some peppers and tomatoes in the ground.
The garden we worked on functions similarly to the gardens at Better Farm, except we use cardboard as our weed barrier while this tract uses black plastic. After raking the dirt into rows, the plastic is stretched over the entire space. Holes are cut along the raised rows to make room for seedlings, and composted dirt is added directly to those plants throughout the season for additional nourishment. This allows a gardener to focus organic fertilizers on the plants themselves without worrying about tilling nutrients into a larger area. The plastic works as a perfect weed barrier and lasts several years; while cardboard has to be replaced throughout the summer as it continuously decomposes.


Educational Outreach
Lyme Central School in Chaumont hosted a "Backyard Science Day" that we stopped in at to talk to kids about building their own solar ovens. We also got to take a look at that school's brand-new hoop house and compost set up (stay tuned for more information on that). Click here to read all about the solar oven and to download the plans for yourself.

Know of someone in the North Country who could use a hand? Want help making your garden "better"? Get in touch! We can be reached at info@betterfarm.org or (315) 482-2536.
Comment

Nicole Caldwell

Nicole Caldwell is a self-taught environmentalist, green-living savant and sustainability educator with more than a decade of professional writing experience. She is also the co-founder of Better Farm and president of betterArts. Nicole’s work has been featured in Mother Earth News, Reader’s Digest, Time Out New York, and many other publications. Her first book, Better: The Everyday Art of Sustainable Living, is due out this July through New Society Publishers.

DIY Solar Oven, Part I

Katie Mollica and Jacob Firman teach children about building their own solar ovens at Lyme Central School on Monday.
We were invited to participate in Backyard Science Day this week at Lyme Central School in Chaumont by Cornell Cooperative Extension. For our presentation, we built a solar oven to show kids how they could heat up food with the sun alone.


To build the solar oven we would show to students at Lyme Central, I borrowed a design from Solar Projects: Working Solar Devices to Cut Out and Assemble by A. Joseph Garrison. I started to build the oven by drawing it out on cardboard paper. It took about 3 hours to draw and cut it out (you can simplify things by simply downloading the schematics here). Once I got them all cut, I put them all together with duct tape.

Once it was all put together, I took tinfoil and covered the front funnel of the oven so it would become reflective and warm up the food inside. Once finished, I named the device “Better Solar Oven.”

There are all different kinds of solar oven that you can built this one was that we picked it come out pretty awesome. When we got to the school we talked to students about how it works, and we handed out links to the website where anyone can print out the directions and building plans to make their own.


DIY Soap

Soap is a very simple household product to make at home, with the added bonus of using your own herbs and oils to create fragrances and designs.


We started by cutting off a large chunk of a clear glycerin soap brick and heating it using the double boil method. To double boil the soap, we started boiling water in a regular pot and then placed a large glass bowl with the soap in it on top to melt. It’s important to remain attentive to the melting soap and stir it frequently while it’s boiling to avoid the soap hardening again before it is done.

After the soap was completely melted, we poured it into several small molds and began adding essential oils and herbs from the herb garden. Since we used six different molds, we made a variety of soaps. In one mold, we mixed eucalyptus oil and tea tree oil. In another, we used finely chopped sage leaves from the herb garden and chamomile oil. After adding oils and herbs, the only thing left to do is wait for the soap to harden and then remove it from the mold.

New Gates Allow for Easy Access to the Garden


The interns (with the help of instructors) last week put in two new garden gates to make accessibility a lot simpler for unloading compost, hay, and cardboard; irrigation, and simply moving in and out. This brings our number of garden gates up to three; allowing for pedestrian access (the main, existing entrance), easy access to and from the greenhouse (a four-foot wide gate, pictured above), and truck access (a double-hinged gate eight feet wide in the garden's back corner closest to Cottage Hill Road).

Day One entailed table-sawing two-by-fours into equal pieces, drilling plywood triangles in the corners to hold them together, cutting a longer flank of wood to run diagonally, and stapling on chicken wire.

On day two, we dug up holes for the gateposts and filled them with cement we mixed in the wheelbarrow. Sweaty and tired, we called it a day and waited for the cement to dry.


The following day, we finalized the gates by attaching the gates to the posts via hinges and putting on stoppers to hold the gates shut. By then we were feeling pretty confident with the drill and Greg and Adam went off for coffee while us interns put on the final touches.


DIY Solar Oven


Plans from Solar Projects: Working Solar Devices to Cut Out and Assemble by A. Joseph Garrison
Comment

Nicole Caldwell

Nicole Caldwell is a self-taught environmentalist, green-living savant and sustainability educator with more than a decade of professional writing experience. She is also the co-founder of Better Farm and president of betterArts. Nicole’s work has been featured in Mother Earth News, Reader’s Digest, Time Out New York, and many other publications. Her first book, Better: The Everyday Art of Sustainable Living, is due out this July through New Society Publishers.