Three Exciting, Money-Making Opportunities For Small Farms

Three Exciting, Money-Making Opportunities For Small Farms

It’s no secret that running a farm is hard work. It a very physical job that involves long hours working in both good and inclement weather conditions. From tending to crops to feeding cattle, countless tasks need to be completed each day. Despite what many may think, the pay that farmers receive does not always reflect the hard work they put in. This can leave many of them feeling under appreciated and tempted to try a different career instead. However, there are ways that even the smallest of farms can maximize their profits. So to keep the lifestyle you adore and to make more money from your farm, consider these exciting ideas.

Read More

Let There Be (Solar) Light

Better Farm hosted its first-ever solar workshop on Sunday, covering the basics of how solar energy works, introducing basic hardware for setting up your own solar kit (including information on inverters, wires, panels, and more), hands-on experience actually installing a kit on Better Farm's Tiny Home, and take-home packets so students could have reference for DIY'ing their own solar setup on any small cabin, shed, work room, studio, apartment or barn.

The workshop was taught by Allen Briggs, who has lived off-grid for years and has extensive experience wiring and installing solar and other off-grid systems.

Short History Of Solar Cell And Direct-Current Systems

The first commercial use and development of a solar panel was by Bell Telephone in 1954. However, DC systems have been used since the mid-1920s in rural areas of the US. Most were powered by wind generators.

How Does A Solar Panel Work?

In short, a solar panel is a silicon and wire lattice encased in glass that allows photons from the sun to react with electrons in the silicon. Silicon is made up of positive and negative electrons that move freely throughout the migration hole the wire lattice provides. When the photons react with the silicon, the electrons become excited and start moving repeatedly in the panel. At the same time, the positive and negative repel away from each other. This process creates electricity, which is funneled out through wires at the bottom of the solar panel and lead to a storage battery.

A Basic Solar System

First, we start with the solar panel, the wires from the panel connected to a charge controller. From there, we connect to the battery. Wires also branch off from teh battery and connect to an inverter and system monitor.

Setting Up The Solar Array

Solar panels should be set up facing south, so the panels get sun the whole day. Most solar panels are angled from 32 to 52 degrees in order to collect the maximum amount of sunlight.

For full instructions, click here.

DIY Soda Can Solar Heater

If you're looking for something to do as the temperatures drop away, why not give this passive solar soda can heater a try? All you'll need is some black spray paint, a bunch of empty aluminum cans, some 2x4s, and a few basic tools.

The solar soda can heater works by bringing in cool air from your home, garage, or shop through an intake hose at the bottom of the unit. Air rises through the system, which is warm from absorbing sunlight. Air comes out the top and back inside through the outtake hose—some bloggers are

reporting at as much as 120 degrees hotter than when it entered

!

We found a few variations on the design from

Hemmings Daily

,

Fair Companies

and

Instructables

. Here's the basic gist; write to us with your variations and photos on the project! And yes, it works: There's even a Canadian company,

Cansolair, Inc.

, selling the things.

Materials

  • 240 aluminum cans

  • 3 - 8 ft. 2x4s

  • 4 ft. x 8 ft. x 1/2 in. sheet of plywood

  • High-temperature silicon

  • 4 ft. x 8 ft. sheet of Plexiglas or Lexan

  • A can of heat-resistant flat black spray paint.

  • Plastic tubing

  • Drill Press with wide drill bits

  • Screws

  • Optional Air Blower (consider a solar-powered unit)

Instructions

  1. Construct a wooden frame out the the 2x4s, approx. 4 ft. wide x 8 ft. high x 3 1/2 in. deep. 

  2. Cut a piece of plywood this size and nail it to the back of the frame.

  3. Drill a hole in the top center of the frame - this is where you'll connect your outlet hose.

  4. Drill a hole in the bottom of the frame - this is where your inlet hose will be connected.

  5. Drill large holes in the tops and bottoms from all the cans except for 16 which will be on the bottom row.  For those, drill the holes in the tops and sides.  Caution! Aluminum cans are sharp - use heavy work gloves or other means to hold them in place as you cut the holes out.

  6. Start placing your cans into the frame.  Create 16 columns of 15 cans each.  Stack them one at at time, sealing them together as you go along.  Make sure the ones with side holes are on the bottom row.  Allow the silicone sealant to cure.

  7. Spray the cans and frame with the heat-resistant flat black paint.

  8. Cover the frame with the sheet of Plexiglas or Lexan.

  9. Cut holes in the side of the building that line up with holes in the top and bottom of the solar panel.  Air will be drawn from the building through the lower hole, which should be just above floor level, and be returned through the upper hole.

  10. Mount the completed panel on the exterior wall of the home.  Alternatively, you might mount the panel in a separate frame that will allow it to be tilted more toward the sun for better exposure.

  11. Install the blower at either the inlet or outlet.  This is not essential, but will increase the efficiency of your solar heater.

This unit allows air to flow all around the cans as it moves through the panel. A more efficient design will force all the air through the inside of the cans.  This will also avoid exposure of the air to the black paint.

Comment

Nicole Caldwell

Nicole Caldwell is a self-taught environmentalist, green-living savant and sustainability educator with more than a decade of professional writing experience. She is also the co-founder of Better Farm and president of betterArts. Nicole’s work has been featured in Mother Earth News, Reader’s Digest, Time Out New York, and many other publications. Her first book, Better: The Everyday Art of Sustainable Living, is due out this July through New Society Publishers.

DIY Solar Oven, Part I

Katie Mollica and Jacob Firman teach children about building their own solar ovens at Lyme Central School on Monday.
We were invited to participate in Backyard Science Day this week at Lyme Central School in Chaumont by Cornell Cooperative Extension. For our presentation, we built a solar oven to show kids how they could heat up food with the sun alone.


To build the solar oven we would show to students at Lyme Central, I borrowed a design from Solar Projects: Working Solar Devices to Cut Out and Assemble by A. Joseph Garrison. I started to build the oven by drawing it out on cardboard paper. It took about 3 hours to draw and cut it out (you can simplify things by simply downloading the schematics here). Once I got them all cut, I put them all together with duct tape.

Once it was all put together, I took tinfoil and covered the front funnel of the oven so it would become reflective and warm up the food inside. Once finished, I named the device “Better Solar Oven.”

There are all different kinds of solar oven that you can built this one was that we picked it come out pretty awesome. When we got to the school we talked to students about how it works, and we handed out links to the website where anyone can print out the directions and building plans to make their own.


DIY Solar Oven


Plans from Solar Projects: Working Solar Devices to Cut Out and Assemble by A. Joseph Garrison
Comment

Nicole Caldwell

Nicole Caldwell is a self-taught environmentalist, green-living savant and sustainability educator with more than a decade of professional writing experience. She is also the co-founder of Better Farm and president of betterArts. Nicole’s work has been featured in Mother Earth News, Reader’s Digest, Time Out New York, and many other publications. Her first book, Better: The Everyday Art of Sustainable Living, is due out this July through New Society Publishers.

Inspiration Station: Solar Electric Tractor


Electric cars have two major downsides. One is battery weight; the other is range.

Neither, of course, applies to an electric tractor.

Weight is an advantage for a tractor because the tractor gets extra traction. In fact, most diesel and gasoline tractors have weight added. Range isn't a problem for a tractor because it rarely travels very far away from the charging station. 

Above is a video of Steve Heckeroth's Solar Electric Tractor model 12 as featured on Permies.com. We even get a quick tour of the solar part!
1 Comment

Nicole Caldwell

Nicole Caldwell is a self-taught environmentalist, green-living savant and sustainability educator with more than a decade of professional writing experience. She is also the co-founder of Better Farm and president of betterArts. Nicole’s work has been featured in Mother Earth News, Reader’s Digest, Time Out New York, and many other publications. Her first book, Better: The Everyday Art of Sustainable Living, is due out this July through New Society Publishers.

Wilderness Electric Vehicles Will Turn Any Ride Electric

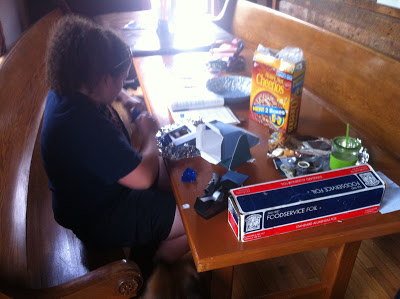
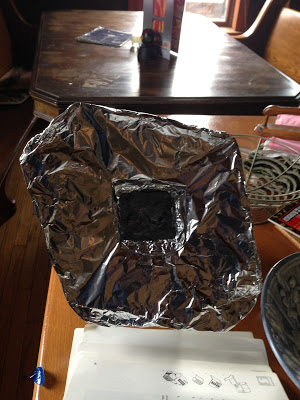
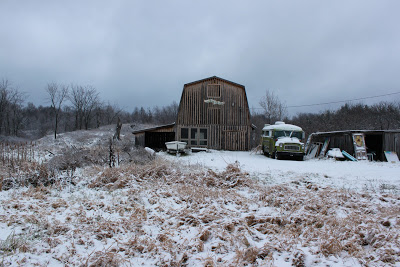
Better Farm's bus: destined for the electric slide?
Better Farm's iconic early-1960s International bus was rebuilt in the 90s with a new engine, souped up with a fresh interior, and used twice a year to transport my Uncle Steve between Tucson, Ariz., and Redwood, N.Y.

We're working to get that bus going again this summer (it was parked in late 2008 after being revamped yet again, and hasn't been turned on since), but there's one major downfall: That engine ain't diesel.

If it was, we could get in touch with our friends (and my fellow Hampshire alumni) over at Greasecar, purchase a conversion kit, and be running off pure vegetable oil. And maybe one day, we'll fundraise enough to get a diesel engine put in. But with this behemoth of a vehicle running off regular old gasoline for now, we were sort of facing a proverbial brick wall (though we've also been examining options for 
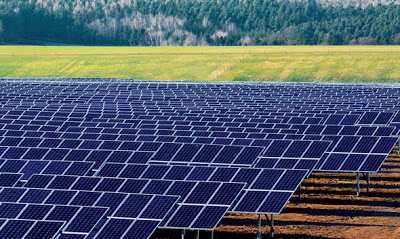
solar sunroofs, solar panels in general, and the like).

Then we were tipped off to Wilderness Electric Vehicles, a company specializing in electric car conversions. Wilderness EV takes gas-powered cars and turns them into clean, efficient, electric vehicles that can be charged with renewable fuels in a hybrid fashion or off-the-grid via solar charging stations at home.

Yes, please!

The company sells four different conversion kits, each offering a different strength and distance:
  • Kit #1 (48-volt system): Top speeds of 35 to 40 MPH and range of 20 to 35 miles all depending on driving terrain, amps used, the voltage set up of the car, cold weather, how many batteries used and what type, weight of the car, etc. This would be the same for any of the kits.
  • Kit #2 (most commonly sold kit, 72-volt system): Top speeds of  45 to 55 mph, range of 25 to 50 miles (50 miles if you were driving only 25 mph, 25 miles if driving 50 mph). You will get speeds over 60 mph and farther range once the car wears in. It takes 15 to 18 cycles of charging the new batteries to have them at 100% efficiency. Also the new brushes on the motor need around a hundred miles of wearing to get higher speeds and distance per charge that you want with it. The colder weather effects the batteries, losing up to 25% to 50% efficiency under 32 F. So that can give you somewhat of an idea with the other kits also. Higher voltage is much more efficient.
  • Kit #3 (120 volt system): top speeds will be 60 to 65 mph+ with the range of somewhere between 20 to 60 miles +. Of course many factors can change the performance as mentioned above such as how many batteries you will have in a conversion, etc.
  • Kit #4 (144 volt system): top speeds will be 65 to 75 mph + with the range of somewhere between 20 to 60 miles. And again, many factors can change the performance as mentioned above. Higher voltage is much more efficient. So that can give you somewhat of an idea of what you want.
So if you're cruising around town or running errands, any of these kits would work perfectly—you'd just have to come home afterwards and charge 'er up. Kind of impractical if we were to, say, go on a Better Farm Bus Tour—but not if we planned on making lots of stops. Maybe there's some kind of a hybrid setup?

To learn more about turning your diesel car or truck into a lean, mean, vegetable oil-eating machine, visit Greasecar.com. To find out more about electric conversion kits for your other vehicle, click here And to donate to our bus revival fund, visit our donation page.
Comment

Nicole Caldwell

Nicole Caldwell is a self-taught environmentalist, green-living savant and sustainability educator with more than a decade of professional writing experience. She is also the co-founder of Better Farm and president of betterArts. Nicole’s work has been featured in Mother Earth News, Reader’s Digest, Time Out New York, and many other publications. Her first book, Better: The Everyday Art of Sustainable Living, is due out this July through New Society Publishers.

What it Takes to Go Solar: Beginner's guide

The Art Barn is going solar! Our 10-panel solar field will be installed in the foreground, at left.
While it's never been simpler or more affordable to go solar, the process can still be intimidating as you try to navigate all the grants, tax incentives, new technology, and solar firms out there to choose from.

As we draw closer to the installation date of our solar panels on the Art Barn, I'd like to take a minute to outline our process so far. Here's a quick rundown of the steps we underwent to get to where we are now.


Photo of a solar farm from Electronic Component News.


  1. Figure out what you want to do. Do you want to go totally off-grid? Are you trying to supplement your energy source? Is this for a seasonal structure or a full-time home or office? Get ahold of some old utility bills and get a sense of exactly how many kilowatts it takes to make that structure tick.
  2. Choose Your Company. There are thousands of solar companies out there to choose from. I recommend going as hyper-local as is feasibly possible—if we found installers as close as Theresa, N.Y., I have to assume every person reading this blog will be able to find a solar installer in his or her county. We got several quotes for the Art Barn, each of which was undercut significantly by 1 Block Off the Grid (1BOG), a  collective solar purchasing company that groups solar customers in a region together to offer pretty outrageous discounts on installation. The company outsources the installation work to local companies (in our case, Finlo Renewable Energy out of Ithaca, N.Y.).
  3. Study up on the Latest Technology, and Discuss with Your Installer. 1BOG introduced us to the world of microinverters, which we didn't know about before. If we had never found out about it, one of the first two companies we talked to would have gone ahead with the installation without incorporating microinverters into the design, thereby weakening the entire system. New solar technology is coming out all the time, so it's important to do your homework!
  4. Settle on a Plan. Here's what we decided on for the Art Barn: a 2.250 kW DC STC rated PV array, including 10 Solar One 225-Watt, 10 Enphase M215 Micro-inverters, and a racking system.  The panels will be arranged on a ground-mounted system in the open field next to the Art Barn. The system will be looped into the grid, which means the power will also backfeed into the house on days we're not using the electric in the barn. Bonus!
  5. Get Your Paperwork in Order. Most contractors will take care of tracking down the forms you need to sign, but so you're aware, there's no shortage of John Hancocks necessary before you get those panels installed. Our short list involved three grant applications, an energy savings action plan form, building permit request, survey map and recent utility bill, and eight photos from the location of the solar field depicting North, Northeast, East, Southeast, South, Southwest, West, and Northwest. No small feat! Make sure you've got a good, trustworthy relationship with your contractor so this process is smooth and easy.
  6. Set an Installation Date. Now comes the easy part! Set your installation date, and start basking in some sun! Your days of getting utility bills are over—with the right setup, you can even get paid back by your utility company as you provide them with power.
Got any specific questions about getting the proverbial solar ball rolling? Shoot us an e-mail at info@betterfarm.org.
Comment

Nicole Caldwell

Nicole Caldwell is a self-taught environmentalist, green-living savant and sustainability educator with more than a decade of professional writing experience. She is also the co-founder of Better Farm and president of betterArts. Nicole’s work has been featured in Mother Earth News, Reader’s Digest, Time Out New York, and many other publications. Her first book, Better: The Everyday Art of Sustainable Living, is due out this July through New Society Publishers.

DIY Solar is Now Affordable, Easy

Our DIY solar setup for the Birdhouse

Better Farm

's human-scale

Birdhouse

is the perfect, private retreat for artists-in-residence throughout the year. But while we're big fans of lanterns and candlelight, it occured to us that having light at the flip of a switch would be nice and significantly less of a fire hazard for the little wooden structure.

So with the help of solar extraordinaire Walter Dutcher, we found a very simple, inexpensive 45-watt solar kit for $179.99 through

Harbor Freight

. The setup came with two lights, and lends itself to bigger projects down the line (it can be hooked to an inverter, larger battery, and additional panels).

The biggest issue we had with installing the kit was figuring out how to mount the panels. I was (I think understandably) concerned about poking holes in our beautiful, brand-new metal roof, so building a mount for the panels involved digging several feet into that clay soil, sticking a 4x4 into the hole, and filling it back in. Mark Huyser helped put the finishing touches on the mount and attach the panels facing south. From there, it just involved running the wires into the Birdhouse, hooking them into the included LED charge indicator, and marveling at the power created.

Depending on what you're hooking into the kit, this particular setup can pay for itself in as little as one year. This is a great application for powering a specific room in your house, work shed, or garage. And it's so straightforward, you don't need to have any experience with wiring or construction to get it set up.

Comment

Nicole Caldwell

Nicole Caldwell is a self-taught environmentalist, green-living savant and sustainability educator with more than a decade of professional writing experience. She is also the co-founder of Better Farm and president of betterArts. Nicole’s work has been featured in Mother Earth News, Reader’s Digest, Time Out New York, and many other publications. Her first book, Better: The Everyday Art of Sustainable Living, is due out this July through New Society Publishers.

How Big a Backyard Do You Need to Live off the Land?

One Block Off The Grid's infographic gives an extremely clear picture of exactly what it would take for a family of four to live completely off the land with independent, solar energy. Click on graphic below for larger viewing size:


One Block Off the Grid is a solar business designed to help homeowners go solar. The company negotiates group discounts on panels and installation with local providers and provide individuals with free advice and support throughout the process. To find out if there’s a group discount available in your area, sign up for One Block Off the Grid (it’s totally free). Want to help take solar mainstream? Tell your friends about One Block Off the Grid.
Comment

Nicole Caldwell

Nicole Caldwell is a self-taught environmentalist, green-living savant and sustainability educator with more than a decade of professional writing experience. She is also the co-founder of Better Farm and president of betterArts. Nicole’s work has been featured in Mother Earth News, Reader’s Digest, Time Out New York, and many other publications. Her first book, Better: The Everyday Art of Sustainable Living, is due out this July through New Society Publishers.

Inspiration Station: Sustainable housing ideas

Found a gem of a website the other day called The Independent Patriot; a kind of step-by-step living guide to worst-case-scenario preparedness. The site, while a bit conspiratorial and fatalistic, features everything from information on long-term survival to food production and storage. "Wow" factor of peering into a fallout-shelter mentality aside, this guy's take on sustainable housing is downright inspirational.

Straw bale houses, buildings made out of old tires, rainwater catchment and graywater systems: you name it, this guy has outlined it. Great food for thought.

Click here to get a peek at the new frontier of sustainable living

(information is also pasted below).

Energy Efficient Structures

Monolithic Dome

Monolithic Dome

Monolithic domes provide superior insulation and protection from the elements, while giving the owner greater flexibility with interior construction. They can also provide and increased level of security when properly designed. These homes are compatible with passive and active solar systems, natural lighting, and underground cooling tubes. This style of home should be a top choice for people interested in independent living and home security. A monolithic dome is not typical "dome home." These domes are constructed by forming a ring-shaped foundation and attaching a flexible PVC "airform" which is then inflated to make the shape of the house. Several inches of polyurethane foam are then sprayed onto the inside of the dome, followed by steel rebar and several inches of concrete. The outside can also be coated with chain link and stucco to make an impermeable, fire-proof, hurricane-proof, earthquake-proof dome structure that is extremely well-insulated and provides an interior space with no supporting beams.

The structures can come in several different shapes and sizes. each airform is custom designed and fabricated. The cost of construction is similar to conventional construction, but the energy and maintenance savings can be substantial - especially in extremely hot or cold climates. These structures can be earth-bermed or covered with vines. Monolithic domes with stucco on the outside and 3"-4" of shotcrete on the inside also provide increased protection from small-arms fire.

Earth-Sheltered

Earth -Sheltered Home

Earth-sheltered homes range from homes with earth pushed up against the walls to homes that are entirely underground. Typically, an earth-sheltered home is set into a hill with earth on three sides and on top. The front is usually exposed to the south. The main advantage of an earth-sheltered home is the insulation offered by the thick covering of earth. Earth-sheltered homes maintain a constant 60-degree temperature, year-round, in hot or cold climates. They can be easily heated, and will hold the heat, due to the thick insulation.

Earth-sheltered homes have comparable construction costs to conventional homes, but cost far less to maintain. With proper use of skylights and windows on the southern exposure, they can have the interior appearance of a conventional home.

Insulating Concrete Forms

Insulating Concrete Forms (ICF) allow you to build a conventional-looking home with reinforced, double-insulated concrete walls. The forms for the walls are made of insulation "blocks" that are stacked and bound together. The space between the foam insulation is where the concrete is poured. The forms are placed over steel rebar and all plumbing and electrical is run through the walls before the concrete is poured. ICF blocks offer several ways of attaching sheetrock or wood paneling. Almost any type of exterior surface can be applied. The walls are thicker than a typical home, but they also provide much better insulation and strength. Multiple-story homes can be built with ICF.

Straw Bale Home

Straw Bale

Straw-bale homes offer a unique twist on highly-insulated structures. The main building component is straw, and the walls are at least two feet thick. The straw makes the building extremely well-insulated, and gives a "soft" feel to the corners. Straw-bale homes can either have load-bearing straw walls, or they can be framed and filled in with straw bales. All utilities are run through the walls as the bales are stacked. Bales are impaled on steel rebar for stabilization. The walls are typically covered with plaster or stucco. If properly sealed and plastered, they will not have problems with water, but high humidity can be an issue, since the water vapor can work its way into the straw. There is no increased risk of fire with the use of straw bales. Straw bales are extremely dense and provide little oxygen for fires to feed on. They are actually a better fire barrier than convention wood-framed walls.

Earthship (Tire House

Earthship

The Earthship concept goes beyond just home construction. It is aimed at providing a complete off-grid system that handles everything from water collection to gray water and sewage treatment. These homes are typically built into the side of a hill and use old tires as the primary wall building material. The tires are stacked like bricks and filled with rammed earth as each layer is laid. The buildings are oriented to the south, with a greenhouse wall that allows in light and lets you grow plants that help filter gray water. The integrated power and water systems make these homes very interesting. Some of these concepts could be used in conjunction with other earth-sheltered homes.

Roofing Goes Green with Solar Shingles

While browsing

Time Magazine's 50 Best Inventions of 2009

, I noticed lucky number 13: The Solar Shingle. With Better Farm's continued efforts to lower our energy consumption, this seems like a cheaper and easier (can be installed by a regular roofer) solution. While not yet available to buy, a little web research sounds promising...

The New York Times

October 7, 2009, 11:46 am

Dow Unveils Solar Shingles

By TODD WOODY

Dow Chemical has unveiled a residential roof shingle in the form of a solar panel designed to be integrated into asphalt-tiled roofs.

Jane Palmieri, managing director of Dow’s Solar Solutions unit, said the Powerhouse thin-film shingle slashes installation costs because it can be installed by a roofer who is already building or retrofitting a roof.

“As a roofer is nailing asphalt shingle on roof, wherever the array needs to be installed he just switches to solar shingle,” said Ms. Palmieri, who said the solar singles are similarly attached to the roof with nails.

“You don’t have to have a solar installation crew do the work or have an electrician on site,” she added. “The solar shingle can be handled like any other shingle – it can be palletized, dropped from a roof, walked on.”

An electrician is still needed to connect the completed array to an inverter and to a home’s electrical system, but unlike conventional solar panels that must be wired together, the solar shingles plug into each other to form the array.

Read the rest of the article here.

Fast Company

Covert Solar Power? Dow's Solar Shingles for Rooftops are Burglar-Proof

BY Ariel SchwartzTue Oct 6, 2009 at 2:09 PM

...There's another hidden benefit to Dow's shingles--they are less likely to be visible to thieves than traditional panels. California has seen a slew of rooftop panel burglaries in the past few years. Thieves make off with the solar panels and sell them on the black market. But shingles nestled into a roof can't just be removed by snipping off a few wires.

Read the rest of article here.

Gizmodo

Dow Powerhouse Solar Shingles Could Finally Have You Hugging Trees

by Sean Fallon

Oct 7 2009

...As you can see, the panels look like standard asphalt shingles—and they can be installed without any specialized knowledge. In fact, they only take about 10 hours to install on average compared to the 22-30 hours for traditional panels. Since a basic roofer could handle the job in a short amount of time, installation costs should be more manageable. Plus, Dow claims that their Powerhouse will be 30% to 40% cheaper than other solar shingle designs.

Read the rest of the article here.

Solar shingles photo from ecogeek.org

Inspiration Station: Solar One

A piece I wrote about a phenomenal nonprofit called Solar One, based out of New York City, is now live on Green Edge NYC's Web site.

Check it out—this organization's ideas about solar power are right in line with our plans here at Better Farm! (And be sure to note the Better Farm mention in my bio!)

Spotlight On...Not-For-Profit Organization Solar 1

By Nicole Caldwell

Stuyvesant Cove Park is a green space resting atop 1.9 acres of Manhattan waterfront that once held a concrete factory. The native plants and grasses stretching lazily along the East River at 23rd Street attract and sustain native bird species and butterflies; and offer a fitting backdrop to New York City’s most cutting-edge green space: Solar One.

The building—and park—is maintained by a nonprofit of the same name striving simply to “empower people of all ages with the vision, knowledge, and resources to attain a more environmentally sound and sustainable future.” It’s a microcosm for what Solar One’s next big project, Solar Two, could be for all of New York City when it’s constructed on the same space and becomes the first self-standing, carbon-neutral, net-zero energy structure in the five boroughs.

Read the rest of this story here

.

Comment

Nicole Caldwell

Nicole Caldwell is a self-taught environmentalist, green-living savant and sustainability educator with more than a decade of professional writing experience. She is also the co-founder of Better Farm and president of betterArts. Nicole’s work has been featured in Mother Earth News, Reader’s Digest, Time Out New York, and many other publications. Her first book, Better: The Everyday Art of Sustainable Living, is due out this July through New Society Publishers.