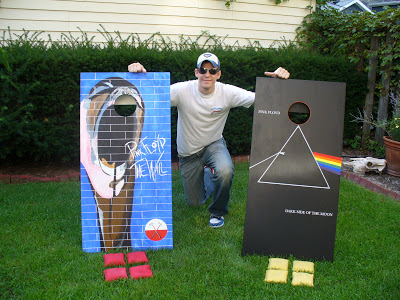
DIY Cornhole Bag-Toss Board
/

DIY Cornhole Supply List:
- 1 - 4' X 8' Piece of Plywood (pre sanded)
- 4 - 2" X 4" X 8' Studs (2 by 4s make sure they are not warped or twisted)
-
1 - Pack of Deck Screws ( 3-1/2" stainless steel square tip head)
-
1 - Pack of Deck Screws (1-1/2" stainless steel square tip head)
-
4 - 4" X 1/2" Bolts & Lock Nuts (stainless steel with washers)
-
Hammer
-
Jigsaw
-
Circular Saw
-
Drill (with square tip bit that should come with the screws)
-
2 - Drill Bits (1/4" and 1/2")
-
Pencil
-
String
-
Measuring Tape
-
Fine Sand Paper (80-120 grit)
-
1 - Bottle of wood glue (optional)
The Fine Print:

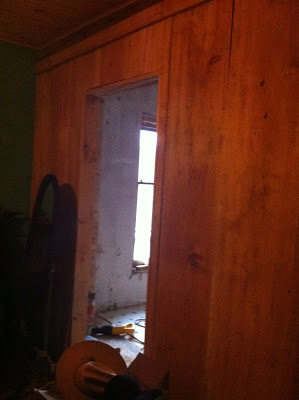
Making
The Plywood Cuts:
Start
by making sure your plywood is square at the corners. You want to start at
one end of the plywood and measure over 24 inches. You must measure
each cut separate in order to avoid losing 1/16 of an inch due to the
thickness of the circular saw blade. NOTE:
Measure only one piece at a time starting with the first piece. Only
measure for the next piece after you have cut the previous piece.

Make
The
2" X 4" X 8' Cuts: Start
with measuring from one end and make the first cut. Then measure the
second cut and repeat the process. You should end up with 4 Pieces 4'
long, 4 pieces 21" long, and 4 Pieces 11-1/2" long.

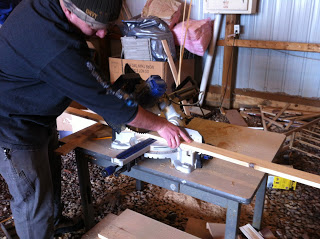 |
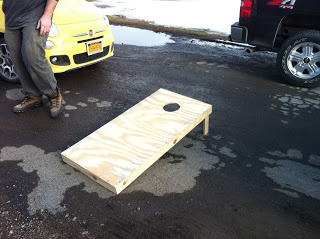
| BetterArts Director Scott Smith makes the legs for the cornhole board. |

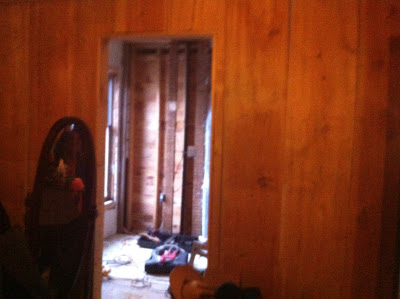
Building the
Frame and Deck: Note:
You may want to drill out a 1/4" pilot hole before you put the
frame together. This will help avoid the studs from splitting. Start
with your 2" X 4" X 4' and place a 21" front and back underneath
at a 90 degree angle flush with each of the ends. Insert two deck screws approximately
1-1/4" from the end and side as shown in the diagram below. Once
you have completed the rectangles, place them a flat surface and mount
the 2' X 4' plywood top on the frame. Make sure to start at one corner and make it flush, then insert
a 1-1/2" deck screw. Then make the next corner flush with the edge of the 2'
X 4' and insert a deck screw. Once you have aligned the corners
continue making the sides and bottoms flush at the edges insert the
remaining deck screws.

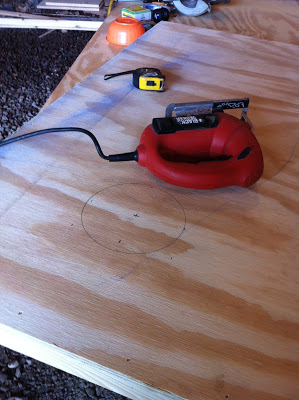
Cutting the
Hole in the Decks: Start
at one end of the board and measure 9" from the end to the center
of the board at 12". Place a deck screw in the center mark. Take
your string and pencil and measure out 3". Keeping the string
extended circle around the deck screw. If you have a ruler or paint
stir stick you can drill two holes 3" apart. Place the deck screw
in one hole and the pencil tip in the second hole and proceed to
circle around the deck screw. Drill a hole inside the circle to allow
your jigsaw blade to penetrate the deck. Carefully cut out the hole.

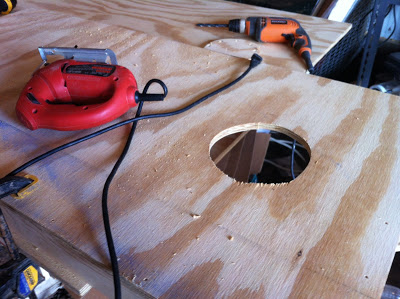 |
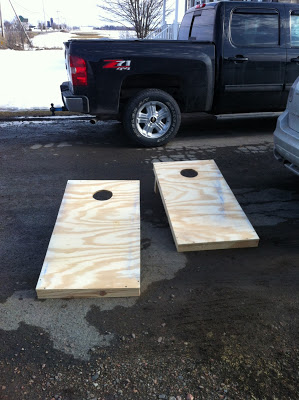
| Handywork of yours truly. |
Mounting the
Legs: Lay
your deck upside down on a flat surface. Place the leg one leg in the
corner as shown below. Measure 1" from the end of the leg to the
inside end of the board. This will allow a
small space for easy swivel. You can drill from the inside of the
board through the hole in the leg. Run the drill about a 1/4"
into the side stud and check for swivel range on the leg. Once
satisfied continue drill through the side stud. Place the 4" bolt
from the outside in and put a washer and nut on the inside. Tighten
the nut until the leg becomes stiff to move.


Finishing
Touches: Once
you get the legs mounted you can flip the boards upright with the legs
in the open position and place them on a flat surface. Measure the
back of the boards you will notice it is a bit higher than 12"
(hopefully not lower or you'll have to remount the legs). Here
is where you fine tune your legs to be as flat as possible to the
ground while making the back of the board 12" even across. Take a
sander or some sand paper and shave the bottom of the leg until you
are satisfied with the height. You can also apply a coat of primer and
paint the boards as you wish.
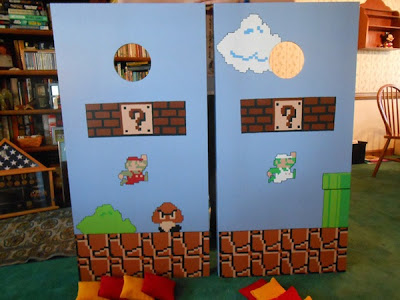
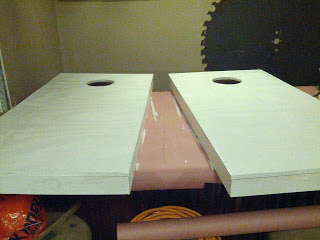 |
| Primed. |
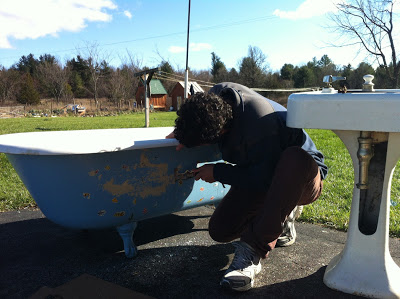
SEWING YOUR OWN CORNHOLE BAGS
 To prevent mass confusion and a potential riot at your cornhole bags’
debut, you will want to have two different colors of fabric in order to
keep teams’ progress straight. Themes like college or pro sports are
typically popular choices here. Whatever your color scheme of choice,
try to pick out sturdy-looking duck cloth that is as blemish-free as
possible.
To prevent mass confusion and a potential riot at your cornhole bags’
debut, you will want to have two different colors of fabric in order to
keep teams’ progress straight. Themes like college or pro sports are
typically popular choices here. Whatever your color scheme of choice,
try to pick out sturdy-looking duck cloth that is as blemish-free as
possible.
Since
the fabric is pretty cheap, get a couple extra inches so you cansquare the cuts up at
home for yourself.Give any loose ends a
little trim in order to square things up.

Having
been trimmed satisfactorily by either you or the fabric counter, your
hunk of duck cloth will probably be a long strip 7” wide by 56” long.
Now all you need to do is make the squares for each bag by cutting
every 7 inches. Using
the right tools can make things much more accurate and often more
convenient. The rolling blade, a gridded cutting mat and a plastic
cutting guide really make all this trimming simple, but if you don’t
have any of these, a good ruler, a pencil, and some sharp scissors will
do the trick.
 By
this point, there should be eight squares of duck cloth, 7 inches by 7
inches, just sitting there on your workspace, practically begging to
be sewn up into four bags and stuffed with feed corn. Before plowing
ahead, however, this is probably a good time to repeat the previous
steps for second team’s color. In the end of this trimming phase, you
should have sixteen total squares of duck cloth: eight of one color,
eight of another.
By
this point, there should be eight squares of duck cloth, 7 inches by 7
inches, just sitting there on your workspace, practically begging to
be sewn up into four bags and stuffed with feed corn. Before plowing
ahead, however, this is probably a good time to repeat the previous
steps for second team’s color. In the end of this trimming phase, you
should have sixteen total squares of duck cloth: eight of one color,
eight of another.
Place two squares of the same color together
so that their edges line up exactly; since the fabric is identical on
both sides, it shouldn’t matter which side is up unless you want to
decorate the outside with an iron-on logo. (If you do have an iron-on
or something like that, it’s probably wise to put it on now according
to manufacturer’s directions. Go ahead and put it on the inside since
we will soon be turning the sewn bags inside-out.) Each seam should be
1/2 inch in from the edge, as shown in the picture. If have a fancy
sewing machine like my mother-in-law’s, then you can actually set it to
double-stitch all at once. Those with the no-frills model will need
to sew a side completely, then repeat again on the same side right next
to the first seam in order to get the double-stitch. Either way, the
punishing abuse that cornhole bags take requires more than a single
stitch. Got an itch to triple-stitch? Why not? Whatever your decision,
be sure to back-stitch at all the corners to prevent the thread from
unraveling.
Sew
as indicated above for three of the four sides, but be sure to LEAVE
ONE SIDE OPEN. You’ll need a hole for getting the corn into the bag.
One smart move might also be to trim the corners a little. This will
reduce the amount of excess fabric that gets crammed into the corners
once you turn the bag inside-out.
 Imagine
your embarassment when, after bragging all afternoon to your buddies
about your sewing skills, one of your new cornhole bags bursts a seam.
We want to do everything in our power to prevent this awkward event.
There are no guarentees, of course, but a little bit of fabric glue
along the inside of those seams might help ease your mind on this
subject. It probably can’t hurt in any case, but it’s an optional
safety precaution that the risk-acceptant can skip.
Imagine
your embarassment when, after bragging all afternoon to your buddies
about your sewing skills, one of your new cornhole bags bursts a seam.
We want to do everything in our power to prevent this awkward event.
There are no guarentees, of course, but a little bit of fabric glue
along the inside of those seams might help ease your mind on this
subject. It probably can’t hurt in any case, but it’s an optional
safety precaution that the risk-acceptant can skip.
Finally,
turn the bag inside-out. Sharp corners are difficult to acheive given
the stiffness of the fabric, but you can improve the look of the
corners by pushing on the from the inside with a pencil, pen, etc.
You’ll notice that once turned out, the bag is now the regulation 6
inches in width.

Measure
out the corn you’ll need. Each bag should weigh between 14.5 to 16 oz.
once filled. The material weighs about .5 oz per bag, so add
15.5 oz feed corn to each bag to make it one pound in total (spoiler alert: at Better Farm, we used dried soybeans instead of corn). As you
play, the corn will break up, and your bags will actually lose a bit of
weight in the form of dust, so you might want to make it on the heavy
end of the acceptable range just to be safe. For this step, you can’t
beat a digital baking scale, accurate to 1/8 oz., but if that’s not an
option, 2 cups of corn comes pretty close to regulation. If you cannot
abide that type of guess-work — good for you!–get the feed store to
separate your order in eight individual bags of one pound each at the
time of purchase. After all, for the 35 cents you paid for each of
those pounds, you deserve some customer service.
Fold the open ends of the filled bag inward to a
depth of 1/2 inch to match the rest of the seams you’ve already sewn. A well-placed sewing pin helped to hold the sides closed,
and, in order to keep the folds from slipping once under the needle
and for overall strength, apply some of the fabric glue to last,
soon-to-be-sewn seam.
 Pinning
the corn bag as shown in the picture helped keep the fabric flat and
out of the way of the sewing foot—and will keep the corn from getting in your way. Placing your stitches as close to
the edge as possible will give the bags a nice look. Do not forget to
double-stitch here, too.
Pinning
the corn bag as shown in the picture helped keep the fabric flat and
out of the way of the sewing foot—and will keep the corn from getting in your way. Placing your stitches as close to
the edge as possible will give the bags a nice look. Do not forget to
double-stitch here, too.