Bank the Farm: Let it Snow!

Originally posted at Mother Earth News

Bank The Farm: Let it Snow!

winter sceneNorthern New York has finally been enjoying a “real winter” of snowfalls up to three feet at a clip. It's made for great shoveling adventures: driveways, decks, igloo and snowman construction. But actually packing that snow against your house (called “banking”) can help to insulate it all winter long (or, at least until it thaws!).

Unless you live in a real wintry tundra where there's no thaw until March, banking your home will probably have to be done after every heavy snowfall. But even if you pick just one wall of your house, the benefits are great — especially if your home is prone to winter drafts. Before home insulation was a widespread practice, many farmers lined their foundations with hay or straw bales to accomplished the same thing as snow-banking.

Understanding the key principles of home insulation is a must for anyone trying to do a better job of keeping the heat inside. Insulation works by slowing down heat movement through building materials. Heat will always move to a colder source. In the winter, insulation keeps heat in. In summer, insulation keeps heat out. The result in both climates is energy saved by keeping the air conditioner or heat source from operating as often.

Insulation is measured by its R-value, which allows you to calculate how much heat will move through a certain wall area depending on the temperature difference between the indoor and the outdoor air. The R-value of insulation is a measure of thermal resistance, expressed as the thickness of the material divided by the thermal conductivity. The higher the number, the better the insulation's effectiveness.

To bank your house, you'll want to have enough snow to make at least two-foot mounds along the outside walls. For every inch of snow, you gain an R-value of 1 or more. Most older homes are still outfitted with R-11 insulation on their walls; newer homes often have wall insulation with R-13 or higher. Banking your house will provide you with several additional R-value degrees on the walls — saving you significant dollars on energy costs or insulation-replacement costs).

Grab a snow shovel (or several—many hands make light work), and mound up snow two feet or higher along the sides of the building. Some people find it's easier to pack snow against their house by using a sheet of plywood (4x6 or 4x8) held vertically two feet away from the outside wall of the house and a pole that is strong enough to support the wooden sheet. Start at the corner of the house and pack snow between the plywood and house, moving the plywood and pole along as you fill in the gap.

This is especially effective when you can bury the foundation—stone being a conductor of heat—in snow. It also seals whatever tiny cracks allow cold to enter.

Decking or stairs may prevent banking at certain locations of your house; but wherever you can, bank. You are guaranteed to feel the difference. 
1 Comment

Nicole Caldwell

Nicole Caldwell is a self-taught environmentalist, green-living savant and sustainability educator with more than a decade of professional writing experience. She is also the co-founder of Better Farm and president of betterArts. Nicole’s work has been featured in Mother Earth News, Reader’s Digest, Time Out New York, and many other publications. Her first book, Better: The Everyday Art of Sustainable Living, is due out this July through New Society Publishers.

Inspiration Station: Solar Electric Tractor


Electric cars have two major downsides. One is battery weight; the other is range.

Neither, of course, applies to an electric tractor.

Weight is an advantage for a tractor because the tractor gets extra traction. In fact, most diesel and gasoline tractors have weight added. Range isn't a problem for a tractor because it rarely travels very far away from the charging station. 

Above is a video of Steve Heckeroth's Solar Electric Tractor model 12 as featured on Permies.com. We even get a quick tour of the solar part!
1 Comment

Nicole Caldwell

Nicole Caldwell is a self-taught environmentalist, green-living savant and sustainability educator with more than a decade of professional writing experience. She is also the co-founder of Better Farm and president of betterArts. Nicole’s work has been featured in Mother Earth News, Reader’s Digest, Time Out New York, and many other publications. Her first book, Better: The Everyday Art of Sustainable Living, is due out this July through New Society Publishers.

School Seedling Program Partnership Enters Second Year

Better Farm is entering its second year of a partnership with the Department of Environmental Conservation's School Seedling Program, which seeks to encourage young people to learn about the natural world and the value of trees in it.

We will invite local youngsters this spring to join us for a morning of planting 50 white spruce seedlings on our property, our mission being to provide visitors to Better Farm with the knowledge of how beneficial trees are to the environment.

Most of us recognize the beauty of trees and their many other values. Trees provide food and shelter for wildlife and prevent loss of soil (erosion). They help protect our streams and lakes by stabilizing soil and using nutrients that would otherwise wash into waterways. Trees help moderate temperature and muffle noise. They even help improve air quality by absorbing some airborne compounds that could be harmful to us, and by giving off oxygen.

When students plant tree seedlings, they can see for themselves the structure of trees, learn what they need and how they grow. Teachers can use the planting process to discuss the benefits trees provide, while including many subjects that their classes are studying. As seedlings mature, the young trees can be a continuing, personalized way of relating what they've learned in books to visible, living examples.

Better Farm's

interns

will provide ongoing care to the young trees throughout their development.

Stay tuned for our planting date! In the meantime, learn more about this program by

clicking here.

Comment

Nicole Caldwell

Nicole Caldwell is a self-taught environmentalist, green-living savant and sustainability educator with more than a decade of professional writing experience. She is also the co-founder of Better Farm and president of betterArts. Nicole’s work has been featured in Mother Earth News, Reader’s Digest, Time Out New York, and many other publications. Her first book, Better: The Everyday Art of Sustainable Living, is due out this July through New Society Publishers.

Guide to Urban Farming in New York

While the bulk of our focus is admittedly on backyard gardeners and amateur farmers in rural settings, much of the training we provide at Better Farm is for people who live in settings classically considered less-than-ideal for DIY-ing your survival. Rainwater catchment systems appropriate for the 'burbs, vertical gardens, and green city living are just some of the topics we've broached in the past—so you can imagine our delight when we discovered the brandy-new "

Urban Guide to Farming in New York State

" recently released by the Cornell Small Farms Program.

The

105-page resource

guide

is designed to inform urban farmers

on a myriad of topics, including tips for advocating for urban agriculture, engaging communities, dealing with contaminated soils, intensive growing techniques, urban composting, site security, urban livestock, direct marking options, accepting food stamps, grant and financial opportunities, and many more!  Also included is an appendix listing services and resources available from several urban farming organizations throughout New York State.

Whether you’re looking to grow food on your rooftop, keep chickens in your backyard, learn more about hydroponics or start an urban CSA, the "Guide to URBAN Farming in NYS" will provide or direct you to the information you need to know.

Download the entire

Guide to Urban Farming in NYS here

(PDF).

The Guide is available as a free download [PDF]

or you may view individual fact sheets 

online (good for dial-up or band-width restricted users). Check it out at  

http://nebeginningfarmers.org/publications

. For more small farm news and events, visit 

www.smallfarms.cornell.edu

.  For beginning farmer assistance, visit 

www.nebeginningfarmers.org

.

Comment

Nicole Caldwell

Nicole Caldwell is a self-taught environmentalist, green-living savant and sustainability educator with more than a decade of professional writing experience. She is also the co-founder of Better Farm and president of betterArts. Nicole’s work has been featured in Mother Earth News, Reader’s Digest, Time Out New York, and many other publications. Her first book, Better: The Everyday Art of Sustainable Living, is due out this July through New Society Publishers.

EFT Tapping Therapy

from

EFT Alive

What is EFT?

EFT stands for

Emotional Freedom Techniques

is a form of

counseling intervention

that draws on various theories of

alternative medicine

including

acupuncture

,

neuro-linguistic programming

,

energy medicine

, and

Thought Field Therapy

. During an EFT session, the client will focus on a specific issue while tapping on "

end points of the body's energy meridians

".

How EFT Tapping Therapy Works

EFT is based on one fundamental premise:

"The cause of all negative emotions and beliefs is a disturbance in our body's energy system."

D

isturbances in the Body's Energy System

The energy system referred to above is the same energy system that is used in acupuncture. Acupuncture talks about there being 14 energy pathways in our bodies called

energy meridians

. All of our negative emotions, like anxiety, hurt, anger, shame and so on, are due to a disturbance in one or more of these energy meridians. These energy disturbances are linked to memories of painful events. It is not the memory itself that is painful. Rather, when we think of the memory, the associated energy disturbance gets activated, which then causes the negative, painful emotions.

EFT Works by Clearing the Energy Disturbances

EFT works by intentionally activating an energy disturbance by thinking about a painful memory or just feeling your feelings. While the energy disturbance is activated, you tap with your fingertips on a set of 10 easily learned acupuncture points in order to clear out the energy disturbance in the affected meridians. As the disturbance gets cleared through the tapping, you will experience your negative emotions actually drain away. When the energy disturbance has been completely cleared, your negative emotions will be gone. You can then think about the memory with no painful emotional reaction! Problems in your life that resulted from the original experience will clear up as well.

It's Important to Stay Focused on the Problem While Tapping

It is essential that the energy disturbance remains activated the whole time you are tapping in order to completely clear it. Therefore, you have to keep your attention focused on the negative feelings while tapping until they are gone. Getting distracted or thinking about two things at once can interfere with EFT working.

The EFT Tapping Procedure

Now that we have a basic understanding of how EFT works, we can learn how to do the actual tapping procedure.

The Ten EFT Tapping Points

This diagram shows you the 10 points that we will use to clear all energy disturbances with EFT. The ten points address all 14 meridians due to the fact that some of the points are located at the intersection of two meridians. Since we are tapping on all meridians when we do EFT, we don't have to worry about which meridians have the disturbance in them. We are tapping on all of the meridians anyway.

See the tapping points diagram. The names of the points starting at the top of the head and going down the body are:

• top of head • beginning of eyebrow • side of eye • under eye

• under nose • chin • collar bone • under arm • inside wrist

• karate chop

How to Tap on the Points

  1. Top of head:

  2. Use all your fingers to "pat" the top of your head so that you don't have to worry about the exact location of the point.

  1. All the facial points:

  2. Use two fingers on each point for the same reason.

  1. Collar bone point:

  2. The collar bone points are located just below the "knobs" at the end of each collar bone. Use a flat fist just below your neck, where a man would knot his tie, to get one or both of the collar bone points.

  1. Under arm point:

  2. This point in located on the side of your body a few inches below your armpit. On a man it is level with the nipple. On a woman it is located in the middle of her bra band. Use all four fingers running up and down on the side of your body to tap on this point.

  1. Inside Wrist point:

  2. Notice the crease between your wrist and your hand on the inside of your wrist. The wrist point is located three finger widths below the crease. Use your whole hand to pat this point.

  1. Karate chop point:

  2. The last point on the pinky side of your hand is called the "karate chop" point because it is the place on your hand you would hit if you did a karate chop. You can tap this point any way that you like.

Note: For the points that are located on both sides of your body, it does not matter which side you use. It's also okay to switch sides while tapping or use both sides simultaneously. It will work any way that you do it. EFT is very forgiving that way.

The tapping on each point should be rapid little "thunks." I say little thunks because you should tap hard enough to feel some percussion during each tap but not hard enough that you will begin to feel tender after a lot of tapping. You only need to tap each point around 4 to 6 times, though more is not a problem. You won't need to count taps because you will be saying a phrase at each point (see below). Just tap rapidly while saying the phrase, and that will be enough taps.

The EFT Tapping Procedure — The "EFT Basic Recipe"

  1. Select the problem that you would like to address with EFT

  2. Most of our current emotional problems are due to painful experiences we had growing up. Therefore, the most effective way to really heal current problems in your life is to apply EFT to the painful memories that are the source of those problems. In addition, it is also possible to apply EFT to relieve in-the-moment difficult emotions (e.g., anxiety, anger, sadness), food and substance cravings, physical pain in the body and many other problems.

  1. The EFT "Reminder Phrase"

  2. Come up with a short phrase used to refer to the memory or problem, the more specific the better. We call this the "reminder" phrase because we will use it during the tapping process to stay focused on the memory or current problem. The way to create a reminder phrase for a memory is to give the memory a title, like the title of a movie. (For more information on creating effective reminder phrases, see the last sections, Picking Good Reminder Tapping Phrases and Using EFT to Heal Painful Memories, at the bottom of this page.)

  3. Examples:

  4. a. My best friend moved away and I was alone (title of memory).

  5. b. I'm afraid of flying.

  6. c. I have a buring pain in my left shoulder.

  7. d. I'm craving ice cream.

  8. e. I'm furious at Jan for going behind my back.

  1. Rate the Pain or Intensity Level

  2. Assess on a 0 to 10 scale how painful the memory is or how intense the emotion or pain is, where 0 is no intensity at all and 10 is the maximum intensity you can imagine. It is not important that this number be totally accurate. It will only be used to generally track our progress, so don't worry about being exact.

  1. Perform the Set-up Affirmation

  2. You do the set-up affirmation by saying a self-acceptance affirmation three times while tapping on the karate chop point. The self-acceptance affirmation has the following form:

  3. "Even though ______________, I deeply and profoundly accept myself."

  4. The blank is filled in with the reminder phrase that you came up with in step 2.

  5. For example: "Even though I'm craving ice cream, I deeply and profoundly accept myself."

  1. The EFT Tapping Sequence

  2. Perform two passes through all ten points:

  3. Say the reminder phrase while quickly tapping on each point. You will say the reminder phrase once per point. This is just the reminder phrase without the "even though" and "I deeply and profoundly accept myself."

  4. It is important to stay focused on the memory or feelings while tapping on all of the points. When you have done all ten points, you have completed one pass through the points. Repeat this for a second pass.

  5. The combination of the Set-up Affirmation and two passes through all of the points is considered the EFT Basic Recipe.

  1. Reassess the Pain/Intensity Level

  2. Reassess the pain level of the memory on a scale of 0 to 10. If the tapping is working, your pain level should come down around 1 - 3 points per basic recipe. It may come down even more.

  1. Perform Another EFT Basic Recipe Until Done

  2. Repeat steps 4 through 6 to apply another EFT basic recipe to the memory or painful emotions. However, if your pain level came down at all, then we change the wording of the set-up affirmation and reminder phrase a little bit to acknowledge the progress that has been made.

  3. The set-up affirmation becomes:

  4. "Even though I still have some _____________, I deeply and completely accept myself."

  5. The reminder phrase becomes:

  6. "Remaining _______________"

You keep applying the EFT Basic Recipe to your painful memory or emotions until the pain level, including all of the associated emotions, goes down to zero. At this point, that memory will be completely healed or your in the moment emotions relieved.

Using this minimal version of EFT, you will tend have a 40 - 50% success rate. There is more to learn about EFT in order to get much better success rates (mine is over 97% at this time). If the tapping process doesn't work for you after several tries, please read my article,

What to Do When EFT Doesn't Seem To Work

,

which can help you get better results.

Where can you go from here?

If you would like tips on how to use EFT, sign up for my Tapping Tips For Your Success Newsletter below. These are short and sweet newsletters with practical, easy-to-digest ways to use EFT to enhance your life.

2 Comments

Nicole Caldwell

Nicole Caldwell is a self-taught environmentalist, green-living savant and sustainability educator with more than a decade of professional writing experience. She is also the co-founder of Better Farm and president of betterArts. Nicole’s work has been featured in Mother Earth News, Reader’s Digest, Time Out New York, and many other publications. Her first book, Better: The Everyday Art of Sustainable Living, is due out this July through New Society Publishers.

DIY Underground Greenhouse

Walipini construction information provided by Benson Agriculture and Food Institute at Brigham Young University, 2002. Download the full instructions here.

The Walipini (underground or pit greenhouse) in this bulletin is designed specifically for the area of La Paz, Bolivia. However, the principles explained in the bulletin make it possible to build the Walipini in a wide variety of other geographic and climatic conditions. The word ‟Walipini” comes from the Aymara Indian language of this area of the world and means ‟place of warmth”. The Walipini utilizes nature’s resources to provide a warm, stable, well-lit environment for year-round vegetable production. Locating the growing area 6’- 8’ underground and capturing and storing daytime solar radiation are the most important principles in building a successful Walipini.

I. How the Walipini Works

The Walipini, in simplest terms, is a rectangular hole in the ground 6 ‛ to 8’ deep covered by plastic sheeting. The longest area of the rectangle faces the winter sun -- to the north in the Southern Hemisphere and to the south in the Northern Hemisphere. A thick wall of rammed earth at the back of the building and a much lower wall at the front provide the needed angle for the plastic sheet roof. This roof seals the hole, provides an insulating airspace between the two layers of plastic (a sheet on the top and another on the bottom of the roof/poles) and allows the suns rays to penetrate creating a warm, stable environment for plant growth.

The Earth’s Natural Heat: Why dig in?

The earth’s center is a molten core of magma which heats the entire sphere. At approximately 4’ from the surface this heating process becomes apparent as the temperature on most of the planet at 4’ deep stays between 50 and 60º F. When the temperature above ground is cold, say 10º F with a cold wind, the soil temperature at 4’ deep in the earth will be at least fifty degrees in most places. By digging the Walipini into the ground, the tremendous flywheel of stable temperature called the ‟thermal constant” is tapped. Thus, the additional heat needed from the sun’s rays as they pass through the plastic and provide interior heat is much less in the Walipini than in the above ground greenhouse. Example: An underground temperature of 50º requires heating the Walipini’s interior only 30º to reach an ambient temperature of 80º. An above ground temperature of 10º requires heating a greenhouse 70º for an ambient temperature of 80º.

More Free Energy: The Sun

Energy and light from the sun enter the Walipini through the plastic covered roof and are reflected and absorbed throughout the underground structure. By using translucent material, plastic instead of glass, plant growth is improved as certain rays of the light spectrum that inhibit plant growth are filtered out. The sun’s rays provide both heat and light needed by plants. Heat is not only immediately provided as the light enters and heats the air, but heat is also stored as the mass of the entire building absorbs heat from the sun’s rays.

Heat Storage: Mass and the Flywheel Effect

As mass, (earth, stone, water -- dense matter) comes in contact with sunlight, it absorbs and stores heat. The more dense the mass (water is more dense than rock and rock is more dense than soil) the more energy can be stored in a given area. Mass of a darker color such as flat brown, green or black absorbs heat best. Light colors, such as white, reflect heat best. As the earthen walls of the Walipini absorb this heat they charge with heat much like a battery charges with electricity. This storing of the heat in the mass of the soil is often referred to as the ‟flywheel effect”, with the flywheel being charged in the day (storing heat/energy) and spinning down or discharging at night as heat/energy flows from the earthen walls out of the greenhouse up through the plastic glazing to the colder night air. The amount of heat stored in the mass is a critical factor in keeping crops from being frost bitten or frozen during the coldest nights of the winter. These critical nights are usually encountered around the time of the winter equinox (June 21 in the Southern Hemisphere and December 21 in the Northern Hemisphere). The Walipini is usually designed to absorb more of the sun’s rays/heat during the three coldest months of the winter than during any other time of the year. The key here is to have enough energy stored in the mass so that on the coldest nights, the plants are not damaged. In general, nighttime temperatures should not be allowed to drop below 45º. This minimum temperature is also dependent upon the types of crops being grown, as some are hardier than others and may require colder nighttime temperatures. An easy way to increase the mass is to put a few 55 gallon drums filled with water and painted flat black along the back wall of the Walipini. Some growing space will be lost, but the heated water will greatly enhance mass heat/energy storage and will provide preheated water for plant irrigation. Preheated water reduces plant shock, thus, assisting plant growth.

Cutting Down Heat Loss: Insulation

A double layer of plastic sheeting (glazing) should be used on the roof. This provides a form of insulation and slows down the escaping of heat during the nighttime. This sealed dead-air space between the plastic sheeting should be between 3/4” to 4” thick. Poles used to span the roof that are 3.5” to 4” in diameter provide the indicated thickness of dead air space when plastic sheeting is affixed to the outside and the inside of the roof’s structure. The inside sheeting also keeps the inside humidity from penetrating and rotting the wooden poles spanning the roof.

All above-ground walls should be bermed with as much soil as possible. This provides some extra mass, but provides much more insulation against above-ground cold temperature, winds and moisture penetration.

When nighttime temperatures are continuously well below freezing, insulated shutters made from foam insulation board or canvas sheets filled with straw or grass can be placed over the glazing. This requires more work and storage, and in many environments is unnecessary, such as is the case in the area of La Paz, Bolivia.

II. Location of the Walipini: 

The Danger of Water Penetration

Water penetration of the walls and/or floor of the Walipini is destructive. If water seeps through the walls, they will collapse. If water comes up through the floor, it will adversely affect plant growth and promote plant disease. Dig the Walipini in an area where its bottom is at least 5’ above the water table. When all of the above ground walls are bermed, a layer of water-proof clay, such as bentonite, or plastic sheeting, should be buried approximately 6” to 1’ under the berm surface. It should be slanted so that the water drains away from the Walipini to the drainage ditches. In some cases where the soil has a low permeability rate, the clay or plastic may not be necessary. Be sure to dig a shallow drainage ditch around the perimeter of the Walipini which leads run off water well away from the structure.

Digging into the Hillside

Walipinis can be dug into a hillside providing the soil is stable and not under downward pressure. Since the Walipini has no footing or foundation, a wall in unstable soil or under pressure will eventually collapse.

Size and Cost Considerations

The primary considerations in designing the Walipini are cost and year-round food production for the family. The minimum recommended size is 8’ x 12’. However, generally speaking, the larger the Walipini, the more cost effective per square foot the construction will be. A minimum of 94 sq. ft. of growing space per person is recommended for a year-round vegetable supply. Thus, for a family of seven people a 12’ x 66’ area = 792 sq. ft. Less 16% for access = 665 sq. ft. of growing space divided by 7 people = 94 sq. ft. per person in the La Paz model. Keeping the size of the Walipini manageable and its cost as low as possible are important design considerations.

The Walipini is designed to keep costs as low as possible using the following: 1) Free labor -- the builder’s and that of friend’s and neighbor’s; 2) Only unlined, inclined, interior earthen walls; 3) Traditional concrete footings and foundations are excluded because they are unnecessary, when the perimeter of the building is protected from water penetration; 4) Plastic ultraviolet (UV) protective sheeting on the top and underside of the roof instead of glass or corrugated fiberglass panels; 5) The most economical, durable materials found thus far for spanning the roof are 4” eucalyptus poles or PVC pipe; 6) The top soil from the dig is used at the bottom for the planting soil; 7) The rest of the soil from the dig is used for the rammed earth walls, berms and adobes; 8) Stones and any gravel from the dig are used in the planting area drainage system and sump-wells; and 9) Used materials are utilized where possible and practical such as used, cleaned 55 gallon oil drums, used doors, etc. It is assumed that only some of the materials will have a monetary cost and that labor will have none. The cost of materials will vary from location to location and will also vary according to what is available free of cost. Materials for the current La Paz models (20’ x 74’) are $250 to $300.

Water Collection Heating/Irrigation System

This system collects runoff from the roof at the front of the roof in a galvanized metal or PVC rain gutter. From the gutter water flows through a pipe into the 55-gallon barrel/drum system used for irrigation and mass heat storage.

Each of the barrels is connected by overflow piping at the top with the overflow pipe at the last barrel exiting at ground level under the back berm to the perimeter drainage ditch.

In case of a down-pour or continuous excessive rain, it would be wise to have a T pipe/valve at the bottom of the gutter so that the runoff can be diverted to an outside perimeter ditch instead of moving down to the already full barrel system. How much run off the system can handle in a given period of time will depend upon the size of the gutter and the diameter of the pipe used. The larger the diameter, the more volume of water can be handled. As previously indicated, this system provides not only preheated irrigation water, but a dense solar mass (water) in which additional heat is stored for the cold winter nights.

IV. Building the Walipini

Tool List

Hammers, shovels, picks, saws, wheelbarrows, crowbar, forms for rammed earth compaction (two 2 ‟ x 12” x 6’ planks held together by 2” x 4” or metal rods or many other type of forms can be made), 100’ and 25’ measuring tapes ( If 100’ tape is not available, measure out and mark 100’ of string or rope), levels, clear hose for corner leveling, cutting knives, hose, nozzle, hand compactors, adobe forms, drill, bits, stakes, nylon string, etc.

Materials List for a 20' x 74' Walipini

Water

20 -- 4” x 16’ poles or PVC pipes to span the roof

3 -- 3’ x 6’ hinged doors (one is for the 3’ x 5’ vent cover)

3 -- 3’ x 5’ door frames ( 2 if rear wall vent is not used)

2 -- 3’ x 6’ door lintels

1 -- 6’ x 3’ vent lintel or roof frame for vent, if used

1700 sq.’ of 200 micron agrofilm (polyethylene UV plastic)

640’ of 1” wood stripping to secure plastic sheeting to the poles

Shovels, tractor or ox drawn fresno plow to dig hole

30 cubic. yds. of gravel for the floor drainage system

1 cubic yds of gravel or stone to fill the 2 drain sumps

233 cubic yds of soil will come from the excavation

22 cubic yds of top soil for planting (8” x 66’ x 12’)

94 cubic yds. for the rammed earth walls

This will leave a remainder of 109 cubic yds. for wall berms.

2700 sq’ of plastic sheeting to bury for drainage, if needed

74 ‛ of drain gutter for the lower end of roof

100’ of overthrow/drain pipe from gutter through barrel system to perimeter drainage ditch

Nails

116 8” x 4” x 12” adobes for the perimeter to seal plastic roof edge

Interest piqued?

Click here

for the full instruction with illustrations:
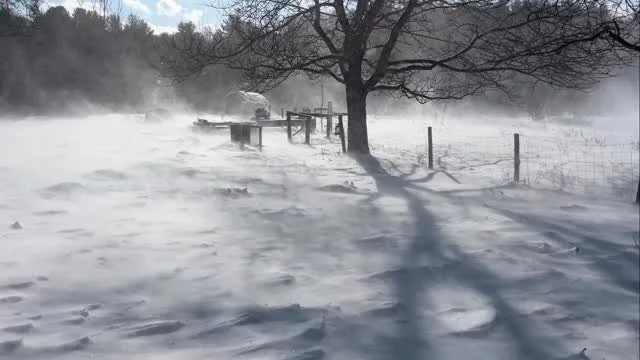
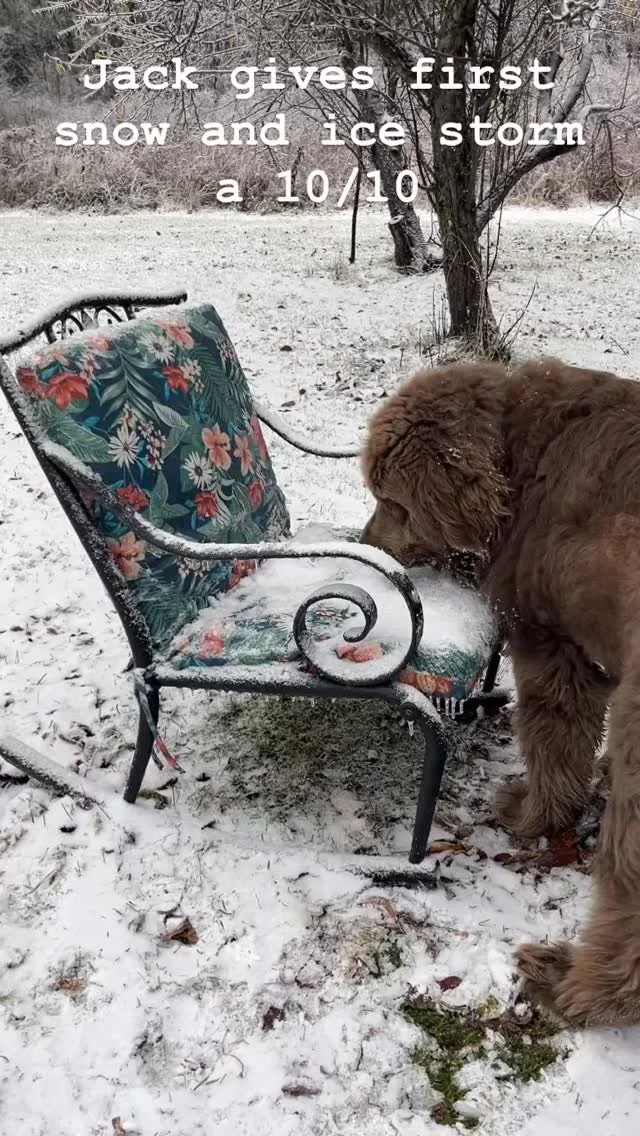
3 Comments

Nicole Caldwell

Nicole Caldwell is a self-taught environmentalist, green-living savant and sustainability educator with more than a decade of professional writing experience. She is also the co-founder of Better Farm and president of betterArts. Nicole’s work has been featured in Mother Earth News, Reader’s Digest, Time Out New York, and many other publications. Her first book, Better: The Everyday Art of Sustainable Living, is due out this July through New Society Publishers.

Better Farm to Host Students from Abroad This Summer

As part of its 2013 programming,

Better Farm is partnering with Cultural Homestay International to host two college students from abroad on the Better Farm campus May through September while they work at Bonnie Castle in Alexandria Bay.

Cultural Homestay International is a non-profit educational organization founded in 1980 to promote international understanding and goodwill through people-to-people exchanges. The belief of CHI's founders was this: The best way to build bridges of friendship and trust among people is to experience directly each others' customs, languages and values. To live, study or work together leads to a transformational experience of acceptance and genuine affection.

To that end, Better Farm will house two college students from May through Labor Day while they work in Alexandria Bay at Bonnie Castle. The students, who are studying hospitality overseas, will be part of the more than 250,000 students and young adults from over 100 countries who have participated in CHI's program in the last 30 years.

CHI Work and Travel program offers overseas university students the opportunity to intimately experience work, life and culture in the U.S. during their summer holiday period. Overseas participants are sponsored by CHI, enabling them to legally work in the U.S. up to four months.

It offers U.S. employers the ability to acquire extra staff to cover busy seasonal positions in peak travel areas of the United States. Typical positions include ride operators, lifeguards, food & beverage, housekeeping, cashiers and many others.

Students work during seasons spring, summer and winter as part of their 4-month J1 visa.  This program is administered by U.S. Department of State; CHI is a designated program sponsor.

Start working with CHI today. Becoming a member of the CHI community is simple and easy. Follow the links on the left menu for more information on how to become a host business, partner or participant of the Work and Travel Cultural Exchange program.

CHI is designated by the

United States Department of State

as a J-1 visa sponsor, and is a proud member of the

Council on Standards for International Educational Travel

(CSIET),

World Youth Student Educational Travel Confederation

(WYSE Travel Confederation),

WYSE Work Abroad

,

International Au Pair Association

(IAPA) and The

Alliance for International Educational & Cultural Exchange

.

1 Comment

Nicole Caldwell

Nicole Caldwell is a self-taught environmentalist, green-living savant and sustainability educator with more than a decade of professional writing experience. She is also the co-founder of Better Farm and president of betterArts. Nicole’s work has been featured in Mother Earth News, Reader’s Digest, Time Out New York, and many other publications. Her first book, Better: The Everyday Art of Sustainable Living, is due out this July through New Society Publishers.

Spend Your Summer (or Spring, or Fall) with Better Farm

As you begin making your plans for 2013, consider taking some time away from home to get a premier education in sustainability—or to enjoy some open space in which to do your art. Better Farm offers a year-round, introductory sustainability education program; while its subsidiary betterArts offers artists an unrivaled, creative environment in which to work on a masterpiece. More information about each below!

Better Farm's Sustainability Education Program
Better Farm’s Sustainability Education Program offers individuals an immersive, introductory crash-course in sustainability initiatives. Those accepted to the program will receive a hands-on education in a myriad of seasonal topics related to sustainability and environmental issues, including:
  • organic small-scale farming and gardening
  • greenhouses and four-season farming
  • compost methods
  • alternative building and energy
  • rain and graywater collection
  • aquaponics
  • chicken care
  • community outreach initiatives (supper clubs, volunteer work at area farms, workshops, presence at local events)
  • homesteading (organic cooking, canning/preserving, splitting wood)
  • outdoor survival

Better Farm's Sustainability Education Program runs in one- to three-month intervals. Those attending will receive daily assignments and chores all related to sustainability initiatives and organic farming, as well as the opportunity to design and implement projects on their own. Upon completion of all units and responsibilities, participants will receive a certificate from Better Farm. College students may additionally receive course credit for completion of Better Farm's Sustainability Education Program (pursuant to agreement by that individual's school).

Individuals are immersed from day one in the local culture while working alongside other residents at Better Farm and in the Redwood community. Students are expected to do their share in maintaining the condition of Better Farm as well as its peaceful environment. Those accepted for Better Farm's Sustainability Education Program are expected to work seriously—and to conduct themselves in a manner that aids fellow residents in their endeavors.

Many sustainability specialists visit Better Farm throughout the year to offer mentoring and guidance to students interested in coming here to work and gain valuable experience. Additionally, individuals have the option of taking any workshops and participating in any excursions or field trips scheduled during their time at Better Farm.

Students live on-site and communally on the Better Farm campus in shared rooms. A flat fee of $500/month is required to cover educational fees, supplies, lodging, field trips, wireless Internet, use of the laundry machine, all linens and towels, on-site parking, and use of the communal kitchen (stocked weekly with food).

All applications must be submitted to internship@betterfarm.org. Applicants will be notified of their status within one month of submission.  

Click here to download the application.  

betterArts Residency Program 
betterArts seeks to provide an opportunity for creative exploration and growth to artists, writers, and musicians within the context of Better Farm's dynamic environment.

Located 10 miles from Alexandria Bay and the Thousand Islands, Better Farm is situated on 65 acres of property offering an unparalleled rural living experience. There are two lakes within walking distance; an on-site pond; vegetable, fruit, and herb gardens; shop space; open-air sheds for pottery and painting; a multimedia room; and a practice space for musicians (recording equipment available for a nominal additional fee). Room and board, all meals, linens and towels, wireless Internet, on-site parking, movie nights, and field trips are included in a low stipend we require of all residents. The environment is simple and communal. Residents are expected to do their share in maintaining the condition of Better Farm as well as its peaceful environment.

betterArts residents are encouraged to interact and participate in the goings-on around the property, and to help out with chores and farm-related responsibilities between three and five hours each week. These responsibilities may include working in the gardens, participating in arts-related community outreach projects, helping with house chores, cooking, or assisting with other odd jobs.

Residencies are for two weeks, three weeks, or month-long periods. Basic facilities at Better Farm will be provided; but betterArts residents are expected  to provide the majority of materials and equipment they would need for the production of their work.

The standards for admission are talent, desire to live and work at Better Farm, and a willingness to have a go at the Better Theory: a belief that each moment presents us with the opportunity for exponential personal growth

Click here to download the application.

Lecture Set: 'Where Sustainability and Art Intersect'

BetterArts President Nicole Caldwell

will present a lecture, "Where Sustainability and Art Intersect", at 7 p.m. Thursday, April 4, at the

North Country Arts Council

gallery space in Watertown's Public Square.

The lecture is part of the arts council's "

Lucky Seven Lecture Series

", a seven-part installment featuring different takes on the arts. The lectures are slated for seven Thursdays at 7 p.m., costing $7 each.

Caldwell's lecture will address the intersection between sustainability, art, and social responsibility. Sustainability issues are steeped in science and fact; but the science of sustainability also involves values-based questions, which may be best answered creatively. Caldwell will share examples of this intersection from several specific projects she has been involved with in her non-profit organization

betterArts

and and offer insights on how art can provoke people to consider their perceptions of sustainability.

Here are the other lectures scheduled in the series:

  • March 7th: Christian Schenk "Understanding Music with Color: A Guide to Teaching and Playing for All Abilities"

  • March 14th: Hilary Oak "Re-Charging Your Creativity"

  • March 21st: Jared Paul "Poetry Readings"

  • March 28th: Craig Thornton "Visual Storytelling in Film"

  • April 4th: Nicole Caldwell "Where Sustainability and Art Intersect"

  • April 11th: Michelle Maphey and Kristie Fuller "American Sign Language and Theater: The Perspectives"

  • April 18th: Werner Sun and Jessica Warren "Sculpted Lines" 

North Country Arts Council's gallery is located in the Franklin Building, 52 Public Square, Watertown. To reserve a spot for a Lucky Seven lecture, call (315)

661-6361 or

click here

.

Nicole Caldwell is president of

betterArts

, a non-profit organization offering year-round workshops, artist residencies, private instruction, studio and gallery space, performances, and events to the public out of its location at

Better Farm

, a 65-acre sustainability education center in Redwood, N.Y.

Comment

Nicole Caldwell

Nicole Caldwell is a self-taught environmentalist, green-living savant and sustainability educator with more than a decade of professional writing experience. She is also the co-founder of Better Farm and president of betterArts. Nicole’s work has been featured in Mother Earth News, Reader’s Digest, Time Out New York, and many other publications. Her first book, Better: The Everyday Art of Sustainable Living, is due out this July through New Society Publishers.

Art Class Features Star Wars the Fawn

Our foster fawn Star Wars, as seen through the eyes of 5-year-olds. Photo courtesy of Joan Applebaum.

An art teacher in Fayetteville, N.Y., brought something a little bit "Better" into the classroom this school year when she did an applied project with the students drawing on inspiration from our summer foster doe, Star Wars.

When a newborn doe's mother was hit and killed by a vehicle in Watertown back in June, we adopted the baby and raised her on special formula until she could go out on her own to forage in the wild:


(video by former intern Amanda Treco)
  
Named "Star Wars" by the little boy who found her, we had the fawn in-house until one day she took off to be free (making several visits back to let us know she was okay).

Joan Applebaum is an art teacher at the YMCA in Fayetteville (and a totally amazing artist herself), and read all about Star Wars on our blog. She shared the story and photos with her kindergarten students, who fell in love with Star Wars. So Joan came up with a "Nest for Star Wars" project...

"The students are all 5 years old and we were working with the idea of drawing and cutting out a few simple shapes to help us form the body of the deer," Joan told us. "After the students glued all the parts to the paper, they added the white spots on the baby deer's back, a white cotton puff for the tail, and then used natural items such as twigs and leaves to create the nest. The project turned out great!" 

Joan has 30 children in the program—here are just a few samples of their work.


Joan Applebaum is a professional artist who has exhibited her work throughout New York State. She is also a local teaching artist and Visual Arts Coordinator and Instructor for youth, teens and adults at the East Area Family YMCA in Fayetteville, N.Y. She earned her B.A. at SUNY Potsdam in Arts Studio and Photography. Joan has taught classes at the Thousand Island Arts Center in Clayton, several after-school programs for Partners for Arts Education, a workshop at the Everson Museum and Kids in Art at SUNY Upstate Medical. Her work will be on display at our open house May 25 and 26To see her work or purchase a  piece in the meantime, click here.

Looking for a great art project to share with your friends, family, or classroom? E-mail us at info@betterarts.org.
1 Comment

Nicole Caldwell

Nicole Caldwell is a self-taught environmentalist, green-living savant and sustainability educator with more than a decade of professional writing experience. She is also the co-founder of Better Farm and president of betterArts. Nicole’s work has been featured in Mother Earth News, Reader’s Digest, Time Out New York, and many other publications. Her first book, Better: The Everyday Art of Sustainable Living, is due out this July through New Society Publishers.

Mural-Building

Decades ago, a guy who went by the nickname "Poppy" painted a small mural of Pan on a wall of Better Farm's dining alcove. Poppy—or possibly someone else—then nailed a homemade frame onto the wall over the painting.

In Greek mythology, Pan is the god of the wild, shepherds and flocks, nature, of mountain wilds, hunting and rustic music, and companion of the nymphs. And since sometime in the 1970s or 1980s, he's been keeping a trained on eye all the goings-on at Better Farm.

I've long wanted to invite visiting artists to add their own mini-murals to the wall, but got so caught up in large-scale projects (like a mural in a bedroom upstairs, another one in the birdhouse, and an almost-lifelike wooden family portrait-turned-roadside attraction), the last four years haven't seen any add-ons to the Wall of Pan in the kitchen. 'Til now, of course.

Last month's intern Zoya Kaufmann has a big-time passion for art and, well, bugs. So when she was invited to make a small mural of her choosing alongside Pan, she couldn't resist. Inspiration drew on her insect intrigue, combined with an inclination to paint something mimicking the mood of the Pan portrait.

Zoya explained, the Pan mural is presenting viewers with an unusual vantage point of something we rarely pause to look at (or even begin to imagine). Running with this idea, she painted another such creature (albeit literal, not mythic): the western conifer seed bug.

The western conifer seed bug, Leptoglossus occidentalis, is a species of true bug (Heteroptera) in the family Coreidae. It was originally native to the warm-temperate western USA (California, Oregon and Nevada) but has in recent times expanded its range and become an invasive species in parts of Europe. This species is sometimes colloquially called "the leaf-footed bug", and is sometimes mistakenly identified as a stink bug due to the unpleasant aroma it emits when disturbed. In its native range the western conifer seed bug feeds on the sap of developing conifer cones throughout its life, and its sap-sucking causes the developing seeds to wither and misdevelop. Here's a photo of what a western conifer seed bug looks like:

And here's Zoya's painting from beginning to end, bringing this unusual sight directly into the foreground for your viewing pleasure:


For more information about Better Farm's sustainability program, click here.

Simple Cost-Analysis for Amateur Gardener-Farmers

Keeping a food scale on-hand during harvest season will allow you to keep track of how much you're producing—and saving.

Whether you're a backyard gardener or a commercial farm, DIY-ing your food is a surefire way to live healthier and save a lot of money... but exactly how much? This blog will explore ways for you to keep track of just how much you're making (or saving) by growing your own—and how much food waste you're keeping out of a landfill by composting.

Chicken Eggs

Organic, free-range chicken eggs will run you anywhere from $3 at a local grocer to $7 at specialty food co-ops; while generic eggs will run you around $2 a dozen. If you're making your foray into having backyard chickens, keep in mind that a bag of generic feed (50 lbs.) is around $15; for organic, you're looking at twice that amount.

To make a cost-analysis worksheet for your birds, 

you'll need to make a chart that looks like this:

DATE       #EGGS         FEED COSTS        OTHER SUPPLY COSTS, NOTES

Some days you may have "zero" written in for your number of eggs; and your feed costs should only be coming up once a month (conversely, your egg numbers will rise in warmer months while your feed costs drop because the birds are able to forage more). After a few months, you should have a very clear idea of how much you're saving (or making!) by having chickens. In the last month (keep in mind this is January, the second-to-worst month for laying hens to produce in Northern New York), this is how our dollars totaled up:

# EGGS     FEED COSTS   OTHER SUPPLIES

   113                    $28                            $0

So,  that's almost 10 dozen eggs. We're only halfway through our feed (remember, we supplement with lots of food scraps from our kitchen, and when there isn't snow on the ground the birds have full access to tons of grass, foliage, and seasonal bugs and pests), which means we will likely double our number of eggs before the food is gone and we have to buy more. Based on that logic, we've essentially "purchased" 20 dozen free-range, organic eggs for $28. We're averaging a dozen organic eggs for just over a buck! Keep in mind these numbers are for 31 birds; this is the middle of winter (lowest egg-producing time); and that 18 of these birds are

rescued hens discarded by the commercial egg industry

. We'll check back with more updates when the weather's warmer and egg production jumps.

Not acknowledged on our worksheet is the amount of money we save by keeping our

hens in the gardens

. This provides us with much-needed fertilizer, sped-up composting (they eat our more delicious food scraps), mini-tilling, and bug and pest control.

Click here for all kinds of facts about eggs

.

Garden Yields

For this one, you're going to need to keep track of how much money you spend on seeds and supplies, and you're going to need a kitchen scale to weigh the food you produce.

Utilizing a

garden map

each year will help you keep track of what you've got going on. From there, check your local grocery store's prices to comparison shop: How much do you save by growing your own organic salad greens, veggies, and fruits in a year? Your garden yield chart will look something like this:

DATE OF HARVEST       ITEM        WEIGHT PRODUCED        

If you know that organic spinach is running you several bucks per pound, and that for $5 you can grow 10 pounds of organic spinach in your yard, well, that combined with all the other crops you're growing can probably save you hundreds of dollars every year. We'll be keeping a close eye on our production here and will keep you updated. We're using the same system to track our aquaponics setup, weighing the food produced against the energy cost of running the grow light and keeping the fish fed (sidenote: we haven't had to buy salad greens for the house since August; before that, we were spending around $8/week on organic greens... so we know we've avoided spending at least a couple hundred bucks).

Food out of the Trash Supply

40 percent of food in the US is thrown out

. As it decays (

if

it decays—because it takes so long for garbage bags to break down, the food is often trapped without access to air. That means it sits instead of rots) in landfills, it produces methane. Methane traps more heat in the atmosphere than carbon dioxide. By keeping your own compost pile (or feeding your food scraps to your chickens), you can keep hundreds of pounds of food out of landfills, and fertilize your garden. Win-win! It's easy to keep track of how much food you're keeping out of landfills by simply utilizing a food scale in your kitchen. Weigh your empty compost bin, then weigh it again when it's full and subtract the original weight.

Comment

Nicole Caldwell

Nicole Caldwell is a self-taught environmentalist, green-living savant and sustainability educator with more than a decade of professional writing experience. She is also the co-founder of Better Farm and president of betterArts. Nicole’s work has been featured in Mother Earth News, Reader’s Digest, Time Out New York, and many other publications. Her first book, Better: The Everyday Art of Sustainable Living, is due out this July through New Society Publishers.

Garden Mapping for 2013

Better Farm's main gardens, 2013 proposal.

Any seasoned backyard gardener or organic farmer knows the importance of garden mapping to help with annual responsibilities of seed selection, companion planting, and crop rotation.

February is the busiest seed-ordering month, as anticipation builds for indoor March planting across the Northeast. At Better Farm, that's where our greenhouse comes in. We get our seeds planted in there the first week of March; by the first week of April (usually!), we're able to start direct-planting outside with crops like peas. So we spend January poring over seed catalogs compiling lists of our favorite fruits and veggies, and beginning our Better Farm garden map.

Different crops have different nutrient requirements and affect soil balance differently. Some, like corn and tomatoes, are heavy feeders that quickly deplete soil nitrogen and phosphorus. If you plant corn in the same spot year after year, that plot of soil will run low on nitrogen and phosphorus more quickly than other parts of your garden will. By changing the location of corn each year, you'll be able to renew the plot where it grew the preceding year, so your soil won't get out of balance. There are other crops that also use up nitrogen rapidly. They tend to be the leafy and fruiting crops, such as lettuce, cabbage, and tomatoes. In contrast, root vegetables and herbs are light feeders. Peas, beans, and other legumes add nitrogen to the soil but need lots of phosphorus.

The general rule of thumb for balancing out soil nutrients is to avoid planting the same general category of crop (root, legume, and leafy/fruiting) successively in the same place. It's best to follow nitrogen-fixing legumes such as peas or beans with nitrogen-loving leaf or fruiting crops such as lettuce or tomatoes. Then, follow the heavy feeding crops with light-feeding root crops.

Utilizing companion planting guides we've referenced before on the blog and referencing past year's garden maps, I set about creating proposed rows that would work together to add fertility to the soil, deter pests, provide shade cover and climbing space, and be done in such a way that we can rotate crop location annually to keep an ever-diverse soil makeup.

To start, I had our intern Zoya take inventory of the seeds we still have leftover from last year:

Then it was time to take measurements in the garden and raised beds, and draw a basic outline of what we were dealing with:

That image was then scanned into the computer for re-use in 2014. Finally, it was just a matter of filling everything in.  

Better Farm's main gardens, 2013 proposal.

Raised herb/asparagus/garlic beds

Here are a few zoomed-in shots of a few raised beds in the main gardens and the mandala garden:

Mandala garden

Proposed new gate to provide garden access from our outbuildings

Chicken tractor, at right, kept in close proximity to mulberry trees to provide easy picking and foraging for the birds. Blueberry bushes, which we'll be doubling this year, will be protected with cages.

I'm leaving plenty of blank space so we can decide as spring sets in whether to produce extra of certain veggies like tomatoes and lettuce for local businesses or residents who might like to pre-order organic toppings for their burgers and salads; or herbs for their cooking.

Here's our grow list so far:

Better Farm Organic Seed List 2013

Herb Beds

  • Amaranth

  • Arugula

  • Asparagus

  • Chia

  • Chives

  • Cilantro

  • Cumin

  • Dill

  • Garlic

  • Lemon Balm

  • Lettuce

  • Marjoram

  • Mint

  • Mustard Greens

  • Oregano

  • Rosemary

  • Sage

  • Spinach

  • Swiss Chard

Main Garden

  • Artichoke

  • Asparagus Beans

  • Beets

  • Black Beans

  • Blueberries

  • Bok Choy

  • Broccoli

  • Brussel Sprouts

  • Cabbage

  • Cannelini Beans

  • Cauliflower

  • Carrot

  • Celery

  • Chick Peas

  • Corn 

  • Cucumber

  • Edamame

  • Hubbard Squash

  • Kale

  • Kidney Beans

  • Leek 

  • Lentils

  • Onion

  • Peanuts

  • Peas

  • Peppers

  • Potatoes

  • Radishes

  • Squash 

  • Strawberries

  • Sweet Potatoes

  • Tomatoes

  • Watermelons

Mandala Garden

  • Artichoke

  • Cantaloupes

  • Eggplant

  • Lavender

  • Marigolds

  • Mulberry Trees

  • Nasturtium

  • Okra

  • Pumpkin 

  • Rhubarb

Aquaponics

  • Lettuce

Sprouts

  • Chia 

Orchard

  • Figs

  • Peaches

  • Raspberries

  • Walnuts

  • Apples

Interested in buying a weekly share of what we're growing? Contact us at

info@betterfarm.org

for more information.

Comment

Nicole Caldwell

Nicole Caldwell is a self-taught environmentalist, green-living savant and sustainability educator with more than a decade of professional writing experience. She is also the co-founder of Better Farm and president of betterArts. Nicole’s work has been featured in Mother Earth News, Reader’s Digest, Time Out New York, and many other publications. Her first book, Better: The Everyday Art of Sustainable Living, is due out this July through New Society Publishers.