Declaring War on Squash Bugs
/By Amanda Treco
Organic gardening means troubleshooting ways to deal with all the bugs who have access to poison-free plants. Recently, we've discovered a large amount of squash bugs taking up residency on our zucchini plants. Because the plants are mature, this is less of an issue than for immature plants—but left unchecked, this could become a hazard even for the mature zucchinis.
Despite using our organic pesticides, the squash bugs multiply rapidly. We hope that the bugs will not spread to our cucumber plants as well. So far, the best method we have found is to rid the plants of the egg masses that are being hatched on the undersides of the leaves, throwing any bugs we find into a bucket of hot, soapy water, or dousing the leaves themselves with hot, soapy water. This method is more about the removal of the bugs with water and less about the pesticides being used. This influx of squash bugs has proven to be quite the challenge, and we will continue to experiment with new management techniques.
Greening Your Toiletries
/Most of us use dozens of beauty products and toiletries without giving a second thought to their ingredients and health impacts.
The Environmental Working Group, a non-profit organization that aims to protect public health and the environment, states that the average adult uses nine products daily containing up to 126 different chemical ingredients. Most of these ingredients require no testing or are tested by the companies selling the product.
Luckily, there are plenty of resources out there to guide us though the litany of ingredients on our product labels. The EWG offers a cosmetic database (click here!)
that provides information and health concerns on most ingredients you would find on a label. There are also resources out there that provide a concise list of synthetic ingredients to avoid. Organic Consumers. Org for example, provides a top ten list, of toxic ingredients that are most harmful to your body. Your best bet is to minimize the number of products you use and to look for the certified organic label. The greatest rule of thumb is to never put something on your skin that you would not put into your mouth. Fruit and Vegetable based products are always best! We recently made several kinds of organic soaps out of simple and natural ingredients such as: coconut oil, orange peel, cucumber, mint, coffee,flax seed, cinnamon, etc. All available for sale at out farm stand!
Upcycled Planters
/Everything from old ceiling fixtures to colanders can be upcycled into planters, saving you lots of money and keeping untold amounts of random old items out of landfills.
With a recently completed renovation on one of the bathrooms at Better Farm, we found ourselves with an old toilet and sink that were just begging to be planted. For aeration and to cut down on the amount of necessary potting soil, we lined the bottom of the containers with stones, sticks, compost, and hay; then made a layer of rich topsoil. We planted our flowers directly into that mixture, and voila:
To fill the front space of the sink, we took the front of an old drawer and attached it to the other structure.
Another idea, though one requiring a little more space, is our piano tomato planter:
Got a great upcycling idea? Send it to us at info@betterfarm.org.
Another Roadside Attraction
/So, next to our farm stand, we've installed an interactive photo op for the public to enjoy. Made with acrylic paint, a sheet of plywood, and a lot of creativity, this roadside attraction is sure to brighten anyone's day.Here's how it was made.
First, we recruited our intern Amanda Treco to create the outline. The imagery evokes the classic painting "American Gothic" (with a little Rosie the Riveter thrown into the mix—the tattoo on the woman's arm says "We Can Do It", and you'll notice her bandana!), a chicken, a sunflower, and a very friendly deer called Star Wars. After Amanda made the outline, she enlisted the help of the rest of the crew here to color in the lines:
Once the main points were filled in, we called on Carl Frizzelle to cut out the faces with a jigsaw:
Here's Noah making sure everything is going smoothly:
...and the finished cuts:
Then for some final touch-ups:
And, drum roll please:
Summer at Better Farm: a Storify
/Here's a short tour of what's going on around the property at Better Farm
Part of what we do here is repurpose old stuff. That toilet had gone to s**t, so to speak, and so we put it out to pasture:

New sink and toilet planters at the greenhouse: dig it - I love the design on this. It isn't done yet—I think Nicole wants to paint some Rosie the Riveter features on the old woman in the middle:

Cooperatively created by @betterfarmers american gothic with chicken sunflower deer w/heads cut out for peoples faces
Second snakeskin I've seen today. Pretty big pic.twitter.com/8MRMiRS3
@mikedelic maybe you should be wearing shoes #SnakeBites
@Chewstroke lol no way im a medicine man and the snakes are my allies- every year i try again with this piano, repainting and replanting
Cherry tomatoes planted in painted piano grow slowly #drought pic.twitter.com/wzsg8Rtz
Wildflowers pic.twitter.com/Pllk7B9D
We have bands play off the back porch of the art barn to this natural amphitheater area pic.twitter.com/eJoogzBa - i like snakeskins and snakes and also like that other people fear them
Nother snakeskin up in the barn pic.twitter.com/hJCq6RJy
Wildflower of paint peels back from broken glass #art pic.twitter.com/0rec6s9n- very hippie here
Hood ornament on the spacebus dig it pic.twitter.com/X9rZit2c- i pulled that farmstand down off a flatbed truck with some other idiots and we all almost died lol
Another roadside attraction pic.twitter.com/NBoEodkd- love this turkey
The freaky turkey guards the garden gate pic.twitter.com/j5HTDKHf
Tomorrow: Ag Tour Open House!
/At the Better Farm stop tomorrow, we'll have several live musical acts, arts and crafts for kids, some roadside attractions, tours every 30 minutes, refreshments, and a 2 p.m. barbecue. Be sure to come by at that time to also check out the Aristocrats, a great New Jersey-based band visiting us for the festivities.
Click here for more information.
Our Babies Grow Up
/Well, with some TLC, a heat lamp, and many times their body weights in starter feed, our roost of baby bard rock chicks have grown their adult feathers and been introduced to grassy fields. Check out these lookers:
Even our handicapped, lovable runt Scooter (who has turned out to be a rooster!) has made the transition. Here he is last month:
And here's our injured chicken, Destiny's Child, hanging out last month:
Here they are acclimating to their new living situation (Scooter in foreground):
The chickens' new home was made back in May, and perfected in the last few weeks with a sealant paint job, French-style doors, and an aluminum can roof. The coop is mobile, and the enclosure we have them in functions as a movable paddock to ensure 365 days of fresh foraging potential (and the chickens helping us to keep the tall grass at bay):
Many thanks to all our volunteers and interns for doing so much work for these birds, and to Penny and Steve for entrusting the babies to our care!
Edible Wild Plants: Mullein
/Photo by Kathrine Birch
Mullein is an easy-to-grow herb, often seen in disturbed areas such as fields and ditches. A multi-purpose herb, mullein offers many healing abilities from its flowers, leaves and root. Mullein is also a lovely addition to landscaping. The stalk can grow 6 feet high, and the leaves can grow up to 2 feet across. Try growing a beautiful specimen in an area that bees can enjoy the blossoms, and birds can eat the seeds. You can also find it growing will all over the North Country!
Mullein has a myriad of uses. Every part of the plant is used at different times in its life cycle. The thick, soft leaves are used to treat respiratory illness. They have been shown to loosen congestion and help clear the lungs. The tiny hairs on the leaves can be irritating, and any teas should be filtered very carefully to avoid this problem. A tincture would alleviate this issue, although it is extremely bitter.
Mullein flowers also provide a soothing and cleansing effect to the skin. As a wash, they are an easy treatment for minor wounds and scrapes. These same flowers can be picked throughout the growing season, placed in olive oil and left to infuse. The resulting infusion is wonderful for earaches that do NOT involve a ruptured eardrum. Add beeswax to the infused oil, and you will have a balm that makes a great addition to any baby's changing table. The delicate skin of a baby's diaper area can benefit from a light layer of this mullein balm.
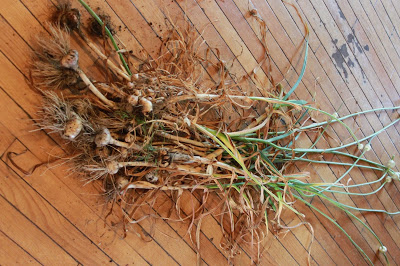
Mullein root is used in urinary tract issues. The plant has a long taproot, making it difficult to harvest, and nearly impossible to transplant. When harvesting, be sure to use a spade and dig when the soil contains some moisture.
Finally, mullein is a wonderful indicator of a soil's contamination level. When looking for wild mullein, only harvest from straight, vigorous stalks. The crooked stalks indicate a high level of chemical contamination in the soil.
Here's how to prepare mullin for its healing qualities:
Things You'll Need
1/2-gallon glass canning jar with lid
1 quart 100-proof alcohol
2 tbsp. honey
Preparing the Herbs
Harvest two quarts of mullein stems and flowers by making an angled cut near the base of hte plant. Don't take more than 50 percent of the total plant so as to leave plenty behind for future use. Shake the leaves free of any dust or insects. You can give the stems a rinse, but this isn't necessary unless the plant was covered in dirt.
Break the stems into pieces and place them into the canning jar. If using purchased dried herbs, the herbs will already be processed. Fill the jar halfway with herbs but don't stuff them in. They will need to have room to fully absorb the tincture solution.
Pour one quart of 100-proof alcohol into the jar. Vodka or brandy is commonly used for making tinctures and is easily purchased in liquor stores. If alcohol is not desired, use a quart of plain white vinegar instead.Add two tablespoons of honey to a quart of water and mix this in with the alcohol. Mullein is a mucilaginous plant, which makes it so valuable as an expectorant. The honey will pull out the mucilage compounds to give you a more effective tincturePut the cap on the jar and shake it a little to allow the herbs to settle into the liquid. It is important that the solution--called the menstruum--completely covers the herbs. Any herbs that are exposed to air during the tincturing process will eventually spoil and destroy the tincture. Add more menstruum if necessarTightly cap the jar and label with the date. Place the jar in a cool, dry location for at least three weeks. The tincture will strengthen the longer it sits. Check on the herbs every couple of days and give the jar a turn to prevent settling. Check to see if menstruum needs to be added to the jar.
Making the Tincture
Place a colander over a pot and line with cheesecloth. You will be wringing the liquid out of the herbs, so use a piece that is big enough to make a small bundle.
Gather the corners of the cheesecloth and squeeze the liquid from the herbs, wrenching as much liquid out as you can.
Discard the mullein to the compost pile and pour the new tincture into a clean glass jar for future use.
Garlic Harvest
/| Our 2012 garlic harvest. |
Here's everything you need to know for harvesting your own garlic (click here to learn about planting).
When to Harvest
- Dig up the garlic bulbs once the leaves begin to dry and fall over, usually in late July or early August.
- Dig carefully around each bulb to loosen the soil, then pull up the bulb by the leaves.
- Inspect the flower stems for bulbil formation on hardneck garlic once they form in summer. Bulbils resemble small bulbs packed tightly together at the top of the stalk. They are covered in a papery fiber. Cut off the garlic stalk with a sharp knife once it falls over. Remove the entire stalk, cutting it off at the soil level.
- Separate out the largest, healthiest-looking cloves for use as seed stock. Larger cloves generally produce larger garlic bulbs when planted.
- Hang the heads by their leaves in a warm, dry place for two weeks. Brush or shake off any remaining soil once the bulbs are dried.
- Brush off any soil clinging to the bulbs. Leave the stalks and roots on the bulbs, while they dry.
- Allow the bulbs to cure, or dry, for three to four weeks in either a well-ventilated room or a dry, shady spot outside. Sunlight can change the flavor of fresh garlic.
- Once the tops and roots have dried they can be cut off.
- You can also further clean the bulbs by removing the outer skins. Just be careful not to expose any of the cloves.
Separate the cloves and plant each one individually. Use the larger outer cloves for planting and use the smaller inner cloves for cooking.
Pan-Fried Squash Blossoms
/Yes, those lovely flowers on your zucchini plants are edible! Here's a simple recipe that adds a great side to any dish.
Fried Squash Blossoms
3/4 cup cornstarch (and/or breadcrumbs, garbanzo bean flour, etc.)
1 teaspoon baking powder
1/4 teaspoon pepper
1/4 cup flour
1/2 teaspoon salt
1/2 cup water
1 egg, slightly beaten (or you can simply use soy or almond milk)
10 to 15 squash blossoms
Stuffing (optional!):
1/2 cup whole-milk ricotta (or equivalent extra-firm tofu, crumbled)
1/4 cup mayonnaise (or equivalent vegan version)
1 tsp dried oregano
1 tbsp bread crumbs
Vegetable oil
Salt & Pepper to taste
First, make the batter. Combine the first 5 ingredients, and then stir in the egg (or vegan equivalent) and water until smooth. Store in the refrigerator for 15 to 20 minutes. While the batter is chilling, prepare the squash blossoms. Carefully separate the flower petals without breaking them and remove the pistil in the center. Combine the cheese, mayonnaise, oregano, and breadcrumbs until smooth. Carefully add about a tablespoon of this mixture to each blossom and twist the top of the flower tight.
Heat enough oil in a frying pan—about an inch deep—to accommodate the blossoms. Get the batter out of the fridge and dip each blossom in batter, coating it. Carefully place each batter-covered blossom in the hot oil and fry until golden crisp on both sides. Remove and drain on paper towels, then sprinkle with salt and pepper. Enjoy!
Serves 3 to 4.
Recipe from Made by Michelle
Next Saturday: Ag Tour Open House!
/Easy Organic Pesticide Recipes
/By Jaci Collins
Pest control in an organic garden always requires ingenuity and experimentation. The past few weeks, we’ve been testing out a few natural pesticide recipes as an attempt to keep down on insect populations that are invading our plants. A simple recipe (which requires reapplication after rain) is 2 tablespoons of soap (a non-toxic/biodegradable brand is best) per 32 oz of water. Spray this mixture all over the plant and under the leaves. If you are having issues with insects chewing up your plants foliage, simply add 1 tablespoon of hot sauce or cayenne pepper to the above recipe. For more information,
.


