'Armyworm' Outbreak in the North Country

Reports in recent weeks of an armyworm invasion in the North Country are the talk of the town, with stories of these invasive buggers tearing through crops and leaving farmers without recourse.

The Watertown Daily Times on Sunday reported that an outbreak of army worms last week has unexpectedly spread to farms in the northern half of Jefferson County, posing a risk for all farmers with hay, grass, corn and small-grain crops. The outbreak at farms north of the Black River was caused by another wave of moths that traveled north from Western New York to hatch the destructive worms in hayfields, according to Michael E. Hunter, field crops educator for Cornell Cooperative Extension of Jefferson County.

The worms are tricky to detect because of their brown color and small size (only about 1.5 inches long). Experts recommend that farmers carefully inspect cool, damp areas at ground level to detect the worms, which can be less than a half-inch in their early growth stage.

It’s critical to find the worms early, Mr. Hunter said, because they do the most damage during the last week of their life cycle. In worst cases, hundreds of acres of crops could be lost. Numerous crops in the southern part of the county have already been destroyed because the worms, which arrived there about two weeks ago, had enough time to grow to full size. The worms, which pupate into moths like caterpillars, seek grassy fields to feed on but avoid crops such as alfalfa and soybean.

While scouting fields in the northern part of the county last Friday, Mr. Hunter discovered that the worms are widespread.

“I’ve covered thousands of acres and have found army worms in every field,” Mr. Hunter said Friday. Farms in Clayton, Orleans and Alexandria Bay were all infested. “There’s probably a good chance that most people have them right now.”

Although farmers can kill the worms with insecticides, in most cases it would be beneficial for them to mow the fields instead, Mr. Hunter said.

“We’ve seen the amount of damage (worms) can do if fields are untreated, but right now farmers have the option to harvest their fields and not lose any yield or quality,” he said. “There’s no advantage in waiting to harvest later, so we’re advising farmers to mow their hay and bale it.”

The worms are also susceptible to spot-treatments of soapy water, for those with smaller gardens.

Mr. Hunter said the worms were detected north of the Black River on Thursday but now have spread across the county’s northern half. They’ve been spotted in parts of St. Lawrence and Lewis counties, as well.

It’s an epidemic that Mr. Hunter said is unprecedented in the north country. The worms have been spotted in hundreds of acres, but that could soon expand to thousands.

“New sightings caused by these migrations are being spotted everywhere, and we can’t rule anything out right now,” he said. “Landowners should now be monitoring their fields closely.”

Jay M. Matteson, agricultural coordinator for Jefferson County, said farmers have been caught off-guard by the outbreak. Farmers who have crop insurance protection are advised to call their agents immediately if they detect damage. In addition, golf courses and lawns located near farmland could be susceptible to the worms.

“I think the severity of this is catching everyone off-guard,” Mr. Matteson said. “Any farm that’s pasture-based should be on the lookout.”

The last outbreak in the north country occurred in 2000 at farms in Lewis County.

For more information, call Mr. Hunter from Cornell Cooperative Extension of Jefferson County at 788-8450.

Comment

Nicole Caldwell

Nicole Caldwell is a self-taught environmentalist, green-living savant and sustainability educator with more than a decade of professional writing experience. She is also the co-founder of Better Farm and president of betterArts. Nicole’s work has been featured in Mother Earth News, Reader’s Digest, Time Out New York, and many other publications. Her first book, Better: The Everyday Art of Sustainable Living, is due out this July through New Society Publishers.

Everything You Need to Raise Your Own Baby Chicks

Raising your own chickens has more benefits than we can list in a little ol' blog post; from helping your compost along, to offering you unparalleled pest control, to creating brilliant fertilizer out of chicken poop, to providing you with healthy, fresh eggs every day.

There's no limit to how creative you can get with chicken housing for every living situation (learn all about urban chicken rearing here), and certainly no shortage of spectacular coop ideas. At Better Farm, we utilize a combination chicken tractor/paddock enclosure method with our birds, which basically functions as mobile chicken tractors enclosed by larger fenced-in areas. As the chickens eat up the grass and vegetation in one area, we move them to another.

We were blessed with a bunch of baby bard rock chicks last week, and set them up in the barn across the street until they've grown in their feathers and can live outside. Here's all you need for a basic set-up for when you want to raise your own:


  • Container large enough to home your baby birds (a kiddie pool will work while the birds are still tiny; a metal trough is better because it has higher side walls)
  • Wood and newspaper shavings for the floor of your container
  • A red heat lamp (white lamps will encourage cannibalism)
  • Starter feed (check with your local feed store)
  • Fresh water (when babies are young fill ice trays with water for them so they don't drown. When they're a little bigger, you can switch to a regular chicken waterer, avaialable at any local feed store)
  • Food dish, to be kept stocked at all times
If you're like us and have frequent snake visitors, you'll also want a screen cover for your birds. We found a discarded screen and cut a hole out for the heat lamp, then carefully stitched a screen "cone" over the light to ensure no predators could get in:


You'll want to keep the light at least 18 inches from the bottom of the tank. If the birds are huddled directly under the light, that means they're chilly and you should lower the light. If the birds form a kind of ring around the light, you've got it right on.

When the birds grow their adult feathers, they're ready to start living outside. Just be sure if you're going to be introducing them to other members of the flock, you also wait until their voices mature. A peeping chick is just begging to be hazed by older birds.

Got a question about raising chickens? E-mail us at info@betterfarm.org. Want to learn more about chicken rearing? Click here!

Comment

Nicole Caldwell

Nicole Caldwell is a self-taught environmentalist, green-living savant and sustainability educator with more than a decade of professional writing experience. She is also the co-founder of Better Farm and president of betterArts. Nicole’s work has been featured in Mother Earth News, Reader’s Digest, Time Out New York, and many other publications. Her first book, Better: The Everyday Art of Sustainable Living, is due out this July through New Society Publishers.

Mojitos Recipe with Organic Mint

Artist-in-residence Jaime Karnes mixes up a batch of fresh mojitos!
Happy Wednesday! Here's a great happy-hour mojito recipe featuring fresh, organic mint from our garden (pick up your own at our farm stand—just $1/bundle!):

Ingredients

  • Ice
  • 6 ounces light rum
  • 12 mint sprigs, or spearmint, 8 roughly broken apart
  • 6 tablespoons fresh lime juice
  • 4 tablespoons sugar
  • Club soda
  • 4 slices lime

Directions

Place ice in beverage shaker then add in the rum, 8 broken up mint sprigs, lime juice and sugar. Shake well and serve over ice in a high ball glass. Top off each glass with a splash of club soda.
Garnish each with a slice of lime and a sprig of mint.
Recipe from the Food Network 


Got a great recipe to share? E-mail us at info@betterfarm.org.
Comment

Nicole Caldwell

Nicole Caldwell is a self-taught environmentalist, green-living savant and sustainability educator with more than a decade of professional writing experience. She is also the co-founder of Better Farm and president of betterArts. Nicole’s work has been featured in Mother Earth News, Reader’s Digest, Time Out New York, and many other publications. Her first book, Better: The Everyday Art of Sustainable Living, is due out this July through New Society Publishers.

Art Barn Gets a Rainwater Catchment Slop Sink

The Art Barn in the last week gained running water to activate a slop sink for artists, thanks to a little rainwater harvesting project undertaken at Better Farm.

Utilizing a blueprint created last year by intern extraordinaire Lizzi Musoke, we constructed a gutter system to catch rainwater runoff on the Art Barn and divert it through a downspout and spigot into a laundry sink. Biodegradable products will flow out of the sink drain and disperse on the ground; and for toxic chemicals and paints, a catchment bucket can be placed below the drain to collect that waste for disposal.

Here's all you need to create your own rainwater catchment system, applicable for any non-potable water use (irrigation, outdoor shower, or outdoor sink):


Materials:
  • Length of plastic gutter to fit along your roof edge
  • End cap for gutter
  • Downspout cut to length
  • Downspout connector to gutter
  • Braces for gutter
  • Exterior screws
  • Spigot with washers
  • Drill with with various bits: one to fit your screws, one with a drill head of the same diameter as your spigot
  • Rainwater catchment barrel (check with your local farms, they're always flush with barrels like this!)
  • A stand for your barrel (cinder blocks at least for a hose attachment, something taller if you want a sink—you are using gravity to pull the water from the bin to your spigot, which should be at the bottom of the rainwater barrel!)
  • Skill saw to cut a hole in your barrel for the downspout
  • Mosquito netting to surround the entrance point of the downspout-to-barrel to ensure no bugs lay eggs in the water
Directions:
Carl Frizzell helps us out by cutting some gutters and downspouts
  • Measure your roof edge and cut your gutter length to fit (any saw will be able to cut through plastic gutter).
  • Take your gutter braces and screw them along the roof line, ensuring a gradual angle so the water runs downstream to where your catchment bin is waiting.
  • Put your gutter in the braces and attach the end cap at one end, downspout attachment piece at the other.
  • Measure from the gutter to where your catchment bin is and cut your downspout to be just a few inches longer. (NOTE: make sure your measurement for the downspout accounts for the fact your rainwater barrel is sitting up on something. This measurement should not be to the floor!)
  • Attach the downspout to the gutter system.
  • Cut a hole in your rainwater barrel's top to fit the downspout.
  • Use your drill to cut a hole in the barrel's side a few inches up from the bottom for your spigot. 
  • Put a washer on your spigot and screw it into the hole.
Any questions? E-mail us at info@betterfarm.org.
Comment

Nicole Caldwell

Nicole Caldwell is a self-taught environmentalist, green-living savant and sustainability educator with more than a decade of professional writing experience. She is also the co-founder of Better Farm and president of betterArts. Nicole’s work has been featured in Mother Earth News, Reader’s Digest, Time Out New York, and many other publications. Her first book, Better: The Everyday Art of Sustainable Living, is due out this July through New Society Publishers.

Aquaponic Gardening Phase III: Build your light stand

Our aquaponics set-up has been enjoyed an ideal nitrogen level for months now, with the ecosystem of various fish and water plants settling into a healthy regimen and routine. Our grow light arrived two weeks ago (ordered through the newly opened North Country Hydroponics in Waterotown), and we scooped up some gravel for inside the grow bed. All that's left to do is build our light stand, add seeds, and watch 'em grow.


There are tons of designs on the market for building a grow light stand, or you can buy your own for a pretty penny. We liked the simple, lightweight construction afforded by plastic pipes; though you could create a similar design with 1x1's as long as your light isn't too heavy.

Here are some easy plans for building a 24-inch grow light stand, courtesy of Cornell University. If you're like us and have a different size grow bed/light system/tank, be sure to adjust the measurements listed below to accommodate your system.

Before you start:

Before making any connection, make sure that the pipe and fitting are correctly positioned. (See diagrams.) Insert the pipe into the fitting as far as you can by hand. The fitting has an internal ridge. The end of the pipe should touch this ridge. Hit the fitting with a block of wood until the pipe is snug against the ridge. Several blows with some force will probably be necessary.

Cut the pipe:

Most types of saws will make the cuts. A miter box is helpful to make straight cuts.

  1. From one 10' pipe length saw two 49" pieces and two 8" pieces.
  2. From a second 10' pipe length saw three 36" pieces.
  3. From the third 10' pipe length saw one 36" piece, two 8" pieces and eight short pieces.
    To determine the length of the short pieces: Measure the depth a pipe will enter an elbow from the edge of the elbow to its internal ridge. (This depth varies depending on the manufacturer of the fitting.) Measure the similar internal depth in a Tee. Add the two depths together and subtract 1/8". This will be the length of the eight short pieces to be cut.
  4. From the fourth 10' pipe length two other pieces will be cut after their lengths are determined.
Assemble the base:
  1. Connect one 90º elbow to a 49" pipe. Connect another elbow to other end of the pipe in the same direction as the first elbow. Connect elbows to other 49" pipe in the same manner.
  2. Figure 2

  3. Position a Tee in the proper direction. Insert a short piece of pipe between them and force the fittings together. Connect three other Tees in the appropriate directions.
  4. Figure 3

  5. Connect two 8" pipes (one fitting at a time) between the Tees on each side of the base.
  6. Figure 4
Assemble the top:

The front assembly of the top should have the same width as the front assembly of the base.
  1. Place an elbow and a Tee touching each other along one end of the front of the base. Place another Tee and an elbow touching each other along the other end of the front of the base.
  2. Measure the distance between the edges of the Tees and then add to this measure the depths the pipe will fit into the two Tees. (This depth varies depending on the manufacturer of the fittings.) The total is the length of each of the two pieces of pipe remaining to be cut.
  3. Figure 5

  4. Cut the two pieces. With two elbows, two Tees, two short pieces of pipe and one of the new pieces of pipe, connect the front assembly of the top. Connect the back assembly of the top with similar pipes and fittings.
  5. Figure 6

  6. Connect the front and back assemblies of the top with two 8" pieces of pipe.
  7. Figure 7
Final assembly:

Connect each of the four 36" pipes to the four Tees on the base. Position the top assembly onto the 36" pipes. Connect the four Tees of the top, one at a time, to the 36" pipes.

Figure 8

Hang the shop light

Loop the chain around a top 8" pipe and close the loop by connecting the end of the chain to one of its links with an S hook. Similarly loop the other piece of chain around the other top 8" pipe. With S hooks attach the lower end of the chains to the slots on the shop light.

The distance between the top of the plants and the shop light can be adjusted by changing the lengths of the loops.

Double shoplight option
If you would like to double the depth of the unit described, cut and use four 17" pieces of pipe instead of the four 8" pieces. Purchase a second 48" fluorescent shop light (2 lamp) (40 watt), one 48"cool white fluorescent bulb (40 watt), one 48" daylight (warm) fluorescent bulb (40 watt), (4) S hooks ( 1" size) and (2) 2 ½ feet of chain ( loops large enough for S hooks).

This system of using two shop lights will allow you to adjust the height of each set of lights independently and provide light to both short and tall plants within the same unit.

24-inch model:
If you have limited space, you can construct a frame that will accomodate a 24" shop light. This smaller version requires only 3 10' sections of PVC pipe. Follow these initial cutting instructions:

  1. From one 10' pipe length saw two 25" pieces and two 34" pieces.
  2. From a second 10' pipe length saw two 34" pieces. Two other pieces will be cut from this pipe after their lengths are determined.
  3. From the third 10' pipe length saw four 6" pieces and eight short pieces. Follow instructions above for determining the length of the short pieces.
  4. Follow the assembly instructions above, only substitute the 25" pieces for the 49" pieces, and the 34" pieces for the 36" pieces.

Read about our aquaponic set-up in its entirety:
Aquaponic Gardening: Phase I
Aquaponic Gardening: Phase II
Building a Grow Bed for your Aquaponic Garden
Comment

Nicole Caldwell

Nicole Caldwell is a self-taught environmentalist, green-living savant and sustainability educator with more than a decade of professional writing experience. She is also the co-founder of Better Farm and president of betterArts. Nicole’s work has been featured in Mother Earth News, Reader’s Digest, Time Out New York, and many other publications. Her first book, Better: The Everyday Art of Sustainable Living, is due out this July through New Society Publishers.

Introducing betterArts Resident Jaime Karnes

Jaime Karnes is a writer originally from Burlington, Vt, visiting us for one month through the betterArts residency program at Better Farm to work on her first historical novel.

"Growing up in Vermont," she told us, "I have a deep connection to and appreciation for communities that work together for a more sustainable lifestyle."

Jaime teaches through New Jersey Institute of Technology, the Gotham Writers Workshop, and Rutgers University; and has in the past covered everything from brand development for the Urban Cowgirl to working as the fiction editor-at-large for Harvard's Utopian. She lives in the East Village of New York City.

Her novel is set in mid-20th century Quebec and is told from the collective point of view of 11- to 13-year-old orphans. The book follows the children through the years known as "The Great Darkness"; when orphans, due to collusion in the Catholic Church, were transferred to psychiatric and insane asylums under orders of Premier Maurice Duplessis. Almost 100,000 orphans over a period of 3- years experienced unconscionable abuse. Of those people, approximately 1,000 Duplessis Orphans are still alive today.

Jaime's research is complete for the novel and she started work on the first draft at the MacDowell Colony last summer. She's continuing her work on it this summer, and will perform a reading from the book before the conclusion of her residency in mid-July. Stay tuned for more information on that event! A warm welcome to Jaime as she joins the ranks here for what we're sure will be a great, productive month.

For more information about the betterArts residency program, click here.
Comment

Nicole Caldwell

Nicole Caldwell is a self-taught environmentalist, green-living savant and sustainability educator with more than a decade of professional writing experience. She is also the co-founder of Better Farm and president of betterArts. Nicole’s work has been featured in Mother Earth News, Reader’s Digest, Time Out New York, and many other publications. Her first book, Better: The Everyday Art of Sustainable Living, is due out this July through New Society Publishers.

Earth Ship Construction, Part I

Image from Real Adventures.
Since blogging in January about earth ship construction, we've been holding on to our empty glass bottles and collecting discarded tires from our neighbors. And today, we'll break ground on a small earth ship cottage.

An Earthship is a passive solar home made of natural and recycled materials. The structures are by design completely self-sufficient and in harmony with the environment.
Earthship Construction
An earthship wall: glass bottles and mortar.
Earthships are typically constructed from old tires, bottles, cans, adobe, stucco, and wood—in other words, a lot of materials that would otherwise end up in a landfill.
So how does it work? Here's the full run-down.
The term "earthship" was coined by Taos-based architect Mike Reynolds to describe his particular brand of environmentally sustainable architecture. As such, the phrase is virtually synonymous with the thermal mass, off-grid, earth-rammed tire and aluminum can-based "U-room" constructions that Reynolds has made famous on the Taos mesa. The rolling sea-green sage-covered Taos mesa which many earthships now populate easily becomes a metaphor for the ocean (an ironic one at that). One might speculate that this was part of what conspired to birth the phrase. The most solid origins of the term however are in the earthship's very character and philosophy. An earthship requires the much more active participation and alertness of its occupant in order for the dwelling to achieve optimal performance. In this regard, an earthship occupant is more of a pilot or sailboat captain than a neutral passenger. He or she must remain casually attentive to his changing environmental conditions in order to respond appropriately and derive peak levels of control and utility from his vessel.

The path of water in an Earthship:

  • Water is caught from roof catchment systems and channeled via silt catches into cisterns.
  • Cisterns gravity feed a DC pump and filter panels (WOM).
  • A Pump and filter panel (WOM) pushes water into a pressure tank and conventional household water pressure is the result.
  • The Toilet is separated from drainage system of all other household plumbing fixtures.
  • Water is used in a conventional way such as bathing or washing dishes.
  • Next, this water is then drained into linear biologically developed interior greywater treatment and containment systems.

The Water Organizing Module

Water from the city, cistern, your well, etc. can all be hooked up to the WOM. Automated systems can manage your water levels.
Filters clean the water for human consumption and use. Bottom Line: Your home has normal plumbing; your plumber sees what they are used to seeing.
Electricity: Earthships produce their own electricity with a prepackaged photovoltaic/wind power system. This energy is stored in batteries and supplied to your electrical outlets. Earthships can have multiple sources of power, all automated, including grid-intertie.
Use: Washing machines, computers, kitchen appliances, print machines, vacuums, etc. can be used normally. No electricity is required for heating & cooling.
Adjusting to Temperature changes isn’t as complicated as it sounds. The comfortable temperature range in any earthship is largely provided for by the natural thermal stability of the earth itself. Many amphibians & reptiles survive winters by burying themselves below the earth's frost line. Below the frost line, temperatures hover at a fairly stable 55-58 degrees. The earthship design takes advantage of this by being dug partially into the earth, or heavily earth-bermed along the outer walls, or both. Skylights provide the release of built up heat in warm climates, and shading for frost glazing can control the amount of solar energy coming in. The orientation of the "U-rooms" and angle of the front-facing glass also play key roles in how much heat is absorbed or dismissed by the dwelling. In extremely hot climates, U-rooms may be pointed away from the midday sun. Additional cooling can be provided for by a pipe run through the cool underground and into the earthship for an all-natural air conditioner.
Earthships are built just about everywhere on the planet. Differences in climate and orientation to the sun play a key role on the design requirements for optimizing earthship performance for a given location, but location itself has not proven to be particularly prohibitive for this type of off-grid dwelling. .
Typical Earthships are made out of earth rammed tires. An earthship of the kind made notable by Michael Reynolds uses earth-rammed automobile tires in "U" shaped room modules for the primary structural load-bearing walls, and a combination of cement and aluminum cans for interior, non-load-bearing walls. Front-facing glass is constructed using wood-framing and large standard sized sheets of glazing. Roofs are usually built with wood framing and sometimes vigas as well as aluminum or rubber sheeting as waterproofing.
Tire Odors? There is no verifiable information to date that suggests that off- gassing of tires occurs in an earthship.
10 Steps to building a simple Earthship
  1. On the bare earth, mark the outer walls in a circular or U shaped layout.
  2. Lay the first row of tires, shoulder to shoulder along the wall line.
  3. Using the dirt from the inside of the wall line, firmly pack the tires until they are solid bricks. The earth cliff on the inside would be excavated down to roughly three feet in depth.
  4. Stack the second row of tires, in a staggered layout, on top of the first, paying attention to keeping them level with each other. Continue this pattern until the walls have reached the desired height.
  5. Fill any voids with empty pop cans and/or glass bottles and cover the tire walls, inside and out, with mud adobe, cement or stucco to create a smooth finished surface.
  6. The roof can be domed shaped, formed from rebar that is wired or welded together then covered with chicken wire and cement. Other options would be log beams or even traditional trusses. A skylight/vent is included in the design to the rear of the structure to help regulate internal temperatures.
  7. The front of the structure is a sloped greenhouse wall built upon a low wall of earth rammed tires and includes a large planter box on the inside. The glazing is recycled sliding glass door panels or similar materials. The entry door is constructed at either end of the greenhouse hallway.
  8. Any interior walls are constructed of a cement and pop can matrix that is covered by an adobe finish. All the planter boxes are built the same way.
  9. The house systems include a rain water catchment cistern, a battery bank, solar panels, power inverter and a composting toilet. The kitchen wastewater is filtered via the greenhouse planters which grow fresh vegetables year round.
Finishing touches include tile or flagstone floors, glass bottle accent windows and wood inlays. Two story designs can include spiral staircases and just about any kind of custom design feature you can imagine.
The exposed surfaces on the outside of the structure are coated with a layer of cement, mud adobe or stucco as the climate demands. Most of the external tire walls are earth bermed and the roofing material is chosen to facilitate capture of rain water for use inside the house. Of course attention must be paid to things like drainage and choosing the best southern exposure for the greenhouse front of the dwelling, but otherwise it is a pretty simple design.
 

Comment

Nicole Caldwell

Nicole Caldwell is a self-taught environmentalist, green-living savant and sustainability educator with more than a decade of professional writing experience. She is also the co-founder of Better Farm and president of betterArts. Nicole’s work has been featured in Mother Earth News, Reader’s Digest, Time Out New York, and many other publications. Her first book, Better: The Everyday Art of Sustainable Living, is due out this July through New Society Publishers.

Make Your Own Soy Milk!

By Jaci Collins
Though making your own soy milk takes time, it's an incredibly inexpensive and easy project.

To get started, you simply need one pound of white dried soybeans (the organic variety is $2 per pound at the local natural food store, however we got ours for free from a local farmer friend), fine-mesh cheesecloth, two large pots, and a food processor or blender.
Directions:
  • Wash the soybeans, picking out any discolored ones, and place them in a large pot or bowl.
  • Cover the soybeans entirely with cold water and allow them to soak from 8 to 24 hours.
  • After soaking, the soybeans should be a bit soft and easy to bite into. 
  • Drain and rinse the soybeans and split them in half. 
  • Place the 2 pots on the stove and heat up (not boil) 8 cups of water in each. Meanwhile, put half of the soybeans in a food processor or blender, barely covering them with cold water. Blend or process for two minutes or until the mixture is creamy and foamy. Place this into a bowl and set aside. 
  • Repeat the same step with the other half of the soybeans. Keep these mixtures separate and place them into the pots. 
  • Stir the mixture for 20 minutes preventing it from foaming out of the pot.  
  • Place the cheesecloth over a large bowl and ladle the heated mixture slowly over the cloth, allowing it to drain completely. To speed up the process, you can use the back of the ladle to spread the mixture thin over the cheesecloth. 
  • Repeat until you have strained all of the mixture. The solid, known as okara, will need to be emptied off the cheesecloth throughout this process as it weighs it down. 
  • Once you've completed this, simply place the soymilk into a pitcher and into the refrigerator. FYI: The soymilk will only last for roughly 3-4 days since there are no preservatives.
Don't through out the okara, as it can be used in various vegetarian/vegan recipes. We used it to make okara burgers:

 
Enjoy!

Farm Stand Opens Tomorrow!

Better Farm soaps!
Our farm stand will open at 9 a.m. tomorrow, featuring an assortment of Better Farm goods.

Available for sale tomorrow will be turnips, radishes, handmade soaps (pressed with herbs from our gardens), T-shirts, coffee, and fresh herbs including sage, chives, and oregano.

We'll also have sign-ups available for our full summer workshop series. Please stop in and say hello!

Our farm stand is located on-site at 31060 Cottage Hill Road, Redwood NY, 13679.
Comment

Nicole Caldwell

Nicole Caldwell is a self-taught environmentalist, green-living savant and sustainability educator with more than a decade of professional writing experience. She is also the co-founder of Better Farm and president of betterArts. Nicole’s work has been featured in Mother Earth News, Reader’s Digest, Time Out New York, and many other publications. Her first book, Better: The Everyday Art of Sustainable Living, is due out this July through New Society Publishers.

Interns and Alpacas!

By Noah Bogdonoff

Yesterday the Better Farm interns headed over to Home Again Farm—Gail and Daryl Marsh's little utopia of alpacas, guinea hens, and grape vines—to assist in "herd health day". The Marshes currently tend to 20 alpacas and must keep close tabs on their antibiotic regimens, weight, and hygiene. If something is wrong, Gail explained, they have to know right away. Ailments such as copper poisoning can harm or even kill an alpaca, and the Marshes have learned from experience that the best resistance to infections and diseases is vigilant observation of the herd.

All that said, what is an alpaca? Until today I had never actually laid eyes on one. Happily, the Marshes' alpacas are quite social and pretty docile, so I managed to get up-close and personal with some of the creatures:
They're pretty silly.

In addition to their incredibly humorous appearance, alpacas provide the world with some of the softest, most usable fur in the world. The Marshes use their alpaca fur to make yarn, and run a little store out of their home that sells clothing, hats, gloves, scarves, and more. I walked away with a hat for the winter. (This year, I'll finally have something warm enough to protect my ears from winter in the northeast!). They are also, as we saw, herd animals. Gail and Daryl taught us how to round the alpacas up and catch them so so that we could harness them and lead them to the scale.

Gail and Daryl weighing an alpaca.
From the scale, we led the alpaca's into a device called a "shoe" that keeps the animal (and human) safe and secure while shots are given, toenails and clipped, and tails are trimmed. Because these alpacas don't get much time on rocks, it's essential to manually clip their nails.

Alpaca in a shoe.
The alpacas proved to be a pretty rowdy bunch. At one point, we led four males into the barn to find the entire female herd lingering on the other side of a fairly thin fence. Chaos ensued. As Daryl said, "We know what's on these boys' minds." Later on in the day, one of the males snuck around us and made a made dash for another area of the farm. Daryl rounded him up and led him back to the herd with a chuckle.

As Better Farm begins to accrue animals, this type of experience and exposure will likely come in handy. Maybe we'll take the plunge and buy an alpaca or two one day. Who knows? In any case, I'm excited to keep up with the Marshes and their business.

To learn more about Better Farm's internship program, click here.

Rainwater Catchment Workshop this Friday

Illustration from Self-Sufficient Blog.
Better Farm on Friday will host a "Rainwater Catchment Systems", a two-hour workshop about harvesting rainwater for irrigation or non-potable water, from 1-3 p.m.

In this workshop, participants will learn about various methods for catching rainwater including commercial set-ups and simple systems anyone can use. Attendees will then put their know-how to use by installing a simple catchment system that will be hooked up to sink in Better Farm's Art Barn.

There is a suggested $10 donation for any workshops scheduled at Better Farm to cover basic material costs. Pre-registration is required! Please contact us at info@betterfarm.org or (315) 482-2536 with any questions or to pre-register. For Better Farm's full summer workshop schedule, click here. For a listing of arts-related events and workshops, click here.

Here's a quick list of the other workshops we have slated here in the next week:

Fundamentals of Violin
All Ages
10 a.m.-12 p.m. Saturday, June 16
In this workshops, students will learn proper technique on violin, finger positions, and basic scales. Instructor will be available at the conclusion of the series to sign people up for private instruction if desired.
Instructor: Brian Purwin is a professional violinist and pianist living in Redwood, N.Y.Cost: Free
Note: Pre-register by e-mailing info@betterarts.org or calling (315) 482-2536. When you pre-register, let us know if you need to borrow a violin! Free, day-long rentals are being made available through a partnership with Trillium Performing Arts Center.

Intro to Guitar
All Ages
1-3 p.m. Saturday, June 16
In this course students will learn basic chord progressions, finger positionings, and a song with music to take home. Each participant must come to workshop with his or her own guitar and strings.
Instructor: Chad Darou has been playing music since he was 8. He has played dobro on stage and in studio with such greats as Bill Keith, Bill Harrell, Frank Wakefield, The Gibson Brothers, Dan Tyminski, Lonesome River Band, Dell Reeves, Bill Anderson, Ray Legere and the Abrams Brothers.
Cost: Free
Note: Pre-register by e-mailing info@betterarts.org or calling (315) 482-2536.

Knitting and Crocheting Circle
All ages
6 p.m. Monday, June 18
People are invited to bring their ongoing knitting and crochet projects to work on. Instructor will be available to answer questions and provide support. Those interested in learning how to knit and/or crochet are invited to sit in with their questions. Yarn and needles will be avaiable for those who do not have their own.
Instructor: Theresa McDonald
Cost: Free
Note: Pre-register by e-mailing info@betterarts.org or calling (315) 482-2536. When you pre-register, please let us know if you'll be bringing your own yarns and needles or if you need us to provide them.
Comment

Nicole Caldwell

Nicole Caldwell is a self-taught environmentalist, green-living savant and sustainability educator with more than a decade of professional writing experience. She is also the co-founder of Better Farm and president of betterArts. Nicole’s work has been featured in Mother Earth News, Reader’s Digest, Time Out New York, and many other publications. Her first book, Better: The Everyday Art of Sustainable Living, is due out this July through New Society Publishers.

Mulch Gardening in Full Swing at Better Farm

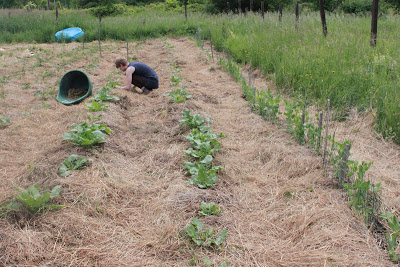
Jaci Collins, intern director, works on a row of cauliflower.
Manicured, conventional gardens are completely antithetical to how plants actually grow. Bare ground with nothing growing between plants may be deemed more aesthetically pleasing; but results of this "conventional" gardening method have created a booming business for chemical companies and garden supply businesses because zapped soil has high levels of sensitivity to temperature and moisture, and weak resistance to topical bacterial infections. Think of topsoil as a garden's skin; and imagine stripping away the top three layers to leave plants with higher sensitivities to temperature, moisture, and weak immunities to topical bacterial infections. You would also be forced to apply excessive moisture and take antibiotics to combat illnesses.
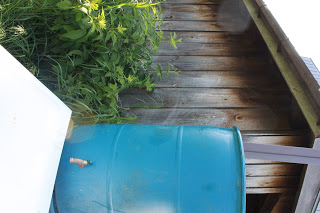
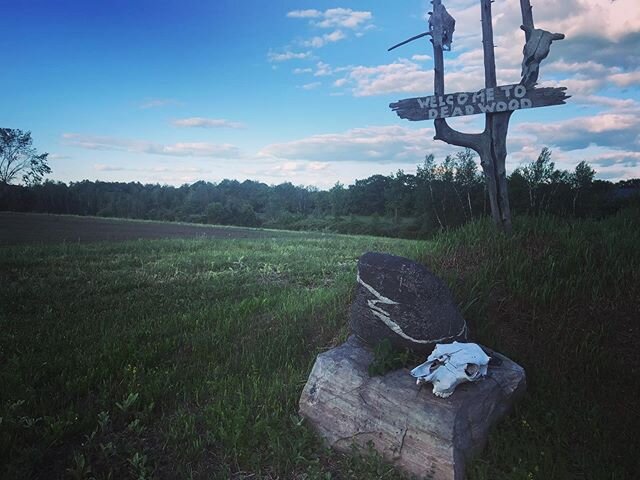
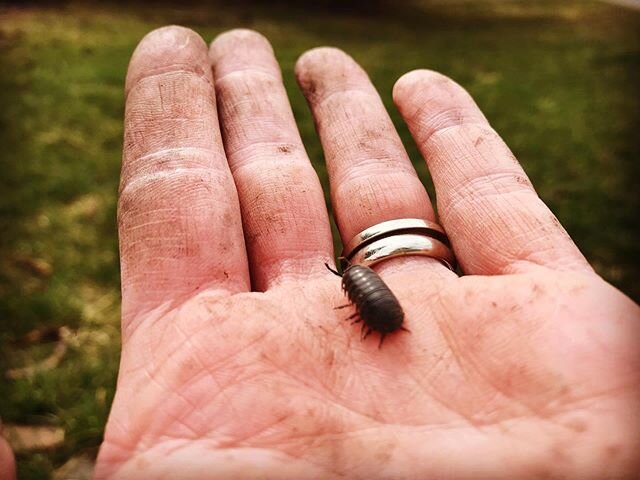

Enter mulch gardening: a layering method that mimics a forest floor and combines soil improvement, weed removal, and long-term mulching in one fell swoop. Also called lasagna gardening or sheet mulching, this process can turn hard-to-love soil rich and healthy by improving nutrient and water retention in the dirt, encouraging favorable soil microbial activity and worms, suppressing weed growth, and improving the well-being of plants (all while reducing maintenance!).

We're in our third year of mulch gardening at Better Farm, which means we're really in our first year of having extremely developed, thick rows of biologically strong dirt and compost for our plants. Here's some information on how you can get started mulch gardening.

How is Mulch Gardening Achieved?
First, a weed barrier like cardboard is laid down to smother weeds. The cardboard decomposes after the weeds have all died and turned into compost. On top of the cardboard you can pile dead leaves, grass clippings, compost, several-years-old composted manure, and other biodegradables such as old hay (our personal favorite). Mulch gardening can range from just a few inches thick to 2 feet or more, depending on how bad your soil is and how much raw material you have available (it will cook down and settle quite a bit). We made two-foot piles last fall, and by spring those had settled and cooked down to about one foot. We sometimes add a fresh layer of cardboard over the top of the rows as everything breaks down and we see evidence of emerging weeds. The cyclical process goes on year-round and works so well we don't have to put a single additive or chemical into the soil.
To say our experience at Better Farm has been a crash-course in everything organic is an understatement. We've been working uphill since Day One, when we "broke ground" (and several shovels) in the clay-rich, hard earth that had homed hay only for at least half a century.

Since that time, we've experimented with several planting, growing, weeding, fertilizing, and pest-control tactics. And what began as a small vermicompost bin in the kitchen has turned into a huge garden full of layered mulch rotting beautifully into dark, rich soil that feeds hundreds of plants every spring, summer, and fall.

Want to learn more? Here's a snippet from an old interview with the Queen of Mulch herself, talking about how you too can have a green thumb without an aching back.

My no-work gardening method is simply to keep a thick mulch of any vegetable matter that rots on both my vegetable and flower garden all year round. As it decays and enriches the soil, I add more. The labor-saving part of my system is that I never plow, spade, sow a cover crop, harrow, hoe, cultivate, weed, water or spray. I use just one fertilizer (cottonseed or soybean meal), and I don't go through that tortuous business of building a compost pile.

I beg everyone to start with a mulch 8 inches deep; otherwise, weeds may come through, and it would be a pity to be discouraged at the very start. But when I am asked how many bales (or tons) of hay are necessary to cover any given area, I can't answer from my own experience, for I gardened in this way for years before I had any idea of writing about it, and therefore didn't keep track of such details.
However, I now have some information on this from Dick Clemence, my A-Number-One adviser. He says, "I should think of 25 50-pound bales as about the minimum for 50 feet by 50 feet, or about a half-ton of loose hay. That should give a fair starting cover, but an equal quantity in reserve would be desirable." That is a better answer than the one I have been giving, which is: You need at least twice as much as you would think.

What Should I Use for Mulch?
Spoiled or regular hay, straw, leaves, pine needles, sawdust, weeds, garbage — any vegetable matter that rots.

Don't Some Leaves Decay Too Slowly?
No, they just remain mulch longer, which cuts down on labor. Don't they mat down? If so, it doesn't matter because they are between the rows of growing things and not on top of them. Can one use leaves without hay? Yes, but a combination of the two is better, I think.
What is spoiled hay? It's hay that for some reason isn't good enough to feed livestock. It may have, for instance, become moldy — if it was moist when put in the haymow — but it is just as effective for mulching as good hay, and a great deal cheaper.

Shouldn't the hay be chopped?
Well, I don't have mine chopped and I don't have a terrible time — and I'm 76 and no stronger than the average person.

Can you use grass clippings?
Yes, but unless you have a huge lawn or neighbors who will collect them for you, they don't go very far.

How Do You Sow Seeds into the Mulch?
You plant exactly as you always have, in the Earth. You pull back the mulch and put the seeds in the ground and cover them just as you would if you had never heard of mulching.

How Do You Sow Seeds into the Mulch?
You plant exactly as you always have, in the Earth. You pull back the mulch and put the seeds in the ground and cover them just as you would if you had never heard of mulching.

 How Often Do You Put on Mulch?


Whenever you see a spot that needs it. If weeds begin to peep through anywhere, just toss an armful of hay on them. What time of year do you start to mulch? The answer is now, whatever the date may be, or at least begin to gather your material. At the very least give the matter constructive thought at one; make plans. If you are intending to use leaves, you will unfortunately have to wait until they fall, but you can be prepared to make use of them the moment they drop. Should you spread manure and plow it under before you mulch? Yes, if your soil isn't very rich; otherwise, mulch alone will answer the purpose.

How Far Apart Are the Rows?
Exactly the same distance as if you weren't mulching — that is, when you begin to use my method. However, after you have mulched for a few years, your soil will become so rich from rotting vegetable matter that you can plant much more closely than one dares to in the old-fashioned way of gardening.

How Long Does the Mulch Last?
That depends on the kind you use. Try always to have some in reserve, so that it can replenished as needed.

Now for the Million Dollar Question: Where Do You Get Mulch?
That's difficult to answer but I can say this: If enough people in any community demand it, I believe that someone will be eager to supply it. At least that's what happened within a distance of 100 miles or so of us in Connecticut, and within a year after my book came out, anyone in that radius could get all the spoiled hay they wanted at 65 cents a bale.
If you belong to a garden club, why can't you all get together and create a demand for spoiled hay? If you don't belong to a group, you probably at least know quite a few people who garden and who would be pleased to join the project.
Use all the leaves you can find. Clip your cornstalks into footlength pieces and use them. Utilize your garbage, tops of perennials, any and all vegetable matter that rots. In many localities, the utility companies grind up the branches they cut off when they clear the wires; and often they are glad to dump them near your garden, with no charge. But hurry up before they find out that there is a big demand for them and they decide to make a fast buck. These wood chips make a splendid mulch; I suggest you just ignore anyone who tells you they are too acidic.

Recently, a man reproached me for making spoiled hay so popular that he can no longer get it for nothing. The important fact, however, is that it has become available and is relatively cheap. The other day a neighbor said to me, "Doesn't it make you feel good to see the piles of hay in so many yards when you drive around?" It does make me feel fine.

Now and then I am asked (usually by an irritated expert) why I think I invented mulching. Well, naturally, I don't think so; God invented it simply by deciding to have the leaves fall off the trees once a year. I don't even think that I'm the first, or only person, who thought up my particular variety of year-round mulching, but apparently I'm the first to make a big noise about it — writing, talking, demonstrating.

And since in the process of spreading this great news, I have run across many thousands who never heard of the method, and a few hundred who think it is insane and can't possibly work, and only two people who had already tried it, is it surprising that I have carelessly fallen into the bad habit of sounding as though I thought I originated it?

But why should we care who invented it? Dick Clemence works hard trying to get people to call it the "Stout System," which is good because it should have some sort of a short name for people to use when they refer to it, instead of having to tell the whole story each time. I suppose it does more or less give me a feeling of importance when I come across an article mentioning the Stout System, yet I am cheated out of the full value of that sensation because I've never been able really to identify the whole thing with that little girl who was certainly going to be great and famous some day. What a disgusted look she would have given anyone who would have offered her the title of Renowned Mulcher!

And it borders on the unenthralling to have the conversation at social gatherings turn to slugs and cabbageworms the minute I show up. And if some professor of psychology, giving an association-of-ideas test to a bunch of gardeners, should say "moldy hay" or "garbage," I'm afraid that some of them would come out with "Ruth Stout." Would anyone like that?

If you want to learn more about the Stout System, you can locate copies of Ruth Stout's books through a used bookseller. You also can order the VHS or DVD video Ruth Stout's Garden from Gardenworks.
Comment

Nicole Caldwell

Nicole Caldwell is a self-taught environmentalist, green-living savant and sustainability educator with more than a decade of professional writing experience. She is also the co-founder of Better Farm and president of betterArts. Nicole’s work has been featured in Mother Earth News, Reader’s Digest, Time Out New York, and many other publications. Her first book, Better: The Everyday Art of Sustainable Living, is due out this July through New Society Publishers.