New Music Video Produced by betterArts Resident Eric Drasin
/
A new music video directed and produced in July by Eric Barry Drasin, a current betterArts resident living at Better Farm, was released yesterday on Consequence of Sound's blog.
The video is for the band Rubblebucket's new signle, "L'Homme", which is off the group's new album, Omega La La. The video was shot and edited in Brooklyn, N.Y., and New Jersey:
Rubblebucket - "L'homme" from Consequence of Sound on Vimeo.
The video is for the band Rubblebucket's new signle, "L'Homme", which is off the group's new album, Omega La La. The video was shot and edited in Brooklyn, N.Y., and New Jersey:
Rubblebucket - "L'homme" from Consequence of Sound on Vimeo.
Mulch Gardening 101
/Mulch gardening is a layering method that mimics a forest floor and combines soil improvement, weed removal, and long-term mulching in one fell swoop. Also called lasagna gardening or sheet mulching, this process can turn hard-to-love soil rich and healthy by improving nutrient and water retention in the dirt, encouraging favorable soil microbial activity and worms, suppressing weed growth, and improving the well-being of plants (all while reducing maintenance!).
Manicured, conventional gardens are completely antithetical to how plants actually grow. Bare ground with nothing growing between plants may be deemed more aesthetically pleasing; but results of this "conventional" gardening method have created a booming business for chemical companies and garden supply businesses because zapped soil has high levels of sensitivity to temperature and moisture, and weak resistance to topical bacterial infections. Think of topsoil as a garden's skin; and imagine stripping away the top three layers.
How is Mulch Gardening Achieved?
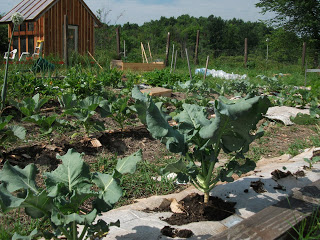
First, a weed barrier like cardboard is laid down to smother weeds. The cardboard decomposes after the weeds have all died and turned into compost. On top of the cardboard you can pile dead leaves, grass clippings, compost, several-years-old composted manure, and other biodegradables such as old hay. Mulch gardening can range from just a few inches thick to 2 feet or more, depending on how bad your soil is and how much raw material you have available (it will cook down and settle quite a bit). Our layers at Better Farm are about a foot thick, with a fresh layer of cardboard placed over the top as everything breaks down and we see evidence of emerging weeds. The cyclical process goes on year-round and works so well we don't have to put a single additive or chemical into the soil.
Here's a quick view of the layers created with rotting matter at the
:

First layer: cardboard, newspaper, junk mail
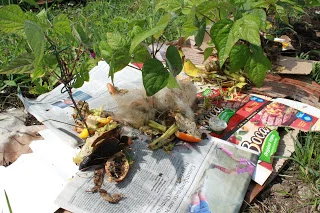
Second layer: fresh compost from our food, compostables swept up on the floor of the farm

Third layer: hay, grass clippings, pulled (and dead) weeds

We put a second layer of cardboard over the top of some rows to make sure no weeds poke through.

As the layers of biodegradables break down, we're left with rich, dark soil.

Grow, baby, grow!
Mulch gardening was made famous by Ruth Stout, whose 1950s-era books
Have a Green Thumb Without an Aching Back
and
Gardening Without Work
changed the face of
Better Homes & Gardens
—esque methods for growing great crops. Though her books are both out of print, her methods live on. Below is an excerpt from
Gardening Without Work
, as reprinted on
' site:

‘Mulch Queen’ Ruth Stout claimed to have smashed saloons with
Carry Nation in Prohibition-era Kansas and worked au natural in
her roadside Connecticut garden, but her labor-saving, soil-im
proving, permanent garden mulching technique is what earned her
lasting fame. Stout was born in 1884 and lived to be 96; by the
1950s, she was writing lively gardening books whose groundbreaking
techniques remain
consistent with the "no-till" gardening methods soil experts recom
mend today (see
):
My no-work gardening method is simply to keep a thick mulch of any vegetable matter that rots on both my vegetable and flower garden all year round. As it decays and enriches the soil, I add more. The labor-saving part of my system is that I never plow, spade, sow a cover crop, harrow, hoe, cultivate, weed, water or spray. I use just one fertilizer (cottonseed or soybean meal), and I don't go through that tortuous business of building a compost pile.
I beg everyone to start with a mulch 8 inches deep; otherwise, weeds may come through, and it would be a pity to be discouraged at the very start. But when I am asked how many bales (or tons) of hay are necessary to cover any given area, I can't answer from my own experience, for I gardened in this way for years before I had any idea of writing about it, and therefore didn't keep track of such details.
However, I now have some information on this from Dick Clemence, my A-Number-One adviser. He says, "I should think of 25 50-pound bales as about the minimum for 50 feet by 50 feet, or about a half-ton of loose hay. That should give a fair starting cover, but an equal quantity in reserve would be desirable." That is a better answer than the one I have been giving, which is: You need at least twice as much as you would think.
What Should I Use for Mulch?
Spoiled or regular hay, straw, leaves, pine needles, sawdust, weeds, garbage — any vegetable matter that rots.
Don't Some Leaves Decay Too Slowly?
No, they just remain mulch longer, which cuts down on labor. Don't they mat down? If so, it doesn't matter because they are between the rows of growing things and not on top of them. Can one use leaves without hay? Yes, but a combination of the two is better, I think.
What is spoiled hay? It's hay that for some reason isn't good enough to feed livestock. It may have, for instance, become moldy — if it was moist when put in the haymow — but it is just as effective for mulching as good hay, and a great deal cheaper.
Shouldn't the hay be chopped?
Well, I don't have mine chopped and I don't have a terrible time — and I'm 76 and no stronger than the average person.
Can you use grass clippings?
Yes, but unless you have a huge lawn or neighbors who will collect them for you, they don't go very far.
How Do You Sow Seeds into the Mulch?
You plant exactly as you always have, in the Earth. You pull back the mulch and put the seeds in the ground and cover them just as you would if you had never heard of mulching.
Isn't It Bad to Mulch with Hay That May Be Full of Weed Seeds?
If the mulch is thick enough, the weeds can't come through it. One man in a group I addressed was determined not to let me get away with claiming that it was all right to throw a lot of hay full of grass seeds on one's garden, and the rest of the audience was with him. I was getting nowhere and was bordering on desperation, when, finally, I asked him: "If you were going to make a lawn, would you plant the grass seed and then cover it with several inches of hay?" Put that way, he at last realized that a lot of hay on top of tiny seeds would keep them from germinating.
However, it's true that you can lay chunks of baled hay between the rows of vegetables in your garden and, in a wet season, have a hearty growth of weeds right on top of the hay. To kill unwanted weeds all you need do is turn over the chunk of hay. Now, this isn't much of a job but some ardent disciples of my system are capable of getting indignant with me (in a nice way, of course) because they are put to that bother. I have relieved them of all plowing, hoeing, cultivating, weeding, watering, spraying and making compost piles; how is it that I haven't thought of some way to avoid this turning over of those chunks of hay?
How Can You Safely Plant Little Seeds Between 8-inch Walls of Mulch?
One can't, of course, but almost before one gets through spreading it, the mulch begins to settle and soon becomes a 2- or 3-inch compact mass rather than an 8-inch fluffy one. It will no doubt be walked on, and rain may come; in any case, it will settle. As a matter of fact you won't need 8 inches to start if you use solid chunks of baled hay.
Many People Want to Know Why I Don't Use Manure and What I Have Against It
I have nothing at all against it; in fact, I have a somewhat exaggerated respect for it. But I no longer need it; the ever-rotting mulch takes its place. I sort of complained, in my first book, that no one ever wrote an ode to manure, and through the years since then at least a half-dozen people have sent me poems they composed about manure piles.
I have been asked over and over if such things as sawdust and oak leaves should be avoided, the idea being that they make the soil too acidic. I use sawdust, primarily around raspberries, with excellent results. We have no oak trees, therefore I can't answer that question from experience, but I certainly wouldn't hesitate to use them; then, if it turned out that they were making the soil acidic, I would add some wood ashes or lime. I've had reports from a great many gardeners who have used both sawdust and oak leaves over their entire garden and have found them satisfactory.
How Often Do You Put on Mulch?
Whenever you see a spot that needs it. If weeds begin to peep through anywhere, just toss an armful of hay on them. What time of year do you start to mulch? The answer is
now
, whatever the date may be, or at least begin to gather your material. At the very least give the matter constructive thought at one; make plans. If you are intending to use leaves, you will unfortunately have to wait until they fall, but you can be prepared to make use of them the moment they drop. Should you spread manure and plow it under before you mulch? Yes, if your soil isn't very rich; otherwise, mulch alone will answer the purpose.
How Far Apart Are the Rows?
Exactly the same distance as if you weren't mulching — that is, when you begin to use my method. However, after you have mulched for a few years, your soil will become so rich from rotting vegetable matter that you can plant much more closely than one dares to in the old-fashioned way of gardening.
How Long Does the Mulch Last?
That depends on the kind you use. Try always to have some in reserve, so that it can replenished as needed.
Now for the Million Dollar Question: Where Do You Get Mulch?
That's difficult to answer but I can say this: If enough people in any community demand it, I believe that someone will be eager to supply it. At least that's what happened within a distance of 100 miles or so of us in Connecticut, and within a year after my book came out, anyone in that radius could get all the spoiled hay they wanted at 65 cents a bale.
If you belong to a garden club, why can't you all get together and create a demand for spoiled hay? If you don't belong to a group, you probably at least know quite a few people who garden and who would be pleased to join the project.
Use all the leaves you can find. Clip your cornstalks into footlength pieces and use them. Utilize your garbage, tops of perennials, any and all vegetable matter that rots. In many localities, the utility companies grind up the branches they cut off when they clear the wires; and often they are glad to dump them near your garden, with no charge. But hurry up before they find out that there is a big demand for them and they decide to make a fast buck. These wood chips make a splendid mulch; I suggest you just ignore anyone who tells you they are too acidic.
Recently, a man reproached me for making spoiled hay so popular that he can no longer get it for nothing. The important fact, however, is that it has become available and is relatively cheap. The other day a neighbor said to me, "Doesn't it make you feel good to see the piles of hay in so many yards when you drive around?" It does make me feel fine.
Now and then I am asked (usually by an irritated expert) why I think I invented mulching. Well, naturally, I don't think so; God invented it simply by deciding to have the leaves fall off the trees once a year. I don't even think that I'm the first, or only person, who thought up my particular variety of year-round mulching, but apparently I'm the first to make a big noise about it — writing, talking, demonstrating.
And since in the process of spreading this great news, I have run across many thousands who never heard of the method, and a few hundred who think it is insane and can't possibly work, and only two people who had already tried it, is it surprising that I have carelessly fallen into the bad habit of sounding as though I thought I originated it?
But why should we care who invented it? Dick Clemence works hard trying to get people to call it the "Stout System," which is good because it should have some sort of a short name for people to use when they refer to it, instead of having to tell the whole story each time. I suppose it does more or less give me a feeling of importance when I come across an article mentioning the Stout System, yet I am cheated out of the full value of that sensation because I've never been able really to identify the whole thing with that little girl who was certainly going to be great and famous some day. What a disgusted look she would have given anyone who would have offered her the title of Renowned Mulcher!
And it borders on the unenthralling to have the conversation at social gatherings turn to slugs and cabbageworms the minute I show up. And if some professor of psychology, giving an association-of-ideas test to a bunch of gardeners, should say "moldy hay" or "garbage," I'm afraid that some of them would come out with "Ruth Stout." Would anyone like that?
If you want to learn more about the Stout System, you can locate copies of Ruth Stout's books through a used bookseller. You also can order the VHS or DVD video
Ruth Stout's Garden
from
.
Turn Soap-Bar Nubs into Savings with DIY Dish Soap
/What to do with all those soap nubs left behind in the tub?
Make your own dish soap, of course.
We gave up a long time ago on buying cleaning products that ironically pollute the very space they're allegedly trying to tidy up; making the switch to biodegradable, gentle products containing as few ingredients as possible.
Unfortunately, the gallon-sized jugs of
that we love retail at the local health store for around $18 (yikes). So when the idea arose to upcycle old bars of soap to create lots and lots of dish soap, we jumped right on the proverbial bandwagon.
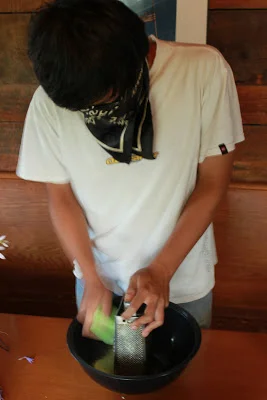
Here's how simple this recipe is:
Old bars (or nubs of bars) of soap
Cheese grater for grating the soap with
Hot water
Lemon juice or white vinegar
Add
two cups of soap shavings
to every
2-3 cups of hot water
(we used a big pasta pot on the stove for this—no need to boil the water, just get it hot!), mix, and let it sit overnight. The next day, mix the concoction again, adding more water as needed. Mix in
1/2 cup of lemon juice or white vinegar
to help fight grease. Then carefully funnel the soap into your bulk containers for easy storage...


Ta-da. This saved us just under $40, took almost no time at all, and works just as well as any dish soap you can buy in a store. Not too shabby.
Thanks to interns Soon Kai Poh, Elizabeth Musoke, and Natasha Pietila.
Floating Gallery Moves Aug. 2
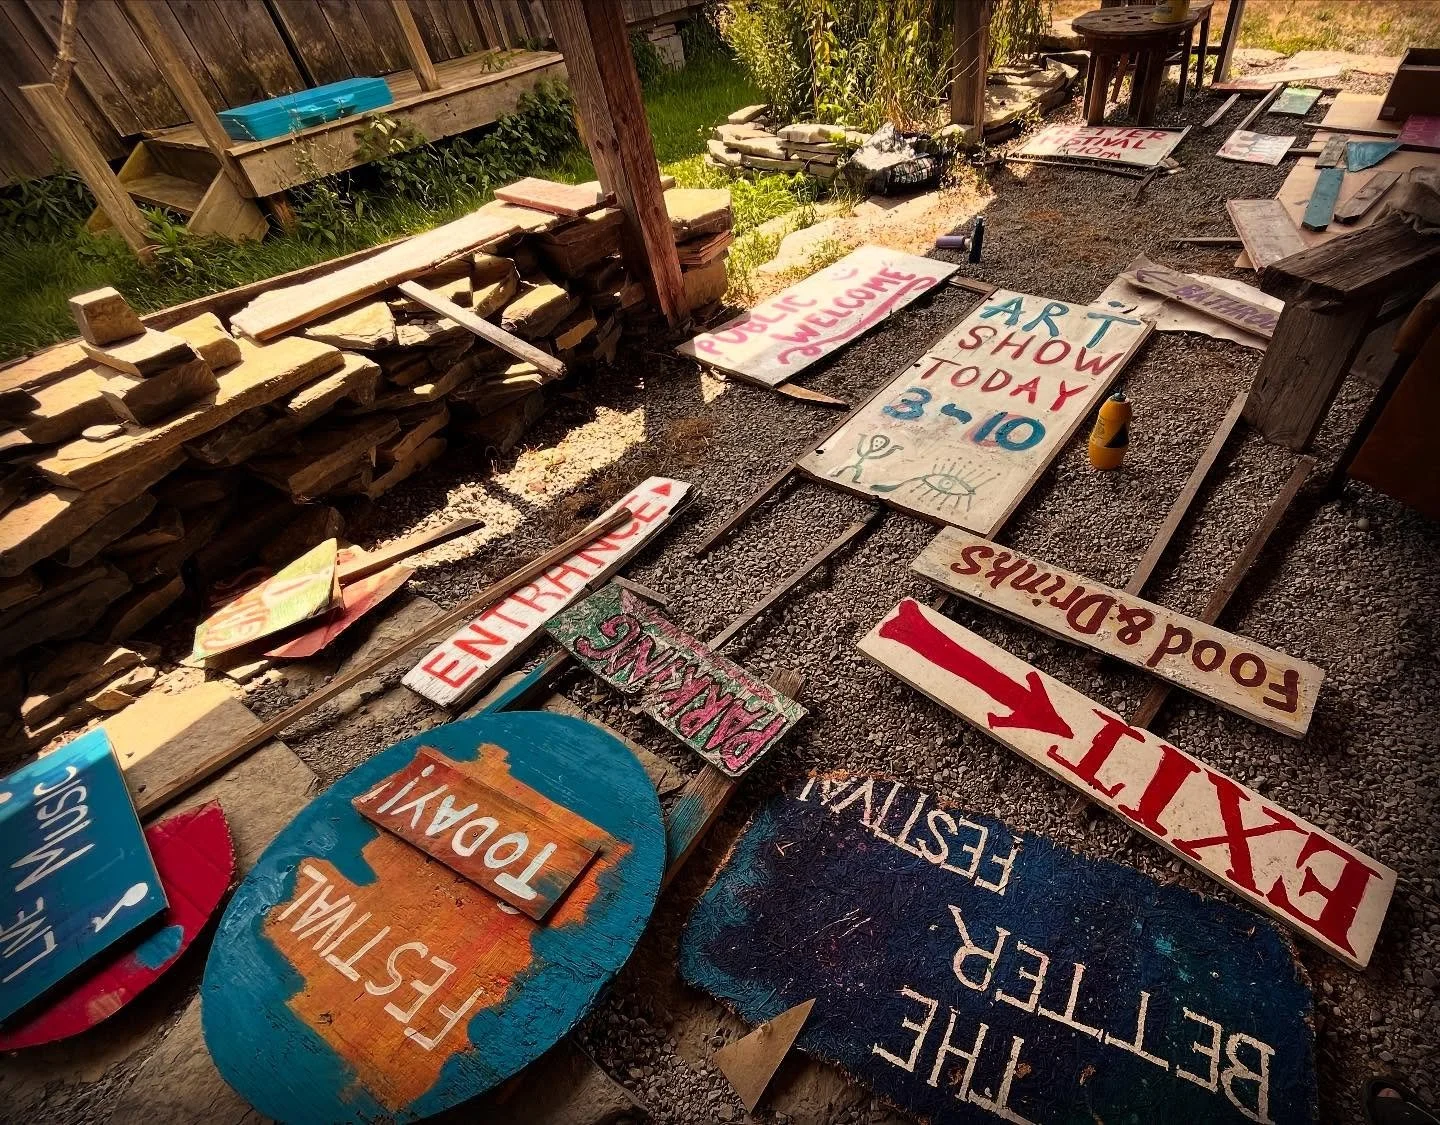
/Area artists are invited to participate in the next rotation of a "Floating Gallery" Aug. 2 in Watertown, N.Y.
More than 100 pieces of art are currently on display and for sale in public spaces throughout the Watertown area as part of the
's "Floating Gallery" initiative. That program, which "floats" pieces between five venues, is an opportunity to increase the visibility of a piece of art, while beautifying the spaces in which the piece hangs over the course of several months.
Those venues include:
Work that's sold is split 70/30 between the artist and the North Country Arts Council (NCAC). Artists interested in selling their work in the Floating Gallery must first be a member of NCAC (to do so,
). Interested artists may bring pieces to Bistro 108 at 10 a.m. Aug. 2, or by arrangement with Floating Gallery's chairperson, Cecilia Thompson, at (315) 777-3385 or
.
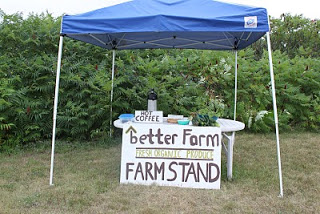
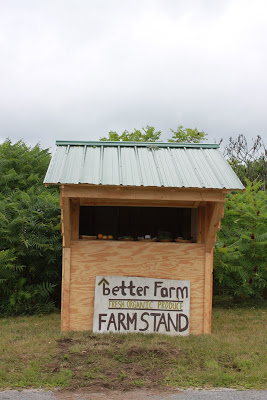
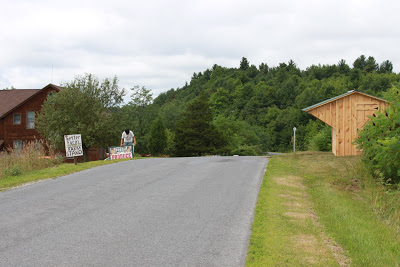
We're in Business
/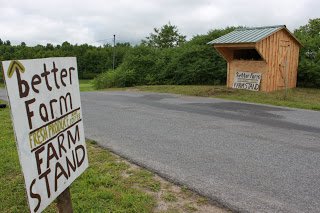 |
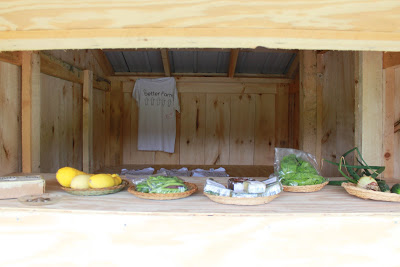
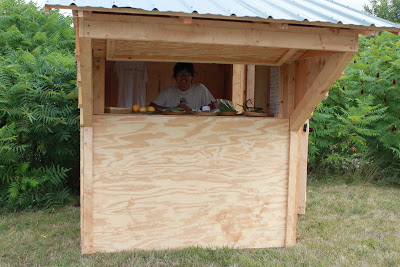
| Better Farm's brand-new, custom-made farm stand and signs. |
So this year, we went bigger.
The amazing crop of interns (Jaci Collins, Natasha Pietila, Soon Kai Poh, and Elizabeth Musoke) set about doubling the size of this year's garden. Then, they (along with artist-in-residence Erica Hauser) built an additional bed for the herb gardens. Transplanting all the babies from the greenhouse took weeks. But when the proverbial smoke finally cleared, the veggies and fruits started coming. And coming. And coming.
With more food due than we can possibly eat, the latest mission has been to expand our outreach. First up was to begin the process of drying many of our herbs (parsley, cilantro, oregano, and dill so far). Next, and probably most important, was to upgrade from last year's farm stand:
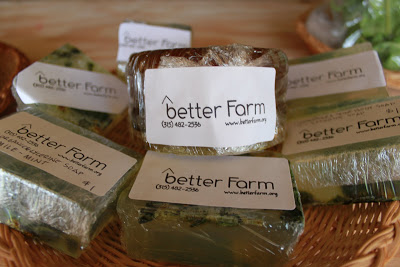 |
| Organic, homemade soaps |
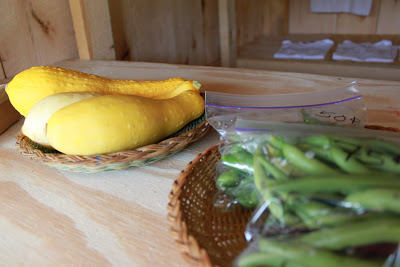
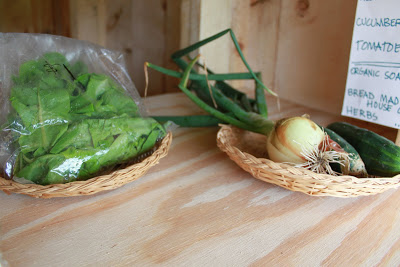
Vegetables—cucumbers, onions, peas, lima beans, brussels sprouts, kale, broccoli, string beans (two varieties), squash (three varieties), pumpkins, cauliflower, cabbage, tomatoes (several varieties), peppers (two varieties), soybeans, beets, carrots, lentils, lettuce, spinach, asparagus
Herbs—chives, mint, cilantro, parsley, oregano, basil, summer savory, chicory, amaranth, chamomile, echinacea
Baked Goods—breads by special order, custom pies, cookies, brownies, and other baked goods. Vegan options available
Homemade Body and Home Care—100% organic soaps, shampoos, conditioners, laundry detergents, and dish soap
Ones to Watch: In.gredients
/From the in.gredients website:
Reducing waste while eating foods that are good for the body and earth can seem impractical. While packaging makes up 40 percent of municipal waste streams in the US, avoiding packaging is sometimes impossible. Nearly all the food we buy in the grocery store is packaged, leaving us no choice but to buy packaged food that's not always recyclable.
in.gredients revolutionizes grocery shopping as we know it. Our goal is to reduce waste by ditching packaging altogether - creating the nation's first zero-waste, package-free grocery store! in.gredients will allow customers to fill reusable containers (even ones brought from home) with their groceries, making waste reduction easy, fun, and convenient!
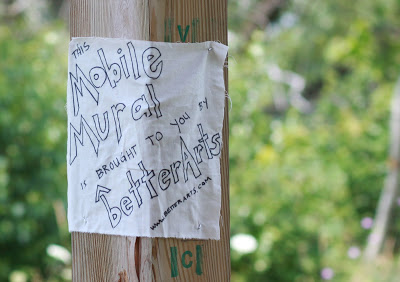
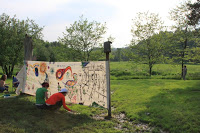
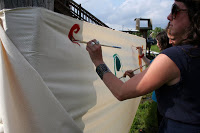
Public Art Goes Up In Redwood
/

 |
| Mike Brown |
 |
| Eric Drasin |

In Bloom
/ |
| Onion |
 |
| Basil |
 |
| Asparagus ferns |
 |
| Broccoli |
 |
| Carrot |
 |
| Celery |
 |
| Lettuce |
 |
| Oregano |
 |
| String beans |
 |
| Summer squash |
 |
| Cherry tomatoes |
 |
| Tomatoes |
Many thanks to this summer's intern staff: Jaci Collins, Natasha Pietila, Elizabeth Musoke, and Soon Kai Poh; WWOOFers Mollie Cross-Cole and Sara Hawkins; visiting artists Ruby Amanze, Joetta Maue, Jennifer Elizabeth Crone, Forbes Graham, Jessie Vogel, and Erica Hauser; and good ol' Mother Nature. You are what makes this possible.
Let There Be Light
/Sometimes, solving some of the biggest problems involve the simplest of ideas. At least, that was the case in the Philippines; where a bottled liter of water with a few teaspoons of bleach is proving to be a successful recipe for dwellers in light-deprived slums. The simple technology is spreading sunlight in places where it has never been, and saving residents money at the same time.
Just another reminder that the biggest change often involves dreaming big and doing small.
(Reuters, 7/11/11)
Top 10 Benefits of Community Gardening
/By Elizabeth Musoke
As I look around the garden at Better Farm, everything is beginning to take shape. We have a wide variety of vegetables growing. It is amazing to see things grow; you gain a new understanding and appreciation for what is on your plate.
I have loved community gardening so much that I wanted to research the benefits of having a community garden and how it relates to urban planning and the people that reside near it...(Yes, I am a little bit of an urban-planning nerd). I think the article I found, "Multiple Benefits of Community Gardening" by the Green Institute in Minnesota, relates to major urban cites as well as small towns. Any community, large or small, could reap the following benefits:
I have loved community gardening so much that I wanted to research the benefits of having a community garden and how it relates to urban planning and the people that reside near it...(Yes, I am a little bit of an urban-planning nerd). I think the article I found, "Multiple Benefits of Community Gardening" by the Green Institute in Minnesota, relates to major urban cites as well as small towns. Any community, large or small, could reap the following benefits:
- Economically beneficial to the city/town
- Community gardens are less expensive to maintain than parkland.
- Property values around community gardens are shown to increase.
- Pocket Parks and Urban Greening
- Community gardens green and beautify the city/town.
- Residents have an enlightened appreciation of greenery.
- Exercise
- I can personally tell you that gardening is quite the work out. The article agrees and states that community gardens encourage physical activity and promote a healthy community.
- Improved Diets
- So far we have made salads from our garden and haven’t really had to purchase lettuce or other greens. As the harvest begins we will have more things to eat.
- Having a community garden allows you to eat fresh, eat locally and eat safely (you know exactly how you have grown your produce.)
- Food Production
- The article states that low income families can afford foods that they ordinarily would not be able to afford.
- Locally grown produce is seen as a more sustainable practice as it shortens the commodity chain (saving on fuel and packaging).
- The Urban Ecosystem
- Community gardens enhance the urban environment by: managing storm water runoff, reducing air pollution, reducing the “heat island” effect and more.
- Youth Education
- From my internship I have learned so much about managing a community garden and planting.
- I think the youth (and adults…it's never too late) could learn a lot about how food is produced, the environment and sustainable living.
- At my internship we have had to troubleshoot various garden problems and come up with solutions, learning new skills among other things. It has been very beneficial and you have a sense of satisfaction once you solve an issue.
- Cultural Opportunities
- Community Gardens in the Minneapolis-St. Paul area have provided various social and cultural enhancements:
- Inter-generational exposure to cultural traditions,
- Cultural exchange with other gardeners
- Access to non-English speaking communities.
- I can say from experience you can really bond with people while working together for the same cause. You also learn a lot of new things from each other
- Horticultural Therapy
- The article describes this best: “Exposure to green space reduces stress and increases a sense of wellness and belonging.”
- It is quite an awesome feeling!
- Crime Prevention
- I found this part of the article particularly intriguing.
- The article states that community gardens instill a sense of pride and ownership within the community and builds a collective spirit.
- Gardens also increase the number of “eyes” on the street (there are more people outside watching the surroundings as they garden).
Check out the article for more in depth details!
DIY Coffee Table
/
By Mark Huyser
Today we made a simple table for the upstairs communal area of Better Farm.
This project was designed and financed as a donation by visiting WWOOFers Sara Hawkins and Mollie Cross-Mole.
After consulting with me the girls were sent off to get furniture-grade plywood and 3/4" oak veneer. The girls had the wood cut somewhat to size and brought it back to the farm.
I had Mollie and Sara design the curved legs and as the design was found it was off to the shop to start on the legs.

After beveling the edges on a 45-degree angle that had to be completed first (because we wanted to use one single board to make two half-legs) it was time to cut the curved legs with the jigsaw.


Next up was to tape the two half-legs together at the seam and apply wood glue to make an L shaped corner leg in which Mollie assisted after watching me assemble the first one.
After one hour, the glue was cured and the legs were ready for a sanding. First up was a 120-grit to get off all the glue residue and eliminate any scratch marks in the veneer; followed up by a quick sanding in 220-grit to ensure a smooth base finish.


The next step was to take the trim router and apply a small beveled edge to minimize injuries and extend the lifetime of the edges on the top plate and the middle board. Then it was back to sanding again.

Of course, a faithful carpenter's dog will not make way for dust and flying wood chips. Instead he will choose to stay right at your feet no matter what.

One of the last things that was left to do was to manufacture 3/4" x 3/4" support and fastening pieces. I chose this fast and simple method instead of using dowels or a biscuit joiner. This method fastens hidden and requires no dry time, which speeds the manufacturing of the table up substantially.

The last step for my part was to assemble all the pieces with wood glue and screws.


Now the table is off to the girls for further enhancement!

Thank you Mollie and Sara for this fun little project!
Learn more about Mark's projects or contact him for custom work by clicking here.
Today we made a simple table for the upstairs communal area of Better Farm.
This project was designed and financed as a donation by visiting WWOOFers Sara Hawkins and Mollie Cross-Mole.
After consulting with me the girls were sent off to get furniture-grade plywood and 3/4" oak veneer. The girls had the wood cut somewhat to size and brought it back to the farm.
I had Mollie and Sara design the curved legs and as the design was found it was off to the shop to start on the legs.
After beveling the edges on a 45-degree angle that had to be completed first (because we wanted to use one single board to make two half-legs) it was time to cut the curved legs with the jigsaw.
Next up was to tape the two half-legs together at the seam and apply wood glue to make an L shaped corner leg in which Mollie assisted after watching me assemble the first one.
After one hour, the glue was cured and the legs were ready for a sanding. First up was a 120-grit to get off all the glue residue and eliminate any scratch marks in the veneer; followed up by a quick sanding in 220-grit to ensure a smooth base finish.
The next step was to take the trim router and apply a small beveled edge to minimize injuries and extend the lifetime of the edges on the top plate and the middle board. Then it was back to sanding again.
Of course, a faithful carpenter's dog will not make way for dust and flying wood chips. Instead he will choose to stay right at your feet no matter what.
One of the last things that was left to do was to manufacture 3/4" x 3/4" support and fastening pieces. I chose this fast and simple method instead of using dowels or a biscuit joiner. This method fastens hidden and requires no dry time, which speeds the manufacturing of the table up substantially.
The last step for my part was to assemble all the pieces with wood glue and screws.
Now the table is off to the girls for further enhancement!
Thank you Mollie and Sara for this fun little project!
Learn more about Mark's projects or contact him for custom work by clicking here.
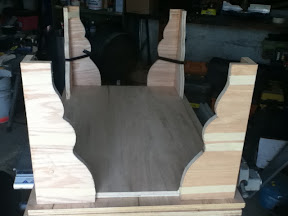
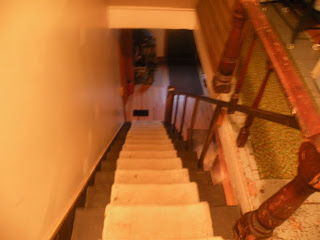
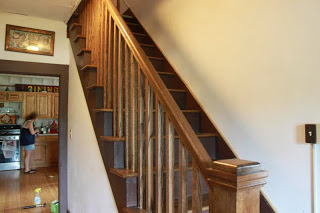
Better Farm's Stairway Goes from Hellish to Heaven
/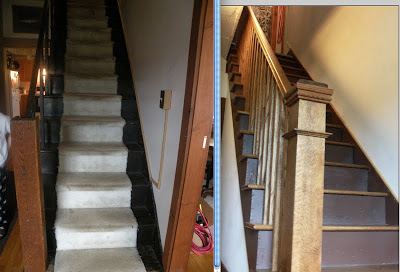 |
| Better Farm's main staircase before, at left; and at right with new oak treads, fresh paint job, spindles, and custom newel post. |

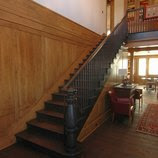
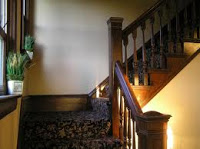
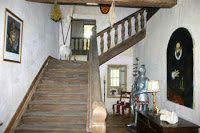
I did a bunch of online searching to see traditional farmhouse staircases, railings, and newel posts. Here are a few of my favorites:

To start, I knew we needed spindles that were up-to-code in their distance from each other (check with your local building inspector to find out the rules in your town or state). We'd also need a new newel post. When I consulted with our carpenter, Gary Stevenson, we realized we could utilize some of the aged oak across the street my uncle had stored in the wood shed more than a decade ago. Gary ended up using the oak to build a custom newel post for the bottom of the stairs. He stained and cut the store-bought oak, which we used for new treads, spindles, and the newel post at the top of the stairs.
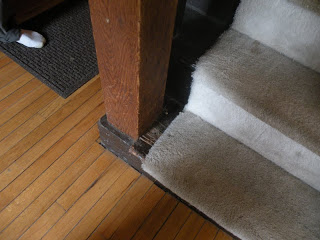
In the process of taking things off and moving them around, Gary found this gem; ancient-looking little girls' shoes hidden underneath one of the steps:

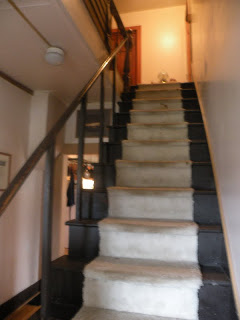
Gary labored away getting all the cuts right and painstakingly replacing each tread, spindle, newel post, and hand railing. And finally, he was done:

Many thanks to Gary Stevenson for his as-always amazing work; Garlock Building Supplies & Design Center for helping us pick out the upstairs newel post, hand rail, treads,and spindles; Joel Zimmer and Mark Huyser for volunteering their help in installing the handrail; and everyone at Better Farm for putting up with this work-in-progress during peak season.