Winterizing the Farm

Are you cold yet?

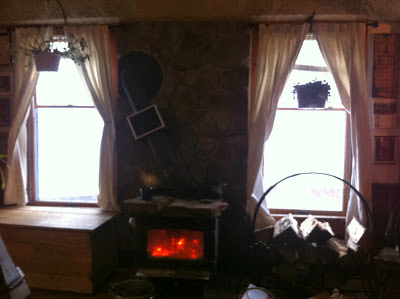
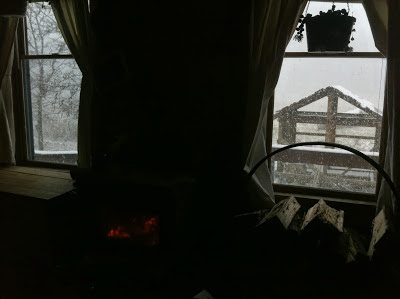
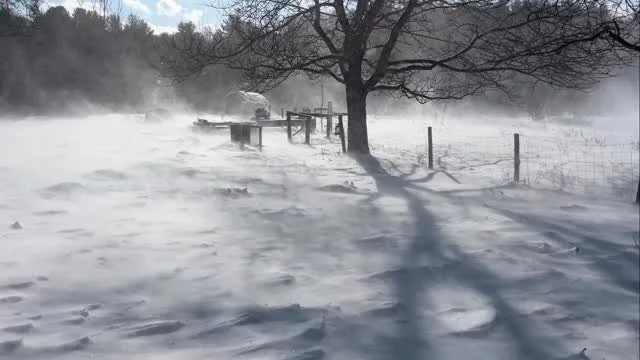
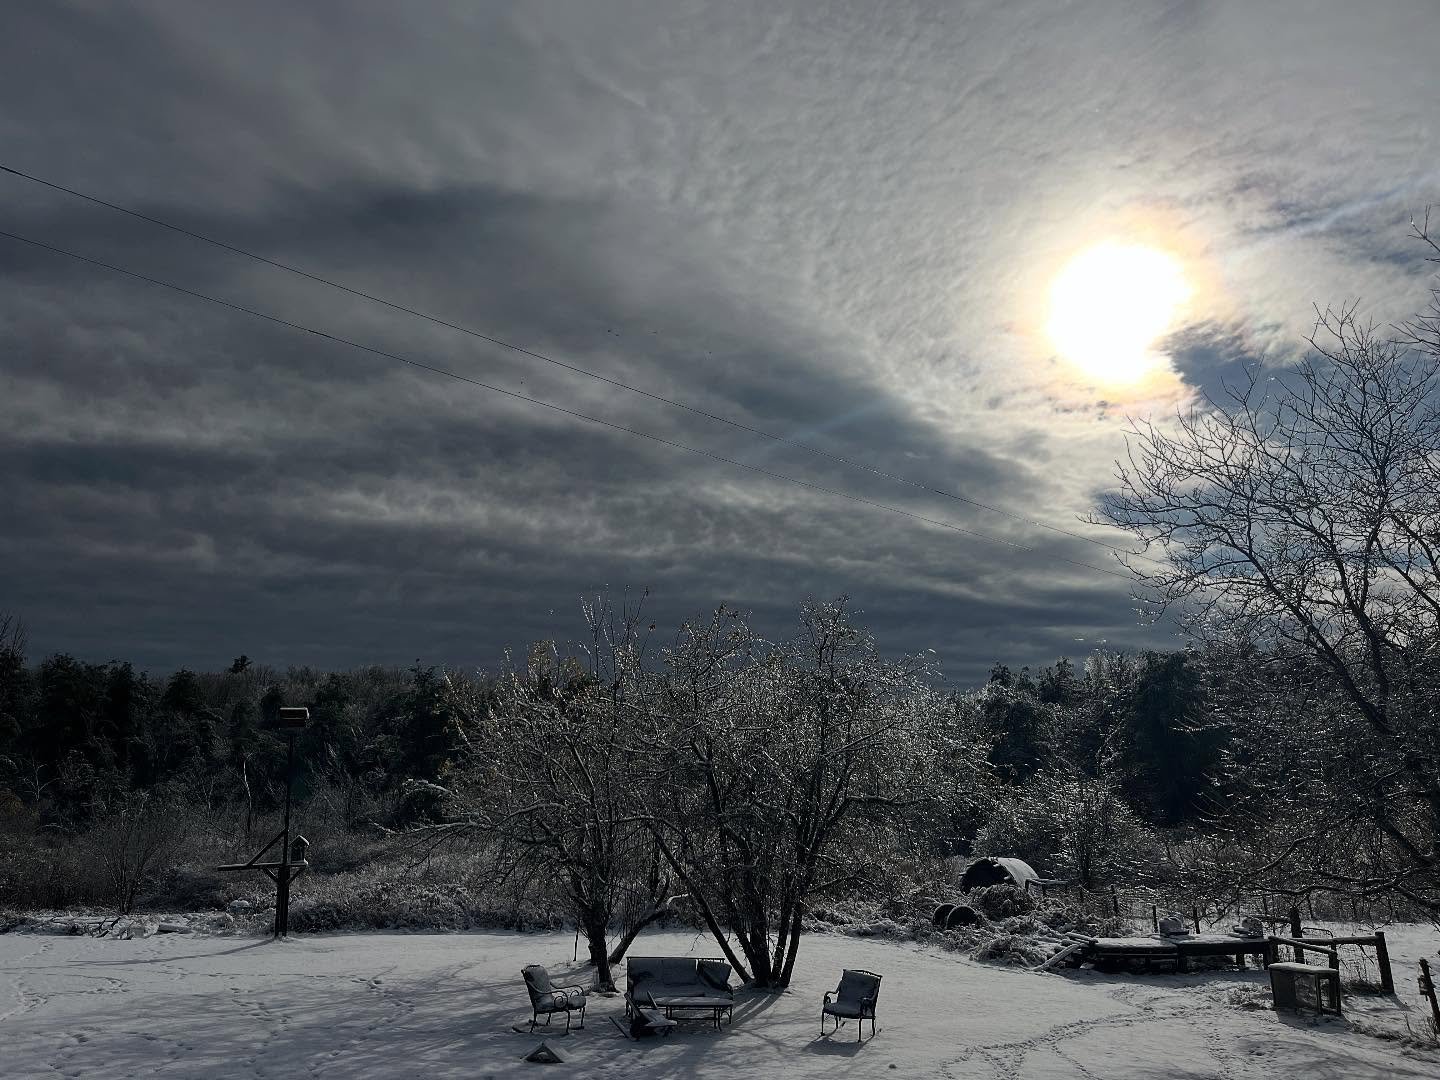
Up here in Northern New York the temperatures have started dropping. I have had the pleasure of spending the last few days living at Better Farm to learn about sustainability and daily farming tasks. The first day I was here it was actually still in 40's, though it was a little drizzly and dreary. The next day the snow started to fall. While I have fallen in love with the wood-burning stove, I can't spend all day huddled in front of it.

With a large, older house, keeping the heat inside can sometimes be a challenge. Even in newer buildings, there are usually small gaps in insulation that can let in a cold draft. One surprising source of these drafts is the "dead space" behind electrical outlets and switch plates. While the amount of heat lost from a poorly insulated outlet is small, consider the number of outlets and light switches the average home has. When added together, the amount of heat loss adds up—statistics suggest each outlet or switchplate accounts for 2 percent of energy loss. One of my (thankfully indoor) tasks was to install pre-cut foam outlets in the farmhouse. It was really simple, and didn't take much time at all.
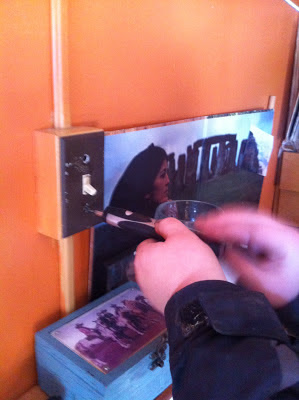
Removing lightswitch covers to insert foam insulation takes only a couple of seconds.
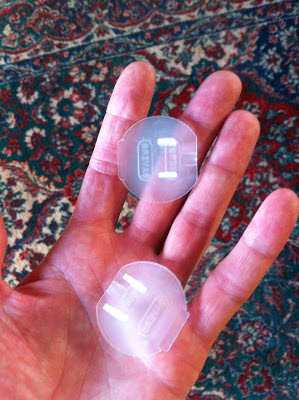
Outlet covers.
I could really feel a difference, especially with the outlets located on the exterior walls of the house. I also covered a window with insulating plastic sheeting. The plastic sheet shrank when heated with a hair dryer to seal all the way around the window. The plastic film can even be taken off later and reused if stored properly. There are many window and outlet insulation kits available on the market, and they don't appear do be very expensive. The most important thing to remember when trying to insulate against the cold is that the heat will try to find a way out. It is best to try and insulate every possible avenue of escape, even the little ones like outlet covers.

Other winterization activities around Better Farm included turning off the water to outside hoses, installing draft guards on infrequently used doors to the outside, hanging insulating curtains in front of windows in bedrooms, bathrooms and the kitchen, changing directions of the ceiling fans in the house, and sealing off rooms that won't be used this winter.

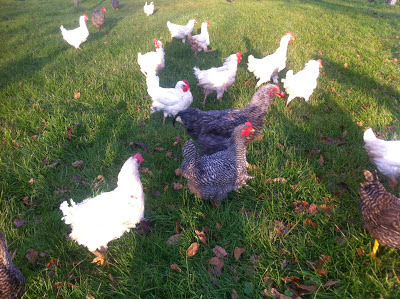
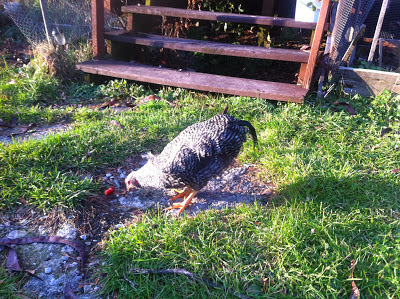
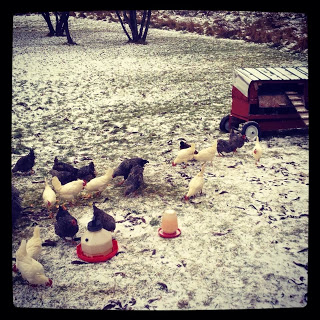
Speaking of winterizing, we also moved the chicken coops closer to the house yesterday in order to make cleaning them and feeding the chickens easier once the snow really starts to fall.

We didn't move the coops very far, but apparently the chickens didn't get the memo. I had been warned that the chickens might not be able to find their way home, but I don't think I was entirely prepared for it. There they sat, huddled together in the empty space where the coops used to be, while the newly cleaned coops sat empty. We actually had to go outside and try to catch them up, one by one, and place them in the coop. And they weren't keen on going quietly. We had three of us out there trying to herd the chickens home. It was a riot! It was so absurd it was hilarious. I haven't had a lot of experience with chickens, but I do want my own flock eventually. This was definitely a great bit of practice. Luckily for us, this is a sharp group of birds—by the next day, all 31 of them had adjusted to their reassignment:

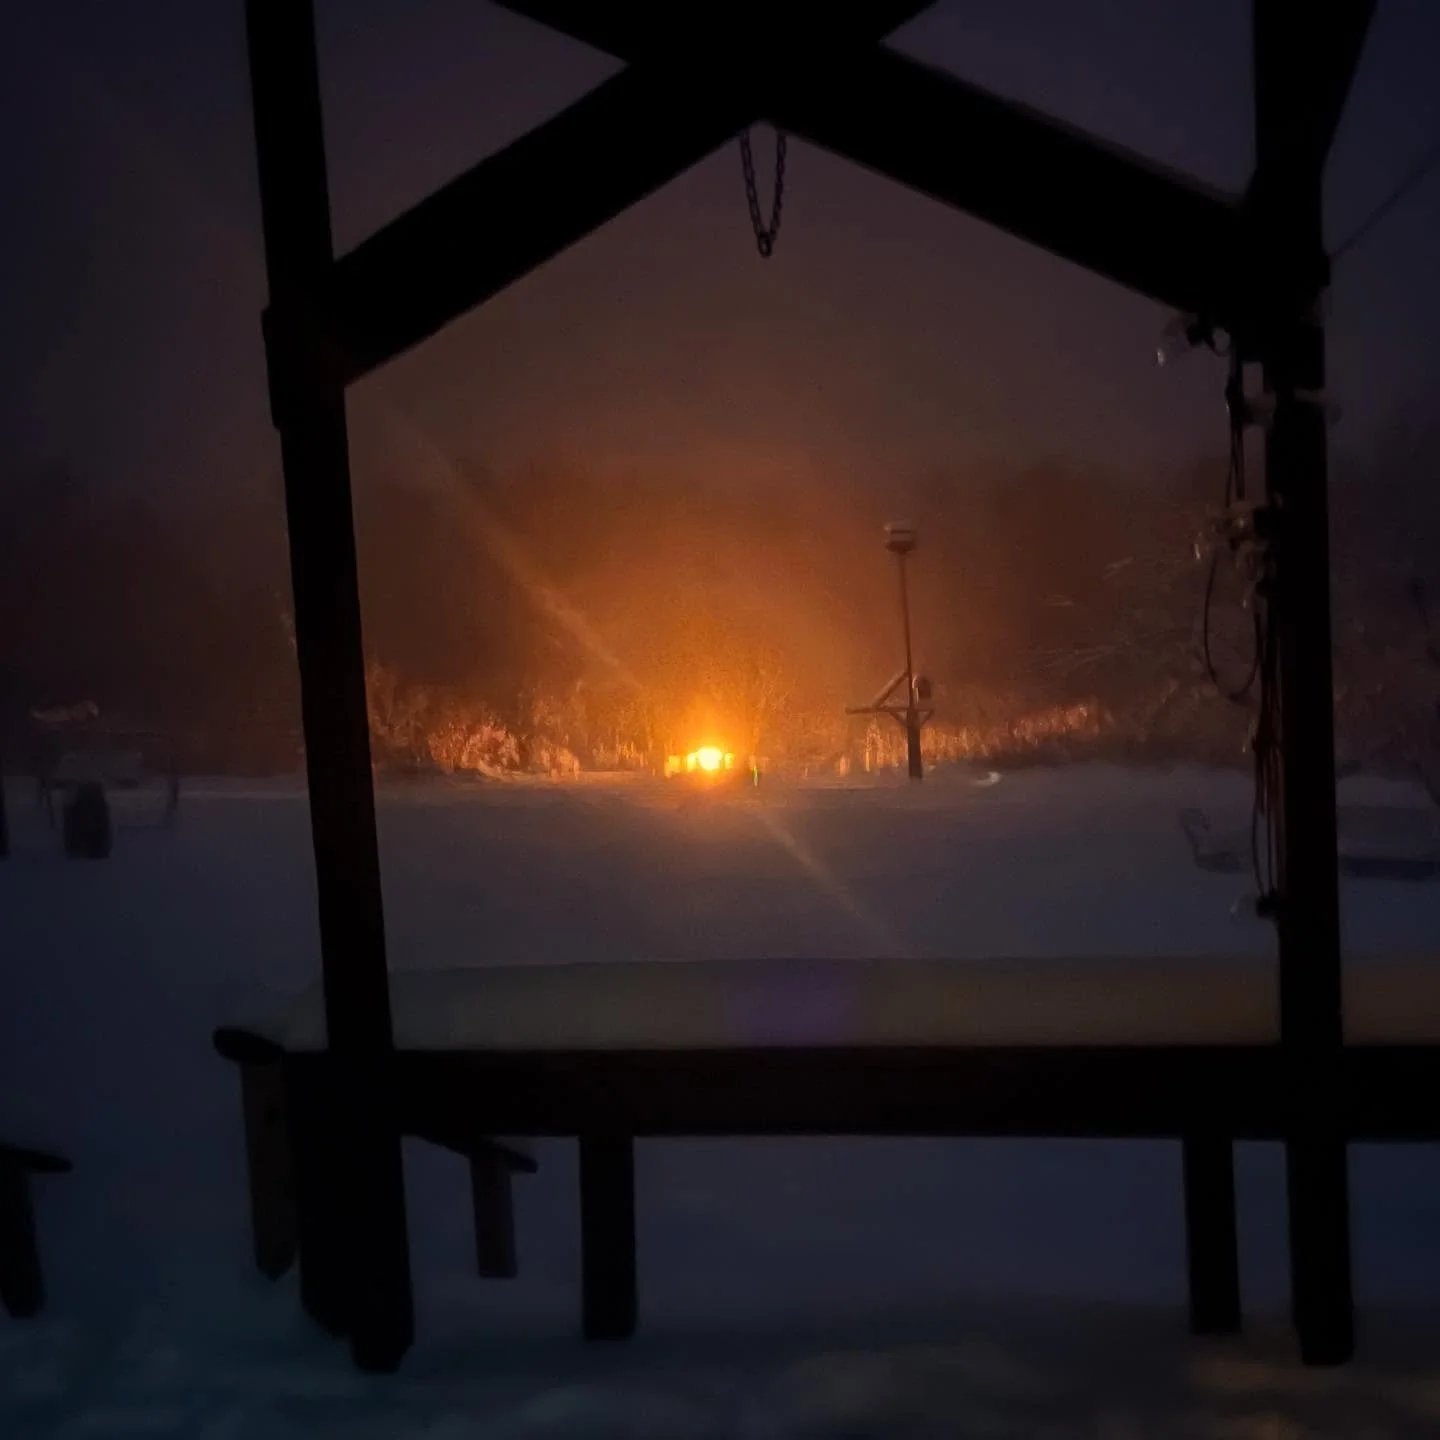
As for me, I think I am going to spend a little time by the fire before heading back out into the tundra. Stay warm, everyone!

DIY Herb-Drying Hanger

Now that the winter holidays are just around the corner, many of you may be preparing elaborate meals for your friends and family. Fresh herbs from your own garden are a great way to pep up any meal, but as it gets colder it may be more practical to use crushed dried herbs instead. You can easily dry your own herbs in your house. Simply tie them up and hand them somewhere out of the way, where it's not too cold or moist. I didn't have a good place to hang them, so I decided to try and make a hanger out of an old lampshade. I chose lampshades since they could provide two levels of hanging space with a small footprint. I picked up two interesting lamp shades at a thrift store for fifty cents each. I looked for ones with unique "skeletons" since the fabric would be removed.

Before I started mutilating—I mean

modifying—

my two lampshades, I gathered my supplies and prepped a flat work space. You will need your shade, butcher's twine or string, scissors and a strong knife (some of the fabric was pretty tough), and what ever it is you want to hang. I had some fresh herbs harvested from the farm earlier that day, along with a small fall bouquet that I wanted to preserve.I separated the flowers into little bouquets and the herbs into small bunches. I wrapped the butcher's twine a few times around the stems and tied a simple knot, leaving about a four inch tail. Once all the bunches were tied, I set them off to the side.

Now it was time for the lampshades! These are the two that I picked. If you want the shape of the shade to be preserved once the fabric is removed, pay attention to the structure of the wire skeleton. The newer shade that I picked basically collapsed with out the fabric to hold it together. The older shade was made of a single solid piece, so it held its shape nicely. There was quite a bit of glue stuck to the wire, so I soaked all of the wire pieces in hot soapy water and scrubbed them down.

The newer shade wasn't a total loss. The large bottom ring had small nobs evenly spaced around it, so that I could still tie the herb bunches around it with out them slipping to the bottom. I used some gold ribbon to make a hanger, and tied on the herbs. I could have also tied the ring horizontally, but I didn't have enough ribbon. It would also have been a pain to make sure the ribbons were all the same so that the ring was parallel to the floor. I really liked the end result, though. Great option if you don't have a lot of space.

The older shade really turned out great. It has a great shape and has lots of space to tie herbs too. I was just going to hang it from some butcher's twine, but I found a chain for a hanging planter that worked perfectly. The whole project only took about an hour. Honestly, the part that took the longest was deciding which herb bunches to hang where. The middle looked a little bare, so I added a small pumpkin for color. Now it looks like a pretty harvest decoration that is also practical. Take that, Pinterest!

Once the herbs have dried, you can chop or crush them and put them in air-tight containers to use throughout the winter. Mine dried long ago, but I admit I haven't taken them down yet. I just love the way the project turned out. I hope you all have as much luck with your own DIY attempts!

Using Fans in Winter

Fans: They're not just for summer anymore.

While fans can be great for dispersing cool air during summer months, it's important to realize they can also spread heat through a home all winter long. Most ceiling fans use about the

same amount of electricity as a 100-watt light bulb

; making fans a cheap, effective way to supplement temperature control in your home.

Keep in mind that fans should only be on when people are in the room to benefit from the air movement—fans do take up energy, and they even produce a little heat—a 1996 study in Florida (

not

Redwood!) determined that using ceiling fans appropriately could allow people to

raise the temperature inside

by 2°F, resulting in about a 14-percent annual cooling energy savings. However, the same study found that most people do not adjust their thermostats when using ceiling fans, actually increasing their energy use rather than reducing it. Something to keep in mind throughout the year!

We'll go over ceiling fans below; but also remember that smaller box fans and

doorway fans

can really help to distribute heat throughout your h

ouse. If you've got a fireplace

, wood stove or pellet stove—or if your forced-air furn

ace

vents aren't spread e

ven

ly throughout your house—these

small fans can make a huge

difference in distributing warmer a

ir (and returning cool air) in your ho

me.

Ceiling Fan Direction in Summer and Winter

The below information is gleaned from the

Ceiling Fan website

.

Ceiling Fan Direction in Summer – Forward / Counter Clockwise

ceiling fan direction for summer

image via Emerson

A ceiling fan’s direction in the summer should be rotating counter clockwise or forward to produce a

Wind Chill

effect by the downward airflow. The thermostat won’t actually change but the room will seem several degrees cooler due to the wind chill factor. You can save on air conditioning bills by placing ceiling fans throughout your home.  According to

Casablanca Fan Company

when you are using a ceiling fan you can then “raise the thermostat setting, resulting in reduced air conditioning energy consumption of 40 percent or more” while still keeping your room cool.

Ceiling Fan Direction in Winter – Reverse / Clockwise

ceiling fan direction for Winter

image via Emerson

The ceiling fan direction in winter should be rotating clockwise or reverse. Warm air rises and gets trapped near the ceiling so when the ceiling fan direction is in reverse mode it circulates the warm air from the ceiling to the floor helping take the chill out of the air. Without a ceiling Fan the warm air would continue to be trapped near the ceiling and the floor level would continue to stay cold. The reverse mode only works if the fan is on low. If you have the fan on a higher speed you will create a wind chill effect that you don’t want since it is already cold. Some ceiling fans now come with a wall or remote control that has a forward/reverse option so you can change the direction of the Fan with a push of a button.

Exceptions for Ceiling Fan Directions

There are some exceptions that you should keep in mind when it comes to ceiling fan direction.  If your ceiling fan is installed in a room with a high ceiling you still put the ceiling fan direction on clockwise or reverse motion in the winter although you should put the speed on medium or high. With higher ceilings it takes more than low speed to help re-circulate the warm air down to floor level.

Also if you have a ceiling fan directly over a dining room table or a desk you should have the ceiling fan direction rotating clockwise/reverse on a higher speed. By having the ceiling fan direction in reverse on a higher speed you will still get the wind chill effect that helps cool you off but will save you from a cold dinner or papers flying all over the place.

Check out

Energy Star’s Ceiling Fan Usage Tips

on how to help save energy with ceiling fans.

Comment

Nicole Caldwell

Nicole Caldwell is a self-taught environmentalist, green-living savant and sustainability educator with more than a decade of professional writing experience. She is also the co-founder of Better Farm and president of betterArts. Nicole’s work has been featured in Mother Earth News, Reader’s Digest, Time Out New York, and many other publications. Her first book, Better: The Everyday Art of Sustainable Living, is due out this July through New Society Publishers.

Shoppers 'R' Us

Kids in a new Toys 'R' Us ad go wild with joy when they learn they're going to a Toys 'R' Us store instead of going on a nature hike.
 Read this, and then take your kids outside.

With a shopping season coming up speckled with uncertainties—fewer days between Thanksgiving and Christmas, an anticipated 2-percent drop in spending, and so on—retailers are doing all they can to bring potential customers into malls and stores. Instead of getting bent out of shape debating the finer points of capitalism, consumerism, and materialism, I'd like to simply draw your attention to one call to arms that I find offensive in particular.

I get that people who own businesses want to sell stuff, and people working at those businesses want to continue to have work. So, I expect the usual marketing ploys like commercials designed to get people into stores and shelling out cash.

But does it have to be done like this?


Toys 'R' Us, which incidentally has on its website a stunningly blank sustainability page, has a new ad campaign called "Make all their wishes come true." According to Toys “R” Us, the story is about how the company “surprises some lucky kids by letting them pick any toy in the store. Toys 'R' Us is making wishes come true this holiday season.”

Basically (and as you can see in the above video) Toys 'R' Us takes some kids on a bus with the promise that they're going on an outdoor excursion to a forest. The kids are portrayed as underwhelmed as some Toys 'R' Us rep invites the kids to shout out names of leaves. Then—surprise!—they're actually all taken to a Toys 'R' Us store and invited to pick out any packaged, plastic schlock they like. The kids react like those ladies on Oprah when they all get new cars (okay, maybe not that bad). And the Christmas spirit is saved.

Awesome. Ho, ho, ho. Stuff! Lots and lots of STUFF! The message in this ad is so obnoxious not only because it glorifies consumerism at its worst (that is, when it's targeted to unsuspecting children), but because it's being done at the cost of demonizing natural, healthy activities that are actually 100-percent great for children. So here's what the toy store has told the world with this ad:
  1. Interacting with the environment is super lame
  2. Getting toys is super cool
  3. Stuff is awesome
  4. What kids really want are toys over experiences
  5. Buy more stuff for your kids
Happy early holiday season, everyone. Can't wait to see how the next four or five weeks shake out.
Comment

Nicole Caldwell

Nicole Caldwell is a self-taught environmentalist, green-living savant and sustainability educator with more than a decade of professional writing experience. She is also the co-founder of Better Farm and president of betterArts. Nicole’s work has been featured in Mother Earth News, Reader’s Digest, Time Out New York, and many other publications. Her first book, Better: The Everyday Art of Sustainable Living, is due out this July through New Society Publishers.

Lean-To Greenhouses

The attached, or "lean-to" greenhouse is perhaps the most practical of all greenhouses in that it actuallybecomes part of your house. Construction is easier and the structure is better braced because one wall of the greenhouse is actually your home.

Lean-to greenhouses can contribute greatly to heating your home in the winter with their passive-solar capabilities—just vent the top into your second-floor, or open up a slider or window into the space for warm air all day long.

Over at

Hobby Greenhouse

, they've got really simple and free plans to download basic lean-to greenhouse designs for a simple 8' x 12' lean-to greenhouse framed with 2' x 4' redwood or cedar and covered with rigid Lexan polycarbonate panels. Once the foundation is complete and all the supplies are on hand, two people can complete this lean-to greenhouse in a weekend. For energy efficiency it should be constructed around a door or window and insulated.

Backwoods Home Magazine

features a first-person account of constructing a lean-to greenhouse with tips on finding inexpensive glass and troubleshooting advice.

And

Live Science

offers information on a home that, with solar collectors working in tandem with a lean-to greenhouse, went 25 years without a heating bill.

The main components of lean-to greenhouses are pretty straightforward. A lean-to greenhouse is a half greenhouse, split along the peak of the roof, or ridge line. Lean-tos are useful where space is limited to a width of approximately seven to twelve feet, and they are the least expensive structures. The ridge of the lean-to is attached to a building using one side and an existing doorway, if available. Lean-tos are close to available electricity, water and heat. The disadvantages include some limitations on space, sunlight, ventilation, and temperature control. The height of the supporting wall limits the potential size of the lean-to. The wider the lean-to, the higher the supporting wall must be.

Temperature control is more difficult because the wall that the greenhouse is built on may collect the sun's heat while the translucent cover of the greenhouse may lose heat rapidly. The lean-to should face the best direction for adequate sun exposure. Finally, consider the location of windows and doors on the supporting structure and remember that snow, ice, or heavy rain might slide off the roof or the house onto the structure.

  • Location: South-facing windows will obviously get the most sun, but morning sunlight on the east side is sufficient for most plants. Morning sunlight is most desirable because it allows the plant's food production process to begin early and maximizes growth. An east side location captures the most November to February sunlight. The next best sites are southwest and west of major structures, where plants receive sunlight later in the day. North of major structures is the least desirable location and is good only for plants that require little light.

  • Glass: Glass is the highest-quality, highest-price option for greenhouses. It is the heaviest material and so can be the most difficult to install, but if installed properly and protected from shattering, glass will outlast any other plastic option in terms of useful life. It is important to have some windows that open for cross vintilation because plants can cook literally if it gets too hot! you will need to decide what transparent material will be best suited for the walls and roof or your greenhouse. Depending on your application, you may need to consider various types of glass, polycarbonate, greenhouse plastic, or other materials. Every material will have its own set of price, strength, durability, maintenance, and aesthetic considerations. Not all materials are practical in all climates or for all styles of greenhouse construction.Visit Two Green Thumbs for a great guide on figuring out what kind of glass to use.

  • Drainage: If flooding is an issue where you live, build your greenhouse above surrounding ground so rainwater and irrigation water will drain away. 

  • Size: An attached greenhouse can be a half greenhouse, a full-size structure, or an extended window structure. There are advantages and disadvantages to each type.

  • Foundations and Floors: Permanent foundations should be provided for glass, fiberglass, or the double-layer rigid-plastic sheet materials. The manufacturer should provide plans for the foundation construction. Most home greenhouses require a poured concrete foundation similar to those in residential houses. Quonset greenhouses with pipe frames and a plastic cover use posts driven into the ground. Permanent flooring is not recommended because it may stay wet and slippery from soil mix media. A concrete, gravel, or stone walkway 24 to 36 inches wide can be built for easy access to the plants. The rest of the floor should be covered by several inches of gravel for drainage of excess water. Water also can be sprayed on the gravel to produce humidity in the greenhouse.

Comment

Nicole Caldwell

Nicole Caldwell is a self-taught environmentalist, green-living savant and sustainability educator with more than a decade of professional writing experience. She is also the co-founder of Better Farm and president of betterArts. Nicole’s work has been featured in Mother Earth News, Reader’s Digest, Time Out New York, and many other publications. Her first book, Better: The Everyday Art of Sustainable Living, is due out this July through New Society Publishers.

Telltale Signs Your Chicken is a Rooster

It has come to our attention that one of our new hatchlings from the summer is, in fact, a rooster. While each breed has certain characteristics you can look for (and some generalizations true across the board), sometimes it's a little tricky to tell who's who when you're dealing with offspring of interracial chickens. Our latest brood includes eight birds of mixed descent: barred rock, Americauna, and leghorn.

The babies

hatched back in July

, and are now just about full-grown. The rooster in the bunch let his colors show one day last week when his tail feathers became more pronounced, he had (yet another) growth spurt causing him to tower over his siblings, and he jumped up on the garden fence and attempted to crow (so far unsuccessfully). Ladies and gentlemen, introducing our rooster

Judge Roy Bean

:

Got a flock of young chickens you're tending to? Here are some easy cues you can use to determine who among them is on the road to roosterdom.

From

My Pet Chicken

:

When sexing most juveniles

, the best, most fail-safe method is to look at the saddle feathers in front of the tail when the bird is about 3 months old. By that age, cockerels will have long and pointy saddle feathers, while a hen's will be rounded. This will indicate for sure whether you have a cockerel or a pullet in every breed but Silkies and Sebrights. You will also be able to see long, curving sickle feathers in the tail of the rooster as he gets a little older.

Crowing is a fairly good indicator, but isn't fail-safe, either. Plus, generally speaking, you will be able to tell by feathers much earlier since roosters don't usually begin to crow until they are 4 or 5 months old. However, we have had roosters wait until a little later, and begin a little sooner, too. Plus, hens will occasionally crow, so even crowing doesn't tell you for sure. To reiterate, the BEST way to tell for sure is by looking at physical characteristics that cannot be mistaken, so check feather shape when your birds are about 3 months old, as other indications are not reliable.

For sebrights

, the cockerels are "hen-feathered," meaning the males have the same shape feathers as females. For sebrights, comb size and wattle size are about the only easy way to tell. (Campines are hen feathered in other countries, but not usually so in the US.)

Sexing juvenile silkies

is complicated, because you can't easily see the shape of the feathers, the comb is often hidden under the crest, and wattles are not evident in most bearded silkies. Experts vent sex (with 90% accuracy) when the babies are a day old, but for the rest of us—and even for silkie breeders—juvenile silkies are especially hard to sex. However, there are a few telltale signs that may help you discern what you have:

  • Generally the puffy crests on the hens' heads are rounder, while the roosters may have long streamers coming from theirs.

  • Sometimes males will have slightly shinier feathers.

  • If they are non-bearded Silkies, the wattles will be larger in males. (Bearded Silkies of both sexes are lacking substantial wattles.)

  • In both types of silkies, the males' comb will be larger. (A silkie's comb is called a "walnut" comb for its shape. Instead of being red like most chicken combs, it is usually a color described as "mulberry.")

  • Roosters will generally be bolder in their behavior, and often friendlier to humans when they are young. (Hens generally "catch up" in the friendliness category after they begin laying, while roosters usually get more stand-offish as they get older.)

  • If you have more than one rooster, they may "chest bump" and assert themselves with each other. However, hens will do this, too--just not as often.

  • If you have mixed hens and roosters, the roosters usually begin to grow larger more quickly than the hens, so hens may be slightly smaller after a few weeks 

  • Watch for spurs! When these ankle-area spikes come in varies widely from breed to breed, but most develop between three and eight months.

Comment

Nicole Caldwell

Nicole Caldwell is a self-taught environmentalist, green-living savant and sustainability educator with more than a decade of professional writing experience. She is also the co-founder of Better Farm and president of betterArts. Nicole’s work has been featured in Mother Earth News, Reader’s Digest, Time Out New York, and many other publications. Her first book, Better: The Everyday Art of Sustainable Living, is due out this July through New Society Publishers.

Space Heater that Uses Zero Energy

In many older homes, supplemental heat is an ongoing issue. While you work to retroactively replace insulation, upgrade wood stoves, pellet stoves, or furnaces and make your place more efficient, a

space heater

is a great way to boost heat where you need it most. The only problem? A lot of them are energy hogs, driving up electric costs quick. So it was a great surprise to stumble on

this video outlining how four tea lights can warm an entire room

in your house!

If you're set on going electric, please be sure to check out

this list of the most energy-efficient space heaters on the market

.

Comment

Nicole Caldwell

Nicole Caldwell is a self-taught environmentalist, green-living savant and sustainability educator with more than a decade of professional writing experience. She is also the co-founder of Better Farm and president of betterArts. Nicole’s work has been featured in Mother Earth News, Reader’s Digest, Time Out New York, and many other publications. Her first book, Better: The Everyday Art of Sustainable Living, is due out this July through New Society Publishers.

Breadmaking 101: French Baguettes


BREAD! What can I say, we all love it—and making it is not that hard. I have never really made bread because the whole process seemed a little daunting. But since I've started doing it, I've learned to love the procedure of it (and, of course, the finished product).

 
Did you know yeast is alive? I certainly didn't realize that at first. But in breadmaking, you rely on your living yeast to help make your dough rise. Throughout the process you bring the yeast back to life—pretty biblical and awesome if you ask me. Working in a bakery at Whole Foods, I eat a good amount of bread. But to make your own bread is an act that's deeply satisfying. The first time really made bread was during last summer's Sustainability Education Program at Better Farm. Greg taught us how to make bread and that was when I realized how much I loved it. Once I came back home I started to really work on my skills of baking so I been starting out easy with a French baguette and I just keep make same thing. Here are some easy instructions on making your own. Trust me, each time you do it, it will get easier!

Making French Baguettes
All you need to make a baguette are four simple ingredients: yeast, flour, salt, and water. Here are step-by-step instructions:

Ingredients 
2 1/4 tsp. (1 packet) instant yeast
3 1/2 c. all-purpose flour
2 1/4 tsp. salt
1 1/2 c. warm water (120º - 130º)   

Directions
  1.  Put 3.5 cups of all-purpose flour (not bread flour) into a bowl.
  2. Add 2.25 teaspoons of salt in the bowl with the flour it mix it in.
  3. Take 1.5 cups of warm water and add the yeast to the water. Let sit for about a minute.
  4. Slowly add the water with the yeast in to the bowl of flour and salt and mix for 5 minutes. I have a bread hook on my mixer but if you don't, just do this step by hand.
  5. After five minutes, take the bread out of the bowl and let sit for about two minutes. 
  6. Clean the bowl, then coat the bottom of the bowl with a teaspoon of olive oil so the dough does not stick. Return the dough to the bowl and let it sit, covered with a clean dish towl, for 3.5 hours.
  7. Deflate the dough by folding it over. Put the dough back in the bowl for another 2 hours.
  8. Take the dough out and cut into three loafs. Let sit for five minutes.
  9. Now you get to shape the loaves—my favorite part! I watched a video of JuliaChild making a French baguette to learn some techniques and would recommend you do the same if you're new to all this. Don't forget to put three or four slices into your shaped loaves!
  10. Put your shaped loaves on a lightly floured baking sheet and let sit for other two hours.
  11. Slide your loaves onto the bottom rack of a 450-degree oven and bake for 25, spritzing the loaves with water (in a spray bottle) every two minutes for the first six minutes. After the sixth minute, move the bread to the top rack of the oven for the remaining time.
Photos of my bread-making process over time:


first time making it
second time
third time

One the questions people always ask me is, What's the key to baking bread? I think the answer love. If you put your heart into making it, it shows.

Delivery CSA Coming to the North Country?

Better Farm

is in the process of outlining a grant that would provide the sustainability campus with start-up funding from SARE to create a network of farms providing a delivery CSA to residents living in the region, and is looking for local farms interested in participating in the proposed programming.

The Northeast Chapter of the

Sustainable Agriculture Research and Education Pr

ogram

(SARE) is offering partnership grants to agricultural agencies, organizations, businesses, or local governments working directly with farmers to address issues that affect the farm community. Farmers must be partners in the planning process and the proposal. SARE funds production, marketing, on-farm demonstrations, and community development efforts that address key themes in sustainable agriculture. Sustainable agriculture is understood to be agriculture that is profitable, environmentally sound, provides a good quality of life for farmers, and is beneficial to the community.

To that end, Better Farm is seeking local farms to partner with for the following proposal:

Better Farm plans to increase access to fresh, locally produced foods for community residents in and

around Redwood, N.Y., while strengthening farmer-consumer relationships and supporting local agriculture by creating a delivery CSA service to people living locally. Community-Supported Agriculture programs provide weekly stipends of fresh food to a community; Better Farm enhances this programming by bringing fresh fruits, vegetables, jams, syrup, meats, cheeses, eggs, and milk from a variety of local farms directly to neighbors' doors. Better Farm would act as liaison between individuals, families, and farmers; creating the network of farmers necessary to provide people with a diverse assortment of weekly groceries for a low rate. Redwood is a small community of 500 people with limited access to food. Shopping at a grocery store in Alexandria Bay is a 20-mile round trip; Watertown a 50-mile round trip. Funding would allow Better Farm to coordinate with local farms and families, create inventory lists and price sheets, convert a diesel truck to run off refined vegetable oil thereby eliminating gas costs, and put the program into its first year of production. With EBT cards now accepted at farmers' markets and farm stands, this programming encourages even those with the lowest incomes to purchase local food at a premium rate. 

How It Works

This is a buy-in program. In its first phase, Better Farm partners with local farmers interested in selling their goods at a bulk rate to individuals and families living locally. 

<!-- @page { margin: 0.79in } P { margin-bottom: 0.08in }

Those farms provide Better Farm with available products and bulk rates, along with seasonal information. Then, Better Farm will disseminate information via radio, print, online, and mailers to homes in the community alerting them to this available program. Signing people up will involve educational workshops, greeting people at their homes, calling campaigns, and public seminars. Individual and family seasonal rates will be available, as well as tiers:

  • Vegetarian (with or without packaged goods, checking all that apply: maple syrup, jams/jellies, lotions/salves, fibers/yarns, dairy products, eggs)

  • Omnivorous (with or without packaged goods, checking all that apply: maple syrup, jams/jellies, lotions/salves, fibers/yarns, dairy products, eggs)

Rates will include fees to cover all-inclusive delivery fee (driver rate, basic maintenance of delivery vehicle, fees due to participating farms, and overhead costs for future marketing efforts) and will be payable via EBT card, check, credit card, or through monthly or weekly installments.

Interested participants will be given a survey at the beginning of each season to go over their expectations, what products they would be interested in purchasing, and their budgets. A similar survey will be distributed at the end of each season to gauge customer satisfaction with products received, chances of having return customers, and suggestions for improvements.

What

It Does

<!-- @page { margin: 0.79in } P { margin-bottom: 0.08in }

-->

Better CSA solves the problem of a

food desert

in several ways. One, it creates a network of local farmers offering a variety of goods at competitive rates. Two, it creates a network of buyers that can then purchase food at a bulk rate. Three, it uses a “green” vehicle (a diesel pickup truck converted to run on spent vegetable oil) to deliver the food to people's doorsteps, reducing their fuel costs and amount of time spent grocery shopping.

This project enhances sustainability in the following ways:

  • Reducing pollution from vehicles going to and from several supermarkets to get groceries

  • Reducing pollution associated with the import-export of produce, meat, dairy products, and eggs

  • Shifting demand from large-scale agricultural practices to more sustainable, family operations

  • Encouraging local farmers to employ sustainable, organic practices

  • Encouraging consumers to eat more nutritious food that sustains healthy lifestyles in the long-term

  • Educating children (and adults!) in the community to make healthier food choices and to enjoy a larger diversity of products in their diets

Farmers interested in partnering with Better Farm on this project should email

nicole.caldwell@betterfarm.org

.

Comment

Nicole Caldwell

Nicole Caldwell is a self-taught environmentalist, green-living savant and sustainability educator with more than a decade of professional writing experience. She is also the co-founder of Better Farm and president of betterArts. Nicole’s work has been featured in Mother Earth News, Reader’s Digest, Time Out New York, and many other publications. Her first book, Better: The Everyday Art of Sustainable Living, is due out this July through New Society Publishers.

Green Tech Files: Will Future Roadways Glow in the Dark?

There's been a lot of buzz around environmentally friendly street and path lighting, with solar energy leading the way for  energy-efficient streetlamps, stop sign illumination, and more; but now there's a new buzz about glow-in-the-dark pavement providing light that won't mess with wildlife, uses zero energy, and looks really cool while it's working.

Here's all the information, gleaned from

Take Part

.

Editor's note: For more information and video footage, be sure to visit

Take Part's fully story

.

Keeping parks well lit at night can be a costly means to ensure pedestrian and cyclist safety. But a British-based company has come up with a way to turn park paths into glow-in-the-dark thoroughfares that double as energy-efficient works of art.

Created by 

Pro-Teq

, Starpath is a sprayable coating of light-absorbing particles that harvests ultra-violet rays from the sun during the day and dramatically lights up like a starry sky at night. The veneer is non-reflective, anti-slip and waterproof, and can be applied to cement, wood, tarmac or other solid surfaces.

Earlier this month, Starpath was tested on all 1,600 square-feet of the paths at Christ’s Pieces Park, in the university town of Cambridge. The park is well trafficked late into the evening by cyclist and pedestrians alike.

"Our surface works best over tarmac or concrete, predominantly tarmac, which is the main bulk of the U.K. path network," says Pro-Teq’s Neil Blackmore, in a sales video. "When it's coming to the end of its useful life, we can rejuvenate it with our system, creating not only a practical, but a decorative finish."

Seeing that local city councils were increasingly shutting off park lights at night to save money, Pro-Teq developed Starpath to maintain public safety without the financial and environmental costs of overhead lighting. It's a common problem; in the U.S. for instance, cities generally count streetlights as their first or second biggest energy drains.

But the glow-in-the-dark spray also comes with additional benefits: Its non-reflective surface doesn't seem to contribute to light pollution, which not only inhibits views of the nighttime sky, but can have dire consequences for local wildlife due to the constant illumination.

Overhead street lighting does provide one important benefit to urban parks, however, and that's the deterrence of crime. It's not yet known if Starpath would provide enough light to do the same.

Pro-Teq's Neil Blackmore says that for larger urban parks where the possibility of crime is higher, his technology could be used in conjunction with overhead lighting, if not replacing street lights completely, then cutting down on the number of them necessary to illuminate darkened areas.

"I was in London today looking at a large park for Starpath," he says. "And there's lights down by the river, but in the back of the park, there's no lighting at all. So having our product there, in the complete darkness, would only benefit the user."

Pro-Teq’s demonstration project in Cambridge is tiny, though, compared to a glow-in-the-dark technology being rolled out across the English Channel.

The Netherlands began its

"smart highway"

redesign this year with the promise of using super-charged glow-in-the-dark paint to illuminate highways during the country's long, dark winters. Not only will the paint light up to define the road and its lanes, but when the temperature drops below freezing, a bright snowflake design appears on the asphalt, warning drivers about the possibility of black ice.

As innovative and environmentally-friendly as the Netherlands' design is, though, Pro-Teq's Starpath may have bested it in terms of pure aesthetics. The starry spray is dramatic and not only lights up to a brilliant blue (as seen in the video above), but is also available in other sparkling colors, like red, gold and green.

Whether its application could extend to some roadways remains to be seen, but at least for now, Starpath looks like an energy-efficient way to light up parks while simultaneously turning them into eye-catching art displays.

Comment

Nicole Caldwell

Nicole Caldwell is a self-taught environmentalist, green-living savant and sustainability educator with more than a decade of professional writing experience. She is also the co-founder of Better Farm and president of betterArts. Nicole’s work has been featured in Mother Earth News, Reader’s Digest, Time Out New York, and many other publications. Her first book, Better: The Everyday Art of Sustainable Living, is due out this July through New Society Publishers.

Greetings from the new 'Wintern'

Hi everyone, I'm Elena!

I am going to be popping in occasionally to Better Farm as part of my college coursework. I recently graduated from JCC with an Associate’s degree in Animal Management (now called Zoo Technology). I am currently working toward my Bachelor’s in Zoo Program Management from Empire State College while working part-time at the New York State Zoo at Thompson Park in Watertown, NY.  Nicole has been kind enough to teach me a course in sustainability. Since I am not technically a full-time intern, I only get to spend a short amount of time at the farm. But I know that there is still a lot to learn and I am very excited.

I hope to get my hands dirty and learn how to live green, even when the farm is covered in a blanket of white. Since most of the harvesting is coming to an end, I look forward to learning how to preserve food and work on indoor projects like hydroponics and vermiculture.  Personally, I have plenty of experience with animal care but when it comes to plants….well, I’m a little "green". On my first visit to the farm, I helped harvest, dry, and chop herbs. I even decided to try my hand at making my own herb-drying rack at home. I love to be crafty and make my own things whenever I can. I think it turned out pretty well, and I hope to have the finished project and DIY instructions up on the blog soon!

To learn more about Better Farm's education program, visit www.betterfarm.org/sustainability-internship.

Why 'Better Radio' Matters

a giant from Free Press's Media Giants infographic

We announced a couple of weeks ago that Better Radio is on its way! And thanks to a community grant from Best Buy, we have the necessary funds to offer New Media training to young people in the North Country. That, along with the pending station confirmation, website and blogs to broadcast podcasts from for a larger reach, and our commitment to showcase local news, personalities, and music, really make Better Radio all about the people it serves. BetterArts board member and grant-writing powerhouse Sarah Herold last week found a great NPR piece that articulates this point exactly and goes a little more in-depth about how low-power FM stations are providing the public with unfettered information now so rare in mainstream media. Below is that piece reposted in its entirety, written by Betty Yu:

Roots, Radio and Social Change: Why Low Power FM Radio is about YOU

October 24, 2013

by Betty Yu for

Moyers & Company

Media watchdog group Free Press’s recent

infographic

reveals how media corporations are using shell companies to evade the Federal Communications Commission’s (FCC) ownership rules and gobble up local TV stations across the US. It’s another sobering reminder that we are facing some of the biggest threats to media democracy and free speech in our country’s history. The

acceleration of media consolidation

and unfair restrictions on community radio and TV have narrowed already limited access to the airwaves for local voices, especially women and communities of color. People of color make up over 36 percent of the US population, but own just over seven percent of radio licenses and three percent of TV licenses.

In an environment in which corporations and the government increasingly control the airwaves, where can social justice movements and marginalized communities go to have their voices heard?  Enter low power FM radio (LPFM). Two years ago, President Obama signed the Local Community Radio Act after a 15-year organizing campaign led by

Prometheus Radio Project

and

Common Frequency

, two grassroots groups supporting community radio. The law marks the largest expansion of community radio in US history. It was a tremendous victory for social change and media justice movements. Local communities now have the power to transform the corporate-driven media landscape.

People of color make up over 36 percent of the US population, but own just over seven percent of radio licenses and three percent of TV licenses.

This expansion of LPFM stations means that hundreds of nonprofit organizations, schools, unions and other community groups have a unique and low-cost opportunity to develop programming to meet their local and issue-based needs. “With new community radio stations preparing to claim a spot on the airwaves, we’re looking forward to hearing truly local news, neighbors speaking to each other about the topics that concern them, and local culture and music programming,” says Julia Wierski of Prometheus Radio Project.

There are many inspiring stories about the profound impact that LPFM stations have had on local communities, not to mention on issues of self-determination, cultural sovereignty and social justice. One such story is the Coalition of Immokalee Workers’

Radio Conciencia

, a station in Immokalee, Fla., run by its members. The coalition is made up of mainly Latino, Maya Indian and Haitian immigrants, working in low-wage jobs throughout the state. They started Radio Conciencia WCIW- LP (107.9 FM) in 2003, a 100-watt station that features news of its members’ labor fights, campaigns and other local issues; music; and cultural and educational programming in several languages, including indigenous dialects. Most coalition members lack access to the Internet, relying on the station for basic news, local information and entertainment.

Two broadcasters at the Coalition of Immokalee Workers’ Radio Conciencia, a worker-run radio station in Immokalee, Florida.

Broadcasters at the Coalition of Immokalee Workers’ Radio Conciencia, a worker-run radio station in Immokalee, Fla.

“When Hurricane Wilma hit Immokalee in 2005, we realized the deep value of Radio Conciencia. All local radio stations were transmitting alerts on the impending hurricane, but Radio Conciencia was the only radio that was transmitting information on where to go and what to do in Spanish and in the indigenous languages spoken in our community,” said Gerardo Reyes-Chavez, an organizer with the coalition and Radio Conciencia.

Another great example of a thriving LPFM station is in Opelousas that is home to zydeco music, a Cajun-Creole tradition in southwest Louisiana that dates back centuries. Zydeco was missing on the airwaves in the city, so in 2003 a local group started KOCZ(LP) and started playing the music along with local news, jazz, R&B and other music. It’s had an influence on other radio stations in the area, which now play music in the zydeco tradition.

Members of

Media Action Grassroots Network (MAG-Net)

, a national media justice network of 170 organizations are taking advantage of the FCC’s LPFM application window. They understand that radio can be a powerful tool for amplifying the voices of grassroots leaders and local communities fighting for social change.

“Community radio stations represent the last bastions of airwaves that are representative of the communities they come from and put the control of whose voices get heard and which stories get distributed in the hands of the community. The potential of the FCC’s LPFM application window is tremendous when we consider that up to 1,000 new radio stations could come on the air in the next few years. Those are 1,000 new voices that are currently not being heard in rural and urban cities across the country,” says Steven Renderos of

Center for Media Justice

.

Comment

Nicole Caldwell

Nicole Caldwell is a self-taught environmentalist, green-living savant and sustainability educator with more than a decade of professional writing experience. She is also the co-founder of Better Farm and president of betterArts. Nicole’s work has been featured in Mother Earth News, Reader’s Digest, Time Out New York, and many other publications. Her first book, Better: The Everyday Art of Sustainable Living, is due out this July through New Society Publishers.

Winterizing Your Strawberry Plants

Strawberry plants will come back annually to provide you with beautiful, yummy fruit for years. But if you live in a northern climate, it's imperative that you protect these plants from the elements. If a strawberry plant's root system freezes solid, the plant you nurtured will die and you'll have to replant the following year. Thankfully, prepping your strawberries for the winter months couldn't be easier.

In-Ground Strawberries

If your strawberries live in garden beds, simply cover them up with a few inches of straw or leaves for the winter. Wait until the ground is fully cooled off and your plants are done growing for the year. Then give them a nice, thick layer of mulch. This does double duty; protecting the fruits from frigid winters, and providing great compost material for your soil. Be sure to check on the plants a few times over the winter to make sure freezing and thawing hasn't forced them up. If so, tamp them back down, water, and add more straw or leaves.

Container Strawberries

Strawberries that are growing in pots should be placed somewhere cold but not frozen. An unheated garage is a great place to store the fruits for the winter, but you'll need some sort of insulation to ensure your strawberry plants don't freeze solid. Don't worry about the lack of light, as the strawberry plants will be dormant and won't need any light. Just be sure to add water every few weeks to ensure the roots don't dry out. You can also plant your strawberries in the ground for the winter, utilizing the straw-as-insulation approach outlined above.

One of the best ways is to over-winter container strawberries is to put the pot in a larger container and insulate the space between with leaves or straw. Or, place the container on the ground next to a heated wall and ideally out of the winter wind. Insulate the exposed sides of the container with mulch, leaves or straw. Or just bury the container. The surrounding soil will insulate the roots over winter. Then dig up and hose down the container next spring.

Please don't try taking your strawberries inside to continue growing as houseplants! Strawberries need a dormant season in order to trigger a new round of growth in the spring for fruiting.

1 Comment

Nicole Caldwell

Nicole Caldwell is a self-taught environmentalist, green-living savant and sustainability educator with more than a decade of professional writing experience. She is also the co-founder of Better Farm and president of betterArts. Nicole’s work has been featured in Mother Earth News, Reader’s Digest, Time Out New York, and many other publications. Her first book, Better: The Everyday Art of Sustainable Living, is due out this July through New Society Publishers.